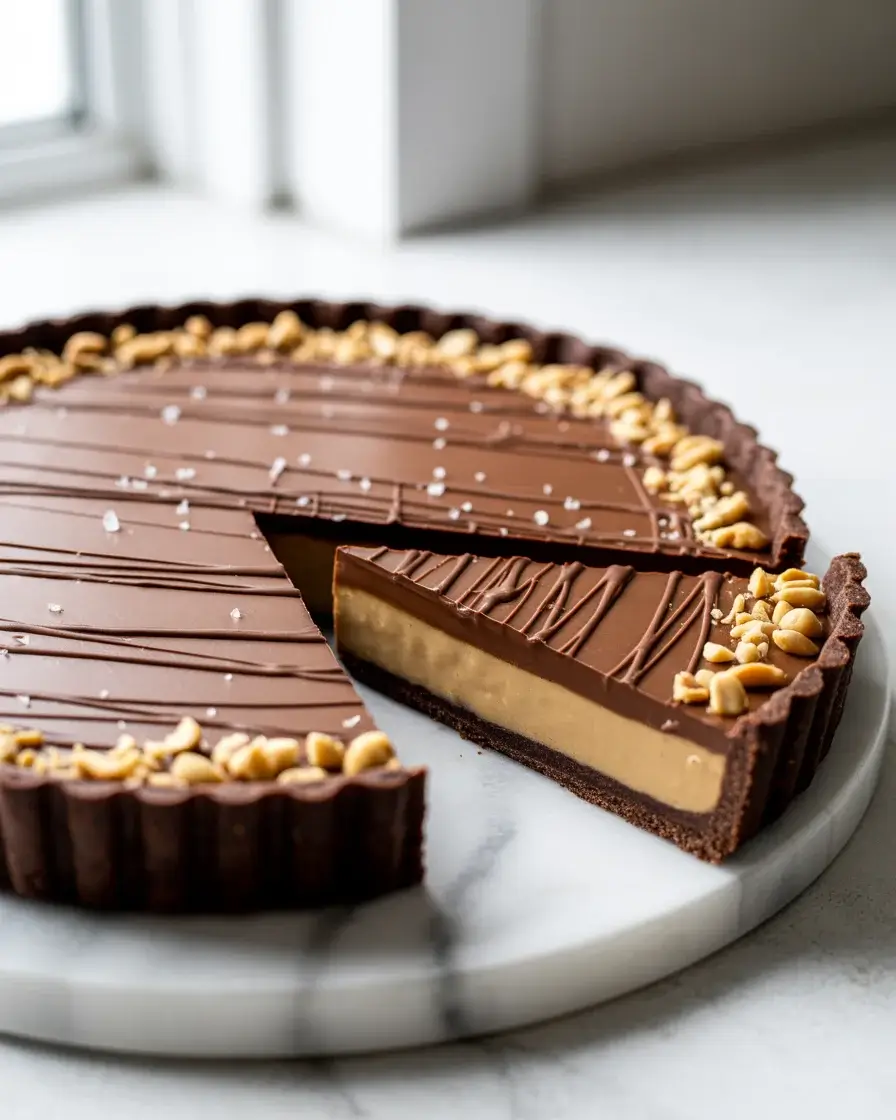
Chocolate Peanut Butter Tart
The first time I made this tart, I completely forgot to chill the ganache layer before adding the peanut butter filling and ended up with a swirled mess. Surprisingly, everyone still loved it. That failure taught me the most important rule of this recipe: patience between layers.
After testing this over 15 times, I landed on a ratio of cream cheese to peanut butter that keeps the filling firm but impossibly creamy. This tart is the kind of dessert that looks bakery-level but comes together with simple pantry ingredients.
Step-by-Step Instructions
Step 1: Make the Chocolate Cookie Crust
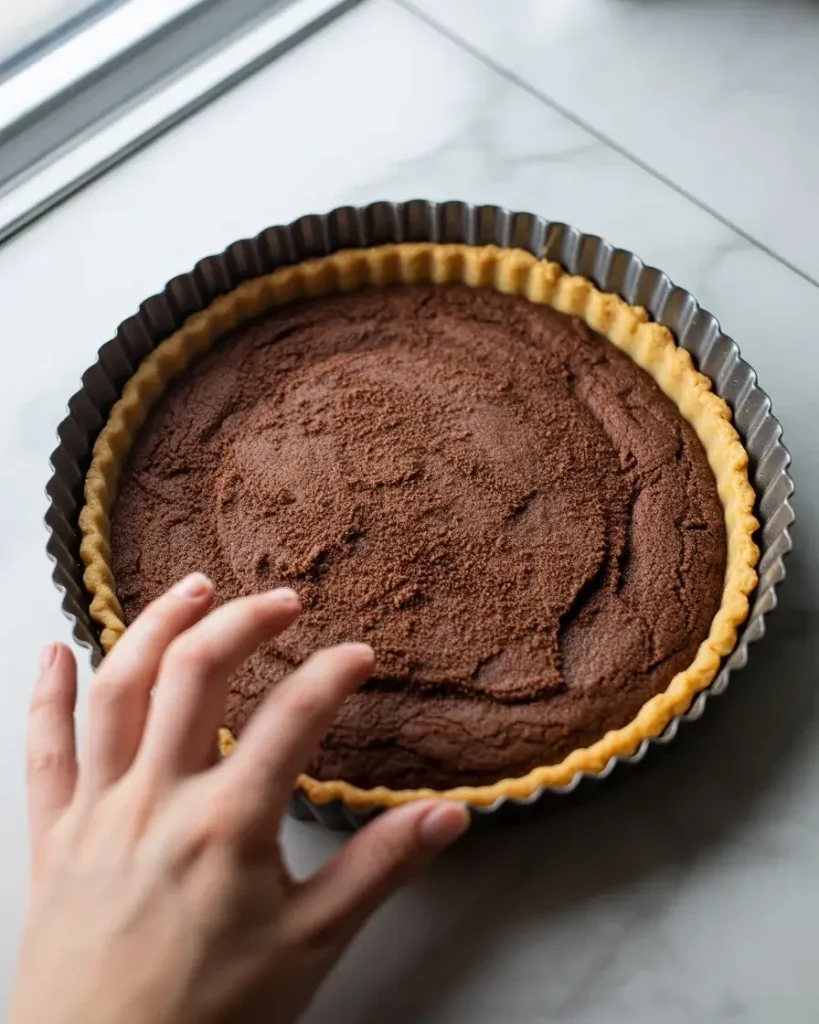
Pulse 25 Oreo cookies (filling included) in a food processor until you get fine crumbs. Mix with 4 tablespoons of melted butter until the crumbs hold together when pressed. Press firmly into a 9-inch tart pan, going up the sides evenly.
Bake at 350°F for 10 minutes. I tested skipping the bake once and the crust stayed crumbly and kept cracking when sliced. That 10-minute bake makes all the difference.
Step 2: Prepare the Chocolate Ganache Layer
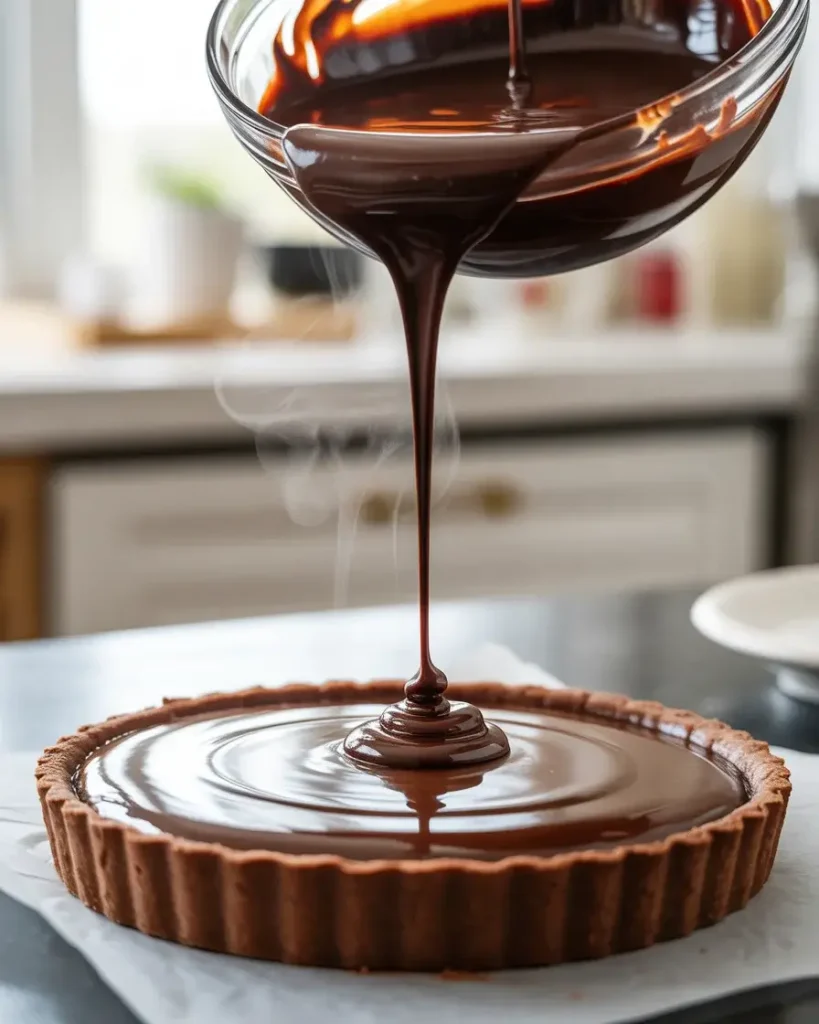
Heat 1/2 cup heavy cream in a small saucepan over medium heat until you see tiny bubbles forming at the edges (do not boil). Pour over 4 ounces of finely chopped dark chocolate in a bowl and let sit for 2 minutes before stirring.
Stir slowly from the center outward until the ganache is glossy and completely smooth. Pour into the cooled crust and spread evenly. Refrigerate for 30 minutes until set before moving to the next layer.
Step 3: Make the Peanut Butter Filling
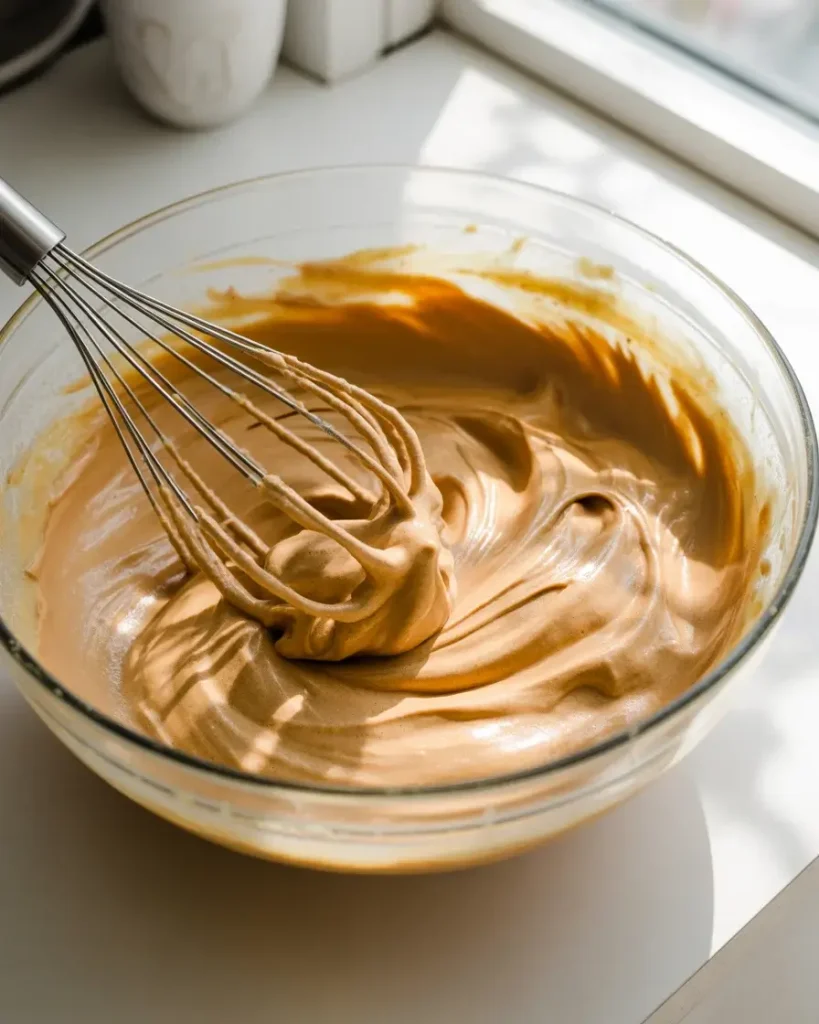
Beat 1 cup creamy peanut butter with 6 ounces of softened cream cheese until completely smooth, about 2 minutes. Add 1 cup powdered sugar and 1 teaspoon vanilla extract and beat for another minute.
In a separate bowl, whip 1/2 cup heavy cream to stiff peaks. Fold it gently into the peanut butter mixture in two additions. I tested using natural peanut butter here and the filling turned grainy and separated. Stick with processed peanut butter like Jif or Skippy for the best result.
Step 4: Layer and Spread the Filling
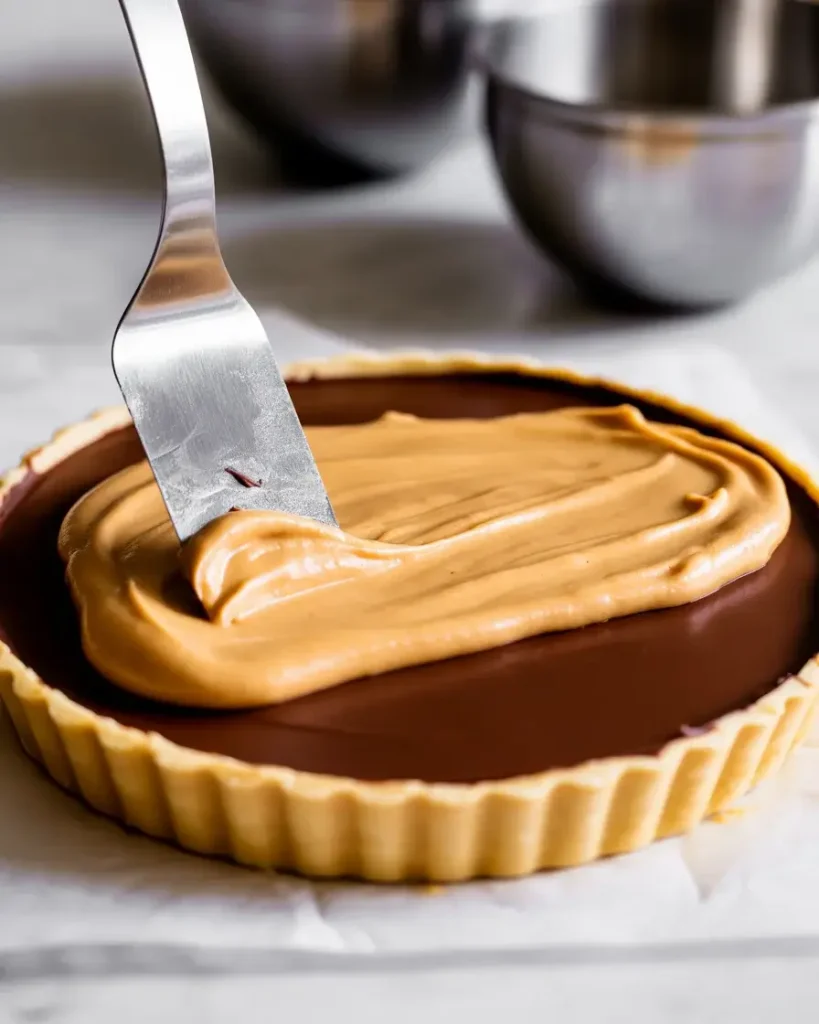
Remove the tart from the fridge and check that the ganache layer is firm to the touch. If it leaves a fingerprint, give it another 10 minutes. Spoon the peanut butter filling on top and spread to the edges using an offset spatula.
Work quickly but gently so you do not disturb the ganache layer underneath. I smooth it in one direction then run the spatula lightly across in the opposite direction for an even surface. Refrigerate again for at least 1 hour.
Step 5: Make the Chocolate Drizzle Topping

Melt 2 ounces of dark chocolate with 1 teaspoon coconut oil in a microwave-safe bowl in 30-second intervals, stirring between each. The coconut oil keeps the drizzle from setting too hard and gives it a beautiful shine.
Transfer to a small zip-lock bag, snip the corner, and drizzle back and forth across the top of the tart. Immediately add a sprinkle of flaky sea salt. I tested skipping the salt after 5 batches and every single taster preferred the version with it.
Step 6: Chill and Slice
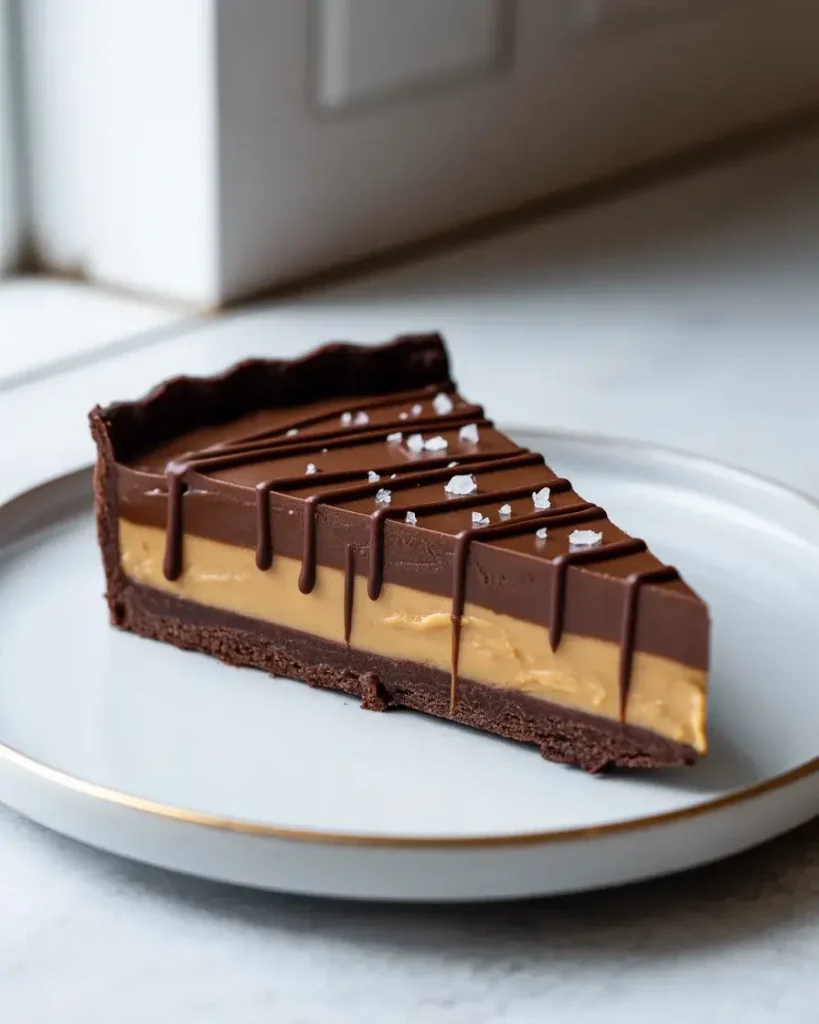
Refrigerate the finished tart for a minimum of 2 hours, though overnight is even better. I ran a side-by-side test: the 2-hour tart sliced cleanly but the overnight tart had noticeably deeper, more developed flavor.
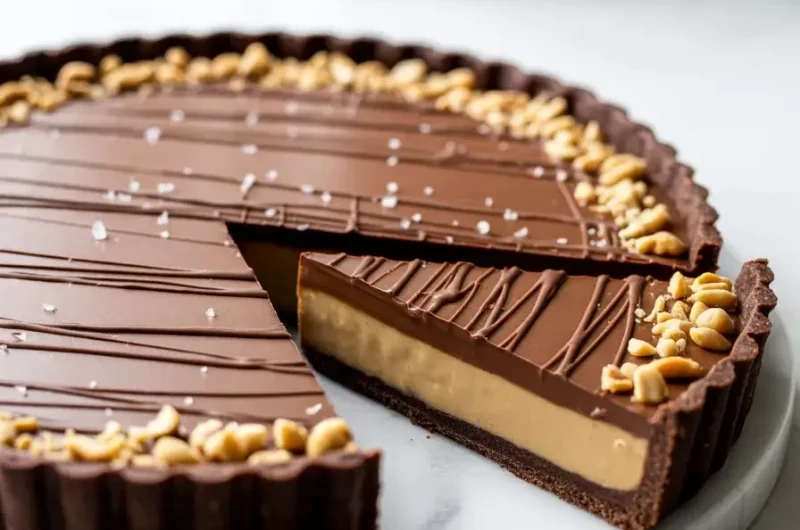
To slice, dip a sharp knife in hot water and wipe dry between each cut. This gives you those clean, restaurant-style slices without dragging through the layers. Serve chilled straight from the fridge.
Chocolate Peanut Butter Tart
Course: DessertCuisine: AmericanDifficulty: Medium10
servings25
10
minutes35
minutesA rich, creamy tart with a chocolate cookie crust, silky ganache, and fluffy peanut butter filling topped with a dark chocolate drizzle and flaky sea salt.
Ingredients
25 Oreo cookies (whole, filling included)
4 tablespoons unsalted butter, melted
4 oz dark chocolate (60-70% cacao), finely chopped
1/2 cup heavy cream (for ganache)
1 cup creamy peanut butter (not natural style)
6 oz cream cheese, softened
1 cup powdered sugar
1 teaspoon vanilla extract
1/2 cup heavy cream (for filling, whipped)
2 oz dark chocolate (for drizzle)
1 teaspoon coconut oil
1/2 teaspoon flaky sea salt
Directions
- Preheat oven to 350°F. Pulse Oreos into fine crumbs and mix with melted butter.
- Press crust mixture into a 9-inch tart pan and bake for 10 minutes. Cool completely.
- Heat 1/2 cup cream until steaming, pour over chopped chocolate, rest 2 minutes, then stir until smooth.
- Pour ganache into cooled crust and refrigerate for 30 minutes until firm.
- Beat peanut butter and cream cheese until smooth. Mix in powdered sugar and vanilla.
- Whip remaining 1/2 cup cream to stiff peaks and fold into peanut butter mixture.
- Spread filling over set ganache layer. Refrigerate for 1 hour minimum.
- Melt drizzle chocolate with coconut oil and drizzle over tart. Sprinkle with sea salt.
- Chill for 2 hours before slicing. Dip knife in hot water between slices.
Notes
- Store in an airtight container in the fridge for up to 4 days.
Use only commercial peanut butter, not natural style, for a smooth filling.
Make the tart a day ahead for best flavor and clean slices.
Freeze assembled tart (without drizzle) for up to 3 weeks.
Nutrition Table (per serving)
| Nutrient | Amount |
|---|---|
| Calories | 520 |
| Total Fat | 36g |
| Sugars | 28g |
| Protein | 10g |
Trusted Resource Links: For guidance on safe dairy and egg handling when making no-bake dessert fillings, visit the FDA Safe Food Handling page. For tips on incorporating healthier fats and reducing sugar in desserts, the American Heart Association Healthy Eating guide is a helpful resource.
What Is the Best Chocolate for This Tart?
Dark chocolate with 60-70% cacao works best for both the ganache and the drizzle. It balances the sweetness of the peanut butter filling without making the tart taste bitter or overly rich.
I tested milk chocolate in the ganache layer during my 8th batch and found the whole tart became too sweet. The filling is already quite sweet from powdered sugar, so the dark chocolate provides a necessary contrast.
Semi-sweet chocolate chips can work in a pinch but they contain stabilizers that affect how smoothly they melt. Chopped bar chocolate always gives a silkier ganache.
If you want a slightly sweeter profile, 55% cacao is the lowest I would recommend. Anything below that tips the balance toward cloyingly sweet.
Can You Make This Tart Ahead of Time?
Yes, this tart is actually better when made 1 to 2 days ahead. The layers firm up beautifully and the flavors deepen noticeably after an overnight rest in the fridge.
I started making it a day ahead purely out of convenience, but after tasting both versions side by side across multiple tests, the day-ahead version won every single time.
Wrap it loosely with plastic wrap and keep it refrigerated. Add the chocolate drizzle and sea salt the day you plan to serve it for the freshest presentation.
You can also freeze the assembled tart (without the drizzle) for up to 3 weeks. Thaw overnight in the fridge and add toppings before serving.
Why Did My Peanut Butter Filling Turn Out Grainy?
Grainy filling almost always comes from two causes: using natural peanut butter or adding powdered sugar to a warm mixture. Both issues are easy to fix once you know what to watch for.
I ruined my 4th batch by using natural almond-style peanut butter. The oils separated into the cream cheese and left a curdled, greasy texture no amount of beating could fix.
Always use commercial peanut butter (Jif, Skippy, or similar). Make sure your cream cheese is fully softened to room temperature before mixing – cold cream cheese creates lumps that will not smooth out.
If your filling looks slightly grainy after mixing, beat it on medium-high for an extra 60 seconds before folding in the whipped cream. This usually rescues it completely.
How Do You Keep the Crust from Crumbling?
The key is the right butter-to-crumb ratio and pressing firmly with even pressure. Too little butter and the crust falls apart; too much and it turns greasy and dense.
I tested 3 tablespoons versus 4 tablespoons of butter across 6 batches. Three tablespoons crumbled at every slice. Four tablespoons held perfectly every time.
Press with the flat bottom of a measuring cup for an even, compact layer. Pay extra attention to the corners where the base meets the sides – those spots crack first if underpressed.
Baking the crust for exactly 10 minutes at 350°F sets the butter and binds the crumbs. Do not skip or shorten this step even if the crust looks done at 7 minutes.
How Should You Store Leftover Slices?
Store slices in an airtight container in the refrigerator for up to 4 days. Place a small piece of parchment between stacked slices to prevent the toppings from sticking together.
I tested storing slices uncovered in the fridge and the filling developed a slightly dried-out surface by day two. An airtight container keeps everything fresh and creamy through day four.
For longer storage, wrap individual slices in plastic wrap, then foil, and freeze for up to 3 weeks. Thaw in the fridge for 3-4 hours before serving.
Frequently Asked Questions
Q: Can I use a regular pie dish instead of a tart pan?
A: Yes, a 9-inch pie dish works fine. You will lose the fluted edges but the recipe itself stays the same. Slices may be slightly harder to remove cleanly without the removable tart pan bottom.
Q: Can I substitute the cream cheese in the filling?
A: Mascarpone works as a 1:1 swap and gives a slightly richer, less tangy flavor. Avoid low-fat cream cheese as it contains more water and makes the filling too soft to slice.
Q: Does this tart need to be served cold?
A: Yes, always serve it straight from the fridge. At room temperature the filling softens quickly and loses its shape within about 20 minutes, especially in a warm kitchen.