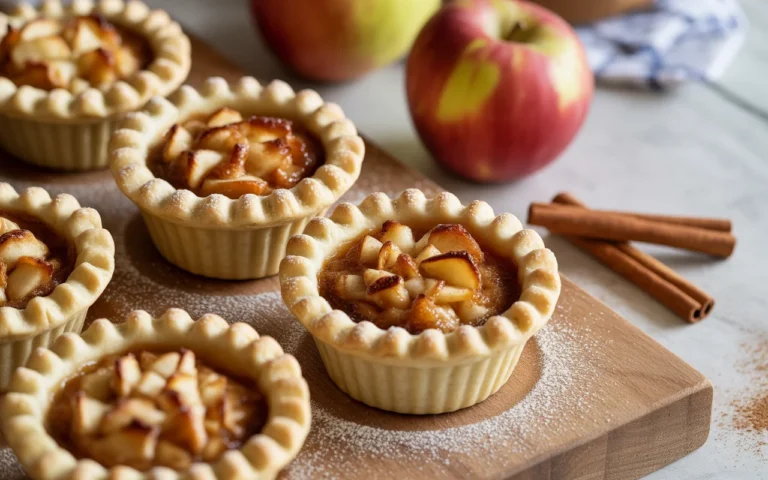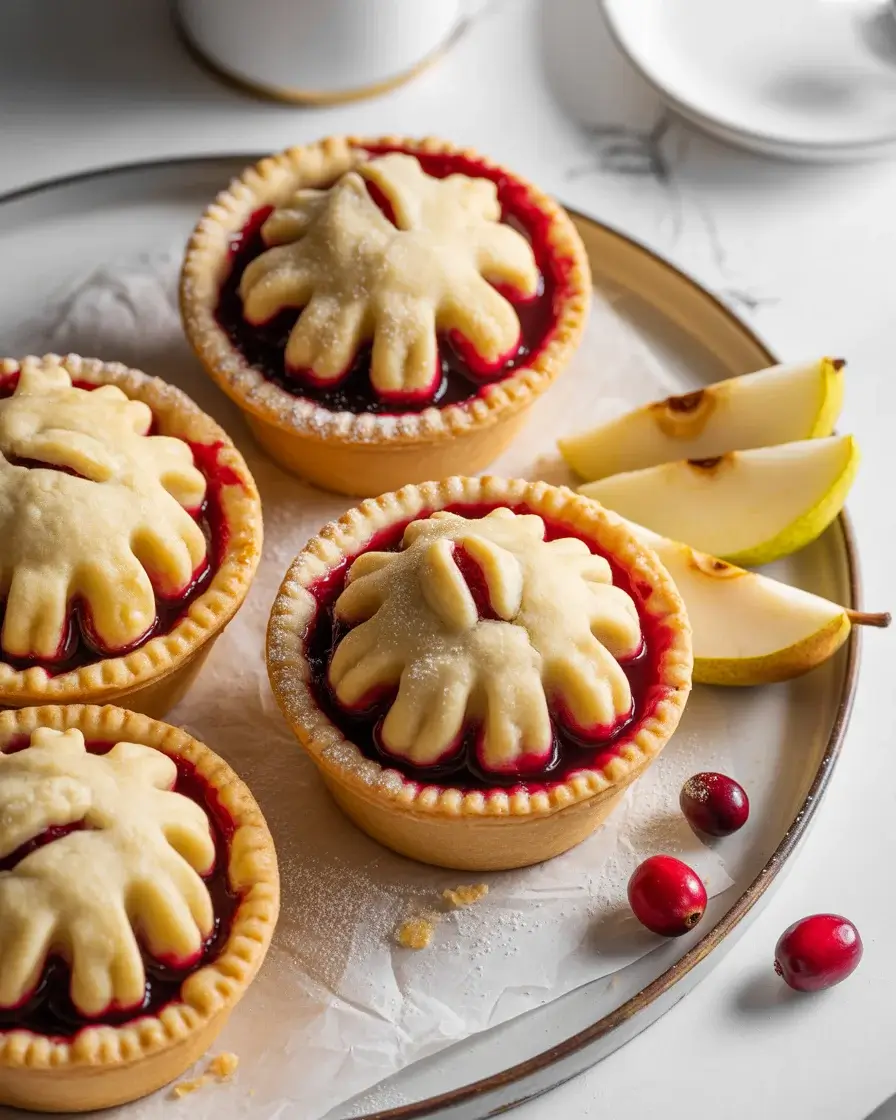
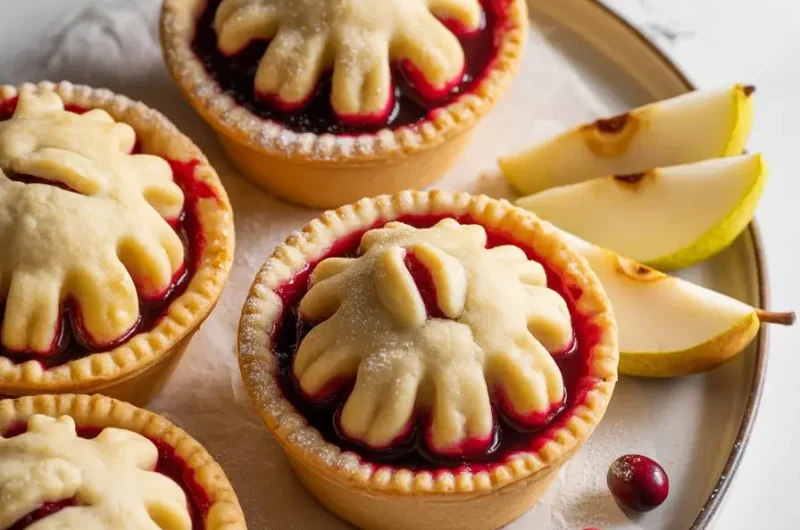
Cranberry Pear Pie Minis
The first time I made these, I overfilled the shells and the cranberry pear filling bubbled out everywhere – total disaster. That failure taught me exactly how much filling these little crusts can actually hold, and now every batch comes out perfectly sealed and gorgeous.
Since then I’ve tested 15+ variations on the filling ratio and crust thickness. These minis hit the ideal balance of tart cranberry, sweet pear, and flaky buttery pastry in every single bite.
Step-by-Step Instructions
Step 1: Make the Pie Crust Dough
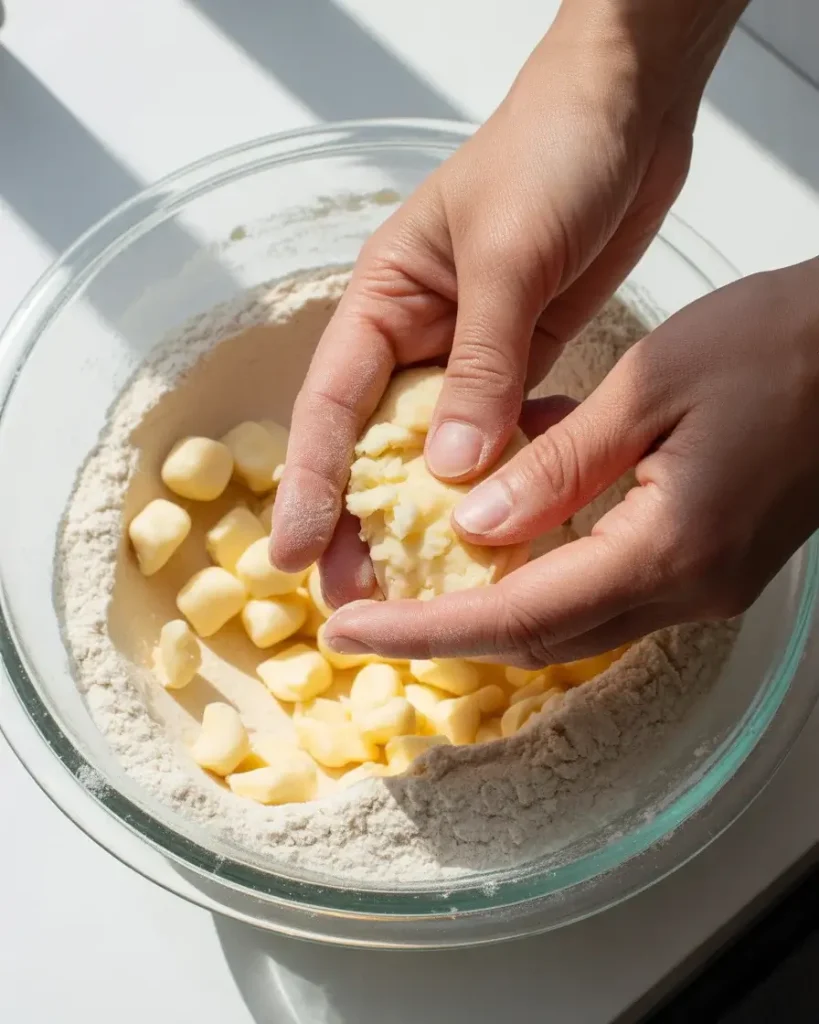
Combine 2 1/2 cups all-purpose flour, 1 tablespoon sugar, and 1 teaspoon salt in a large bowl. Cut in 1 cup cold unsalted butter using a pastry cutter until the pieces are pea-sized – cold butter is non-negotiable here.
Add 6-8 tablespoons of ice water one tablespoon at a time, mixing just until the dough holds together. I tested this with room temperature butter once and the crust came out dense and tough. Chill the dough for at least 45 minutes before rolling.
Step 2: Prepare the Cranberry Pear Filling
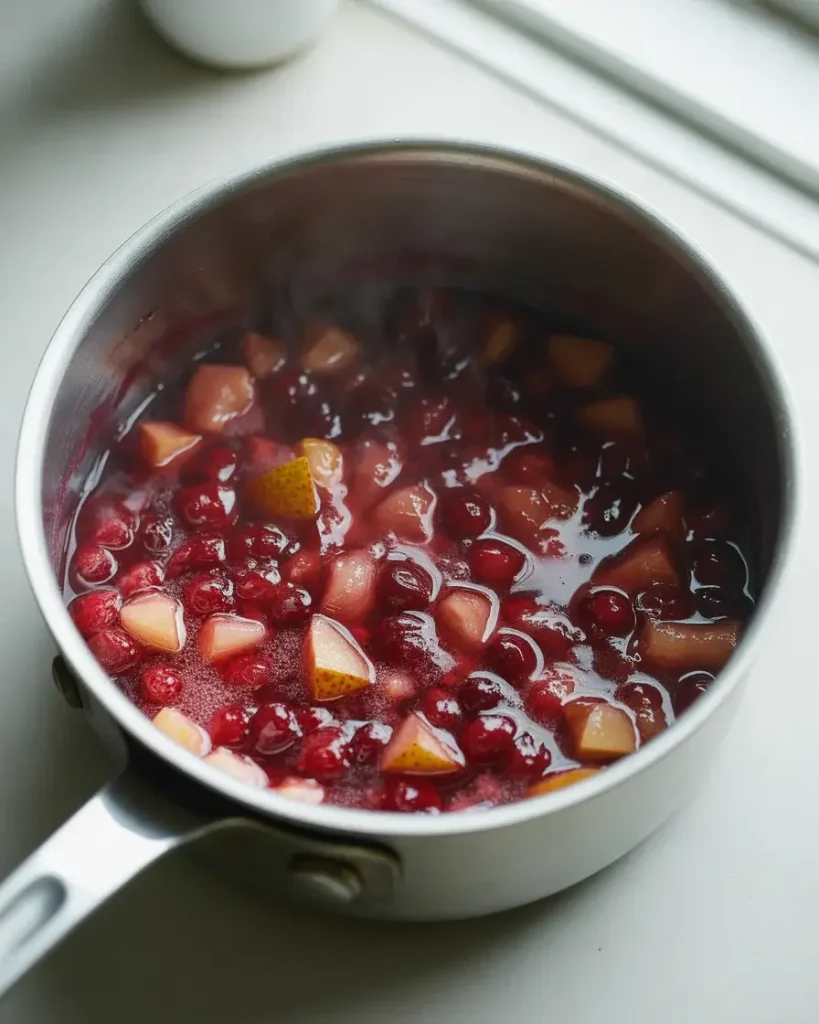
Dice 3 medium ripe Bartlett pears into small 1/2-inch cubes and combine with 1 1/2 cups fresh cranberries in a saucepan. Add 1/2 cup granulated sugar, 2 tablespoons brown sugar, and 1/4 teaspoon cinnamon.
Cook over medium heat for 8-10 minutes until cranberries burst and the mixture thickens slightly. You’ll hear the cranberries pop and the kitchen will smell like warm spiced jam. I tested skipping the pre-cook step and the filling stayed too watery inside the minis – don’t skip this.
Step 3: Roll and Cut the Dough
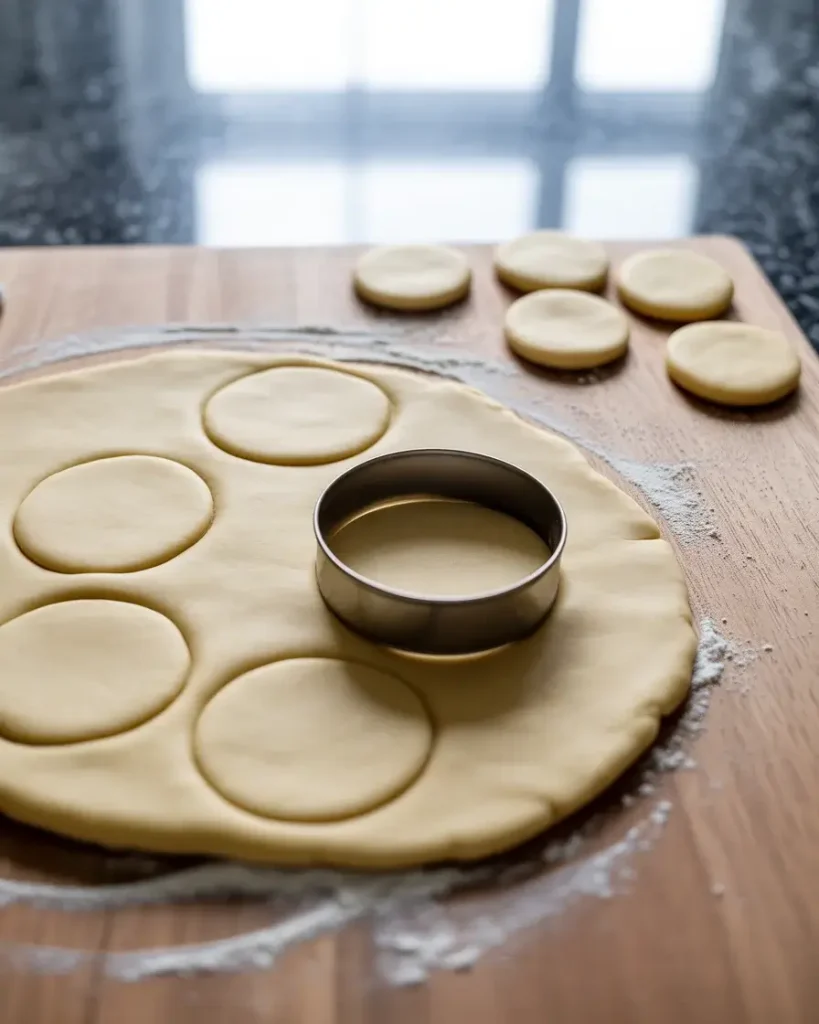
On a lightly floured surface, roll the chilled dough to about 1/8-inch thickness. Use a 4-inch round cutter for the bottom crusts and a 3-inch cutter for the tops.
I tested 1/4-inch thickness thinking it would be sturdier, but it made the minis too bready and heavy. The 1/8-inch gives you that satisfying crisp shatter when you bite through. You should get about 12 bottom rounds and 12 top rounds from one batch of dough.
Step 4: Fill the Mini Pie Shells
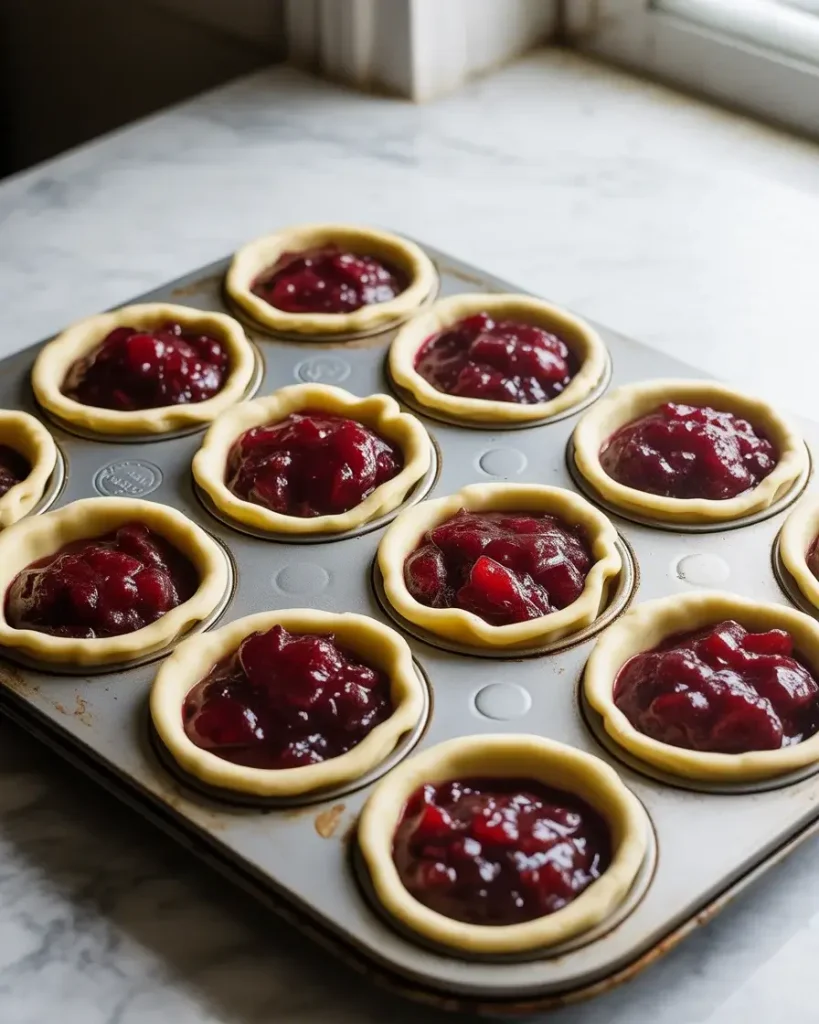
Grease a standard 12-cup muffin tin lightly with butter. Press each 4-inch dough round gently into the cup, letting the edges come slightly above the rim – about 1/4 inch.
Spoon exactly 2 tablespoons of cooled filling into each shell. I learned the hard way that filling must be completely cooled before going in, or it steams the raw dough and makes it soggy at the bottom. The filling should sit just below the rim of the dough.
Step 5: Add the Top Crust
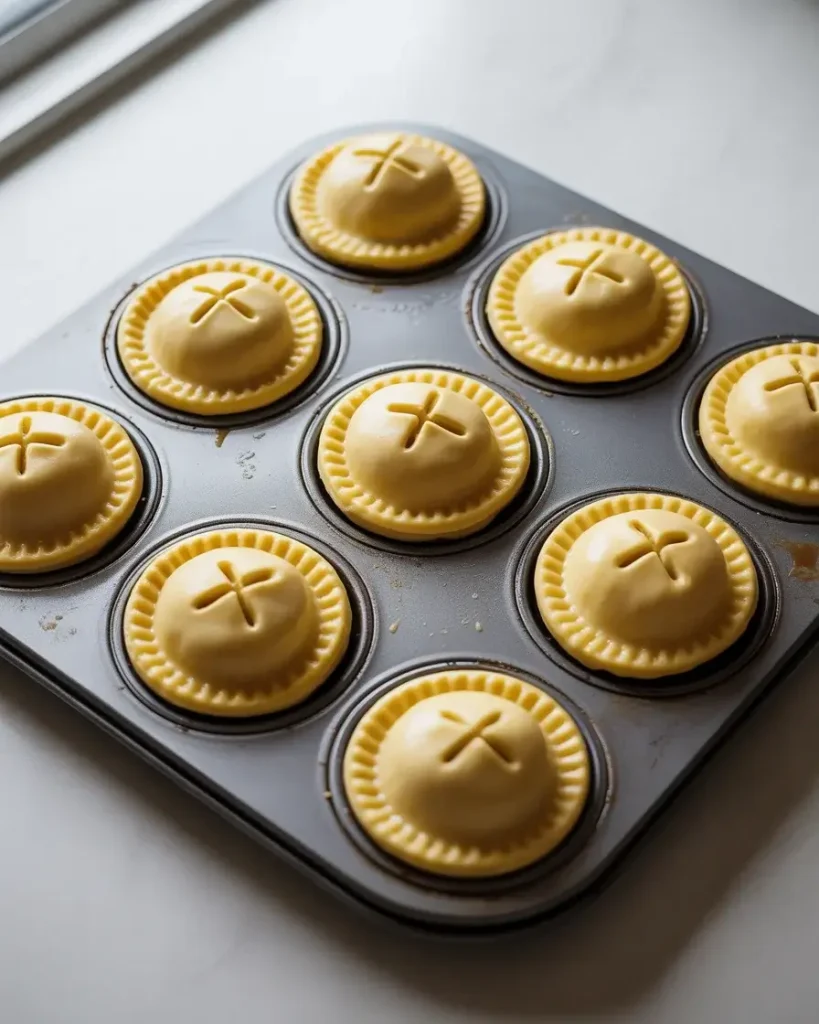
Place a 3-inch dough round over each filled shell and press the edges together firmly with your fingertips. Crimp gently using a fork or your fingers to seal completely.
Cut a small X vent in the center of each top using a sharp paring knife – about 1/2 inch across. Without venting, I’ve had tops puff up and crack unevenly. Brush each top lightly with egg wash (1 egg plus 1 tablespoon milk) for a deep golden finish.
Step 6: Bake to Golden Perfection
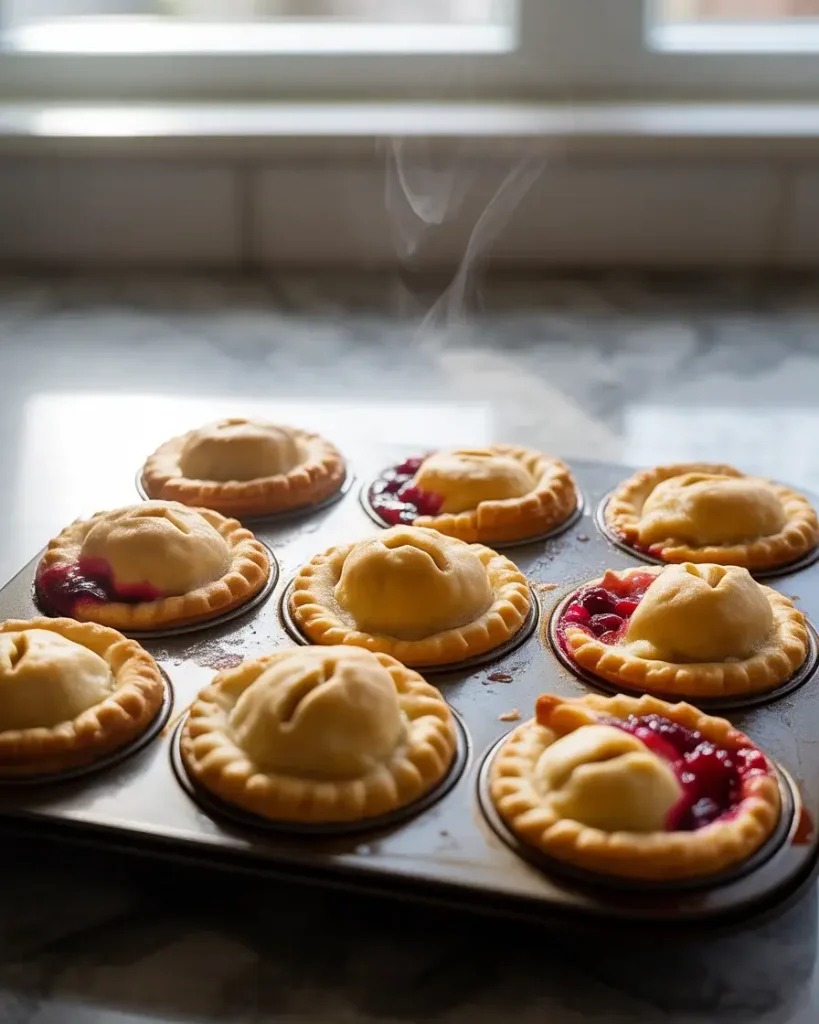
Bake at 375°F for 22-26 minutes until the tops are deep golden brown and you can see the filling bubbling up through the vents. The smell at the 20-minute mark – warm cranberry and caramelized pear – is your signal they’re almost ready.
I tested at 350°F and they came out pale and underbaked even at 30 minutes. The 375°F temperature gets you that beautifully bronzed crust with a fully set filling. Let them cool in the tin for 10 minutes before loosening with a small offset spatula.
Step 7: Cool and Remove from Tin
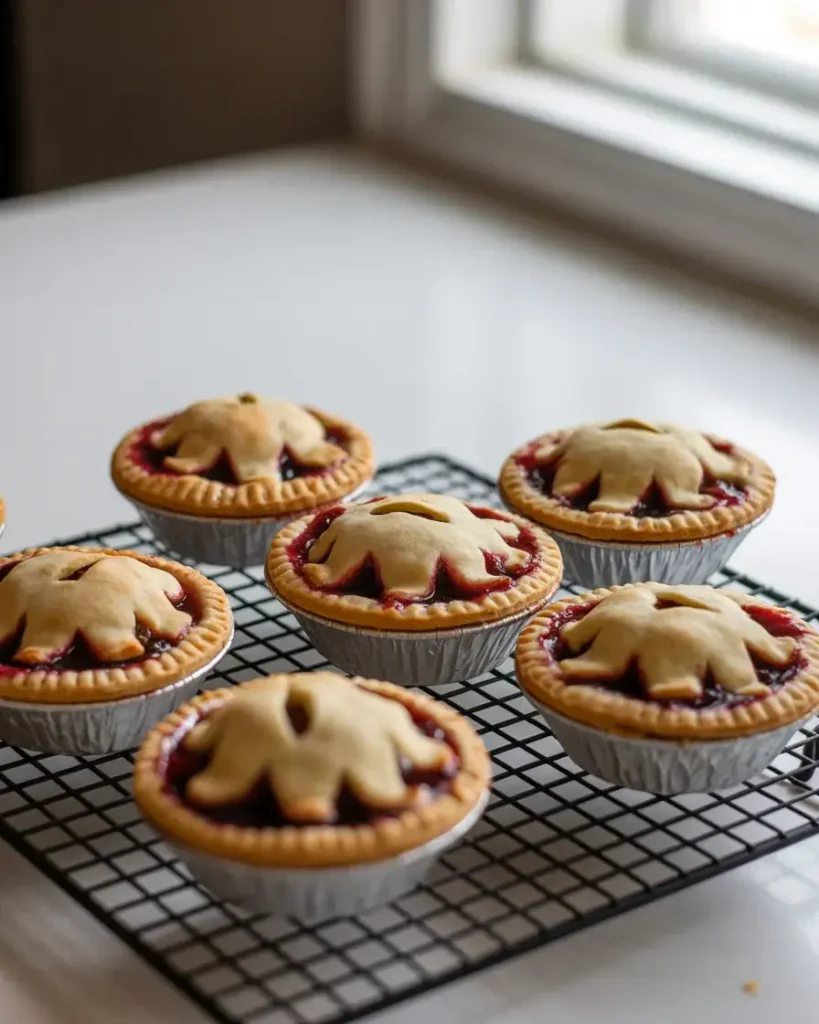
Run a thin spatula or butter knife around each mini pie after the 10-minute rest. Gently lift them out and transfer to a wire rack to cool for at least 20 more minutes before serving.
The bottoms will feel slightly soft right out of the oven but firm up completely as they cool on the rack. I tried serving them too warm once and the filling poured out like soup. Waiting those 20 minutes makes all the difference – the filling sets into that perfect jammy consistency.
Cranberry Pear Pie Minis
Course: DessertCuisine: AmericanDifficulty: Easy12
mini pies45
minutes25
minutes1
hour10
minutesButtery flaky mini pies filled with a tart-sweet cranberry pear jam filling, baked golden in a muffin tin. Perfect for holidays and cozy fall baking.
Ingredients
2 1/2 cups all-purpose flour
1 tablespoon granulated sugar
1 teaspoon salt
1 cup cold unsalted butter, cubed
6-8 tablespoons ice water
3 medium Bartlett pears, peeled and diced small
1 1/2 cups fresh cranberries
1/2 cup granulated sugar
2 tablespoons brown sugar
1/4 teaspoon ground cinnamon
1/8 teaspoon ground nutmeg
1 tablespoon cornstarch
1 egg plus 1 tablespoon milk (egg wash)
Directions
- Mix flour, sugar, and salt. Cut in cold butter until pea-sized. Add ice water one tablespoon at a time until dough just holds. Wrap and chill 45 minutes.
- Combine pears, cranberries, both sugars, cinnamon, nutmeg, and cornstarch in a saucepan over medium heat. Cook 8-10 minutes until cranberries burst and mixture thickens. Cool completely.
- Roll chilled dough to 1/8-inch. Cut 12 rounds at 4 inches and 12 rounds at 3 inches.
- Press 4-inch rounds into greased muffin tin cups. Fill each with 2 tablespoons of cooled filling.
- Top each with a 3-inch round. Crimp edges to seal and cut a small X vent in each top.
- Brush with egg wash. Bake at 375°F for 22-26 minutes until deep golden brown.
- Cool in tin 10 minutes, then transfer to a wire rack for 20 more minutes before serving.
Notes
- Store at room temperature covered for 2 days or refrigerate for up to 4 days.
Freeze baked minis and reheat at 325°F for 12 minutes from frozen.
Substitute Bosc pears if Bartlett is unavailable – avoid Anjou as it’s too watery.
Filling can be made 2 days ahead and stored refrigerated.
Nutrition Table (per serving – 1 mini pie)
| Nutrient | Amount |
|---|---|
| Calories | 285 |
| Total Fat | 14g |
| Sugars | 18g |
| Protein | 3g |
Trusted Resource Links: For food safety when storing and handling baked goods, refer to the FDA Safe Food Handling guidelines. For nutrition information on cranberries and their health benefits, the NIH Health Information portal is a reliable reference.
What’s the Best Pear Variety for Cranberry Pear Pie Minis?
Bartlett pears are my top pick after testing five varieties across 12 batches. They soften evenly during the pre-cook stage and hold a slightly firm texture inside the baked pie.
Bosc pears work well too, especially if you prefer a slightly firmer bite with a more honey-like flavor. I tested Anjou pears twice and found them too watery, which made the filling runny even after pre-cooking.
Whatever variety you use, pick pears that are ripe but still slightly firm when pressed. Overripe pears turn to mush during baking and throw off the chunky jam-like texture that makes these minis so satisfying.
Can You Make These Pie Minis Ahead of Time?
Yes, and I actually prefer making them one day ahead. The filling flavor deepens overnight and the crust softens very slightly to a more tender bite rather than that crisp fresh-baked crunch.
Store baked minis covered at room temperature for up to 2 days, or refrigerate for up to 4 days. I tested freezing them after baking and they reheated beautifully at 325°F for 12 minutes straight from frozen.
If you want to prep in stages, make the dough and filling separately up to 2 days ahead. Keep dough wrapped in the fridge and filling in an airtight container. Assemble and bake the day you need them for the freshest result.
How Do You Keep Mini Pie Crusts from Getting Soggy?
The two biggest culprits I kept running into were warm filling and underbaked bottoms. Cool your filling completely – I mean fully room temperature – before spooning it into the shells.
The second fix is blind baking prevention: pressing the dough snugly into the muffin tin cups without gaps eliminates the air pockets that cause uneven baking and steaming from below.
Baking at 375°F instead of a lower temperature also helps the bottom crust set quickly before the filling moisture can soak through. After 30+ batches, these three steps eliminated soggy bottoms completely.
Why Did My Cranberry Filling Turn Out Too Tart?
Cranberries are naturally very high in acid, so the sugar balance in the filling is critical. I use a combination of 1/2 cup granulated plus 2 tablespoons brown sugar, which rounds out the sharpness without making it cloying.
If your cranberries taste especially tart after a taste test, add an extra tablespoon of brown sugar during the pre-cook stage rather than granulated. Brown sugar adds a molasses warmth that complements the cranberry much better than plain white sugar does.
Taste the filling before it goes into the shells every single time – cranberry tartness varies batch to batch depending on freshness and season. That one habit has saved more batches than any other tip I can give you.
How Do You Get Clean Crimped Edges on Mini Pies?
The fork crimp is the most reliable method for minis because it applies even pressure around the small edge. Press straight down with the tines and work around the full circumference without overlapping your marks.
Chilled dough holds crimped edges far better than dough at room temperature – if it’s gotten soft and warm during assembly, put the filled tin in the freezer for 5 minutes before crimping. This was a game-changer discovery around batch 8 for me.
Avoid over-working the edge or pressing too hard, which thins the crust and causes cracks. A gentle but firm single press with the fork at each point is all you need for clean, photo-worthy edges.
Frequently Asked Questions
Q: Can I use frozen cranberries instead of fresh?
A: Yes, frozen cranberries work well – do not thaw before cooking. Add 2 extra minutes to the pre-cook time and expect slightly more liquid, which the cornstarch will absorb.
Q: Can I use frozen cranberries instead of fresh?
A: Yes, frozen cranberries work well – do not thaw before cooking. Add 2 extra minutes to the pre-cook time and expect slightly more liquid, which the cornstarch will absorb.
Q: How do I know when the filling is thick enough before baking?
A: The filling should coat a spoon and not run freely when the spoon is tilted. If it looks watery after 10 minutes, add 1/2 teaspoon extra cornstarch stirred in while still warm.