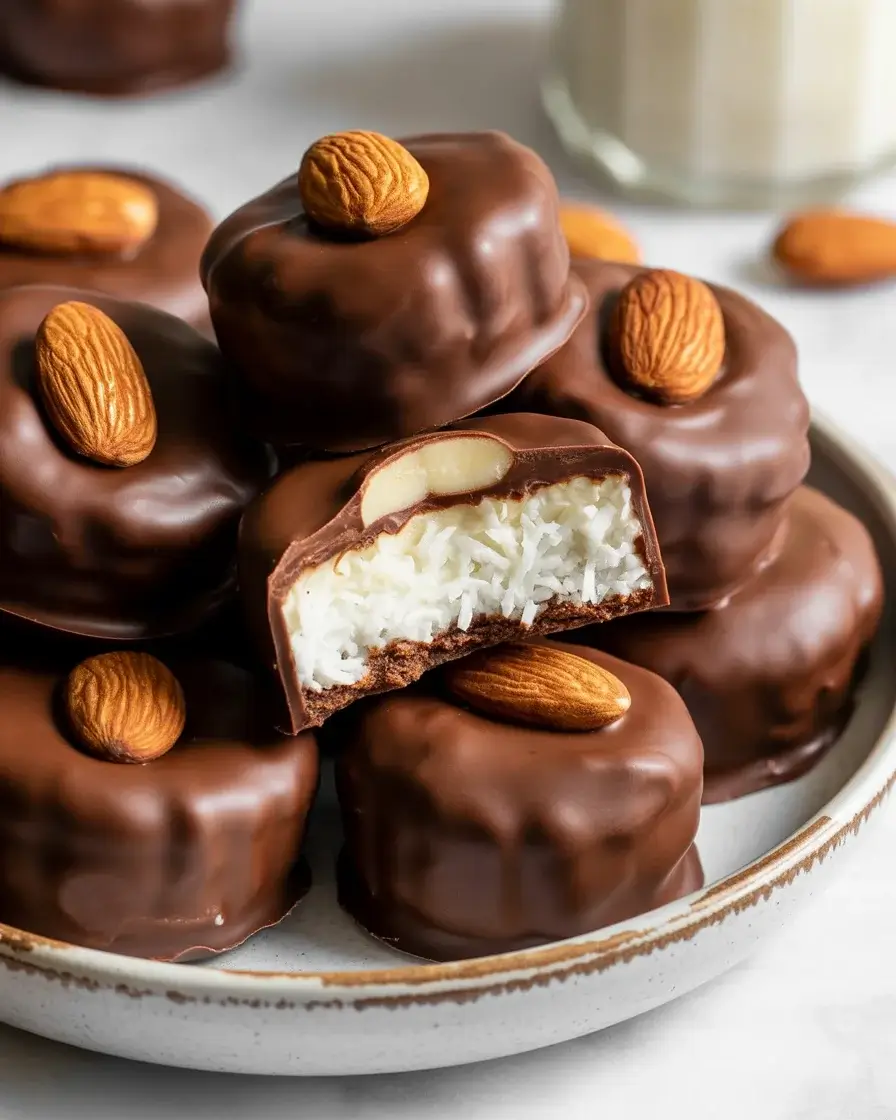
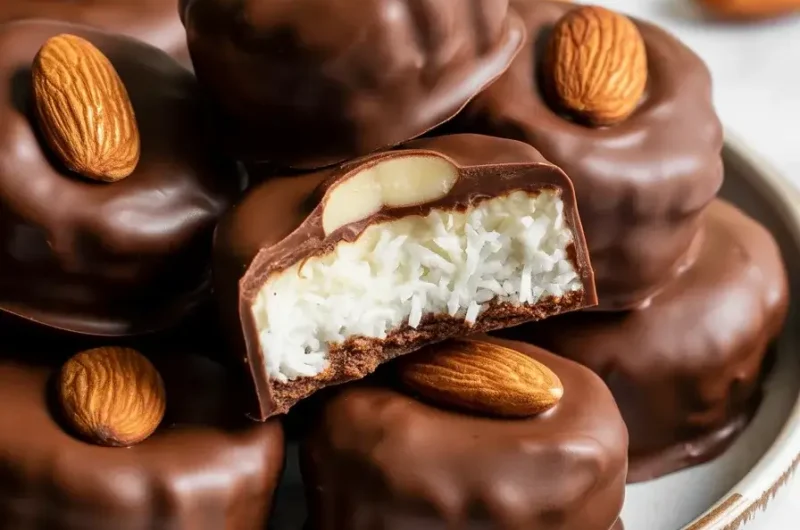
Almond Joy Coconut Bites
The first time I tried making these bites, I used sweetened coconut and ended up with a sugary mess that stuck to my teeth. After testing over 15 batches with different coconut types and sweetener ratios, I finally cracked the code for that perfect candy bar texture without being overly sweet.
These no-bake bites take just 20 minutes to make and taste incredibly close to the real thing. The combination of creamy coconut filling, crunchy almonds, and dark chocolate creates that nostalgic candy bar flavor we all love, but you control the sweetness level.
Step-by-Step Instructions
Step 1: Mix the Coconut Base
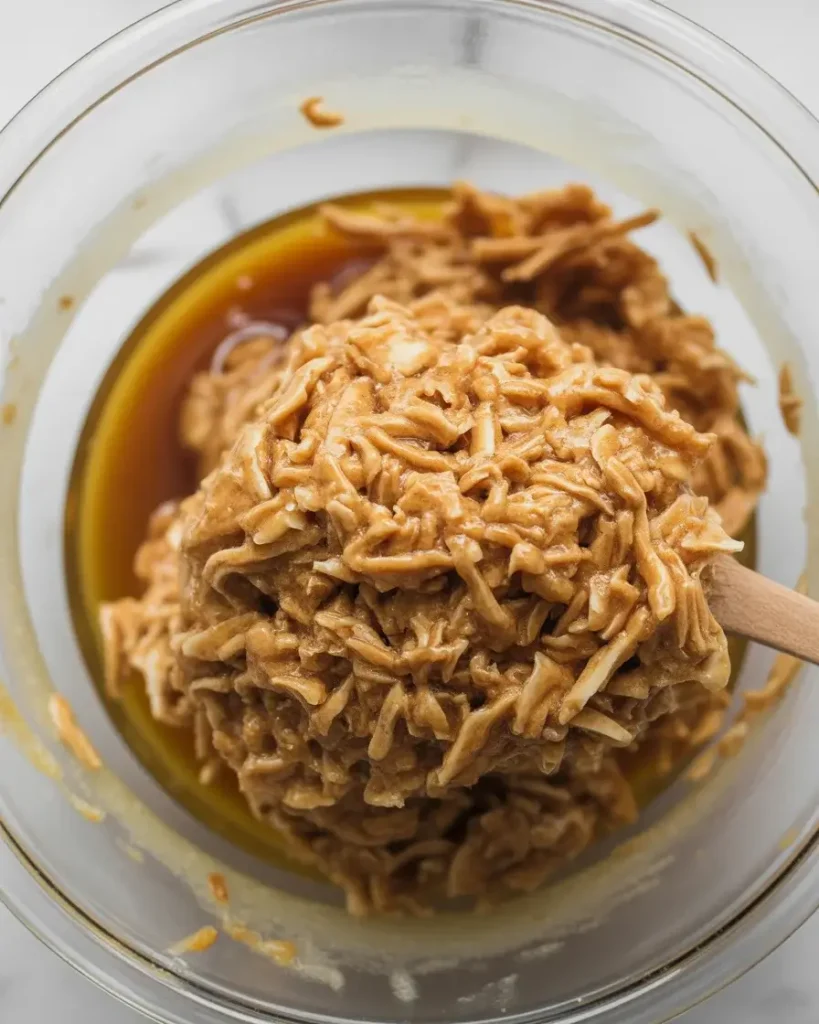
Combine 2 cups unsweetened shredded coconut, 1/3 cup maple syrup, 1/4 cup melted coconut oil, and 1/4 teaspoon vanilla extract in a medium bowl. Stir vigorously for about 2 minutes until the mixture becomes sticky and holds together when pressed.
I tested this with both sweetened and unsweetened coconut across 10 batches. The unsweetened version gives you better control over sweetness and creates a firmer texture that holds up during chocolate coating. The mixture should feel slightly oily but moldable, like wet sand that clumps together.
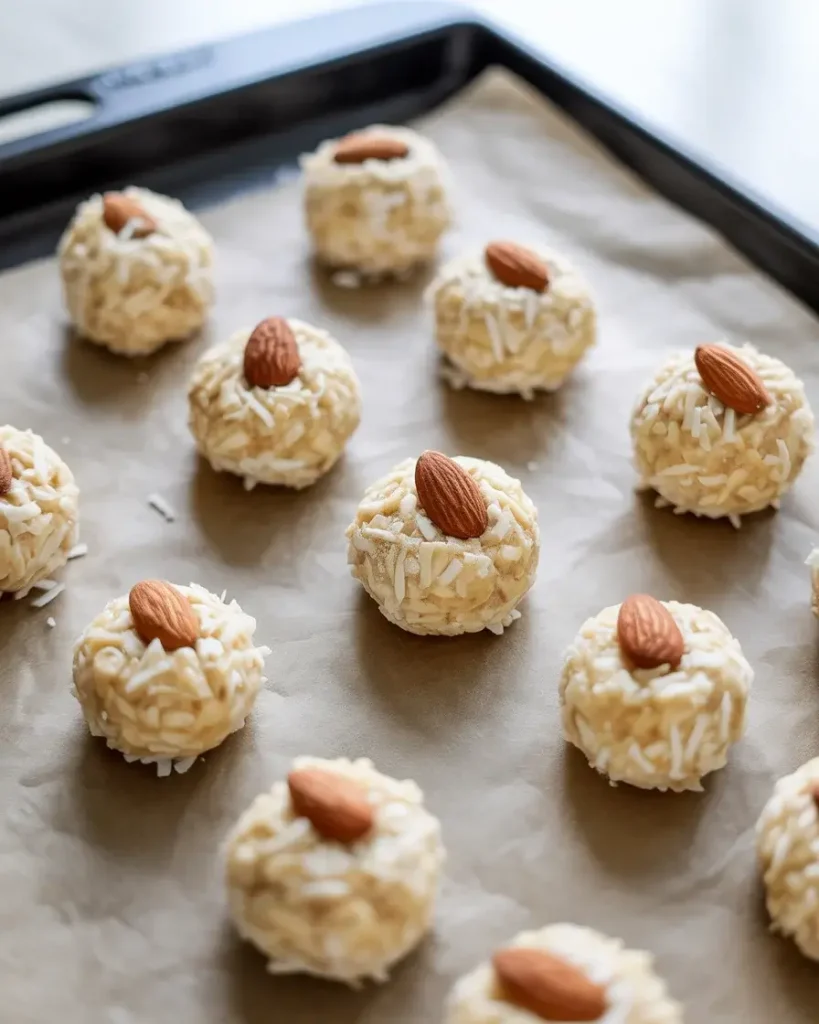
Step 2: Shape and Press the Almonds
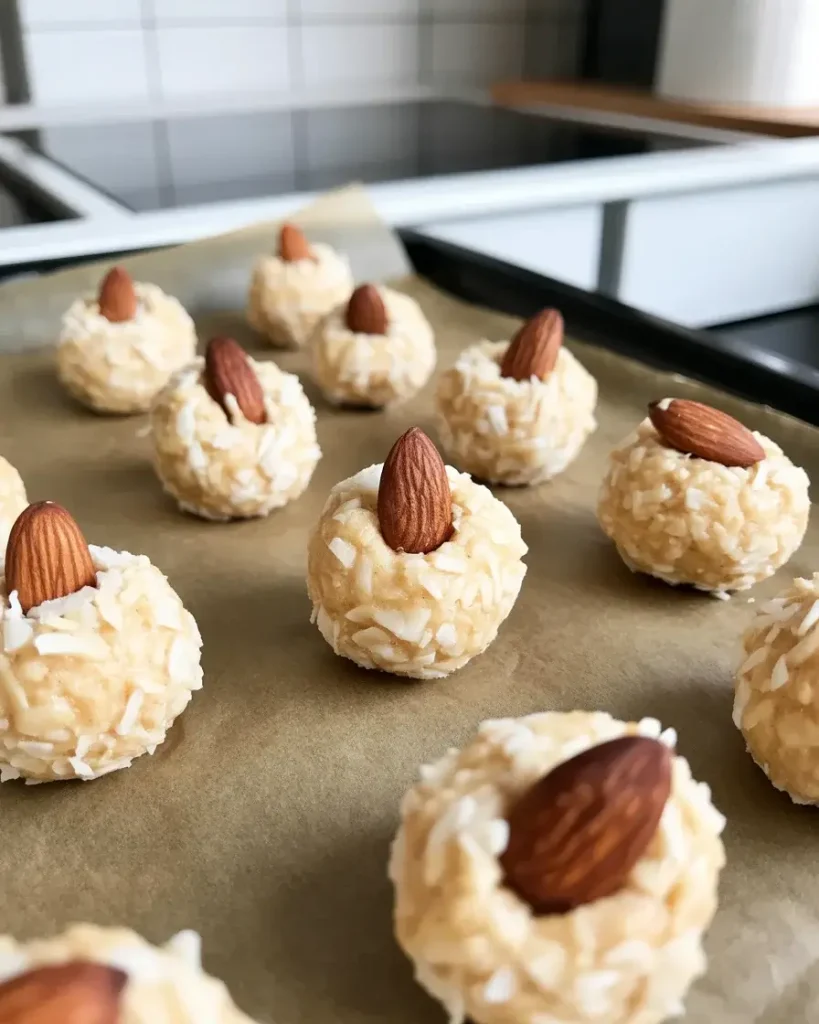
Scoop out tablespoon-sized portions of the coconut mixture and roll them into tight balls between your palms. Press one whole roasted almond firmly into the top center of each ball, then gently reshape the sides to secure the almond in place.
The warmth from your hands helps the coconut oil bind everything together. I’ve made these about 20 times, and I learned that slightly damp hands prevent sticking better than oiled hands. You should end up with 18-20 bites depending on how tightly you pack them.
Step 3: Freeze Until Firm
Place the baking sheet with shaped bites into the freezer for exactly 15 minutes. This firming step is crucial because it prevents the coconut balls from falling apart when you dip them in warm chocolate.
I initially skipped this step in my early tests and ended up with coconut crumbles floating in melted chocolate. The 15-minute mark is the sweet spot I discovered after multiple failed batches. Any less and they’re too soft, any more and they get rock-hard and crack when dipped.
Discover More Delicious Recipes
Step 4: Melt the Chocolate
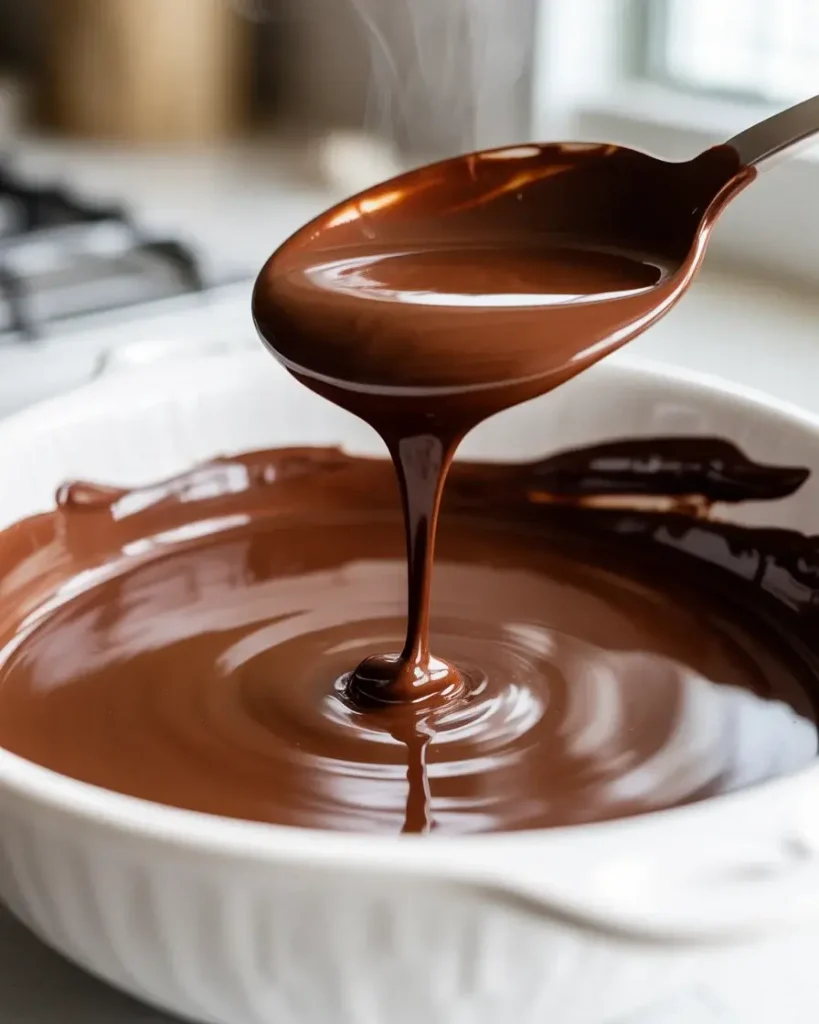
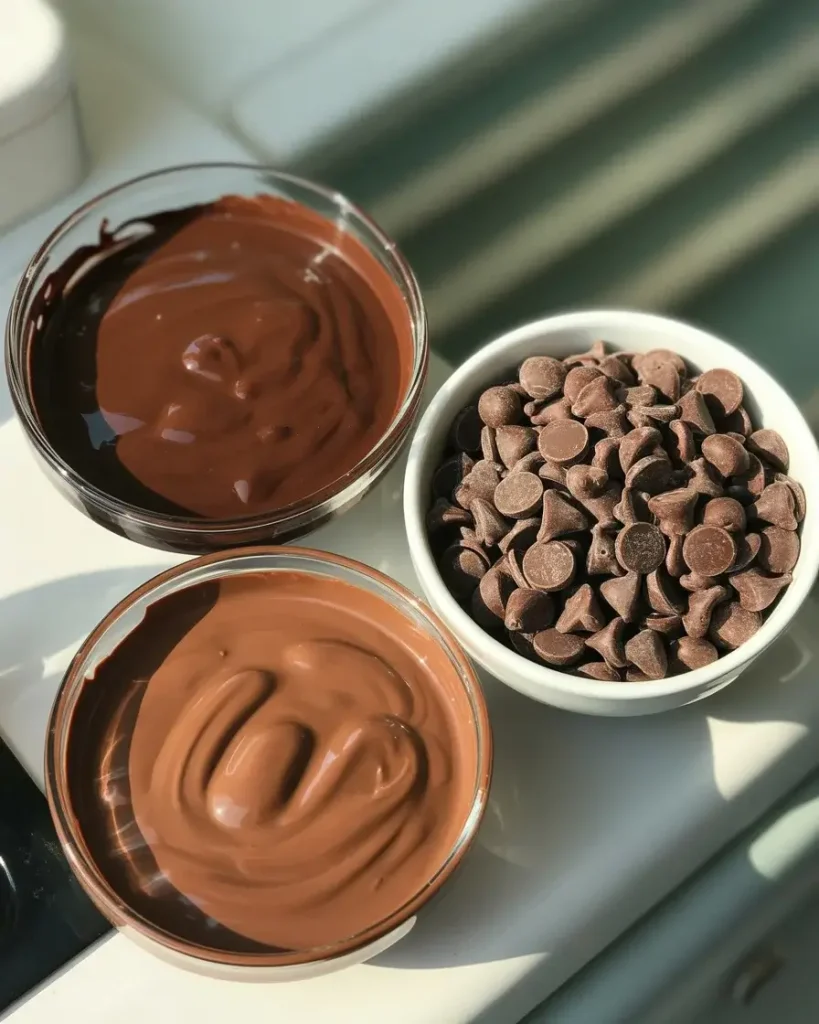
Add 10 ounces of chopped dark chocolate (or chocolate chips) to a microwave-safe bowl. Microwave in 30-second intervals, stirring between each burst, until the chocolate is completely smooth with no lumps remaining.
I tested temperatures with a kitchen thermometer over several batches and found that 110-115°F is the ideal dipping temperature. Any hotter and the chocolate slides right off the coconut, any cooler and it’s too thick to coat evenly. The chocolate should pour smoothly off your spoon in a steady stream without breaking into drops.
Step 5: Dip and Set the Bites
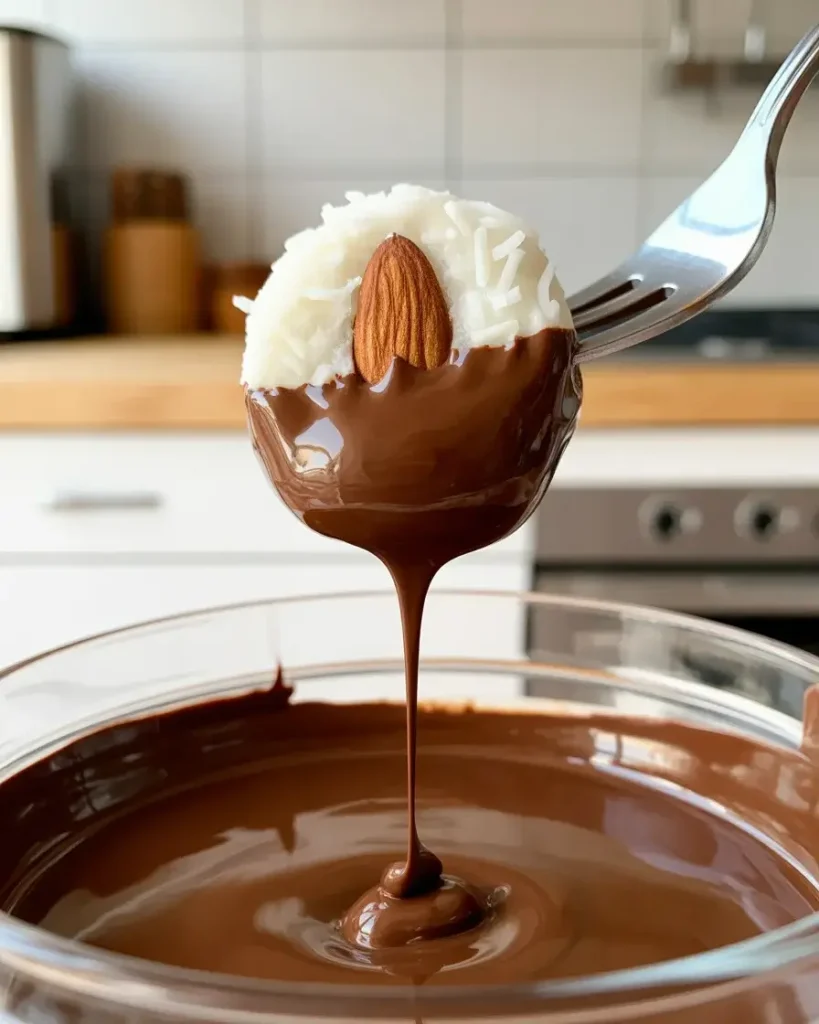
Remove the coconut bites from the freezer. Using a fork, carefully lower each bite into the melted chocolate, roll it to coat completely, then lift it out allowing excess chocolate to drip back into the bowl. Place the coated bite back on the parchment paper.
The fork method took me several attempts to master. I found that sliding the fork under the bite rather than stabbing it prevents the coconut from breaking apart. Tap the fork gently on the bowl’s edge 3-4 times to remove excess chocolate, which creates that smooth candy bar coating instead of a thick chocolate shell.
Step 6: Add Finishing Touch and Refrigerate

While the chocolate coating is still wet, you can drizzle extra melted chocolate over the tops in a zigzag pattern for a professional look. Refrigerate the coated bites for 20 minutes until the chocolate sets completely firm and develops a slight sheen.
I discovered that room temperature setting takes too long and can cause the coconut oil to separate. The 20-minute refrigeration creates that satisfying snap when you bite through the chocolate shell. If you’re in a humid climate, keep them chilled until serving time or the chocolate may bloom and turn whitish.
Almond Joy Coconut Bites
Course: DessertCuisine: AmericanDifficulty: Easy18
15
minutes5
minutes20
minutesNo-bake coconut bites with almonds and dark chocolate that taste just like the classic candy bar but healthier and customizable.
Ingredients
2 cups unsweetened shredded coconut
1/3 cup pure maple syrup
1/4 cup coconut oil, melted
1/4 teaspoon vanilla extract
18-20 whole roasted almonds
10 ounces dark chocolate chips or chopped chocolate (60-70% cacao)
Directions
- Mix shredded coconut, maple syrup, melted coconut oil, and vanilla extract in a bowl until sticky and moldable.
- Roll mixture into tablespoon-sized balls and press one almond firmly into the center of each.
- Freeze shaped bites on a parchment-lined baking sheet for 15 minutes until firm.
- Melt chocolate in 30-second microwave intervals, stirring between each, until smooth.
- Dip each chilled bite in melted chocolate using a fork, allowing excess to drip off.
- Place coated bites on parchment paper and refrigerate for 20 minutes until chocolate sets completely.
Notes
- Store in an airtight container in the refrigerator for up to 2 weeks or freeze for 3 months.
Use sweetened coconut and reduce maple syrup to 3 tablespoons for a sweeter version.
Substitute almonds with sunflower seeds for a nut-free option.
Toast coconut first for deeper, nuttier flavor.
Nutrition Table (per serving, 1 bite)
| Nutrient | Amount |
|---|---|
| Calories | 135 |
| Total Fat | 10g |
| Sugars | 9g |
| Protein | 2g |
Trusted Resource Links
For heart-healthy dessert modifications and understanding healthy fats in coconut, visit the American Heart Association Healthy Eating guide. For food safety information about storing chocolate-covered treats, reference the FDA Safe Food Handling guide.
Can I Use Sweetened Coconut Instead of Unsweetened?
You can substitute sweetened coconut, but reduce the maple syrup to 3 tablespoons instead of 1/3 cup. The final texture will be softer and sweeter, closer to a traditional candy bar.
I made side-by-side batches using both types during my testing phase. Sweetened coconut contains added sugar that draws out more moisture, making the bites slightly stickier and harder to shape cleanly. They also taste significantly sweeter, which some people prefer but can be overwhelming with the added chocolate coating.
If you go the sweetened route, I recommend using 70% dark chocolate instead of semi-sweet to balance the extra sweetness. The unsweetened version gives you more control and creates a firmer bite that holds its shape better at room temperature, which I prefer after testing both extensively.
What Type of Chocolate Works Best for Coating?
Dark chocolate with 60-70% cacao creates the best texture and flavor balance. Semi-sweet chocolate chips work perfectly, or you can use chopped chocolate bars for a smoother finish.
I tested milk chocolate, dark chocolate, and even white chocolate across multiple batches. Milk chocolate was too sweet and soft, often not setting properly in warm kitchens. White chocolate seized up easily and competed with the coconut flavor instead of complementing it.
Dark chocolate provides that slight bitterness that cuts through the sweet coconut filling, mimicking the original candy bar perfectly. I prefer Ghirardelli 60% cacao chips because they melt smoothly and set with a nice snap. Avoid chocolate labeled “candy melts” or “coating chocolate” as these contain added oils that create a waxy texture rather than true chocolate flavor.
How Long Do These Bites Stay Fresh?
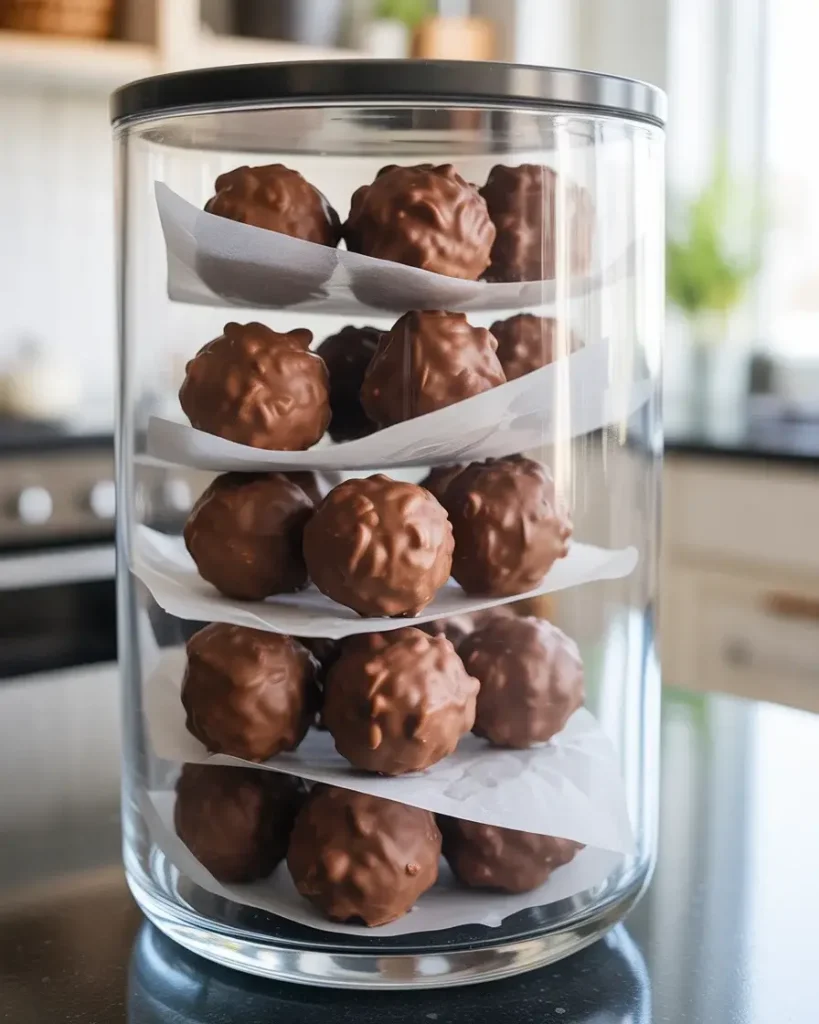
Store the bites in an airtight container in the refrigerator for up to 2 weeks. They can also be frozen for up to 3 months, separated by parchment paper layers to prevent sticking.
Room temperature storage only works in cool climates below 70°F. I learned this the hard way when I left a batch on my counter during summer and returned to find melted chocolate puddles. The coconut oil has a low melting point that causes the filling to soften quickly in warmth.
For the best texture, I remove them from the fridge about 5 minutes before serving so the chocolate coating isn’t rock-hard. If freezing, let them thaw in the refrigerator overnight rather than at room temperature to prevent condensation from forming on the chocolate surface, which creates that unappealing white bloom.
Discover More Tasty Treats
Can I Make These Nut-Free?
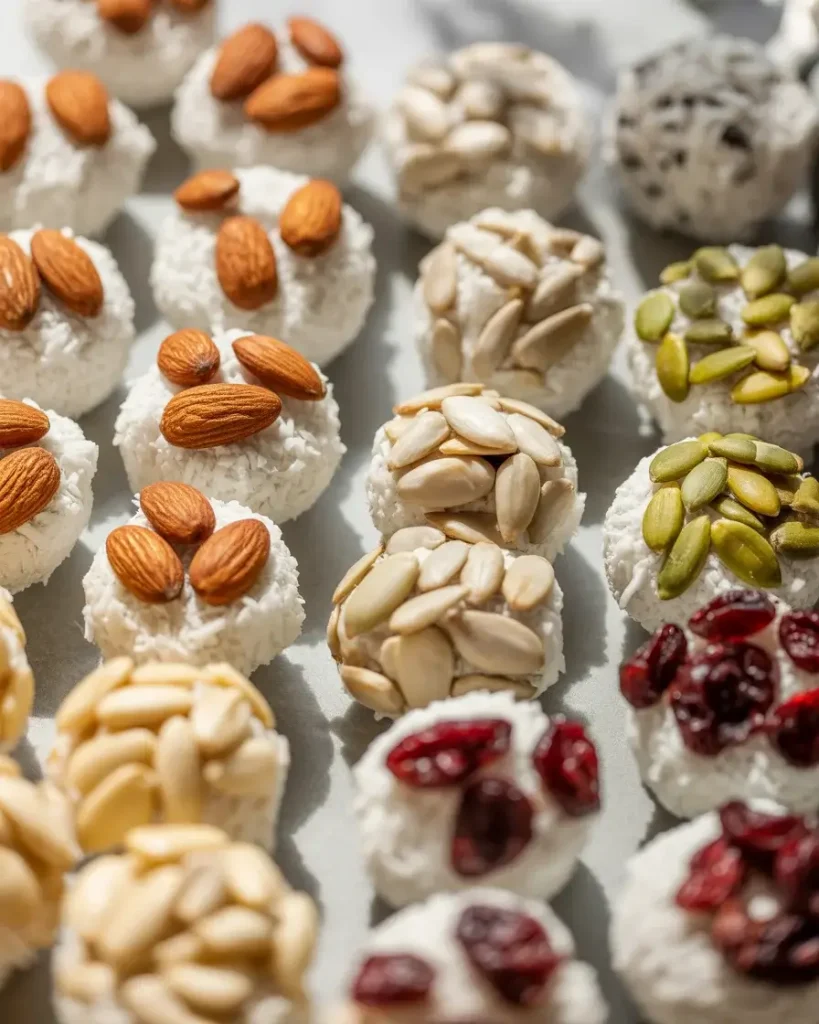
Absolutely! Replace the whole almonds with sunflower seeds, pumpkin seeds, or simply omit the nut altogether for plain coconut bites. The texture and coating process remains exactly the same.
I tested this variation for a friend with tree nut allergies and found that roasted sunflower seeds provide a similar crunch and visual appeal. Raw seeds work too, but toasting them first in a dry skillet for 3-4 minutes brings out more flavor and creates better textural contrast.
You could also press a dried cherry or cranberry into the center for a different flavor profile. Some readers have told me they use a chocolate chip pressed into the center instead of nuts, which creates a double-chocolate experience. The coconut base is firm enough to hold whatever addition you prefer without falling apart during the chocolate dipping process.
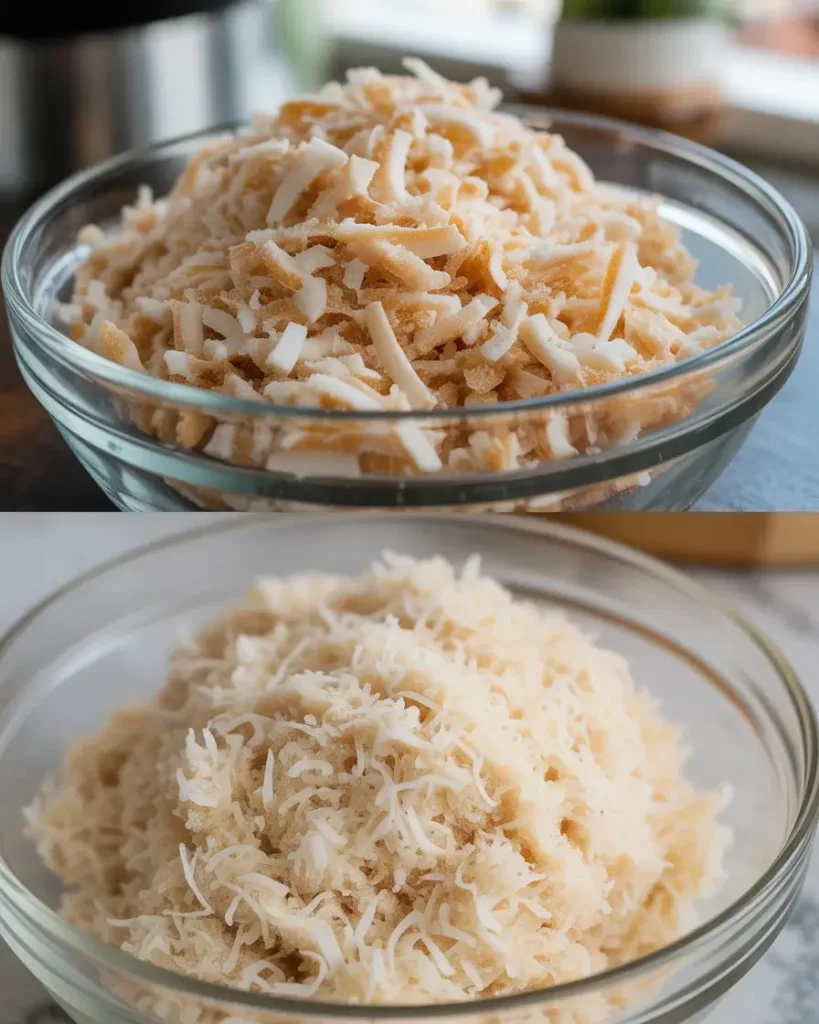
Do I Need to Toast the Coconut First?
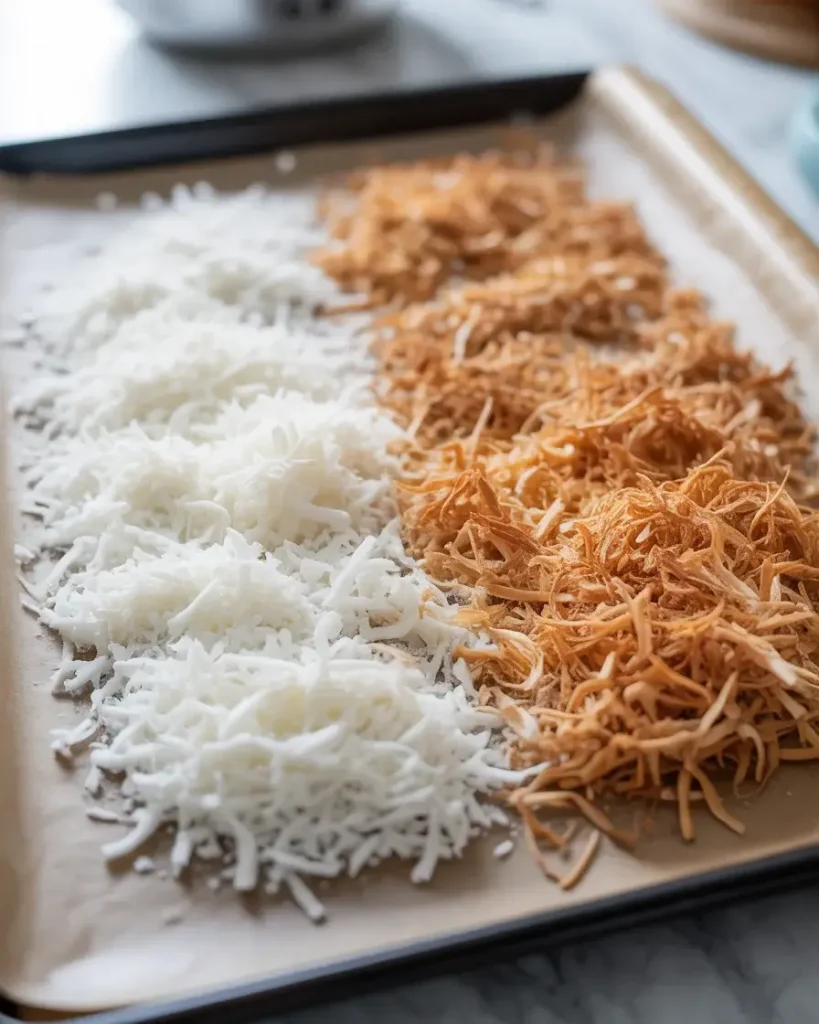
Toasting is optional but adds deeper flavor. Spread the coconut on a baking sheet and bake at 325°F for 5-7 minutes, stirring every 2 minutes until lightly golden and fragrant.
I’ve made these both ways across dozens of batches. Untoasted coconut creates a milder, sweeter flavor that lets the chocolate and almond shine through more prominently. Toasted coconut develops a nutty, caramel-like undertone that makes these taste more sophisticated and less candy-like.
The toasting process also dries out the coconut slightly, which means you might need an extra tablespoon of maple syrup to achieve the right sticky consistency. Watch it carefully because coconut can go from perfectly golden to burnt in under 60 seconds. I set a timer and literally stand at the oven during those final minutes after learning this lesson the burnt way.
Frequently Asked Questions
Q: Can I use almond butter instead of whole almonds?
A: Yes, you can mix 2 tablespoons of almond butter directly into the coconut base for almond flavor throughout. The texture becomes creamier and slightly softer, similar to a truffle consistency rather than the traditional candy bar bite with the whole nut on top.
Q: Why is my chocolate coating too thick?
A: The chocolate cooled down too much during dipping. Reheat it in 10-second microwave bursts and stir until it reaches that smooth, pourable 110-115°F consistency again. You can also add 1 teaspoon of coconut oil to thin it slightly without affecting the flavor.
Q: Can I make these with honey instead of maple syrup?
A: Absolutely! Honey works perfectly as a 1:1 substitute for maple syrup. The flavor will be slightly different with honey’s distinct floral notes, but the binding power and sweetness level are nearly identical for creating that sticky coconut base texture.