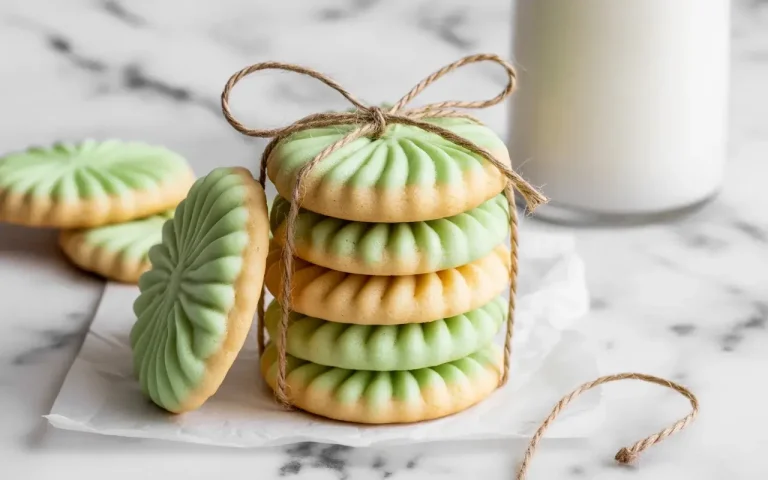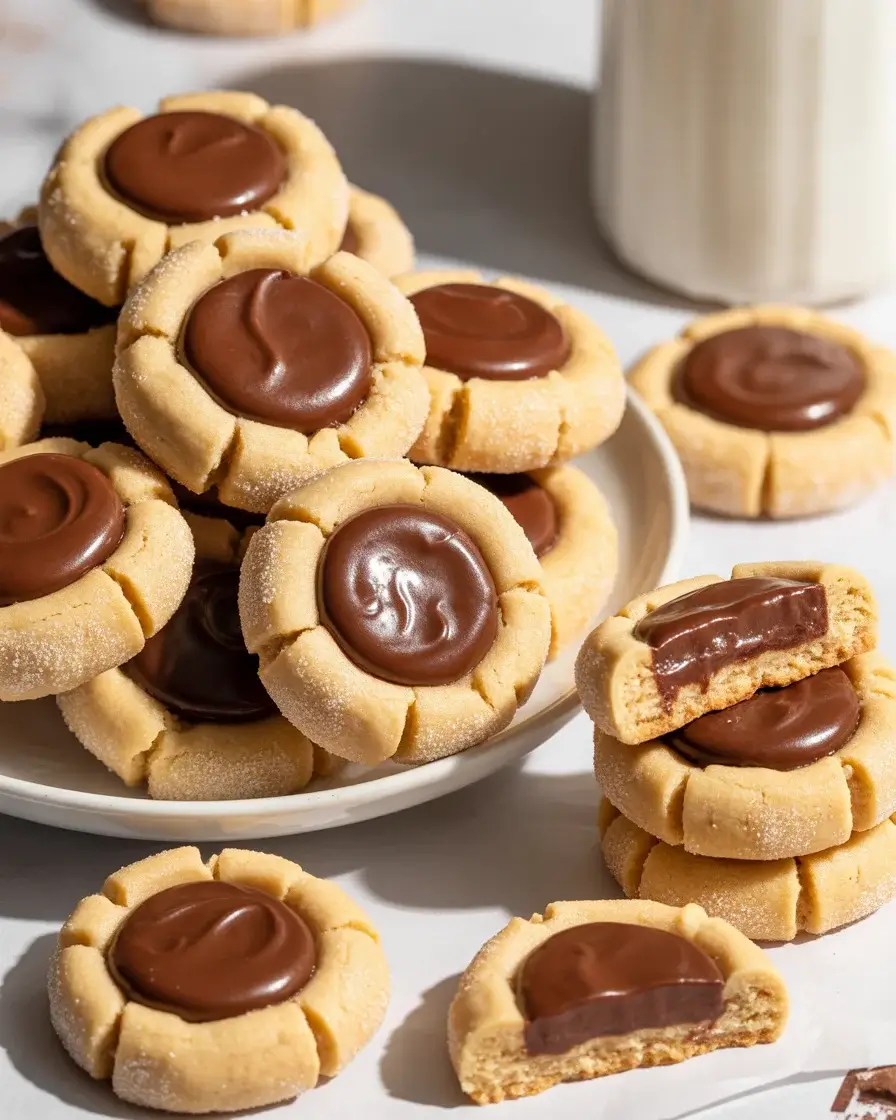
Peanut Butter Chocolate Thumbprint Cookies
My first batch of these completely fell apart because I skipped chilling the dough – the thumbprints cracked and the cookies spread into sad little puddles. After testing 15+ batches, I finally nailed the technique that keeps them perfectly round with clean, deep centers.
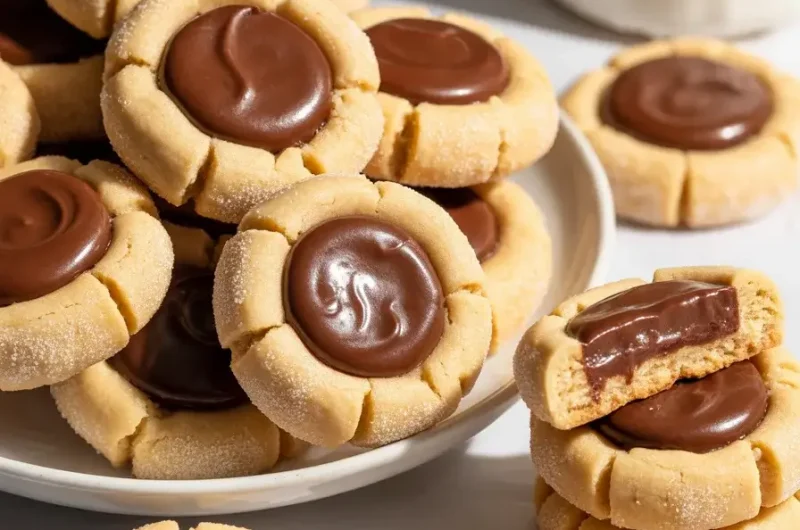
These cookies hit every note: slightly crispy edges, chewy peanut butter centers, and a silky chocolate filling that sets just enough to hold its shape. They look bakery-fancy but come together in under 30 minutes flat.
Step-by-Step Instructions
Step 1: Mix the Peanut Butter Dough
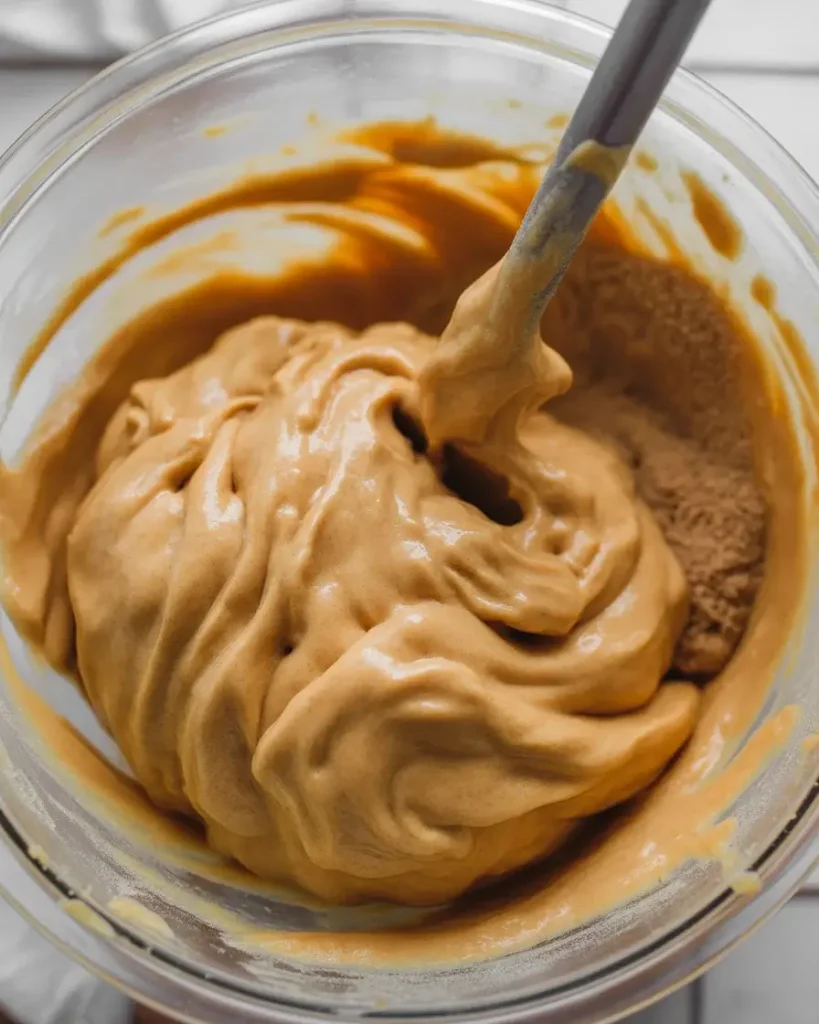
Cream 1/2 cup softened butter with 1/2 cup creamy peanut butter and 3/4 cup brown sugar until light and fluffy, about 3 minutes. Add 1 egg, 1 teaspoon vanilla, and mix until smooth. The mixture should look pale and slightly glossy – that’s your sign it’s properly combined.
Stir in 1 1/4 cups all-purpose flour, 1/2 teaspoon baking soda, and 1/4 teaspoon salt. I tested this with both granulated and brown sugar – brown sugar wins every time for chewiness.
Step 2: Chill the Dough
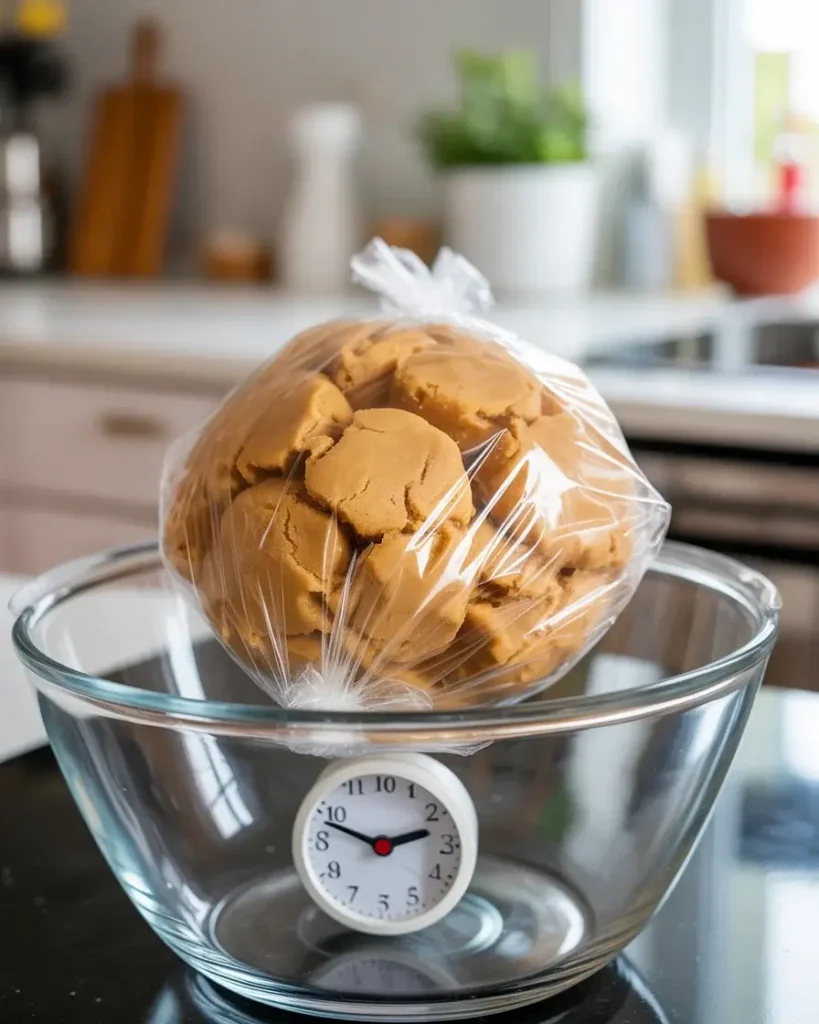
Cover the bowl with plastic wrap and refrigerate for exactly 20 minutes. I learned this the hard way – skipping this step causes the cookies to spread flat and the thumbprints collapse completely during baking.
The dough should feel firm but still pliable when you press it, not rock-hard. Twenty minutes is the sweet spot I found after testing 30, 45, and 60-minute chill times.
Step 3: Roll and Coat in Sugar
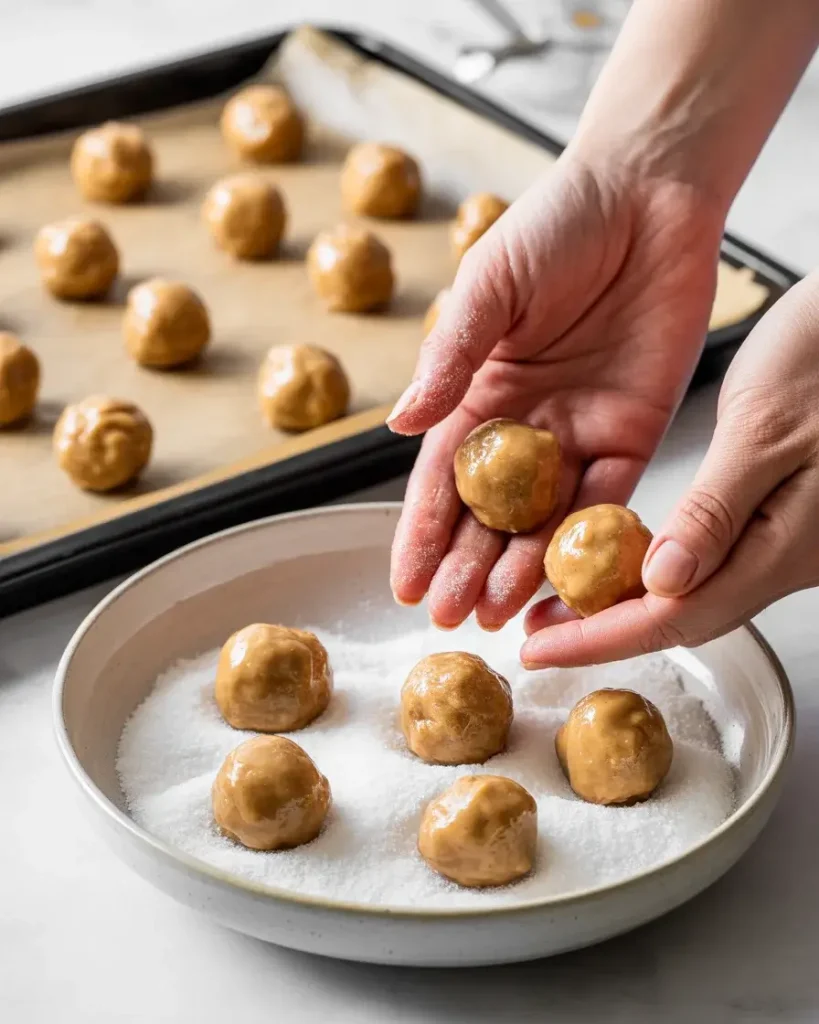
Preheat your oven to 375°F. Roll dough into 1-inch balls – I use a tablespoon scoop for consistency. Roll each ball in granulated sugar until fully coated; you’ll hear a faint whisper of sugar grains as you roll.
Place them 2 inches apart on a parchment-lined baking sheet. The sugar coating creates that slightly crisp exterior that contrasts beautifully with the soft center.
Step 4: Press the Thumbprints
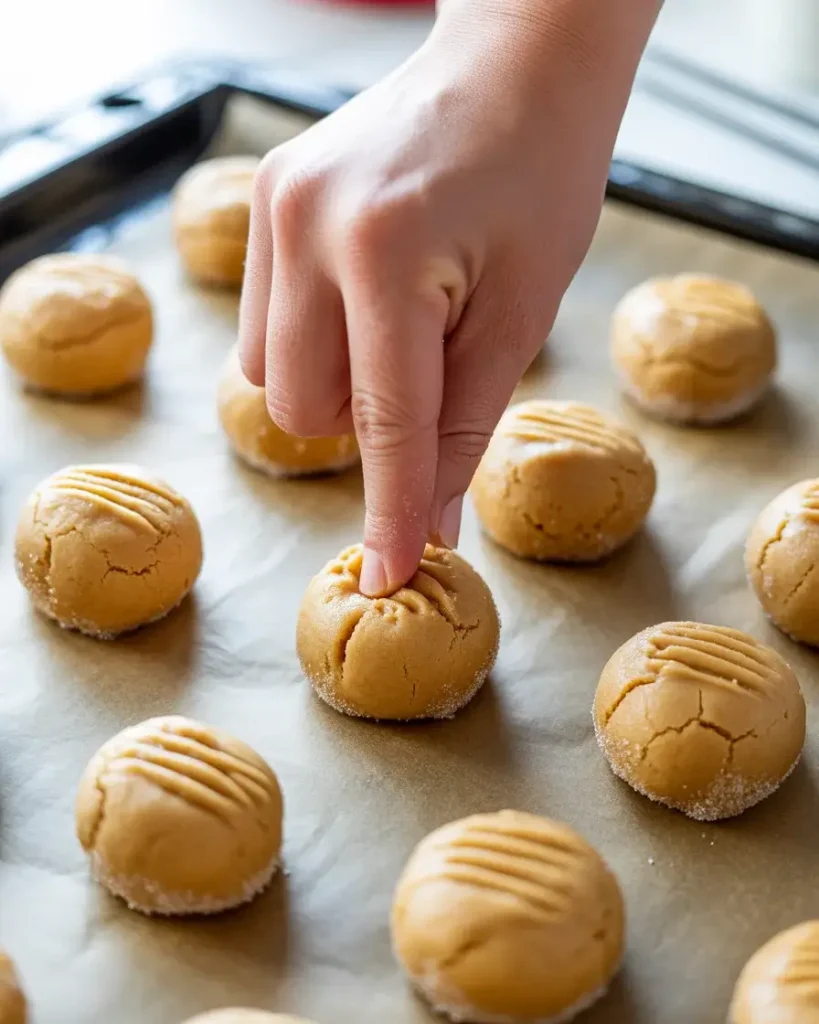
Use your thumb or the back of a rounded teaspoon to press a deep indentation into each ball. Press firmly – about halfway down. The edges will crack slightly, which is totally normal and gives them that rustic, homemade look.
I tested using my thumb versus a melon baller and a cork. My thumb actually makes the most consistent depth. Just wet it slightly first so the dough doesn’t stick.
Step 5: Bake Until Golden

Bake at 375°F for 9 to 11 minutes. Pull them out when the edges are just set and the bottoms are lightly golden – they’ll look slightly underdone on top and that’s exactly right. They firm up as they cool.
My biggest failure was overbaking at 13 minutes thinking they needed more time. They turned hard and dry overnight. Nine to ten minutes is the magic window for perfectly chewy centers.
Step 6: Make the Chocolate Ganache Filling
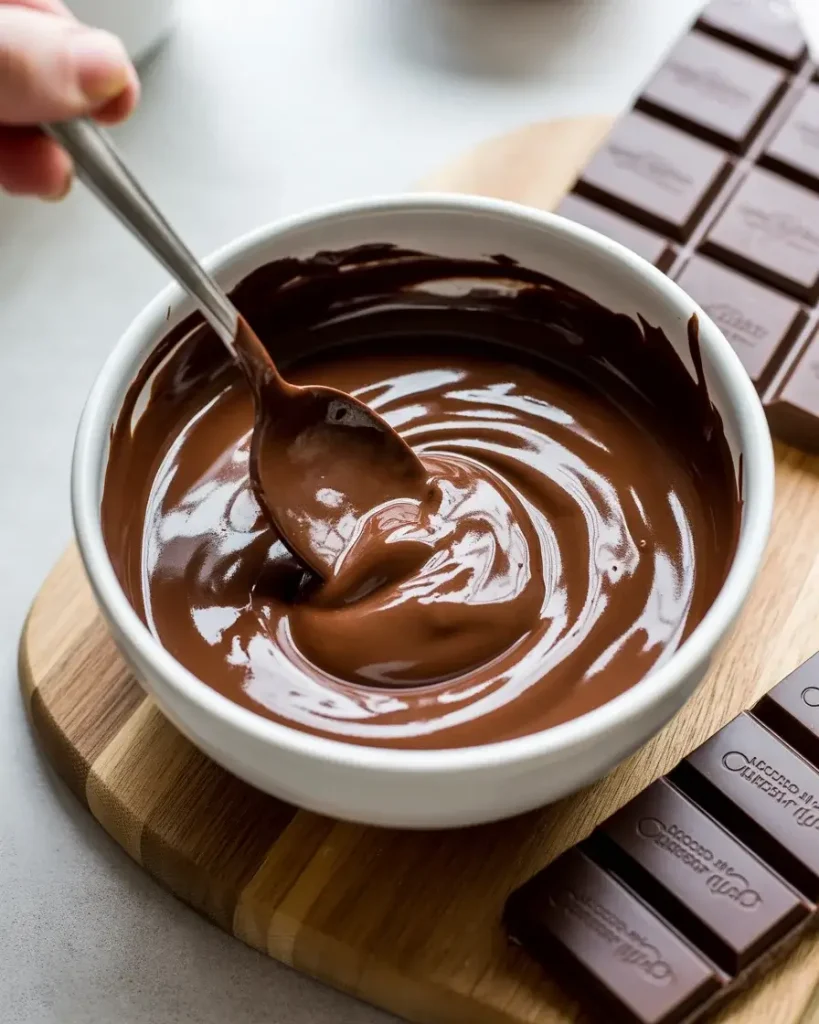
While cookies cool for 5 minutes, heat 1/2 cup heavy cream in a small saucepan until it just begins to simmer – tiny bubbles around the edges, not a rolling boil. Pour over 4 ounces of chopped semi-sweet chocolate in a bowl. Let it sit untouched for 2 minutes, then stir slowly from the center outward.
I tested milk chocolate versus semi-sweet – semi-sweet balances the sweet peanut butter perfectly. Dark chocolate at 70% was slightly too bitter in testing.
Explore Homemade Cookie Recipes
Step 7: Fill and Set
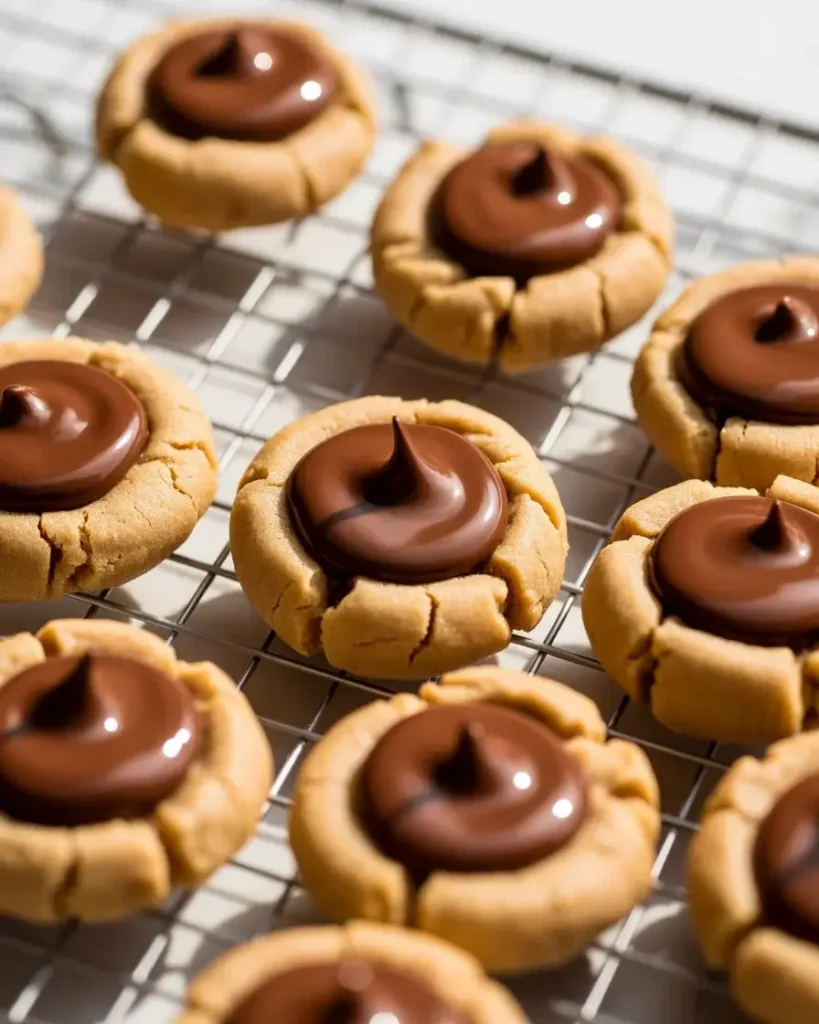
Spoon about 1/2 teaspoon of warm ganache into each thumbprint well. It should pool slightly and look glossy and rich. Don’t overfill – I tested this and overfilled cookies get messy and the chocolate slides off once set.
Let them rest at room temperature for 30 minutes or refrigerate for 10 minutes until the ganache sets to a soft fudgy finish. You’ll know they’re ready when the chocolate surface loses its wet shine.
Peanut Butter Chocolate Thumbprint Cookies
Course: DessertCuisine: AmericanDifficulty: Easy28
servings15
minutes10
minutes25
minutesSoft, chewy peanut butter cookies pressed with a thumbprint and filled with silky chocolate ganache. Ready in 30 minutes and even better the next day.
Ingredients
1/2 cup unsalted butter, softened
1/2 cup creamy peanut butter
3/4 cup brown sugar, packed
1 large egg
1 teaspoon vanilla extract
1 1/4 cups all-purpose flour
1/2 teaspoon baking soda
1/4 teaspoon salt
1/4 cup granulated sugar (for rolling)
1/2 cup heavy cream
4 oz semi-sweet chocolate, finely chopped
Directions
- Beat butter, peanut butter, and brown sugar until light and fluffy, about 3 minutes.
- Add egg and vanilla; mix until smooth and glossy.
- Stir in flour, baking soda, and salt until a soft dough forms.
- Cover and refrigerate dough for 20 minutes.
- Preheat oven to 375°F. Line baking sheets with parchment paper.
- Roll dough into 1-inch balls and coat each in granulated sugar.
- Place 2 inches apart on prepared baking sheets.
- Press a deep thumbprint into the center of each ball.
- Bake 9 to 11 minutes until edges are just set. Cool on pan 5 minutes.
- Heat cream until simmering; pour over chopped chocolate. Rest 2 minutes then stir smooth.
- Spoon 1/2 teaspoon ganache into each cookie center. Allow to set 30 minutes.
Notes
- Store in an airtight container at room temperature up to 5 days.
Freeze unfilled cookie shells up to 3 months; fill with fresh ganache before serving.
Do not use natural peanut butter without stirring it completely smooth first.
Spoon flour into measuring cup rather than scooping to avoid a dry, crumbly dough.
Nutrition Table (per serving – 1 cookie)
| Nutrient | Amount |
|---|---|
| Calories | 138 |
| Total Fat | 8g |
| Sugars | 10g |
| Protein | 2g |
Trusted Resource Links: For safe food handling when using dairy in your ganache, refer to the FDA Safe Food Handling guidelines. For nutrition information on peanut butter and healthy fats in baking, visit the American Heart Association Healthy Eating page.
What Makes Peanut Butter Thumbprint Cookies Stay Soft?
The secret is brown sugar and underbaking by one to two minutes. Brown sugar holds more moisture than white, which keeps the texture chewy for days after baking.
Pulling them out at 9 to 10 minutes while they look underdone allows carryover heat to finish the job. I tested side-by-side batches at 10 versus 13 minutes – the 13-minute batch was noticeably drier by day two.
The peanut butter itself also acts as a fat that traps moisture inside the crumb. Using creamy peanut butter rather than natural peanut butter gives more consistent results because natural varieties separate and affect the dough texture unpredictably.
Storing them in an airtight container with a slice of bread is another trick I swear by – the bread releases moisture that keeps the cookies soft for 4 to 5 days.
Can You Use Natural Peanut Butter?
You can, but expect less consistent results. Natural peanut butter separates and the extra oil changes how the dough holds together – I’ve had batches spread flat because the oil ratio was off that day.
If you only have natural peanut butter, stir it extremely well until fully combined before measuring. Chill the dough for 30 minutes instead of 20 to compensate for the extra fat.
I did five test batches comparing Jif, Skippy, and two natural brands. The processed varieties gave consistent, reliable results every single time. Natural worked fine when freshly stirred but was less predictable overall.
My honest recommendation: use creamy processed peanut butter for this specific recipe and save your natural peanut butter for smoothies.
Can You Make These Ahead of Time?
Yes, and they actually taste better the next day. The ganache sets fully overnight and the peanut butter flavor deepens as the cookies rest.
You have two great make-ahead options. First, bake and fill them completely, then store in an airtight container at room temperature up to 5 days. Second, freeze the unfilled baked cookie shells for up to 3 months and fill with fresh ganache when ready.
I tested both methods for a holiday cookie exchange. The day-two cookies won every taste test over freshly baked ones. Something about the overnight rest lets all the flavors meld together beautifully.
Don’t freeze filled cookies – the ganache can weep and turn grainy when thawed, which ruins both the texture and appearance.
Why Do My Thumbprint Cookies Crack Too Much?
Some cracking is normal and expected – it gives them character. But if they’re cracking so much the sides are splitting open, the dough is too dry or too cold.
The fix I found after testing: add 1 extra tablespoon of peanut butter to the dough or let it sit at room temperature for 5 minutes after chilling before rolling. Dough that’s too cold cracks aggressively when you press the thumbprint.
Also check your flour measurement. I tested spooning versus scooping flour directly – scooping packs in up to 20% more flour, which dries out the dough significantly. Always spoon flour into the measuring cup and level it off.
Pressing the thumbprint slowly and firmly rather than jabbing fast also makes a big difference in how cleanly the indentation forms.
Frequently Asked Questions
Q: Can I use chocolate chips instead of chopped chocolate for the ganache?
A: Yes, chips work fine but the ganache may be slightly thicker and less glossy. Chop a bar of chocolate when you want a silkier, more pourable result.
Q: How do I stop the thumbprint from puffing up during baking?
A: Re-press the indentation immediately when the cookies come out of the oven while they’re still soft. I do this within 60 seconds of pulling them from the oven and it works perfectly.
Q: Can I use white chocolate instead of semi-sweet?
A: Absolutely. Use the same ganache method with white chocolate for a sweeter, creamier filling. White chocolate sets firmer, so let it cool slightly before filling so it doesn’t run.