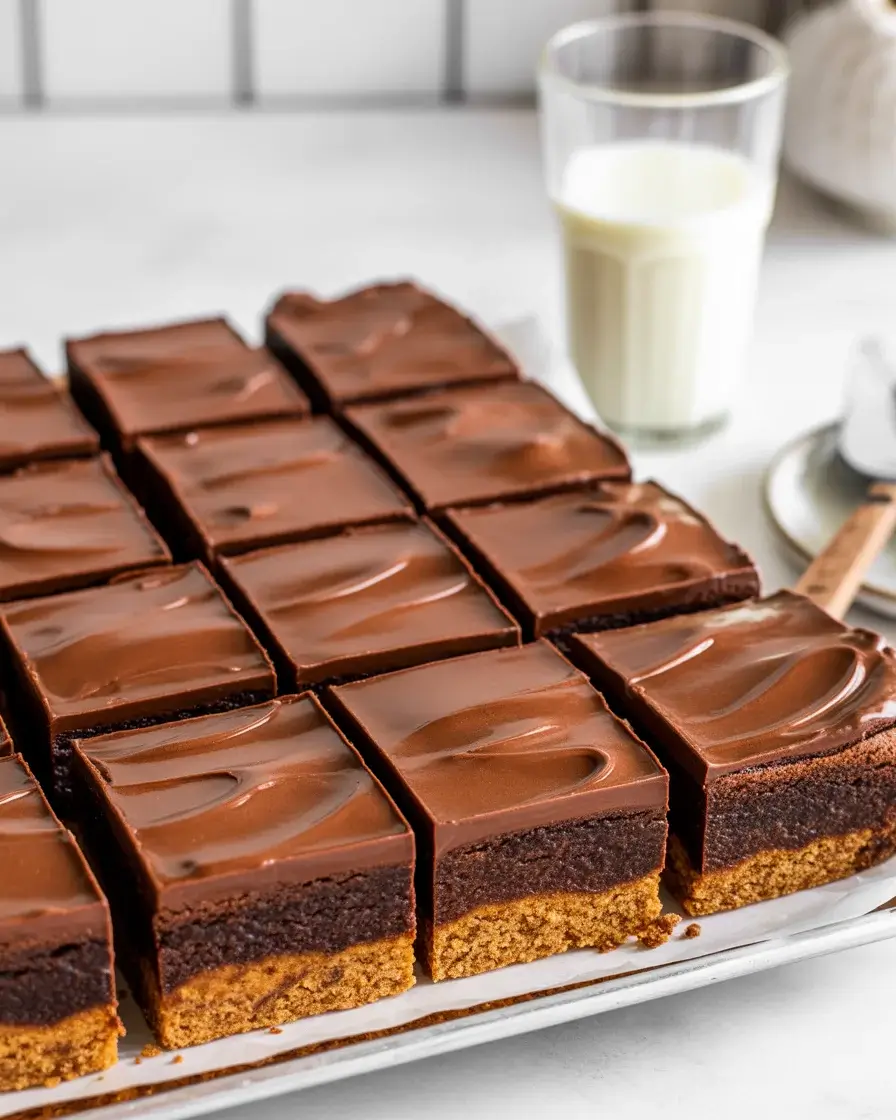
Lunch Lady Brownies
The first time I tried recreating these, I completely overbaked them at 350°F and got dry, cakey squares instead of those dense, fudgy bars I remembered from the school cafeteria line. That failure taught me everything about what makes this recipe work.
After 15+ test batches, I locked in the right fat ratio and pan size that gives you that signature dense chew with a glossy chocolate frosting that sets just enough to slice cleanly without cracking.
Step-by-Step Instructions
Step 1: Melt the Butter and Cocoa Together
Combine 1 cup melted butter with 6 tablespoons cocoa powder in a large mixing bowl, stirring until the mixture looks like dark, glossy fudge sauce with no dry streaks. This is your flavor base, and rushing it leaves lumps that never fully mix in.
I tested this with both Dutch-process and natural cocoa. Natural cocoa gave a deeper, more nostalgic chocolate flavor that matched my memory of the original school version perfectly.
Step 2: Mix in Sugar, Eggs, and Vanilla
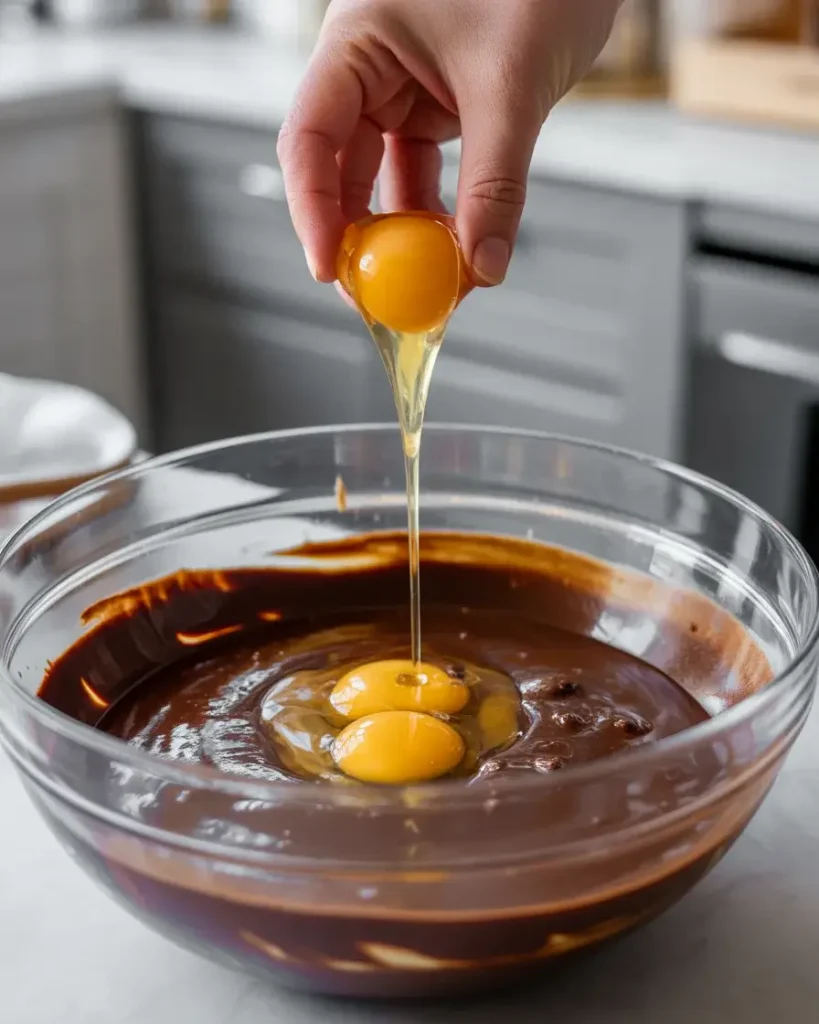
Add 2 cups granulated sugar to the warm chocolate mixture and stir until combined, then beat in 4 large eggs one at a time. The batter will go from grainy and thick to smooth and slightly ribbony as the eggs incorporate.
Don’t overmix once the eggs go in. I learned after a few cakey batches that aggressive stirring builds gluten and kills that fudgy texture you’re going for.
Step 3: Fold in Flour and Pour into Pan
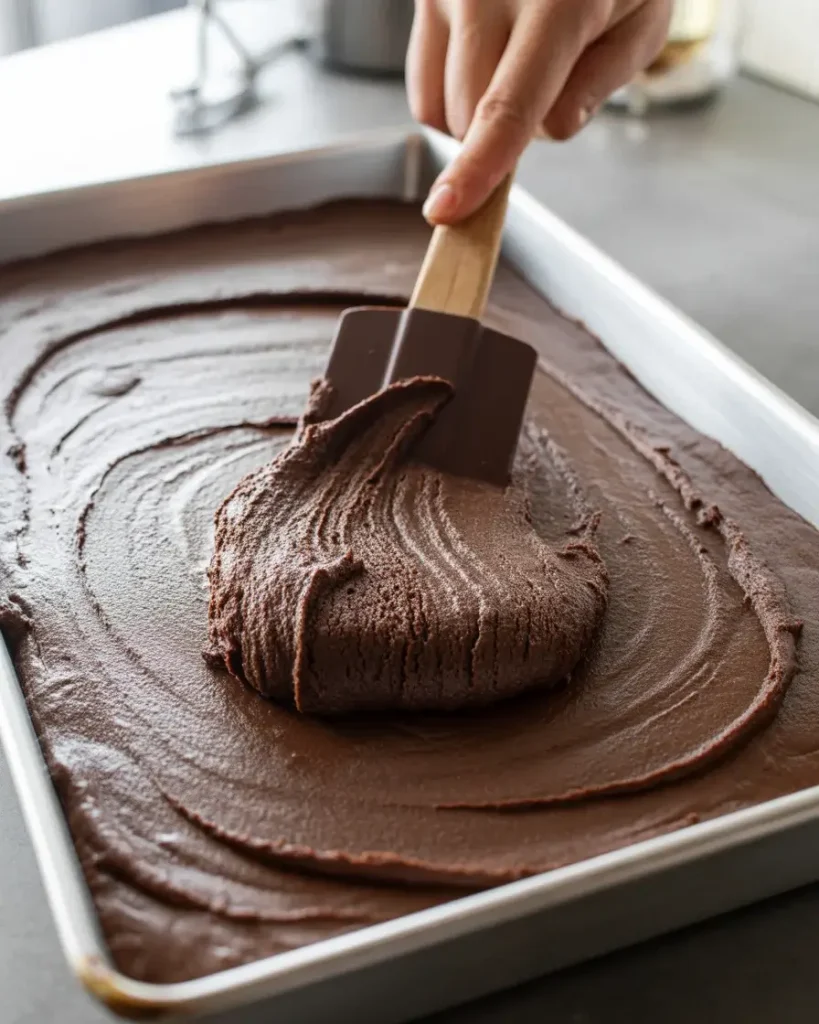
Stir in 2 cups all-purpose flour and 1 teaspoon vanilla extract just until no white streaks remain. The batter will be thick, almost brownie-dough-like, and you’ll need to spread it into a greased 18×13-inch sheet pan using a spatula.
That large pan size is non-negotiable. I once used a 9×13 and got a thick, underbaked center that needed 20 extra minutes. The sheet pan gives you that thin, evenly baked bar with crisp edges.
Get More Dessert Bar Recipes
Step 4: Bake at 325°F
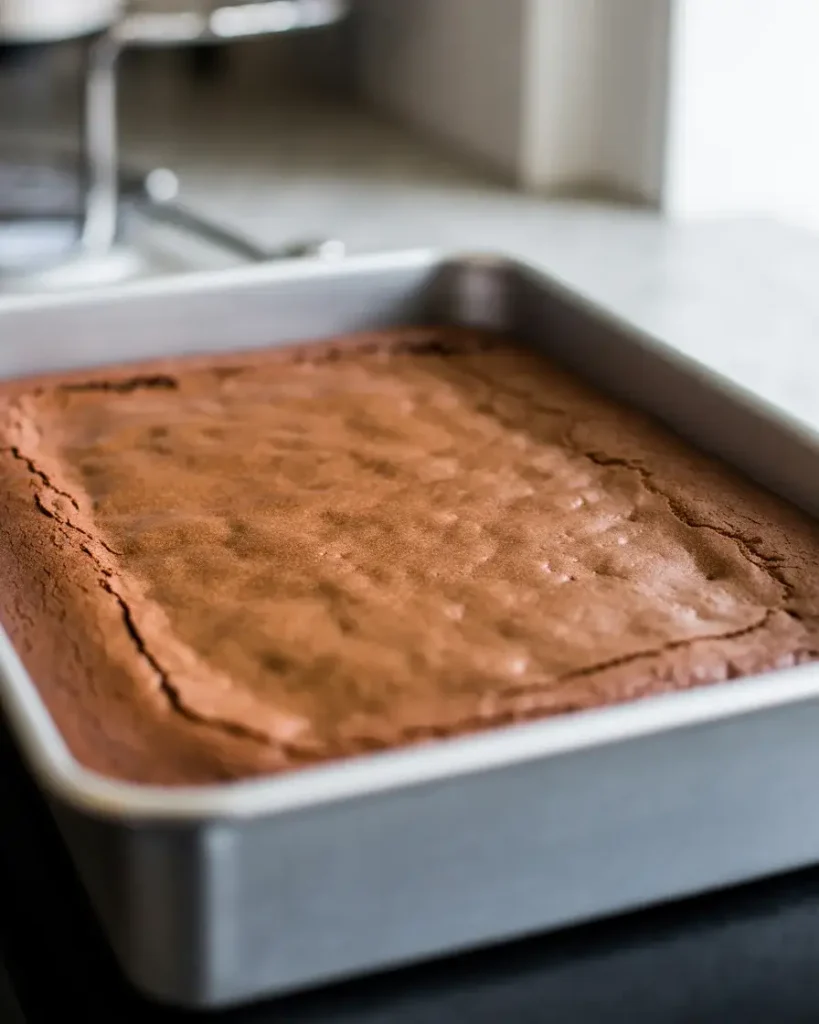
Bake at 325°F for 20 to 22 minutes. The edges will look set and slightly pulling from the pan, but the center should still look barely done and matte rather than glossy. Pull them at this point even if you’re nervous.
I overbaked my first three batches waiting for a completely set center. At 325°F the carry-over heat finishes the job perfectly. A toothpick at 20 minutes should come out with moist crumbs, not clean.
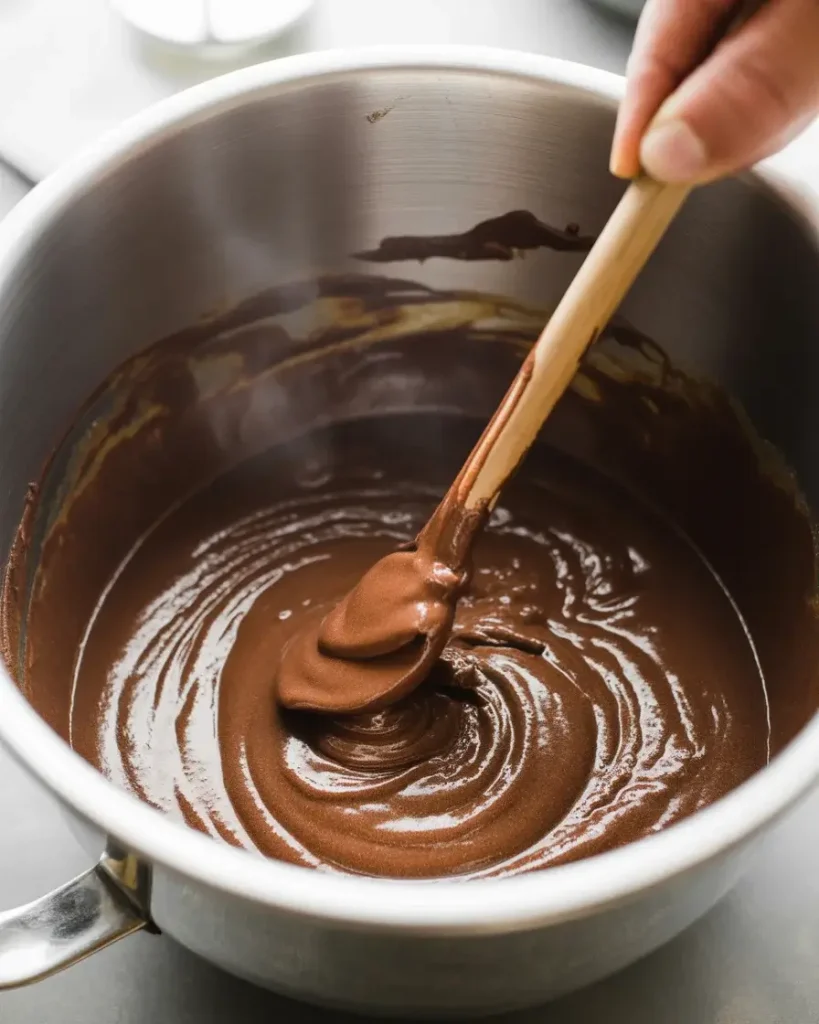
Step 5: Make the Chocolate Frosting
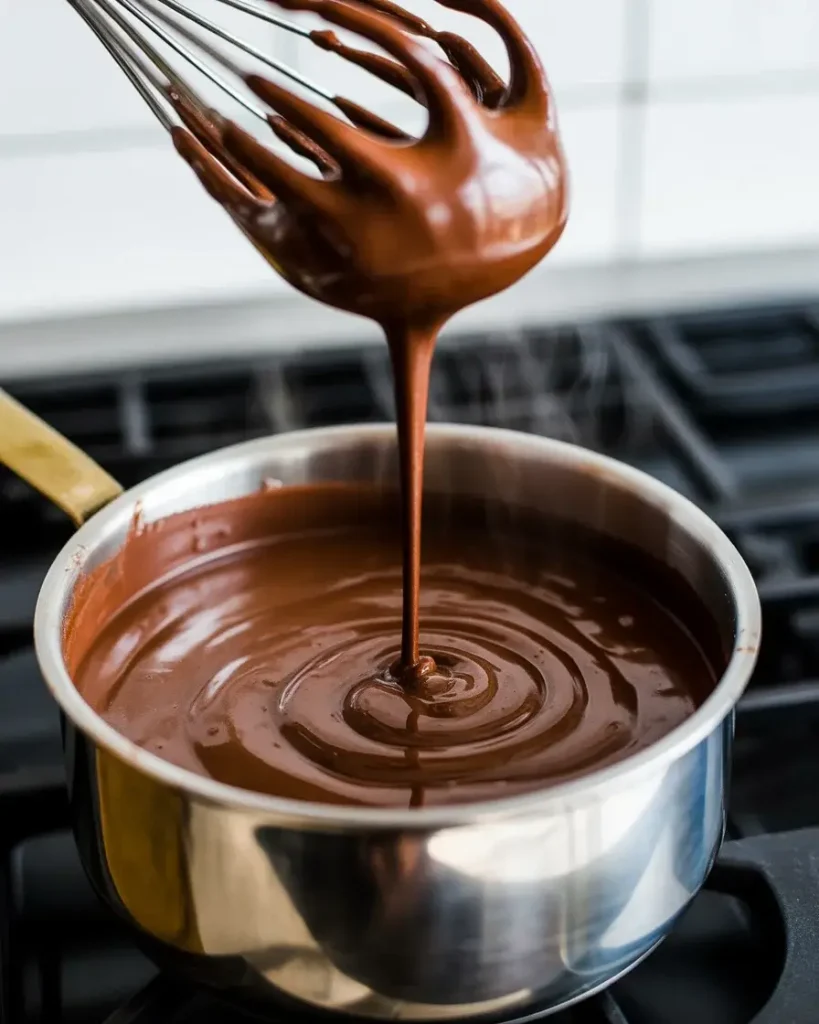
While the brownies are still hot, melt 6 tablespoons butter with 6 tablespoons milk in a small saucepan over medium heat. Whisk in 3 tablespoons cocoa powder until smooth, then remove from heat and stir in 3 cups powdered sugar and 1 teaspoon vanilla.
The frosting should be pourable and glossy, like hot fudge that flows off a spoon. If it thickens before you’re ready, reheat it gently for 30 seconds and stir.
Step 6: Frost the Hot Brownies
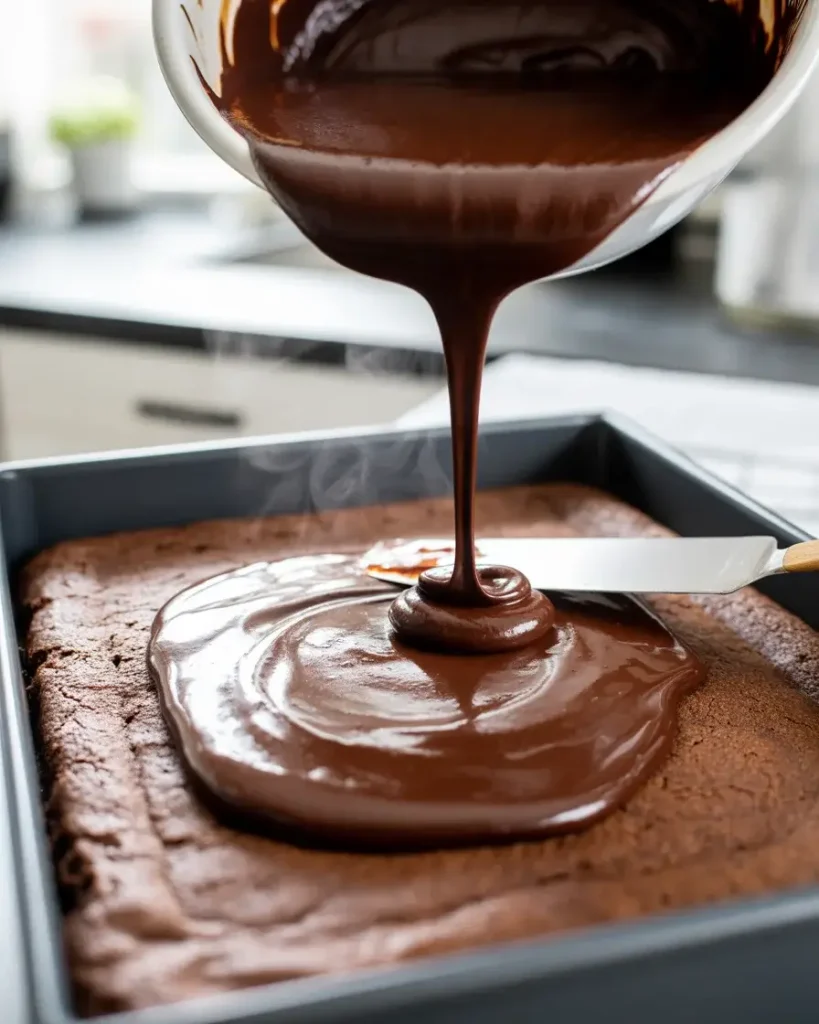
Pour the warm frosting over the hot brownies immediately and spread it in an even layer using a spatula. It will look thin at first but settles into a smooth, shiny coat within 2 to 3 minutes as it cools slightly.
Frosting on hot brownies is the secret. I tried waiting once and the frosting hardened too fast, pulling and cracking when I spread it. Hot-on-hot gives you that signature smooth, slightly fudgy topping.
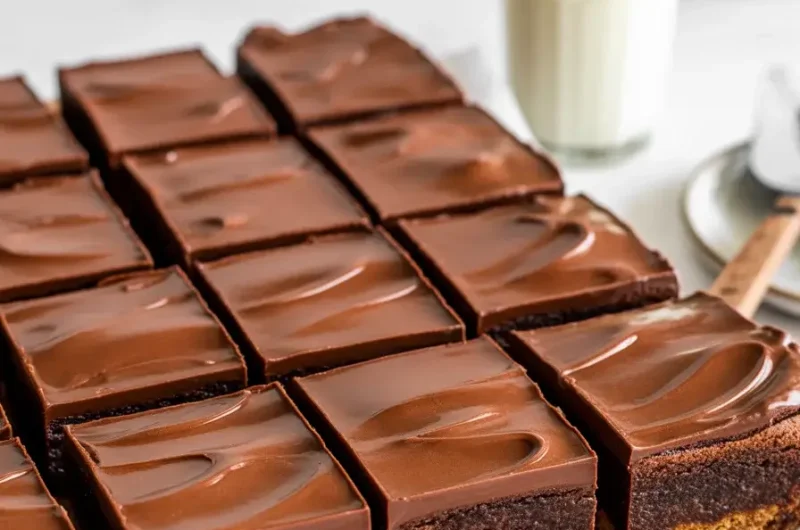
Step 7: Cool and Slice
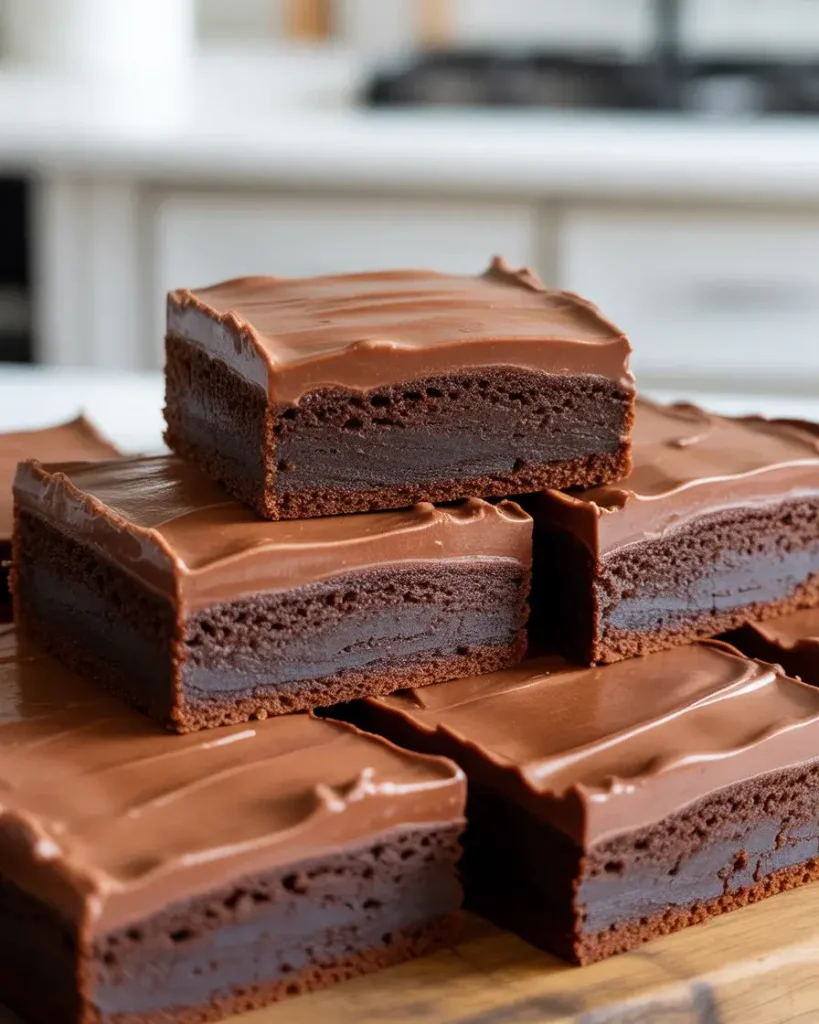
Let the frosted brownies cool at room temperature for at least 45 minutes before slicing. The frosting sets from glossy and soft to a slightly firm, fudgy layer that holds a clean cut. Use a sharp knife and wipe it between cuts.
I tested chilling them in the fridge to speed this up, but it made the frosting too hard and the brownie texture dense in the wrong way. Room temperature cooling is the only way to get that classic soft-but-sliceable bar.
Lunch Lady Brownies
Course: DinnerCuisine: AmericanDifficulty: Easy24
bars15
minutes22
minutes37
minutesDense, fudgy chocolate brownies baked in a sheet pan and topped with a warm glossy chocolate frosting, just like the ones from the school cafeteria.
Ingredients
1 cup (2 sticks) unsalted butter, melted
6 tablespoons natural cocoa powder
2 cups granulated sugar
4 large eggs
2 cups all-purpose flour
1 teaspoon vanilla extract
- Chocolate Frosting
6 tablespoons unsalted butter
6 tablespoons whole milk
3 tablespoons natural cocoa powder
3 cups powdered sugar
1 teaspoon vanilla extract
Directions
- Preheat oven to 325°F. Grease an 18×13-inch sheet pan.
- Stir melted butter and cocoa together in a large bowl until smooth.
- Add sugar, then beat in eggs one at a time.
- Stir in flour and vanilla until just combined.
- Spread batter evenly in prepared pan.
- Bake 20 to 22 minutes until edges are set and center looks barely done.
- While brownies bake, melt butter and milk in a saucepan over medium heat.
- Whisk in cocoa, remove from heat, stir in powdered sugar and vanilla.
- Pour warm frosting over hot brownies and spread immediately.
- Cool 45 minutes at room temperature before slicing.
Notes
- Store covered at room temperature for up to 4 days.
Freeze uncut, unfrosted bars for up to 2 months.
For extra fudgy texture, pull brownies at 20 minutes exactly.
Natural cocoa powder works better than Dutch-process for this recipe.
Nutrition Table (per serving)
| Nutrient | Amount |
|---|---|
| Calories | 285 |
| Total Fat | 12g |
| Sugars | 38g |
| Protein | 3g |
Trusted Resource Links: For food safety when storing baked goods, refer to the FDA Safe Food Handling guidelines. For nutrition information on cocoa and chocolate-based desserts, visit the Mayo Clinic Nutrition Guide.
What Makes Lunch Lady Brownies Different from Regular Brownies?
Lunch lady brownies use a cocoa powder base instead of melted chocolate. This gives them a milder, nostalgic flavor and a more uniform texture that holds up when cut into large sheet pan bars.
The hot frosting applied directly to the warm bars is also what sets them apart from homemade versions. It bonds to the surface and creates that distinctive thin, fudgy topping.
I tested this recipe with melted dark chocolate once to see if it improved the flavor. It made the bars richer but completely changed the texture, turning them into something closer to a fudge brownie rather than the cafeteria-style bar everyone recognizes.
The simplicity of cocoa powder is actually the point. It keeps the fat content balanced so the bars stay moist for days without getting greasy or heavy on the palate.
Can You Make Lunch Lady Brownies Ahead of Time?
Yes, these brownies are ideal for making ahead. They actually taste better on day two once the frosting has fully set and the flavors have had time to meld together overnight.
Store them covered at room temperature for up to 4 days. I’ve tested refrigerating them and while they last longer, the cold firms up the texture in a way that loses that soft, fudgy chew.
For longer storage, freeze uncut bars without the frosting for up to 2 months. Thaw at room temperature, then add the frosting fresh. I tried freezing frosted bars and the frosting developed a dull, cracked surface after thawing.
Why Did My Brownies Turn Out Cakey Instead of Fudgy?
Cakey brownies almost always come from overbaking or overmixing the batter after the flour goes in. Both activate gluten and drive out moisture, which lifts the crumb instead of keeping it dense.
Baking at exactly 325°F for no more than 22 minutes is critical. A higher temperature sets the structure too fast and pushes out the moisture that creates fudginess.
I ruined my first four batches this way by treating it like a cake recipe. Pulling the brownies when the center still looks slightly underdone is the single most important step in this whole recipe.
How Do You Get the Frosting to Spread Smoothly?
The key is timing. Pour and spread the frosting within 5 minutes of pulling the brownies from the oven, while both the pan and frosting are still warm. Cold frosting on warm brownies creates drag and tears the surface.
Keep the frosting warm over very low heat while the brownies finish baking. I keep it on the lowest burner setting and stir occasionally so it stays fluid.
If the frosting seizes up before you’re done spreading, add 1 teaspoon of warm milk and stir quickly. That small amount of liquid brings it back to a spreadable consistency without thinning the chocolate flavor.
Can You Double This Recipe for a Large Crowd?
Doubling works well because this recipe is already designed for a large sheet pan. Use two 18×13-inch pans and bake them on separate oven racks, rotating halfway through at the 11-minute mark.
I’ve made a doubled batch for a school bake sale and the results were identical to a single batch. The key is making the frosting in two separate batches rather than doubling it in one pan.
A doubled frosting batch gets too thick and stiff before you can spread it across both pans in time. Two smaller batches stay fluid long enough to coat each pan evenly.
Frequently Asked Questions
Q: Can I use salted butter in lunch lady brownies?
A: Yes, salted butter works fine. Just skip any added salt in the recipe. The slight saltiness actually enhances the chocolate flavor in both the batter and frosting.
Q: What size pan is best for this recipe?
A: An 18×13-inch half sheet pan gives you the right thin, even bar. A 9×13 pan will produce thick, under baked brownies that need significantly more baking time and lose that classic texture.
Q: Can I add nuts or mix-ins to this recipe?
A: Walnuts or pecans can be folded in with the flour. Use no more than 1 cup or the batter becomes too heavy to spread evenly and the bars lose their signature smooth, dense texture.