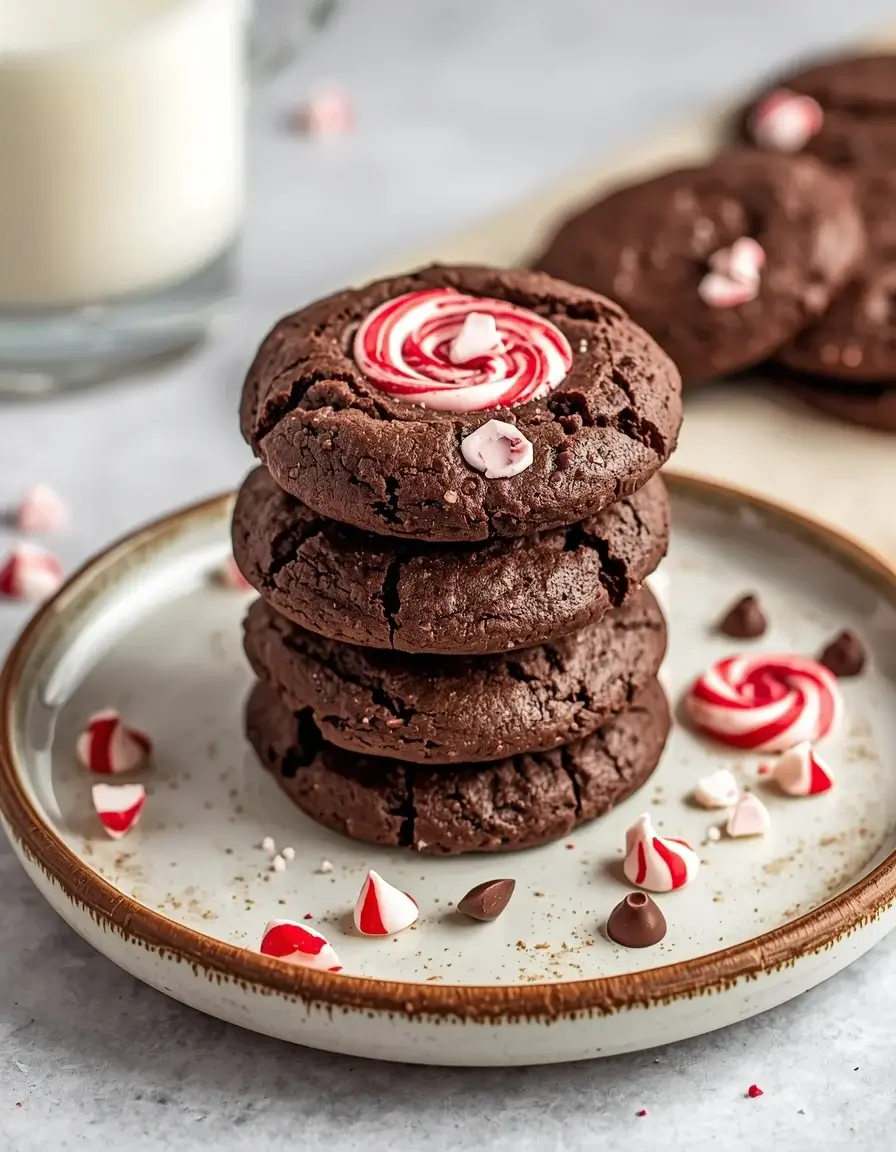
Peppermint Mocha Delights: Holiday Cookie Perfection
Last December, I burned through four batches trying to nail the peppermint-to-chocolate ratio before discovering that less is more. These cookies became my go-to holiday treat after testing over 20 variations in my kitchen.
The espresso amplifies the chocolate without making them taste like coffee, while crushed candy canes add festive crunch. They’re perfect for cookie exchanges, holiday parties, or leaving out for Santa with a glass of milk.
Step-by-Step Instructions
Step 1: Prepare the Dry Ingredients
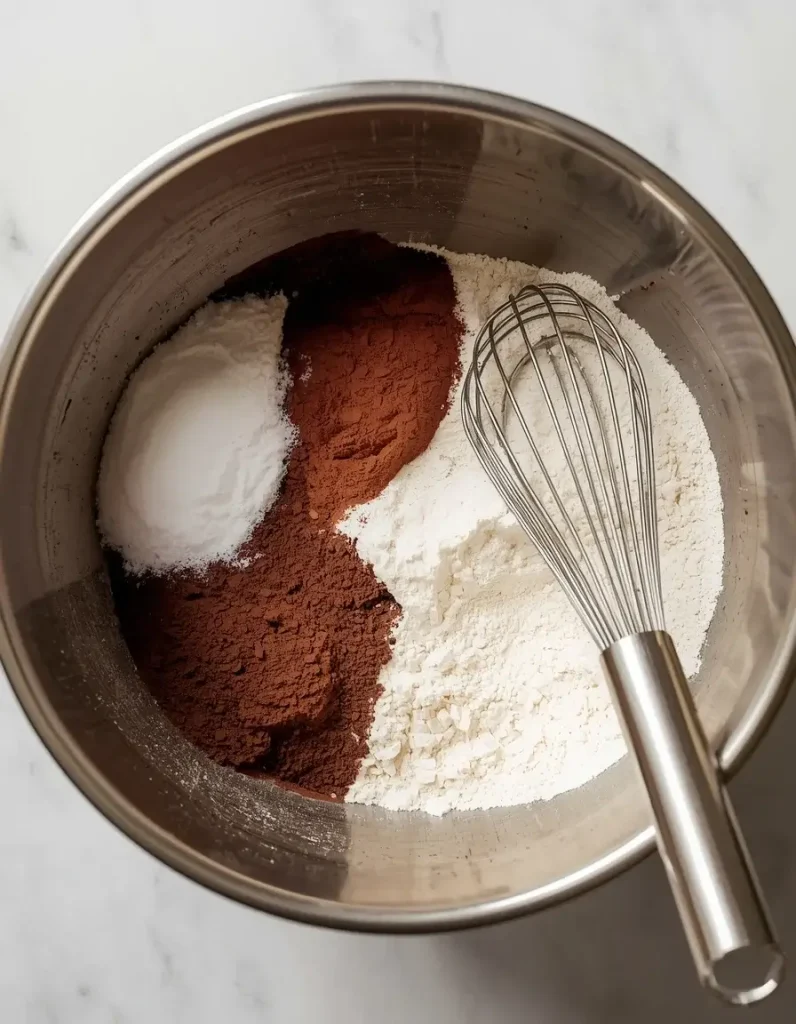
Whisk together 2 cups all-purpose flour, 3/4 cup Dutch-process cocoa powder, 1 teaspoon baking soda, and 1/2 teaspoon salt in a medium bowl. I tested this with natural cocoa powder once and the flavor was too acidic. Dutch-process creates that deep, rich chocolate flavor you’re after.
Sift the mixture if your cocoa powder has lumps. The texture should feel like fine, dark powder when you run your fingers through it. This step prevents cocoa clumps in your finished cookies.
Step 2: Cream Butter and Sugars
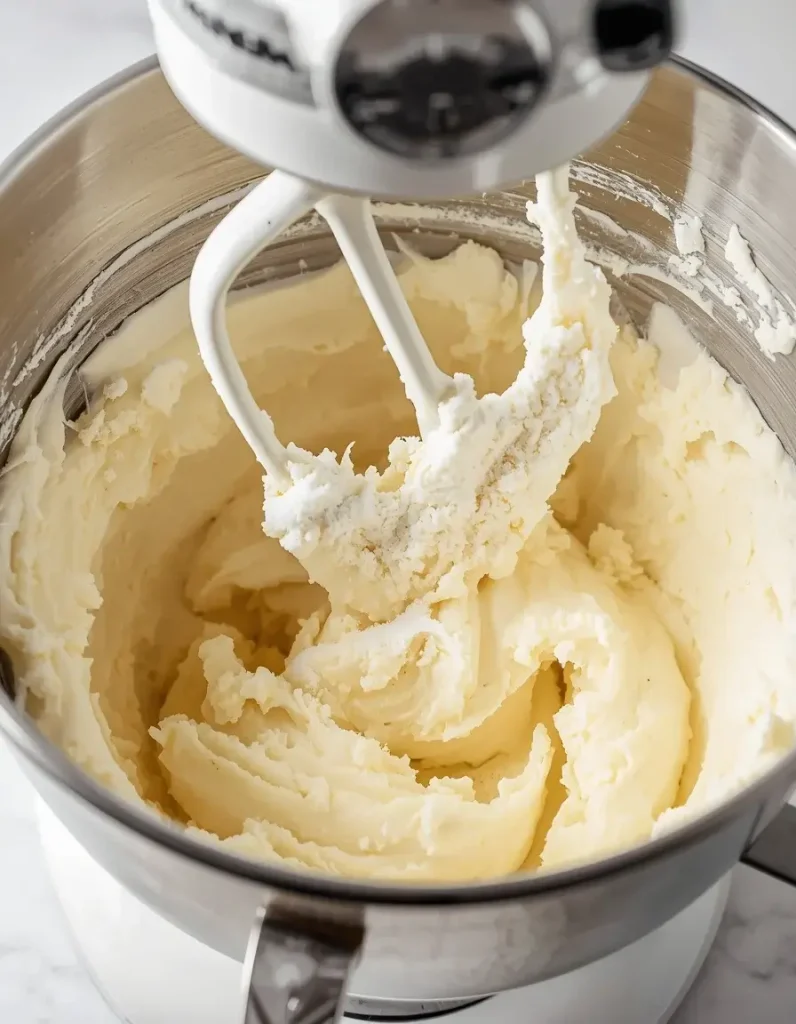
Beat 1 cup softened butter with 1 cup granulated sugar and 3/4 cup packed brown sugar on medium-high speed for 3-4 minutes until light and fluffy. The mixture should look pale and almost mousse-like when properly creamed. I time this exactly because under-creaming creates dense cookies.
Scrape down the bowl sides twice during beating. You’ll hear the mixer change pitch when the mixture reaches the right consistency. The sugar granules should be mostly dissolved when you rub a bit between your fingers.
Discover More Delicious Recipes
Step 3: Add Eggs and Flavorings
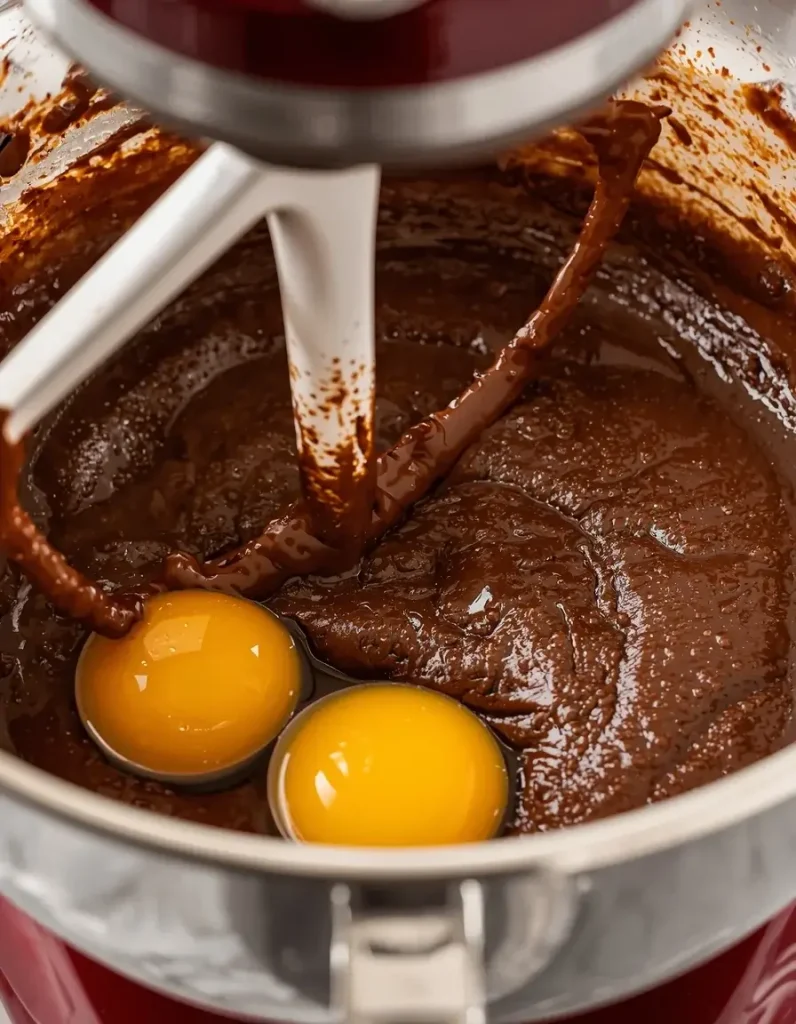
Beat in 2 large eggs one at a time, then add 2 teaspoons vanilla extract, 1 tablespoon instant espresso powder dissolved in 1 tablespoon hot water, and 1 teaspoon peppermint extract. Mix on low speed for 30 seconds after each addition. I learned the hard way that adding cold espresso creates lumps.
The espresso-butter mixture should smell rich and slightly minty without overwhelming coffee aroma. If you smell mostly peppermint, you’ve added too much. The batter will look glossy and smooth at this stage.
Step 4: Combine Wet and Dry Ingredients
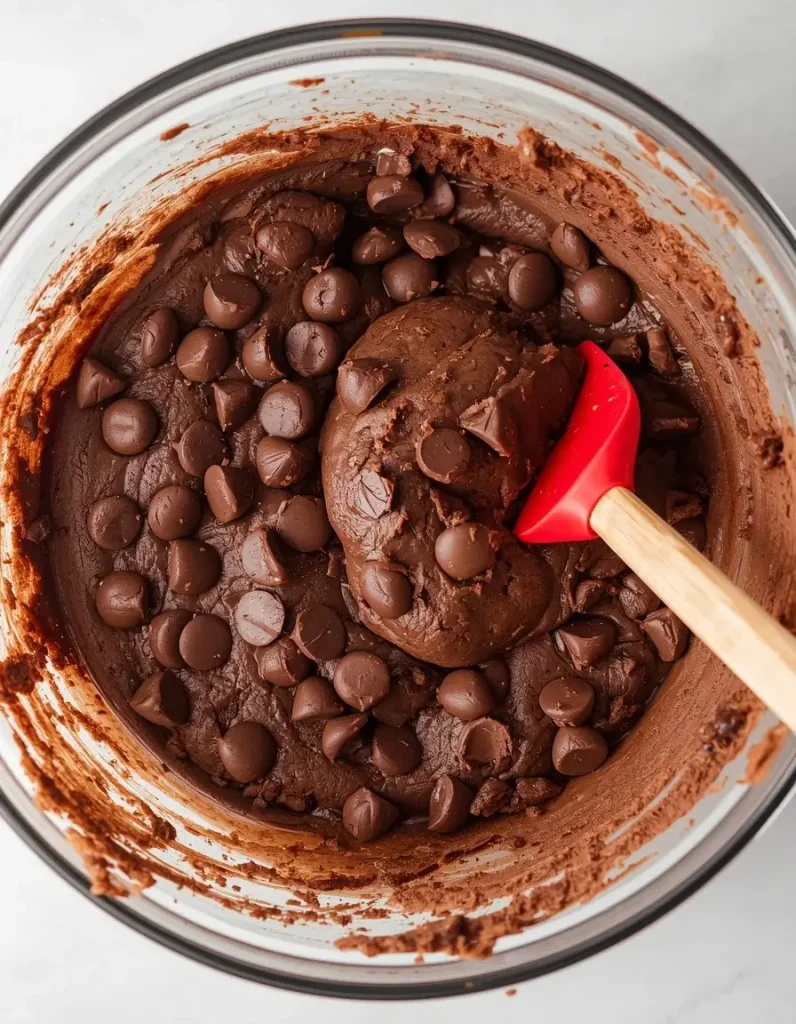
Add the dry ingredients to the wet ingredients in three additions, mixing on low speed just until combined after each addition. Stop mixing when you still see a few flour streaks. The dough will look slightly rough and shaggy. Over-mixing develops gluten and creates tough cookies instead of tender ones.
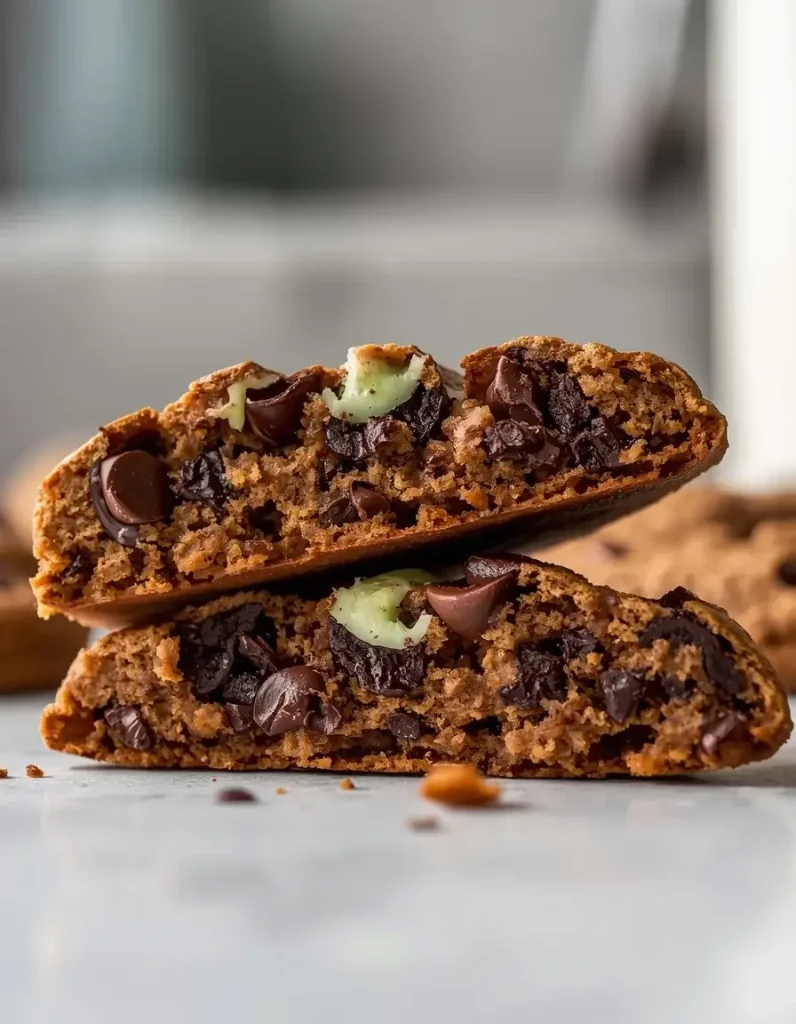
Fold in 1 cup semi-sweet chocolate chips by hand using a rubber spatula. I tested mini chips versus regular and regular chips create better pockets of melted chocolate. The dough should be thick and scoopable.
Step 5: Chill the Dough
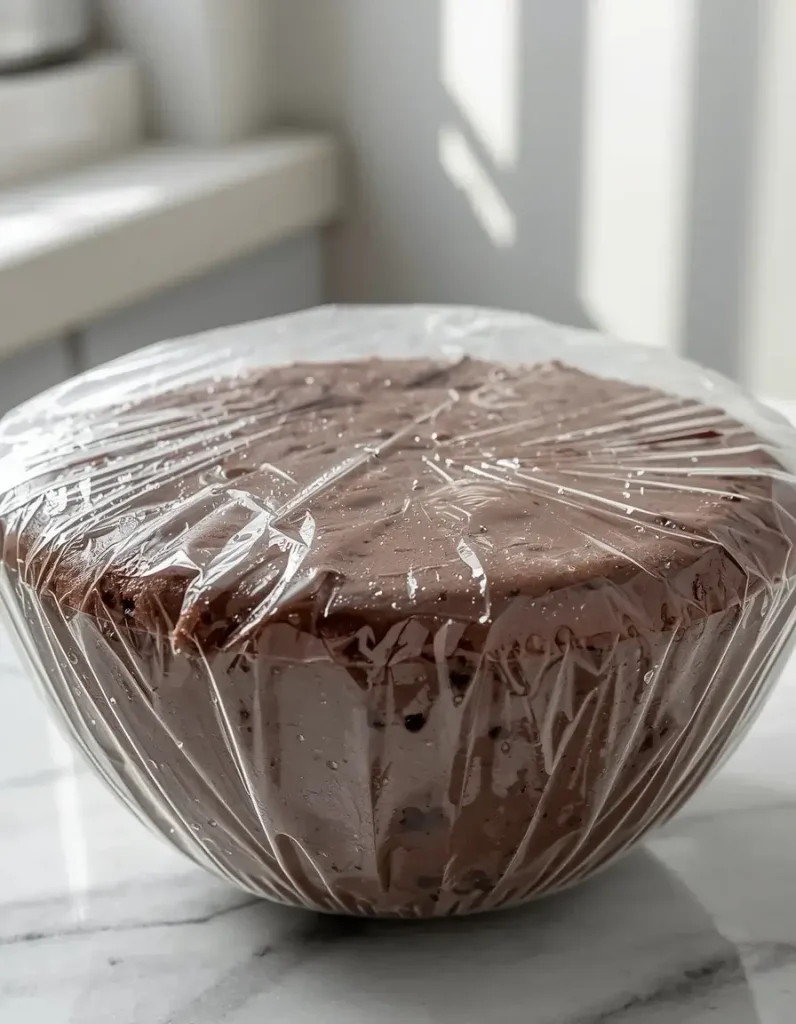
Cover the bowl with plastic wrap and refrigerate for at least 2 hours or up to 48 hours. I’ve tested chilling times from 30 minutes to 3 days. The 2-hour minimum allows the flour to fully hydrate and the flavors to meld.
Chilled dough spreads less during baking, creating thicker cookies with better texture. The dough will firm up significantly and become harder to scoop. Let it sit at room temperature for 10 minutes before scooping if it’s too hard.
Step 6: Shape and Top the Cookies
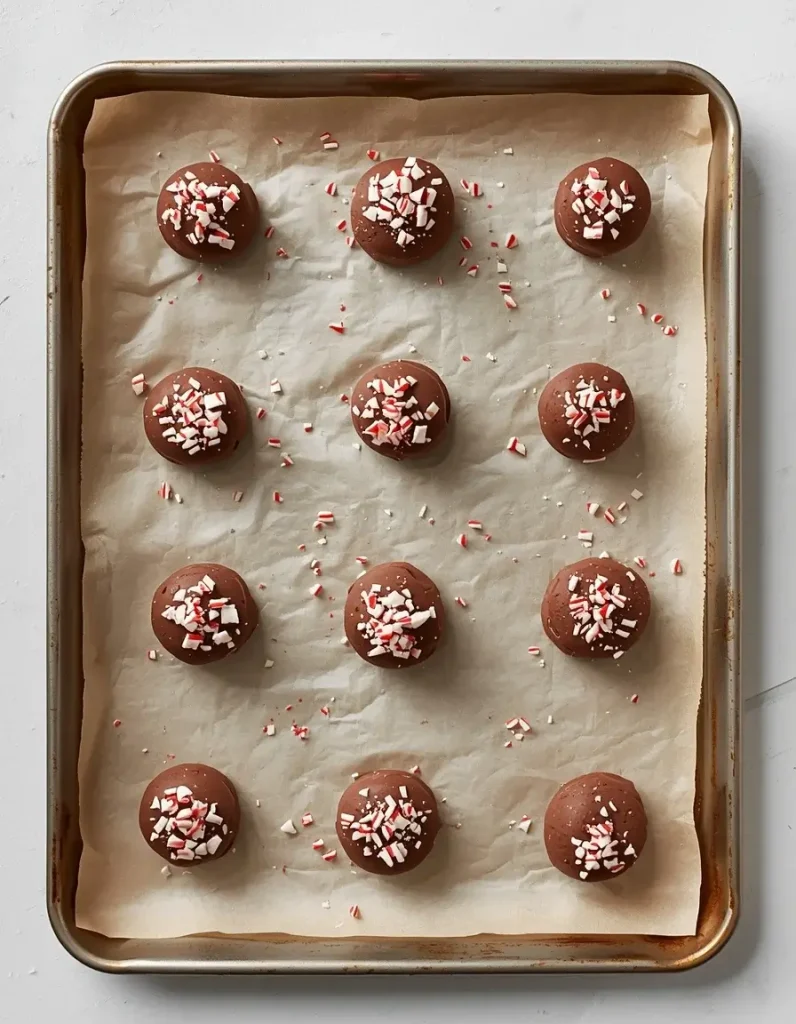
Preheat oven to 350°F. Scoop 2-tablespoon portions of dough and roll into balls. Place 3 inches apart on parchment-lined baking sheets. I space them generously because these spread more than you’d expect during the first 5 minutes of baking.
Press 3-4 pieces of crushed candy cane into the top of each dough ball. The candy will melt slightly and create a shiny, festive topping. Don’t skip this step or you’ll lose that signature peppermint crunch.
Step 7: Bake to Perfection
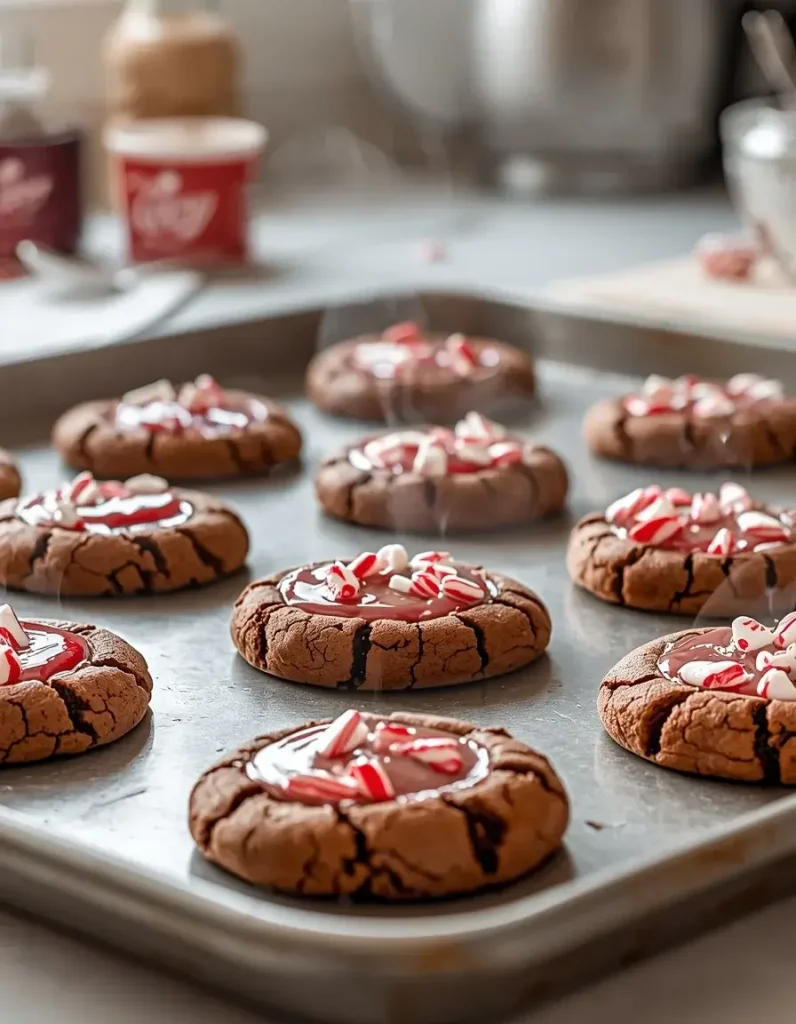
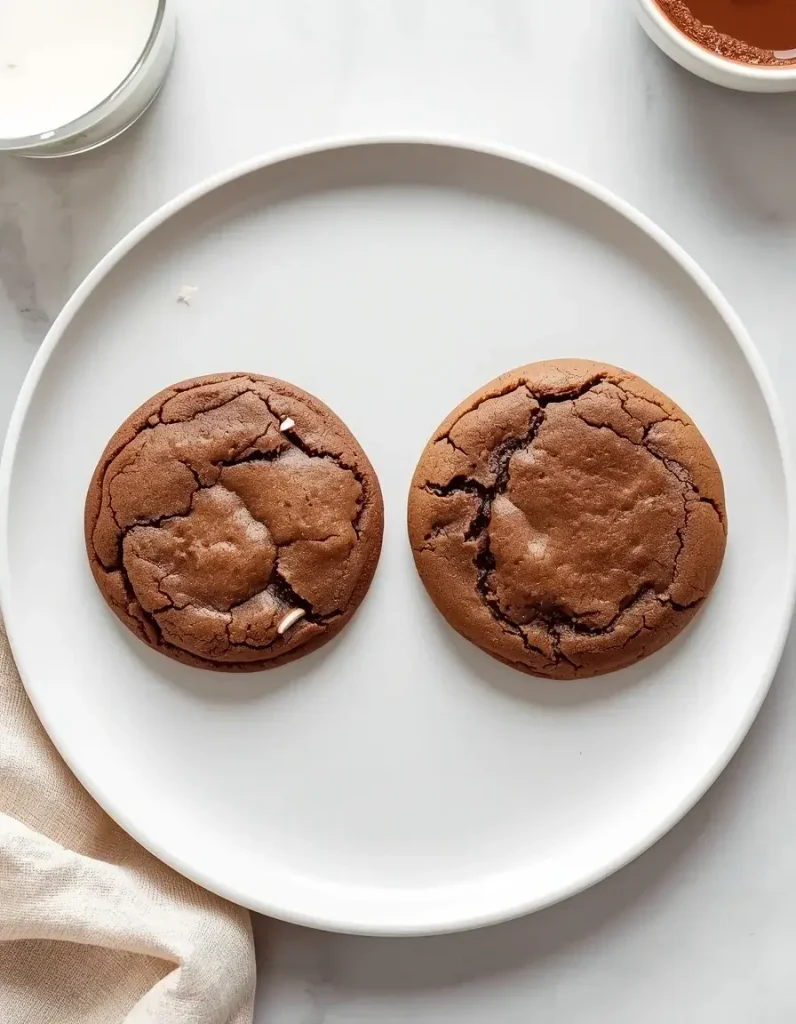
Bake for 11-13 minutes until the edges look set but centers still appear slightly underdone. The tops will look matte instead of shiny. I pull them at exactly 12 minutes for soft centers with crispy edges. Over-baking creates dry, cakey cookies instead of fudgy ones.
Let cool on the baking sheet for 5 minutes. The cookies will continue cooking from residual heat and firm up considerably. You’ll see the candy canes melt into glossy pools. After 5 minutes, transfer to a wire rack to cool completely.
Peppermint Mocha Delights: Holiday Cookie Perfection
Course: DessertCuisine: AmericanDifficulty: Easy24
cookies20
minutes2
hours12
minutes2
hours32
minutesRich chocolate cookies with espresso and peppermint, topped with crushed candy canes for festive holiday flavor.
Ingredients
For the Cookies:
1¾ cups all-purpose flour
¾ cup unsweetened cocoa powder
1 teaspoon baking soda
½ teaspoon salt
1 tablespoon instant coffee or espresso powder
½ cup unsalted butter, softened
½ cup brown sugar, packed
½ cup granulated sugar
1 large egg
1 teaspoon vanilla extract
½ teaspoon peppermint extract
½ cup powdered sugar (for rolling)
For the Peppermint Glaze:
1 cup powdered sugar
2-3 tablespoons milk
½ teaspoon peppermint extract
2 drops red food coloring (optional)
¼ cup crushed candy canes
Directions
- Whisk together flour, cocoa powder, baking soda, salt, and instant coffee in a medium bowl. Set aside.
- Cream softened butter with brown sugar and granulated sugar until light and fluffy, about 3 minutes.
- Beat in egg, vanilla extract, and peppermint extract until well combined.
- Gradually mix in the flour mixture until just combined. Don’t overmix.
- Wrap dough in plastic wrap and refrigerate for 30 minutes.
- Preheat oven to 350°F. Line baking sheets with parchment paper.
- Roll dough into 1½-inch balls, then roll each ball in powdered sugar.
- Place cookies 2 inches apart on prepared baking sheets.
- Bake for 10-12 minutes until edges are set. Cool on baking sheet for 5 minutes before transferring.
- For glaze: whisk powdered sugar, milk, peppermint extract, and food coloring until smooth.
- Drizzle glaze over cooled cookies and sprinkle with crushed candy canes.
Notes
- Store covered at room temperature for up to 5 days
Dough can be made 2 days ahead and kept refrigerated
For a deeper coffee flavor, use 2 tablespoons of instant coffee
Substitute mint extract if peppermint is too strong for your taste
| Nutrient | Per Serving |
|---|---|
| Calories | 142 kcal |
| Total Fat | 8 g |
| Sugars | 9 g |
| Protein | 2 g |
| Dietary Fiber | 1 g |
Trusted Resource Links
For safe holiday baking temperatures and food handling, check the USDA Safe Temperature Chart. For nutrition information about chocolate and mint, visit the Mayo Clinic Nutrition Guide.
Can You Make These Cookies Ahead?
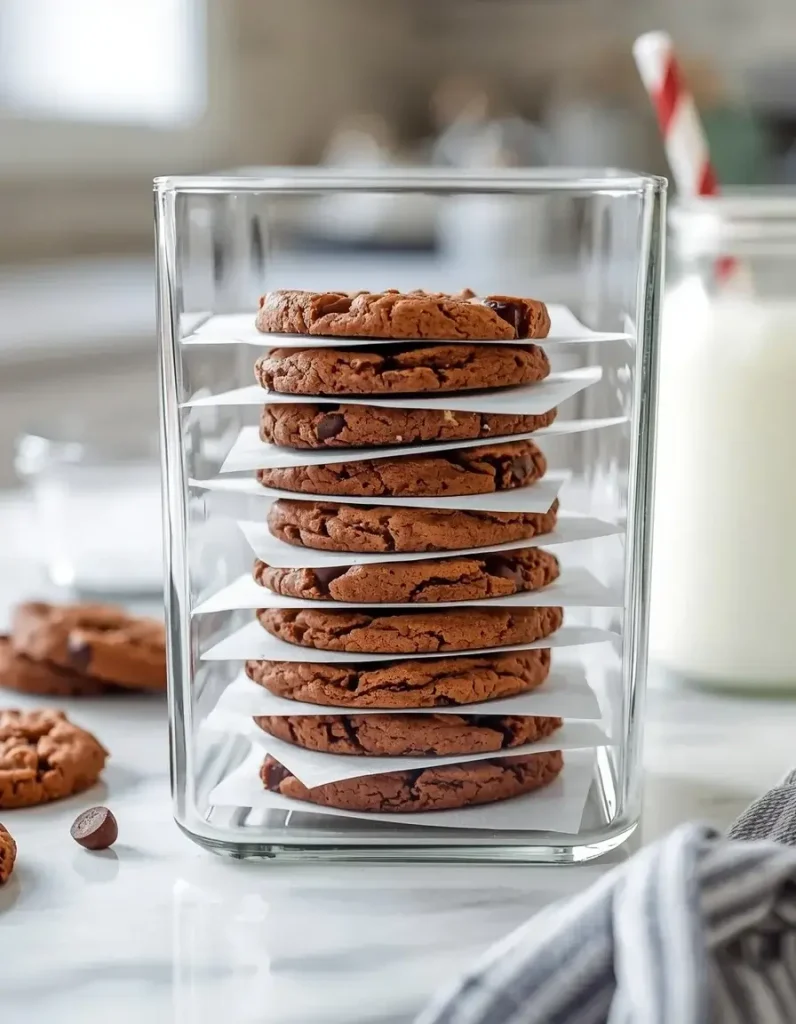
Yes, these freeze beautifully for up to 3 months. I bake a triple batch every November and freeze them for holiday emergencies.
Freeze baked cookies in airtight containers with parchment between layers. Thaw at room temperature for 30 minutes before serving. The texture stays perfectly soft with crispy edges even after freezing.
For unbaked dough, freeze shaped dough balls on a baking sheet until solid, then transfer to freezer bags. Bake directly from frozen, adding 2 extra minutes to the baking time. I actually prefer the texture of cookies baked from frozen dough.
What’s the Best Way to Crush Candy Canes?
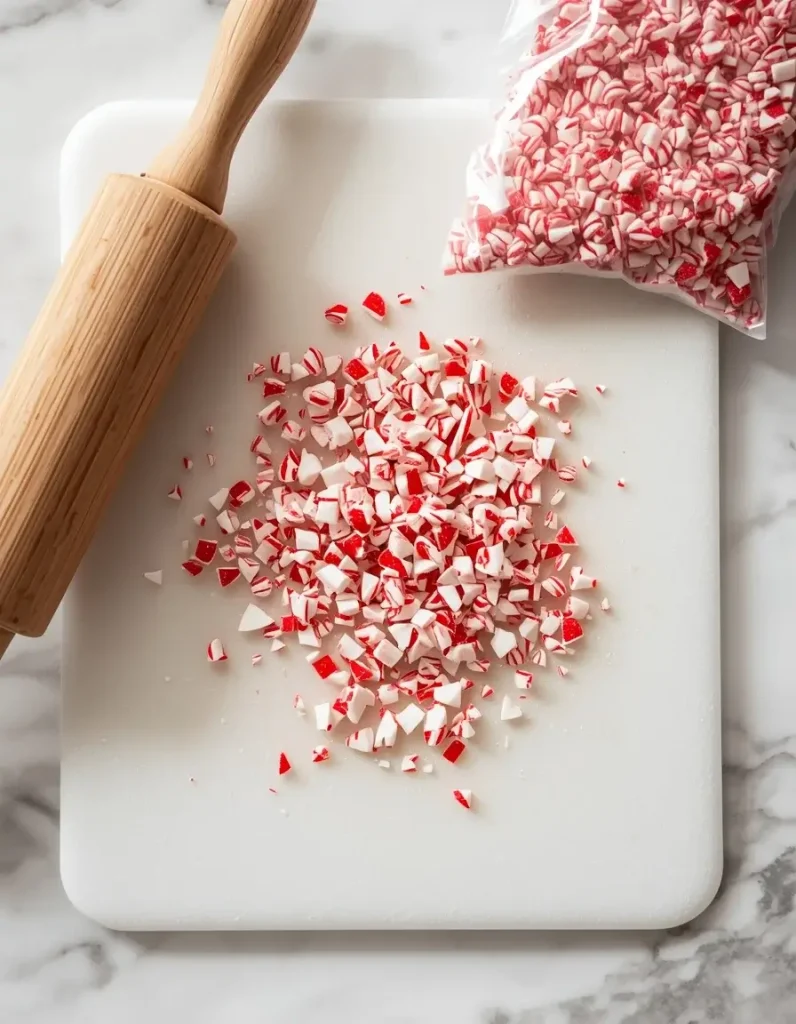
Place unwrapped candy canes in a heavy-duty zip-top bag and crush with a rolling pin or meat mallet. I’ve tested food processors and they turn candy canes into powder instead of creating the chunky pieces you want.
Aim for pieces about the size of small peas. Too fine and they disappear into the cookies. Too large and they’re hard to bite through.
Crush them just before using because the pieces stick together in humid conditions. I learned this after my first batch turned into a solid candy cane brick overnight. Store crushed candy in an airtight container for up to 2 days maximum.
Why Do My Cookies Spread Too Much?
Under-chilling the dough is the most common culprit. If your cookies spread into thin pancakes, refrigerate the dough for the full 2 hours minimum. I’ve tested this extensively and cookies from dough chilled less than 90 minutes always spread excessively.
Check your oven temperature with an oven thermometer. If your oven runs hot, cookies spread before they can set. My oven runs 15°F hot, so I bake at 335°F instead of 350°F.
Old baking soda loses its leavening power and won’t help cookies puff up. Replace baking soda every 6 months. Also, make sure your butter is softened but not melted. Melted butter creates flat, greasy cookies every single time.
How Strong Should the Peppermint Flavor Be?
The peppermint should be noticeable but not overwhelming. After testing with 1/2 teaspoon to 2 teaspoons of extract, I settled on 1 teaspoon as the sweet spot. You want a subtle mint freshness that enhances the chocolate rather than dominating it.
The crushed candy canes on top provide most of the peppermint punch. If you want stronger mint flavor, increase the extract to 1 1/2 teaspoons maximum. Beyond that, the cookies taste medicinal.
Different peppermint extract brands vary in strength. Start with 1 teaspoon and taste the dough. Add more in 1/4 teaspoon increments if needed. I use McCormick peppermint extract for consistent results every time.
Discover More Tasty Treats
Should You Use Natural or Dutch-Process Cocoa?
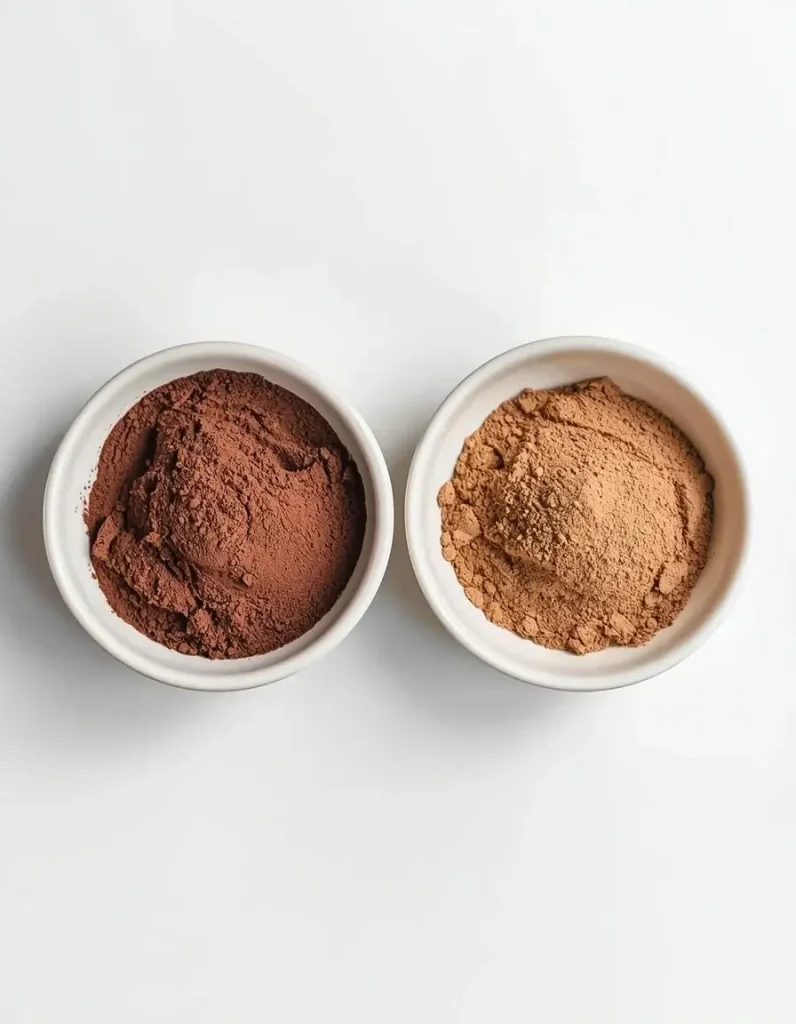
Dutch-process cocoa is essential for these cookies. I tested both and natural cocoa created flat, acidic cookies with a harsh chocolate flavor. Dutch-process cocoa has been alkalized to neutralize acidity, resulting in darker color and smoother, richer taste.
The Dutch-process also interacts better with baking soda. Natural cocoa is acidic and needs baking powder, but this recipe uses baking soda for better spread and chewiness.
Look for brands like Droste, Valrhona, or Ghirardelli Dutch-process. Regular Hershey’s cocoa is natural, not Dutch-process. The package should specifically say Dutch-process or alkalized. The color should be very dark brown, almost black, compared to natural cocoa’s reddish-brown hue.
Frequently Asked Questions
Can I make these cookies without instant coffee?
Yes! Simply replace the instant coffee with an equal amount of cocoa powder. The cookies will be slightly less complex in flavor but still delicious.
How do I prevent the cookies from spreading too much?
Make sure to chill the dough for the full 30 minutes and don’t skip rolling in powdered sugar. Also, ensure your baking sheets aren’t hot when you place the dough on them.
Can I use mint extract instead of peppermint extract?
Absolutely! Mint extract will provide a milder flavor, so you may want to use ¾ teaspoon instead of ½ teaspoon for a more pronounced mint taste.
Why are my cookies too cake-like instead of chewy?
This usually occurs due to overmixing the dough or using too much flour. Mix just until combined and measure flour by spooning it into the cup and leveling off.
How long does the glaze take to set?
The peppermint glaze will set within 15-20 minutes at room temperature. For faster setting, place cookies in the refrigerator for 10 minutes.