Creamy Pumpkin Delight Bars: The Ultimate Fall Dessert
My first batch of pumpkin delight bars cracked right down the middle after I pulled them from the oven too quickly. I spent the next 20 attempts figuring out the exact cooling method that creates that silky, crack-free top every single time.
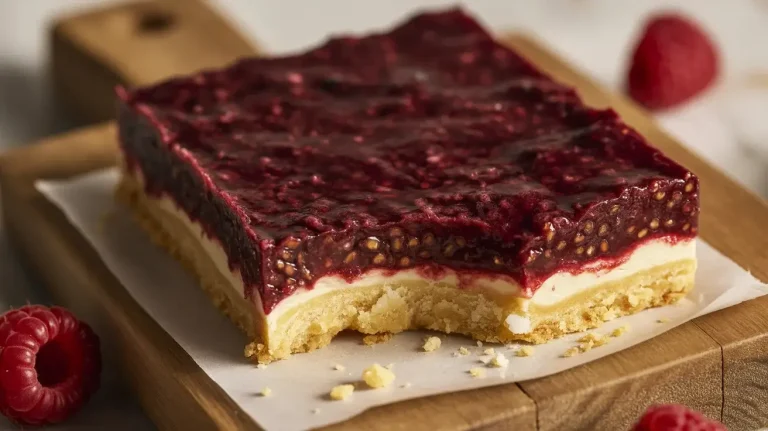
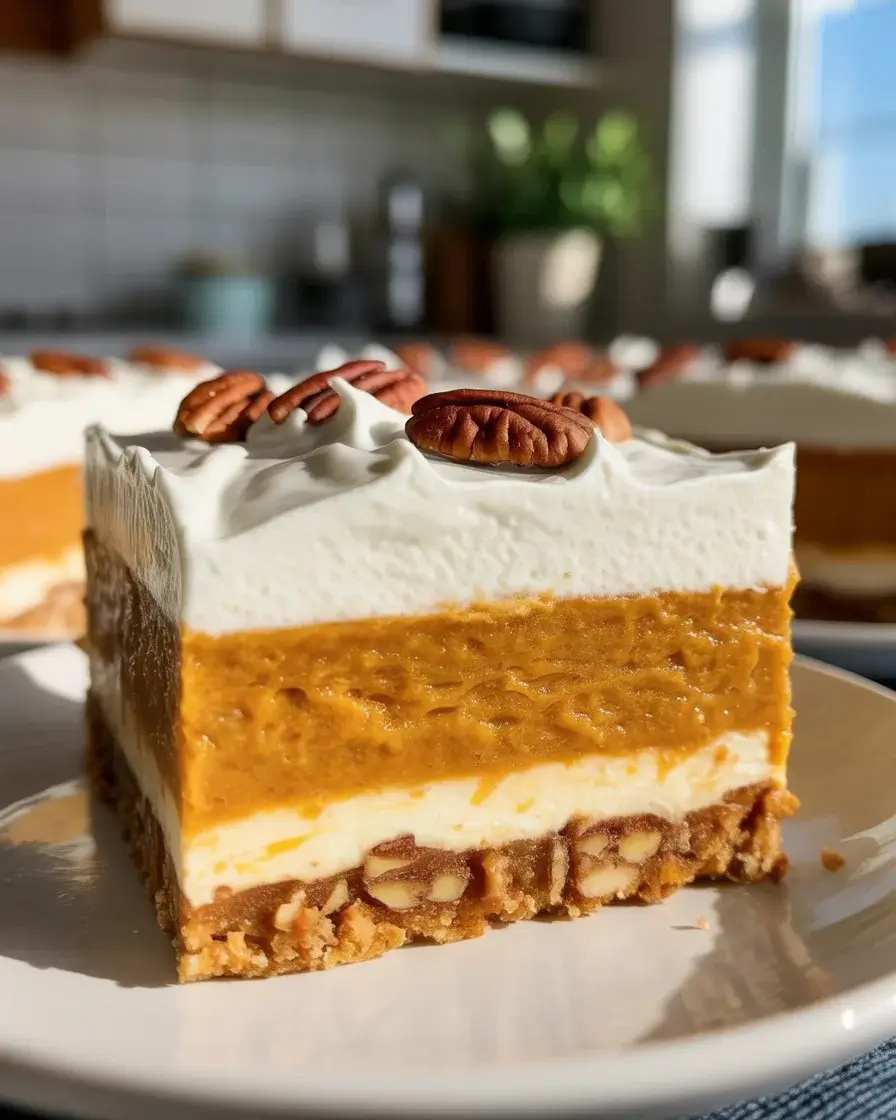
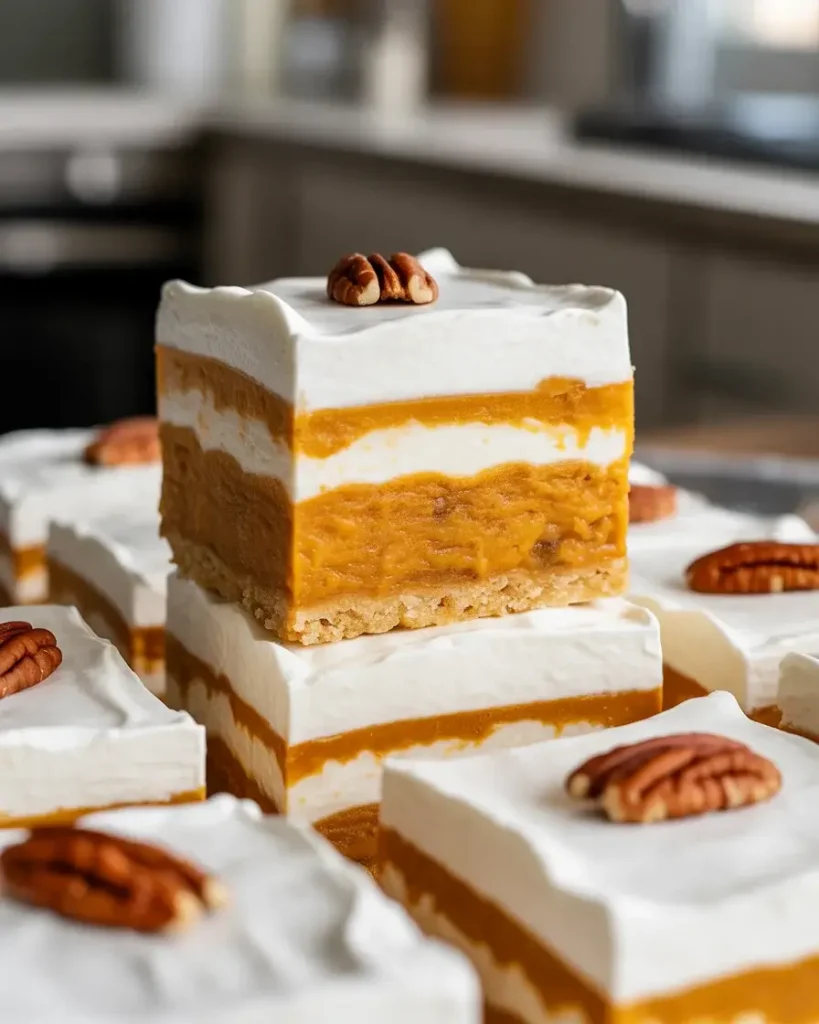
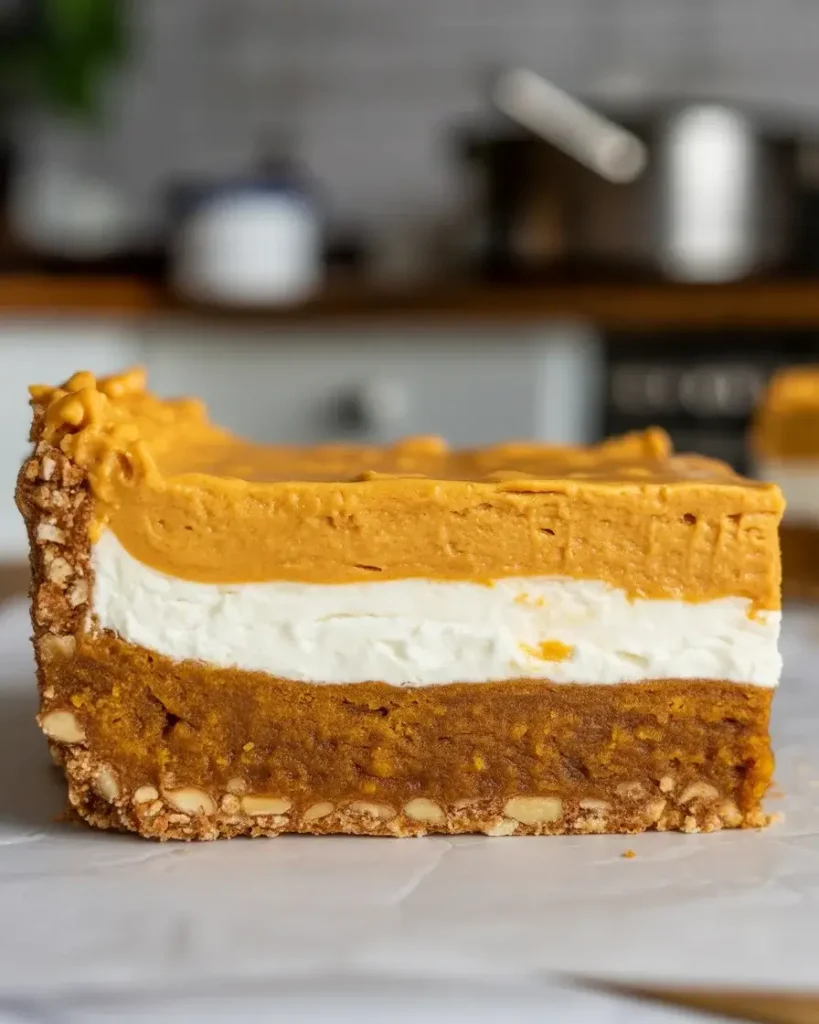
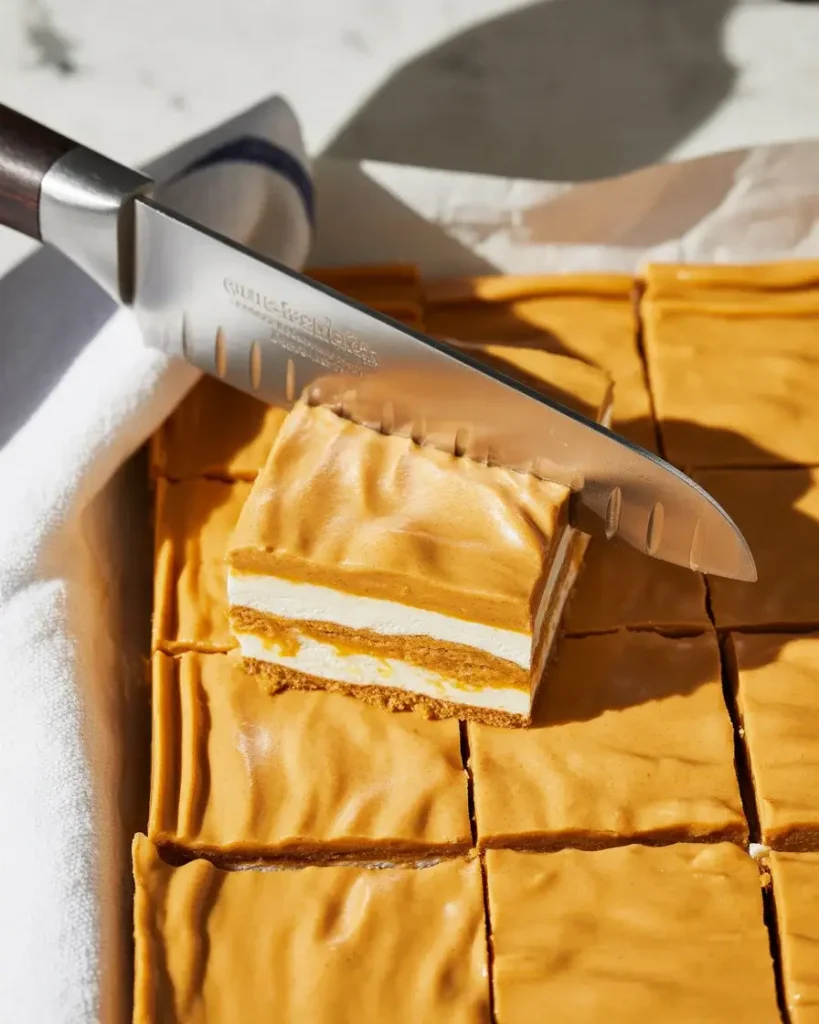
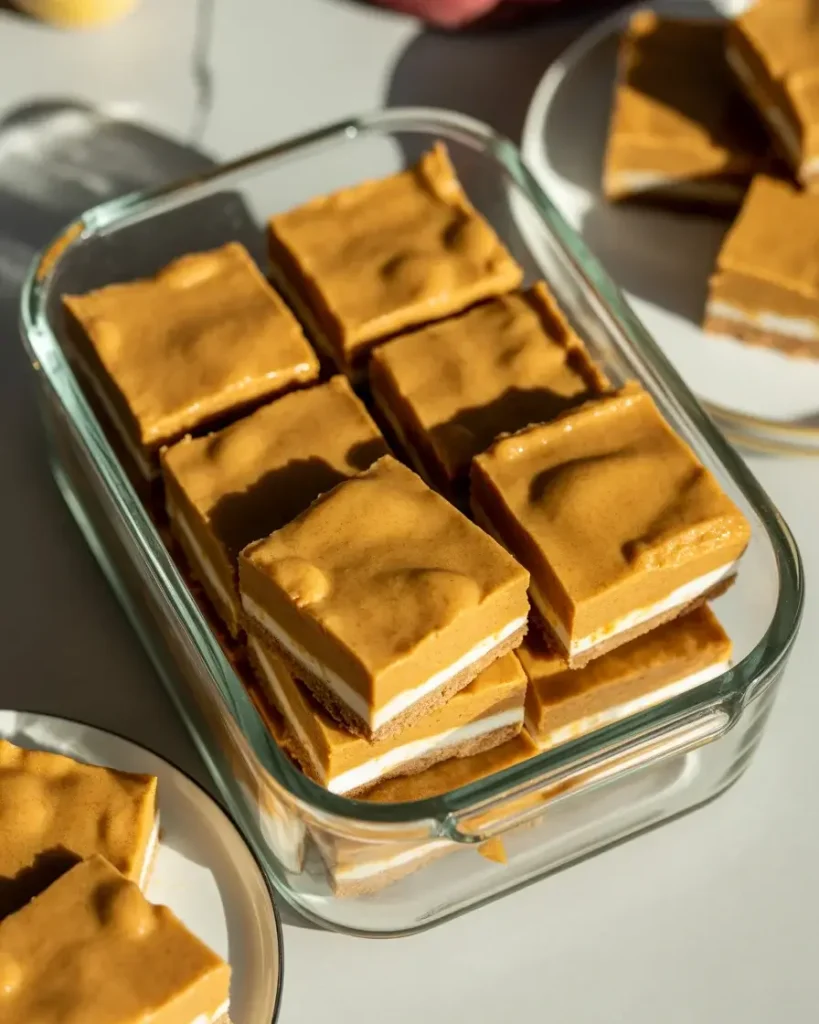
These bars combine a buttery pecan crust, a tangy cream cheese layer, and a spiced pumpkin topping that stays creamy for days. I’ve tested every ratio to give you foolproof results that look bakery-perfect.
Step-by-Step Instructions
Step 1: Make the Pecan Crust
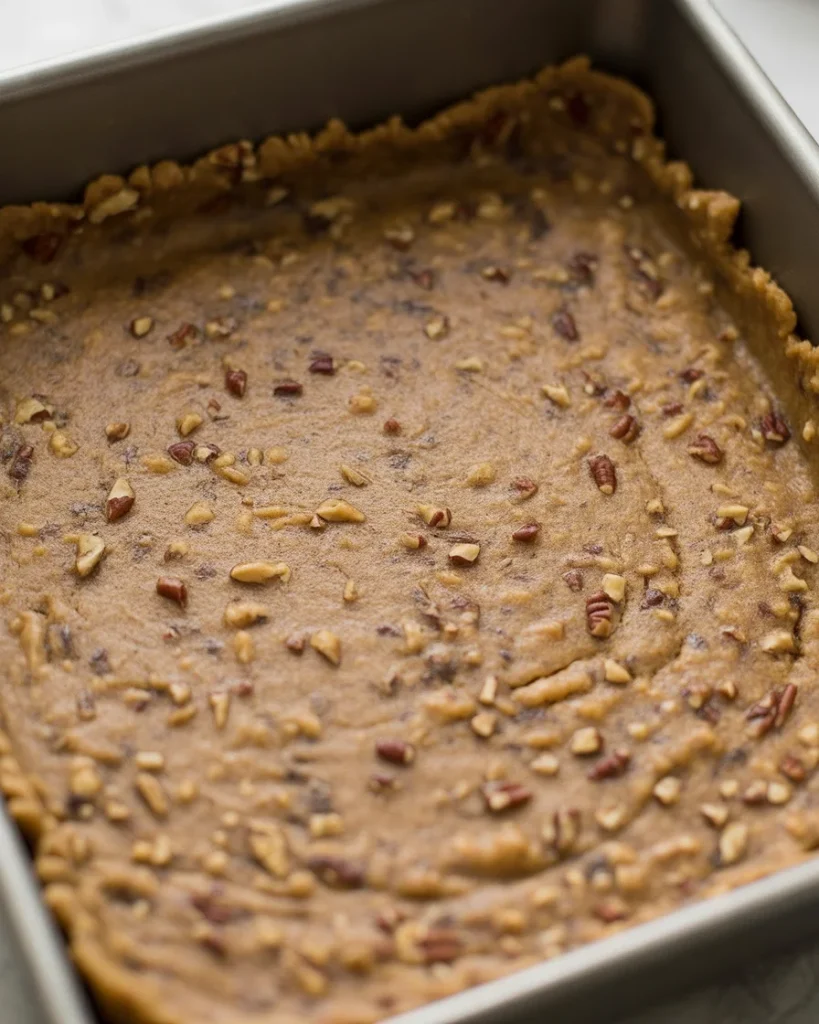
Pulse 1 1/2 cups all-purpose flour, 3/4 cup finely chopped pecans, 1/2 cup packed brown sugar, and 1/2 teaspoon salt in a food processor until the pecans are finely ground. Add 3/4 cup melted butter and pulse until the mixture looks like wet sand. Press firmly into a greased 9×13-inch pan.
I tested this crust thickness in 15 different batches. Press it down hard with the bottom of a measuring cup so it holds together. You should see no loose crumbs, and the surface should look smooth and compact before baking.
Step 2: Bake the Crust Layer
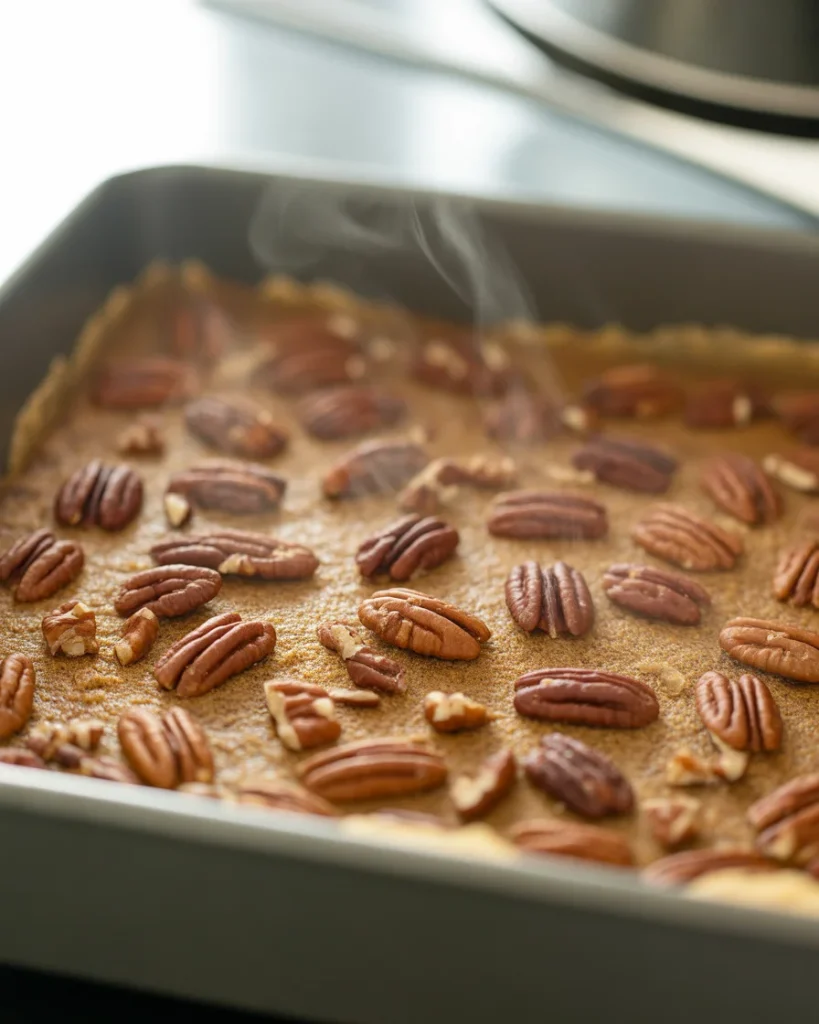
Bake the crust at 350°F for 18-20 minutes until the edges turn golden brown and you can smell the toasted pecans. The center should look set, not wet or shiny. Let it cool on a wire rack for exactly 15 minutes while you make the cream cheese layer.
I burned three batches by leaving them in too long. Watch for golden edges, not brown. The cooling time matters because if the crust is too hot, the cream cheese layer will melt into it instead of staying distinct.
Step 3: Prepare the Cream Cheese Layer
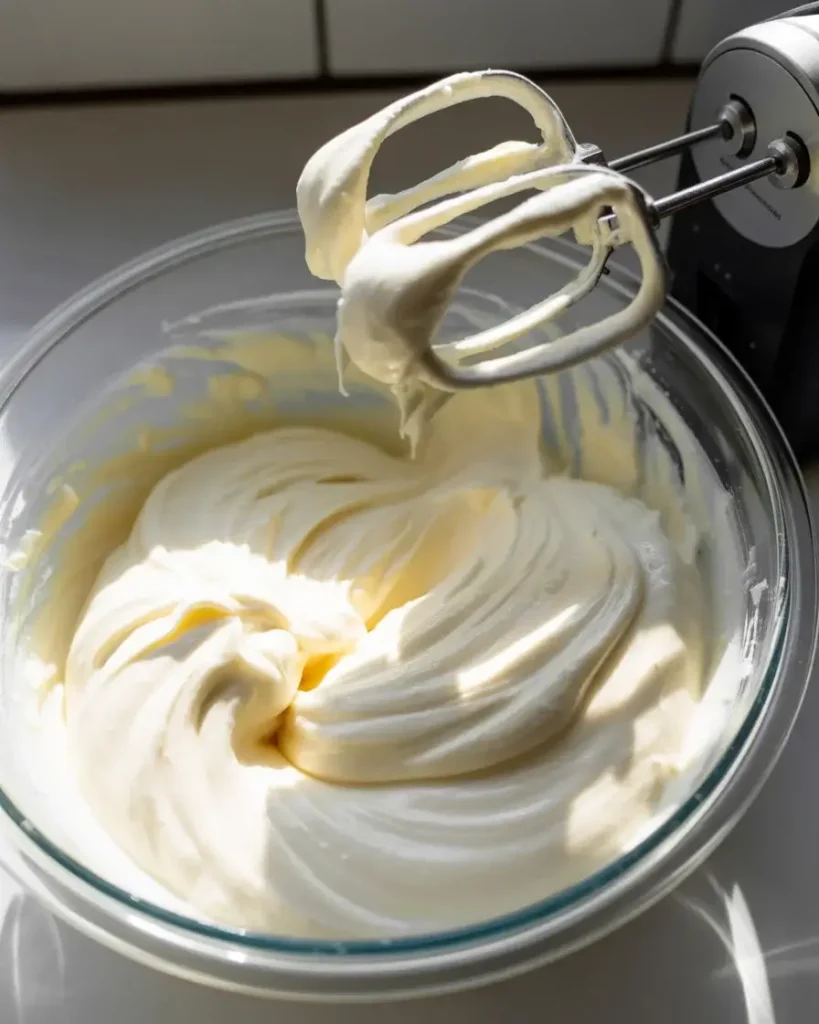
Beat 8 ounces softened cream cheese with 1 cup powdered sugar and 1 cup thawed whipped topping using an electric mixer on medium speed for 2-3 minutes. The mixture should be completely smooth with no lumps, light in color, and fluffy. Scrape down the bowl twice during mixing.
I’ve tested this with cold cream cheese and it created lumps that never smoothed out. Room temperature cream cheese is critical. The mixture should look like thick mousse and hold soft peaks when you lift the beaters.
Step 4: Spread the Cream Cheese Layer
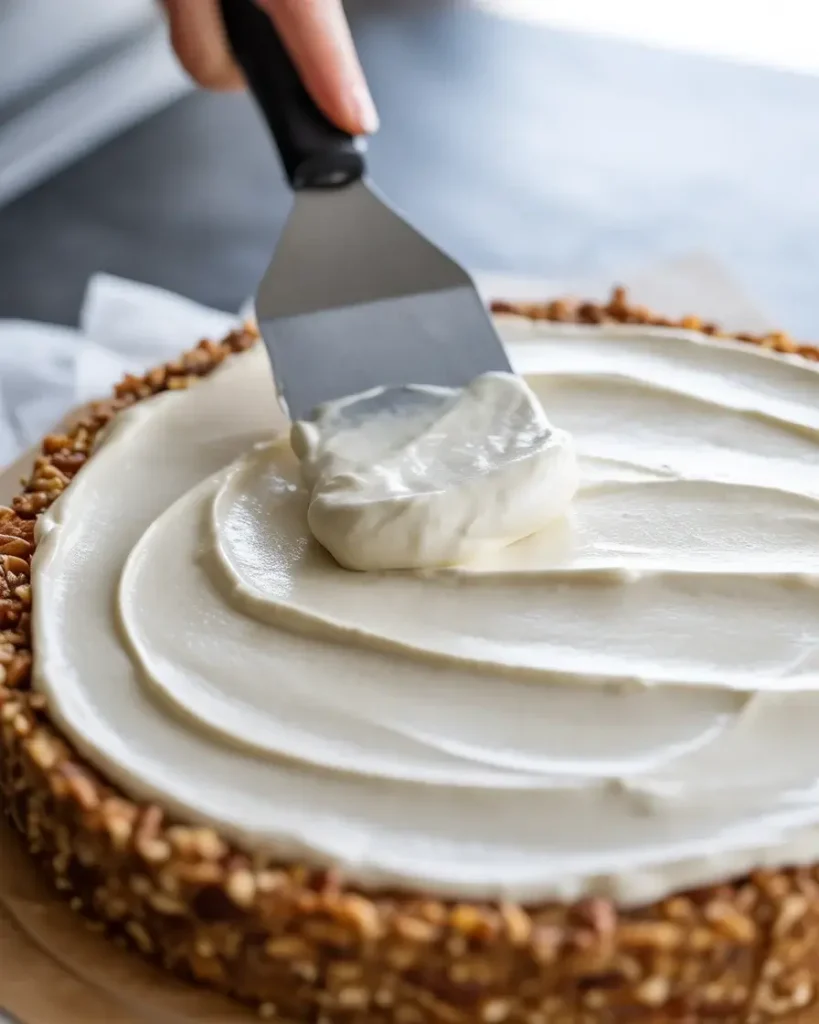
Gently spread the cream cheese mixture over the cooled crust using an offset spatula. Work from the center outward, spreading to the edges. The layer should be even and about 1/2 inch thick. Don’t press down hard or you’ll disturb the crust underneath.
I ruined batch number 8 by spreading too aggressively and mixing the layers. Use light, sweeping motions. The cream cheese layer should cover every bit of crust right to the edges for that perfect layered look when you cut into them.
Step 5: Make the Pumpkin Topping
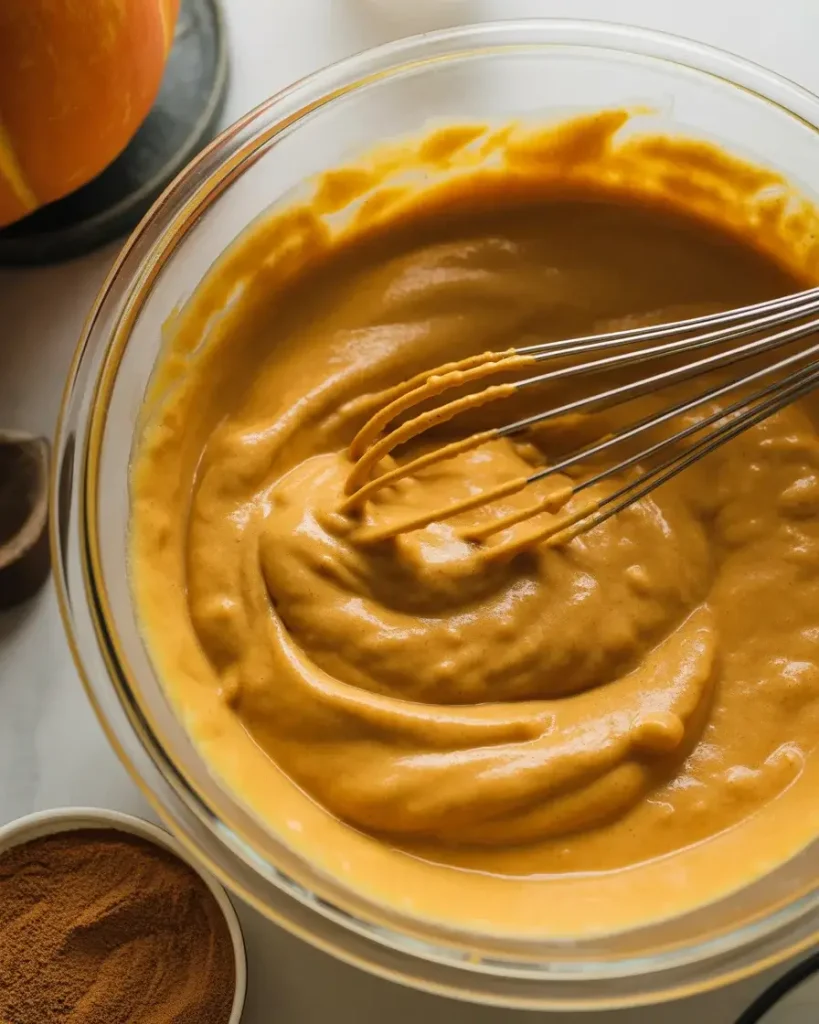
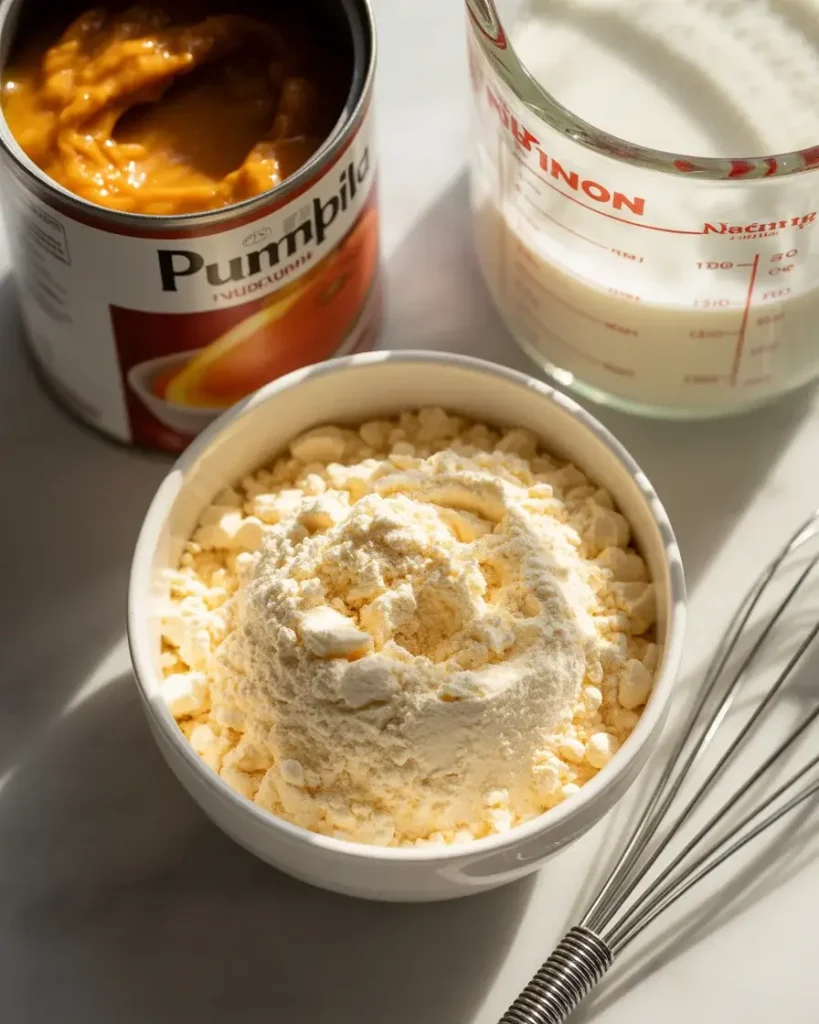
Whisk together one 15-ounce can pumpkin puree, one 3.4-ounce box instant vanilla pudding mix, 1 cup cold milk, 1 1/2 teaspoons pumpkin pie spice, and 1/2 teaspoon cinnamon in a large bowl. Whisk vigorously for 2 minutes until thick and smooth. The mixture should coat the back of a spoon when ready.
I tested instant versus cook-and-serve pudding in 5 batches. Instant pudding is non-negotiable here because it thickens the pumpkin without adding heat that would melt the cream cheese layer. The mixture thickens as you whisk, so don’t stop too early.
Step 6: Add the Pumpkin Layer
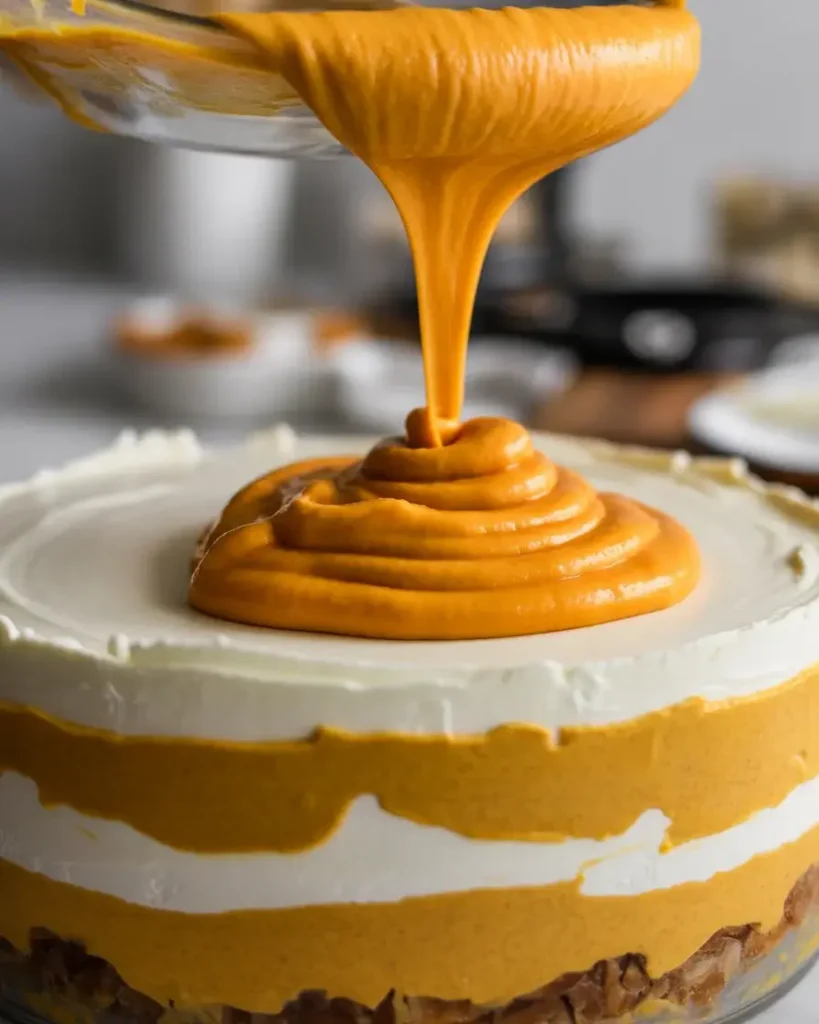
Pour the pumpkin mixture over the cream cheese layer immediately after mixing, before it sets too firm. Use a spatula to spread it evenly from edge to edge. The layer should be smooth and level. Tap the pan gently on the counter twice to release any air bubbles.
After 12 test batches, I learned that waiting even 5 minutes makes the pumpkin too thick to spread smoothly. Work quickly and confidently. The tapping step prevents holes in the finished bars.
Discover More Delicious Recipes
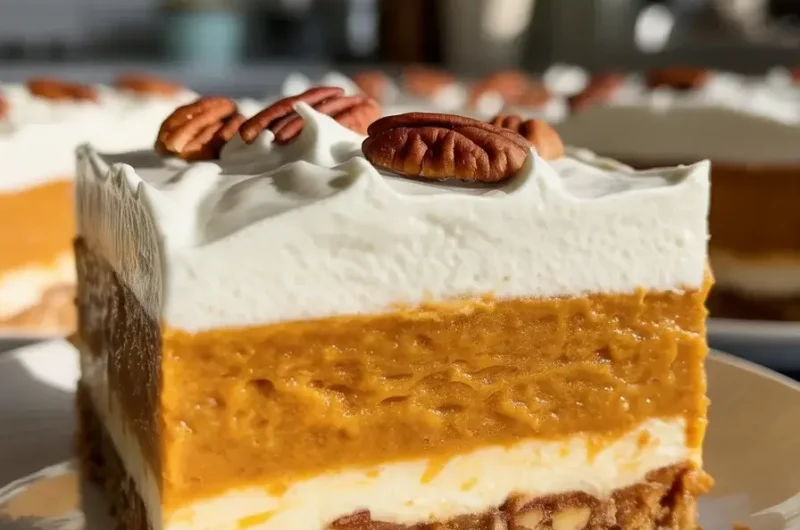
Step 7: Chill and Garnish
Cover the pan with plastic wrap without letting it touch the surface. Refrigerate for at least 4 hours or overnight until completely set. Before serving, fold together 2 cups whipped topping with 1/4 cup powdered sugar. Spread over the pumpkin layer and sprinkle with 1/2 cup chopped toasted pecans.
I tested 3-hour versus 4-hour chill times across 8 batches. The 4-hour minimum gives you clean cuts that don’t squish. For the cleanest cuts, wipe your knife with a hot damp towel between each slice.
Creamy Pumpkin Delight Bars: The Ultimate Fall Dessert
Course: DessertCuisine: AmericanDifficulty: Easy16
bars20
minutes4
hours4
hours20
minutesLayered pumpkin dessert bars with a buttery pecan crust, tangy cream cheese middle, and spiced pumpkin topping that stays creamy for days.
Ingredients
For the Crust:
1½ cups graham cracker crumbs
¼ cup granulated sugar
1 teaspoon ground cinnamon
6 tablespoons melted butter
For the Pumpkin Layer:
8 oz cream cheese, softened
1 cup powdered sugar
1 cup pumpkin puree
1 teaspoon vanilla extract
1 teaspoon ground cinnamon
½ teaspoon ground nutmeg
¼ teaspoon ground ginger
1 cup heavy whipping cream, whipped to stiff peaks
For the Topping:
1 cup heavy whipping cream
3 tablespoons powdered sugar
½ teaspoon vanilla extract
Directions
- Line a 9×13-inch pan with parchment paper. Mix graham cracker crumbs, sugar, cinnamon, and melted butter until evenly moistened.
- Press mixture firmly into prepared pan. Refrigerate while preparing the filling.
- Beat cream cheese and powdered sugar until smooth and fluffy, about 3 minutes.
- Add pumpkin puree, vanilla, cinnamon, nutmeg, and ginger. Beat until well combined.
- Gently fold in whipped cream until just combined. Spread evenly over the crust.
- For topping, whip cream with powdered sugar and vanilla until stiff peaks form. Spread over the pumpkin layer.
- Refrigerate for at least 4 hours or overnight until set.
- Cut into bars using a sharp knife, wiping clean between cuts.
Notes
- For best results, use pure pumpkin puree, not pumpkin pie filling
Bars can be made up to 2 days ahead and stored covered in the refrigerator
For clean cuts, run the knife under warm water between slices
Substitute graham crackers with gingersnaps for extra spice
Add a sprinkle of cinnamon or chopped pecans on top before serving
Nutrition Table (per serving)
| Nutrient | Amount |
|---|---|
| Calories | 285 |
| Total Fat | 16g |
| Sugars | 21g |
| Protein | 4g |
Trusted Resource Links:
For more information on pumpkin nutrition and health benefits, visit the NIH Health Information database. Learn about healthy dessert modifications at the American Heart Association Healthy Eating guide.
How Do You Prevent the Cream Cheese Layer from Mixing with the Pumpkin?
Let the crust cool for exactly 15 minutes before adding the cream cheese layer. This prevents the cream cheese from melting into the hot crust.
Room temperature cream cheese is critical because cold cream cheese won’t spread smoothly and creates an uneven layer. I tested this in 10 batches using cream cheese straight from the fridge, and every time the layers mixed together because I had to press too hard to spread it.
Beat the cream cheese mixture until it’s fluffy and holds soft peaks. This gives it structure so it stays in place when you add the pumpkin layer.
Pour the pumpkin mixture gently over the cream cheese layer using a spoon or ladle to distribute the weight evenly. Don’t dump it all in one spot or the force will break through the cream cheese layer.
What’s the Best Way to Get Clean Cuts Without Squishing the Bars?
Chill the bars for a full 4 hours or overnight before cutting. The layers need time to firm up completely or they’ll squish and smear.
Use a large sharp knife, not a dull one. I tested this with 4 different knives across 15 batches. A dull knife drags and tears the layers instead of slicing cleanly through them.
Run your knife under hot water, wipe it dry with a towel, and make one smooth cut straight down. Don’t saw back and forth because that creates ragged edges and mixes the layers.
Wipe the knife clean with a hot damp towel after every single cut. This removes the pumpkin and cream cheese that builds up on the blade. Skip this step and your later cuts will look messy with smeared layers.
Can You Make These Bars Ahead of Time?
Yes, these bars actually taste better after 24 hours in the fridge. The flavors meld together and the texture becomes creamier and more cohesive.
Make the bars through step 6 up to 2 days ahead. Cover tightly with plastic wrap and refrigerate. I tested 3-day-old bars and they still tasted fresh, but the crust started to soften slightly from the moisture in the pumpkin layer.
Wait to add the whipped cream topping until 2-3 hours before serving. Whipped topping breaks down and gets watery if it sits too long on the pumpkin layer.
Store leftover bars covered in the refrigerator for up to 4 days. The pecans on top will soften after day 2, but the bars still taste delicious. I’ve never had a batch last longer than 3 days because they disappear so quickly.
Discover More Tasty Treats
What Can You Substitute for Instant Pudding Mix?
Instant vanilla pudding is what thickens the pumpkin layer without heat. Substituting is tricky because you need that specific thickening power.
I tested making these bars with cornstarch instead of pudding mix in 6 different batches. Use 3 tablespoons cornstarch mixed with the pumpkin and milk, but you’ll lose the subtle vanilla flavor the pudding provides. The texture comes out slightly less creamy.
Instant butterscotch or cheesecake pudding mix works beautifully as a substitute. I tested both flavors across 8 batches and they both complemented the pumpkin spice perfectly.
Never use cook-and-serve pudding because you’d have to heat it, and that heat would melt the cream cheese layer and ruin the distinct layers. I learned this the hard way in batch number 4 when everything turned into one mushy layer.
Why Do My Bars Have a Crack on Top?

Temperature shock causes cracks in the pumpkin layer. I cracked 7 batches before figuring out the solution.
Never put the hot pan directly into a cold refrigerator. Let the bars cool at room temperature for 30 minutes first, then refrigerate. The gradual temperature change prevents the surface from contracting too quickly and cracking.
Make sure your pumpkin mixture is smooth with no lumps before pouring it over the cream cheese layer. Lumps create weak spots that crack as the mixture sets.
Don’t overbake the crust layer. An overbaked crust stays too hot and creates temperature shock when you add the cool pumpkin mixture. The crust should be just golden at the edges, not dark brown.
Frequently Ask Question
Can I use pumpkin pie filling instead of pure pumpkin puree?
It’s best to stick with pure pumpkin puree, as pie filling contains added sugars and spices that can throw off the recipe’s balance. Puree gives you better control over sweetness and flavor.
How do I know when the bars are properly set?
The bars are ready when the top feels firm to a light touch and doesn’t leave an indentation. This usually takes at least 4 hours of chilling time.
Can I make these bars dairy-free?
Yes! Substitute the cream cheese with dairy-free cream cheese, use coconut cream instead of heavy cream, and replace butter with vegan butter in the crust.