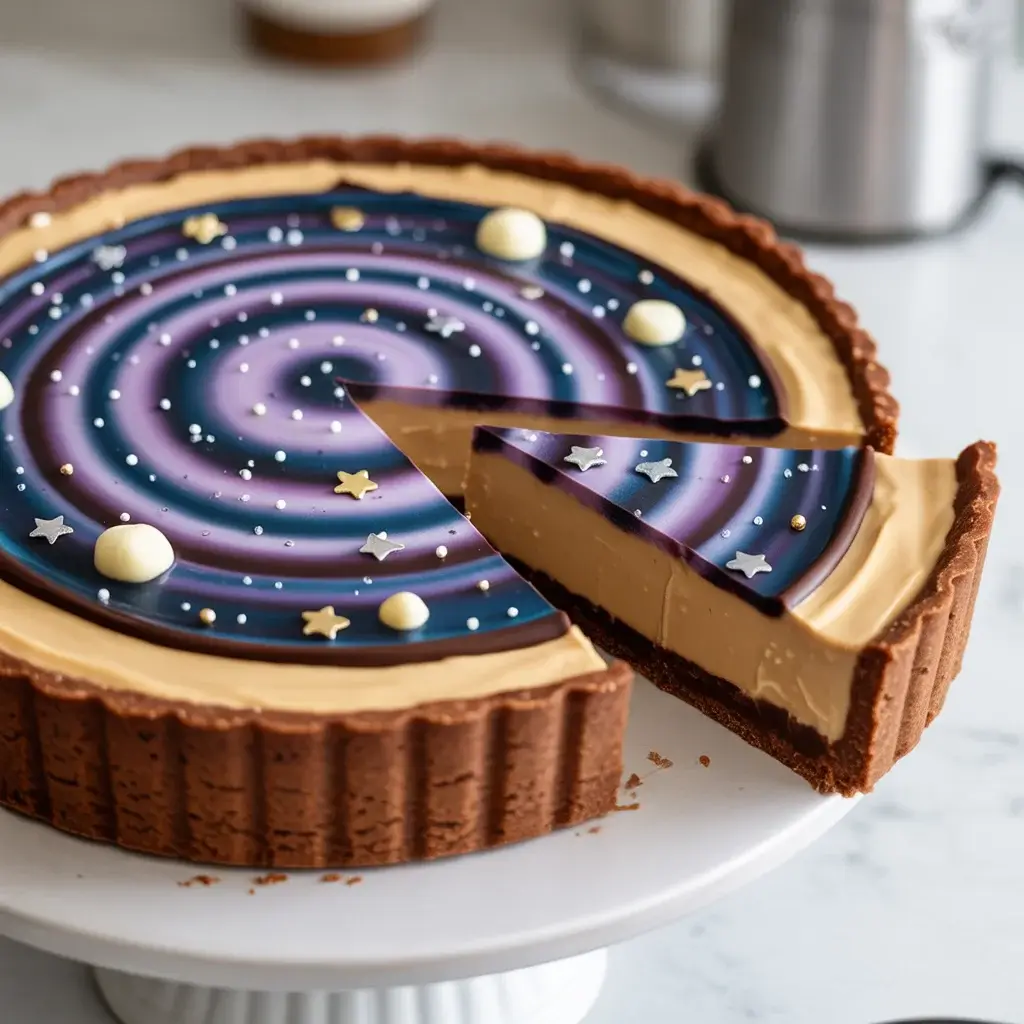
Galactic Peanut Butter Tart: A Stellar No-Bake Dessert
I created this tart after a disastrous attempt at baking a peanut butter pie during a heatwave. My oven made the kitchen unbearable, and the filling cracked everywhere. That’s when I realized no-bake was the answer.
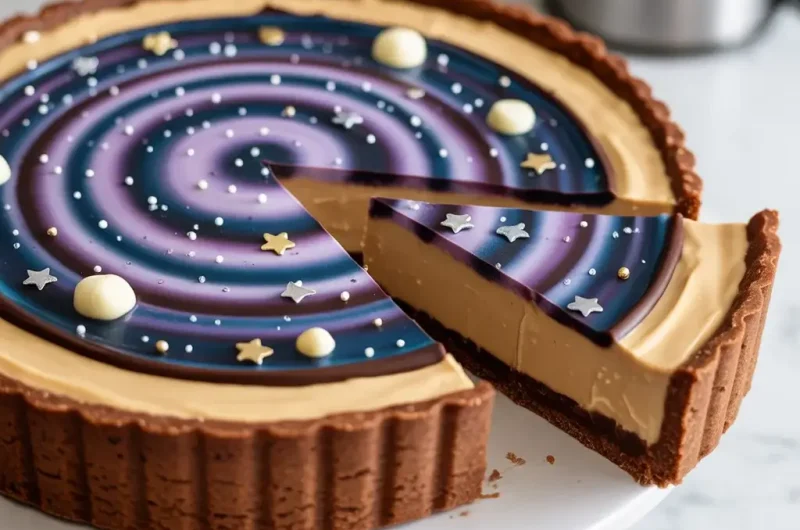
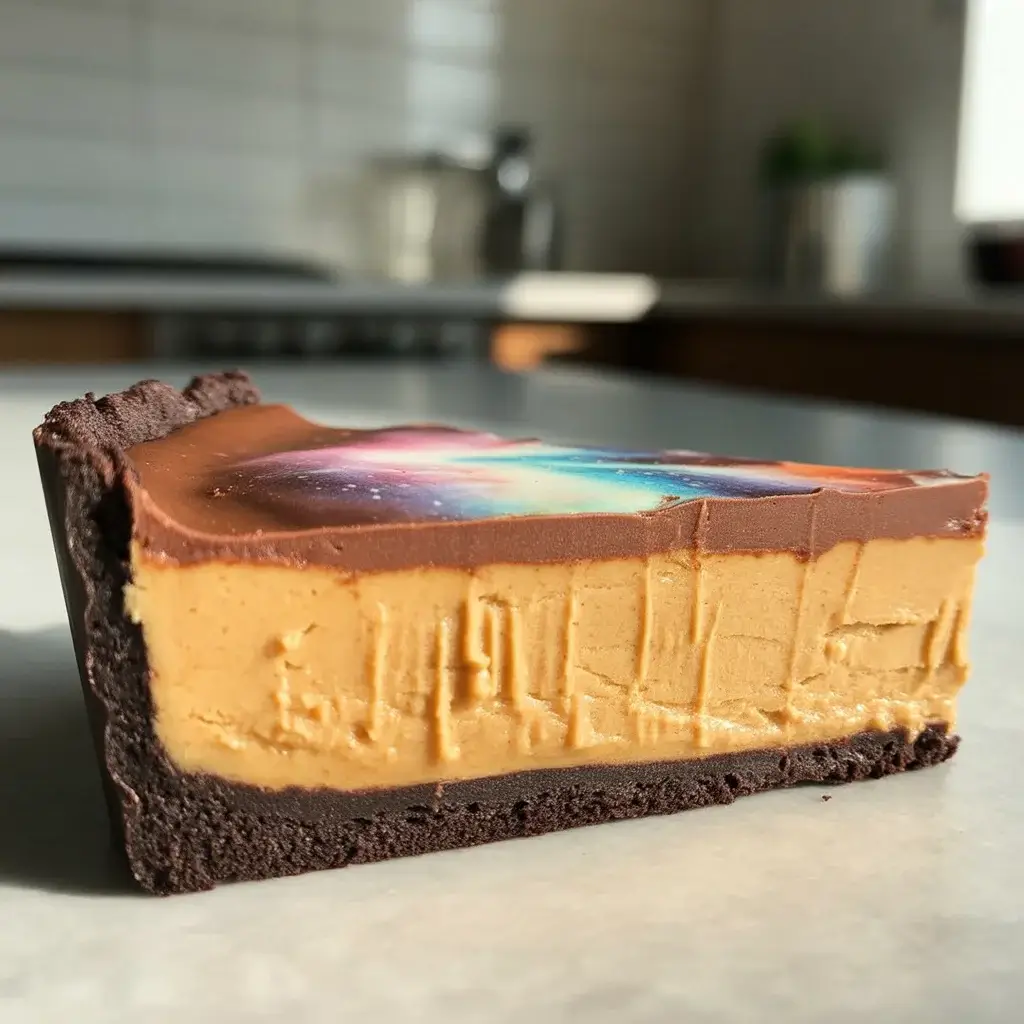
This galactic beauty takes just 30 minutes of hands-on time and delivers a creamy, dreamy peanut butter filling that tastes like it took hours. The chocolate cookie crust adds the perfect crunch, and the galaxy-inspired topping makes it party-ready.
Step-by-Step Instructions
Step 1: Make the Chocolate Cookie Crust

Pulse 20 chocolate sandwich cookies (about 2 cups) in a food processor until they’re fine crumbs. I’ve tested this with both Oreos and off-brand cookies, and honestly, they all work beautifully. Add 4 tablespoons of melted butter and pulse until the mixture looks like wet sand.
Press this mixture firmly into a 9-inch tart pan with a removable bottom. Use the bottom of a measuring cup to pack it tight, especially up the sides. I learned this the hard way when my first crust crumbled because I was too gentle. Freeze for 15 minutes while you make the filling.
Step 2: Whip the Peanut Butter Base

Beat 1 cup of creamy peanut butter with 8 ounces of softened cream cheese using an electric mixer on medium speed for 2 minutes. The mixture should look completely smooth with no streaks. I always use full-fat cream cheese because light versions make the filling too loose.
Add 1 cup of powdered sugar and 1 teaspoon of vanilla extract. Beat for another minute until fluffy. The filling will lighten in color and increase slightly in volume. Don’t overmix or it can become grainy.
Step 3: Fold in the Whipped Cream
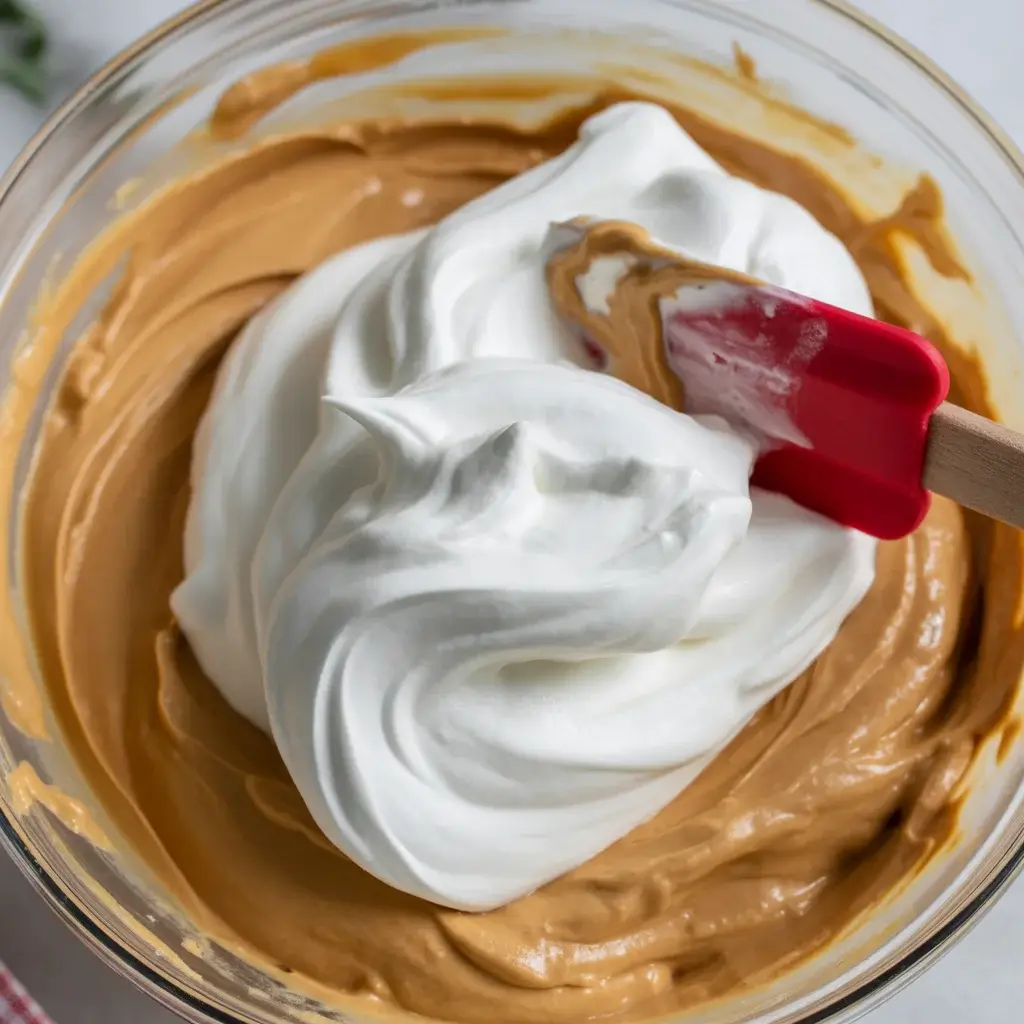
Whip 1 cup of heavy cream in a separate cold bowl until stiff peaks form. This takes about 3 minutes on high speed. You’ll know it’s ready when the cream holds its shape and doesn’t slide around the bowl when you tilt it.
Gently fold the whipped cream into the peanut butter mixture in three additions. Use a rubber spatula and cut down the center, then sweep along the bottom and up the side. I tested dumping it all at once, and you lose too much air. The folding method keeps everything light and mousse-like.
Step 4: Fill the Tart Shell
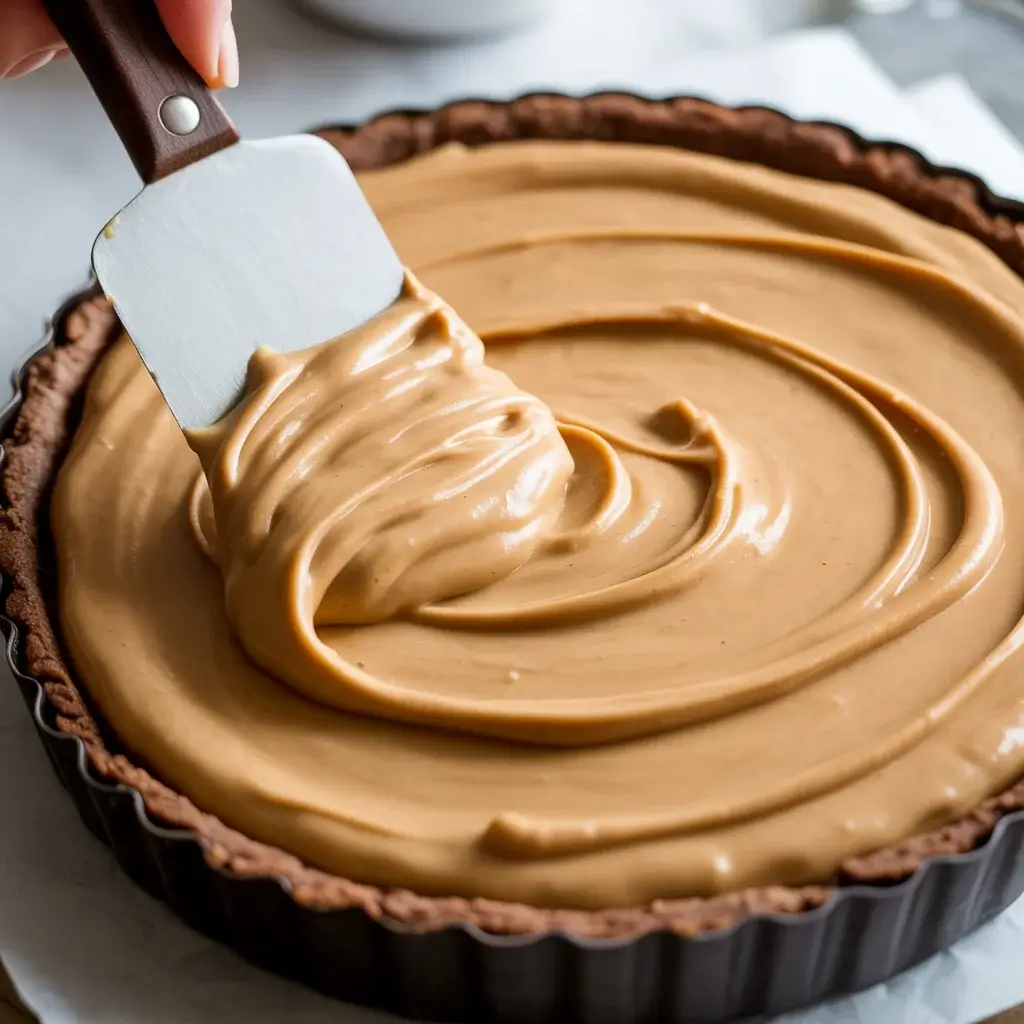
Pour the peanut butter filling into your chilled crust. Use an offset spatula to spread it evenly, working from the center outward. The filling should come right to the top edge of the crust but not overflow.
Smooth the top completely. I like to do one final pass with the spatula dipped in hot water and wiped dry. This creates a perfectly smooth surface for decorating. Refrigerate for at least 4 hours or overnight. The tart needs this time to firm up properly.
Step 5: Create the Galaxy Topping
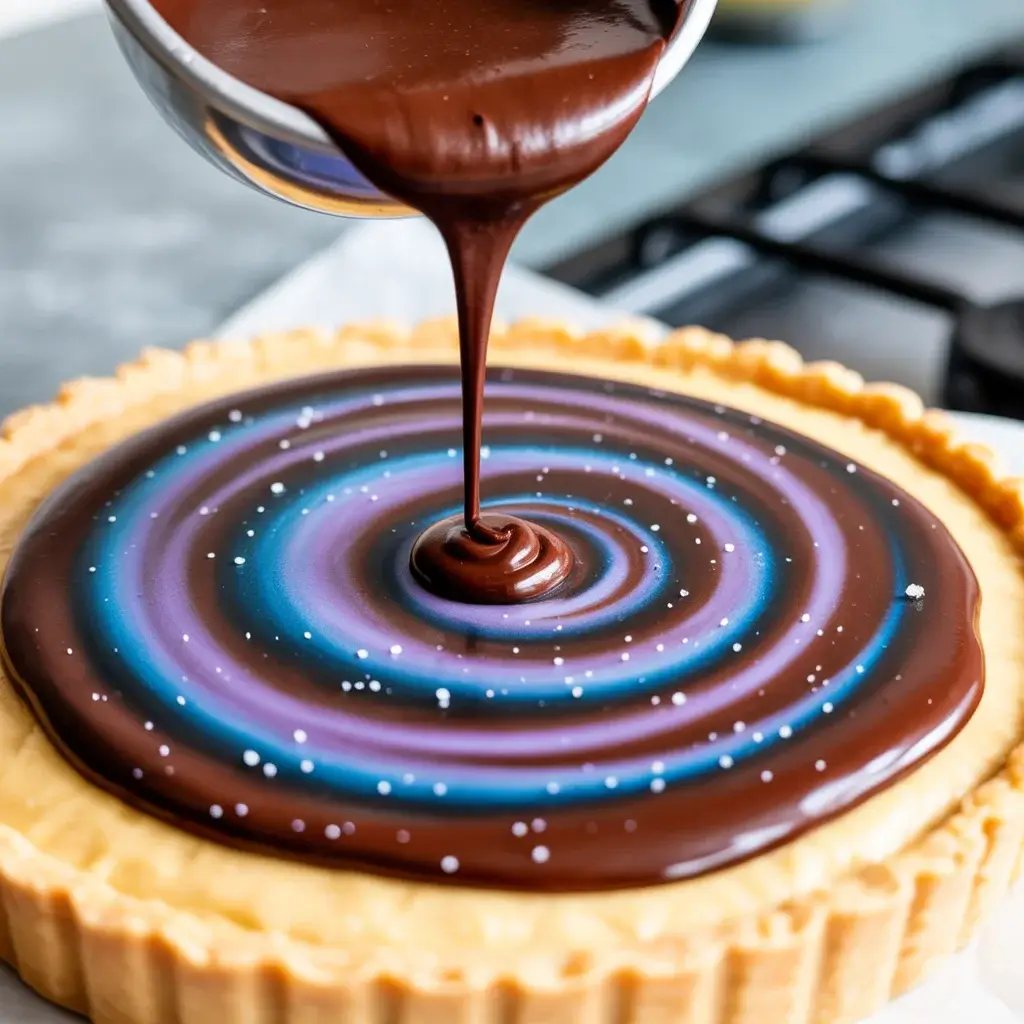
Melt 4 ounces of dark chocolate with 2 tablespoons of heavy cream in 20-second microwave bursts, stirring between each. The ganache should be smooth and pourable but not hot. Let it cool for 5 minutes.
Drizzle the chocolate over the chilled tart in random swirls. I use a spoon and let it fall naturally rather than trying to control it too much. Add blue and purple edible luster dust or gel food coloring in dots, then use a toothpick to swirl everything together. The marbling happens fast, so work quickly.
Discover More Delicious Recipes
Step 6: Add Star Decorations
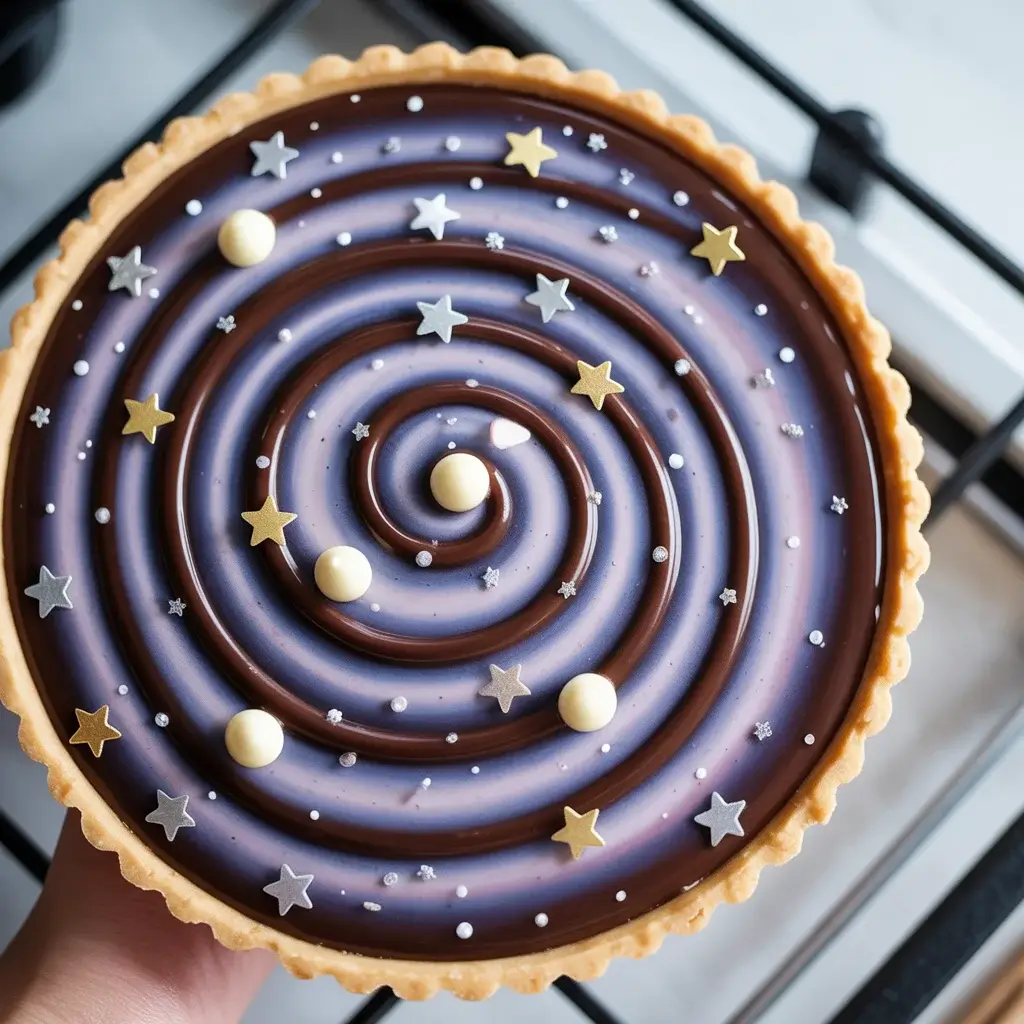
Sprinkle edible silver star sprinkles or white pearl dust across the chocolate swirls while they’re still slightly wet. I concentrate them more heavily in some areas to look like star clusters. You can also add gold stars for extra dimension.
For an extra touch, pipe small dots of white chocolate or white candy melts in various sizes to represent planets and moons. Let everything set for 15 minutes in the fridge. The chocolate will firm up and the decorations will stay in place perfectly.
Galactic Peanut Butter Tart: A Stellar No-Bake Dessert
Course: DessertCuisine: AmericanDifficulty: Easy8-10
20
minutes4
hours4
hours20
minutesThis stunning no-bake peanut butter tart features a chocolate cookie crust, creamy peanut butter filling, and galaxy-inspired chocolate topping perfect for any celebration.
Ingredients
- For the Crust:
1½ cups graham cracker crumbs
⅓ cup melted butter
3 tablespoons granulated sugar
Pinch of salt
- For the Peanut Butter Filling:
8 oz cream cheese, softened
1 cup creamy peanut butter
¾ cup powdered sugar
1 teaspoon vanilla extract
1 cup heavy whipping cream
- For the Galaxy Topping:
½ cup heavy cream
4 oz dark chocolate, chopped
Purple gel food coloring
Blue gel food coloring
Edible glitter
Edible star sprinkles
Directions
- Mix graham cracker crumbs, melted butter, sugar, and salt in a bowl. Press firmly into bottom and sides of 9-inch tart pan.
- Beat softened cream cheese until smooth and fluffy, about 2 minutes. Add peanut butter, powdered sugar, and vanilla, mixing until combined.
- Whip heavy cream to stiff peaks in separate bowl. Gently fold whipped cream into peanut butter mixture until just combined.
- Spread peanut butter filling evenly over crust. Smooth top with offset spatula and refrigerate for 2 hours.
- Heat ½ cup heavy cream until just simmering. Pour over chopped chocolate, let sit 2 minutes, then stir until smooth ganache forms.
- Divide ganache into 3 bowls. Leave one plain, color one with purple gel, and one with blue gel food coloring.
- Drop spoonfuls of different colored ganache over tart. Use toothpick to create galaxy swirl patterns throughout.
- Sprinkle with edible glitter and star sprinkles while ganache is still soft. Refrigerate for 2 more hours before serving.
Notes
- For best results, use gel food coloring rather than liquid to maintain ganache consistency
Tart can be made 1 day ahead and stored covered in the refrigerator
Let it sit at room temperature for 10 minutes before slicing for cleaner cuts
Substitute almond or sunflower seed butter for a peanut-free version
| Nutrient | Per Serving |
|---|---|
| Calories | 483 |
| Total Fat | 38g |
| Sugars | 11g |
| Protein | 8g |
| Dietary Fiber | 4g |
Trusted Resource Links
For food safety guidance on dairy products like cream cheese, visit the FDA Safe Food Handling Guide.
For heart-healthy dessert modifications, check the American Heart Association Healthy Eating Resources.
Can I Make This Tart Ahead of Time?
Yes, this tart actually improves when made 1-2 days ahead. The filling firms up perfectly and the flavors meld together beautifully in the fridge.
I’ve tested making it up to 3 days in advance, and it holds wonderfully. Keep it covered loosely with plastic wrap, making sure the wrap doesn’t touch the decorated surface. The chocolate topping stays glossy and the crust remains crisp.
For longer storage, you can freeze the tart without decorations for up to 1 month. Wrap it tightly in plastic wrap, then aluminum foil. Thaw overnight in the fridge and add your galaxy decorations the day you plan to serve it.
If you’re transporting it, keep the tart in its pan until you arrive. The removable bottom makes it easy to slide onto a serving plate at the last minute.
What Type of Peanut Butter Works Best?
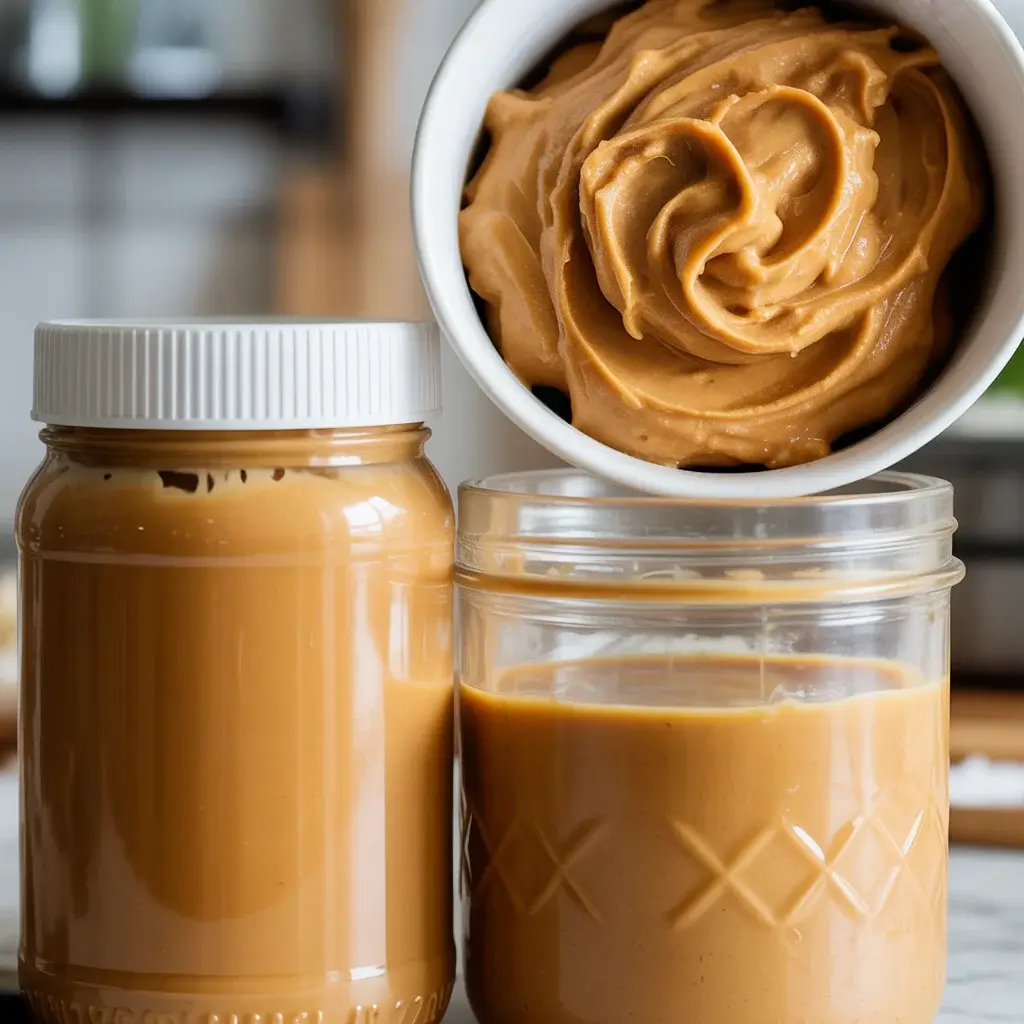
Use regular creamy peanut butter, not natural or no-stir varieties. I learned this after a complete filling failure with natural peanut butter that separated and made everything oily.
Commercial brands like Jif, Skippy, or store brands work perfectly because they contain stabilizers that help the filling set properly. Natural peanut butter has too much oil that doesn’t incorporate well with the cream cheese.
Avoid chunky peanut butter for this recipe. The filling should be silky smooth. I tested chunky once for texture, but the pieces sink to the bottom and create an uneven consistency.
If you only have natural peanut butter, you’ll need to add 2 tablespoons of softened butter to help stabilize the mixture. Even then, it won’t be quite as firm as the commercial version.
How Do I Prevent a Soggy Crust?

The key is freezing the crust before adding the filling. Those 15 minutes make a huge difference in keeping everything crisp and preventing moisture from seeping in.
I also brush the bottom and sides of my frozen crust with 1 ounce of melted chocolate before adding the filling. This creates a moisture barrier. Let the chocolate harden for 5 minutes in the freezer before proceeding.
Make sure your peanut butter filling isn’t warm when you pour it in. Everything should be at room temperature or slightly cool. Warm filling will melt the chocolate coating and soften the crust.
Store the tart in the refrigerator, not at room temperature. The cool environment keeps the crust firm. If you must leave it out for serving, don’t let it sit more than 30 minutes before slicing.
Can I Use Different Toppings Instead of Galaxy Design?
Absolutely! The galaxy theme is fun, but this tart is versatile. I’ve made it dozens of ways depending on the occasion and what I have on hand.
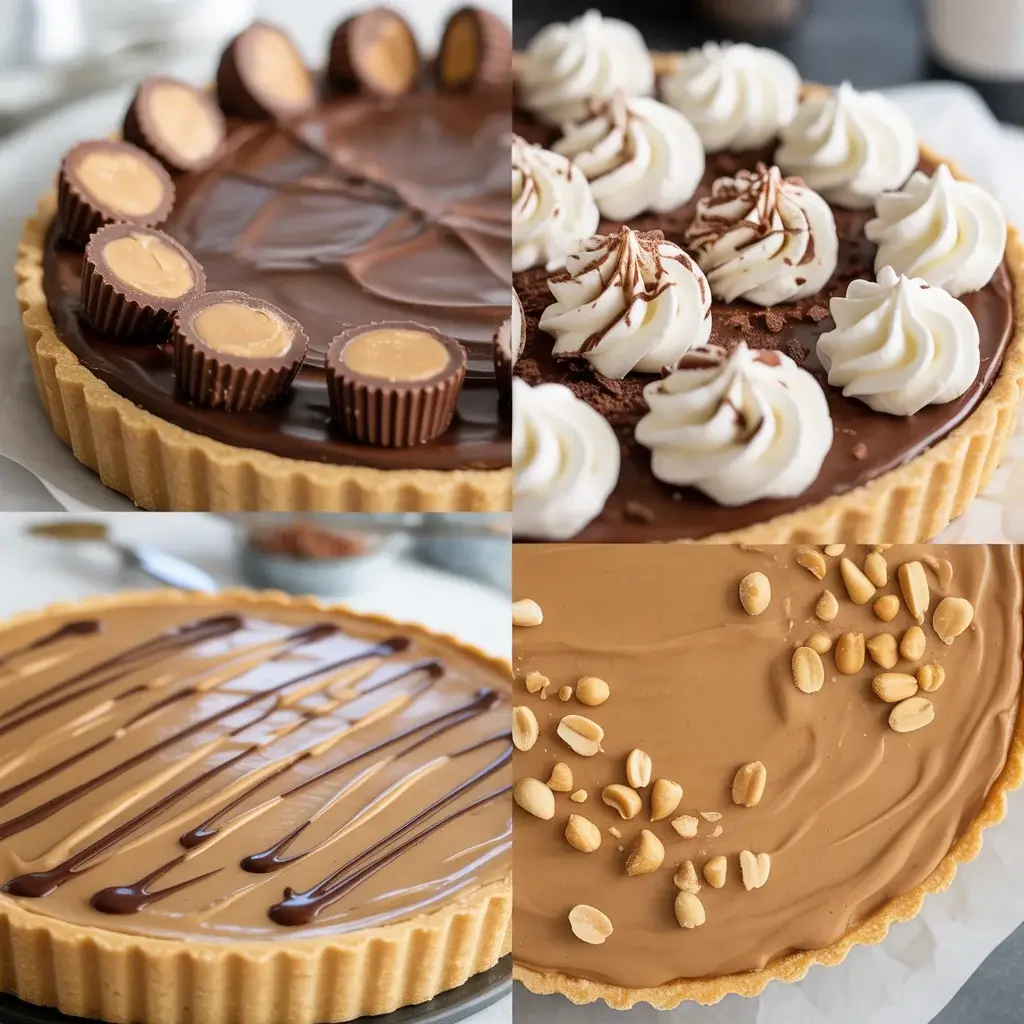
For a classic look, top with chocolate ganache and chopped peanut butter cups. Drizzle with melted peanut butter for extra flavor. Mini chocolate chips and crushed peanuts also work beautifully for simple decoration.
For holidays, swap the galaxy colors for seasonal themes. Red and green swirls for Christmas, orange and black for Halloween, or pastels for Easter. The technique stays the same, just change your food coloring.
A simpler option is whipped cream rosettes piped around the edge with chocolate shavings in the center. I do this when I’m short on time but still want it to look impressive.
What’s the Best Way to Slice This Tart Cleanly?
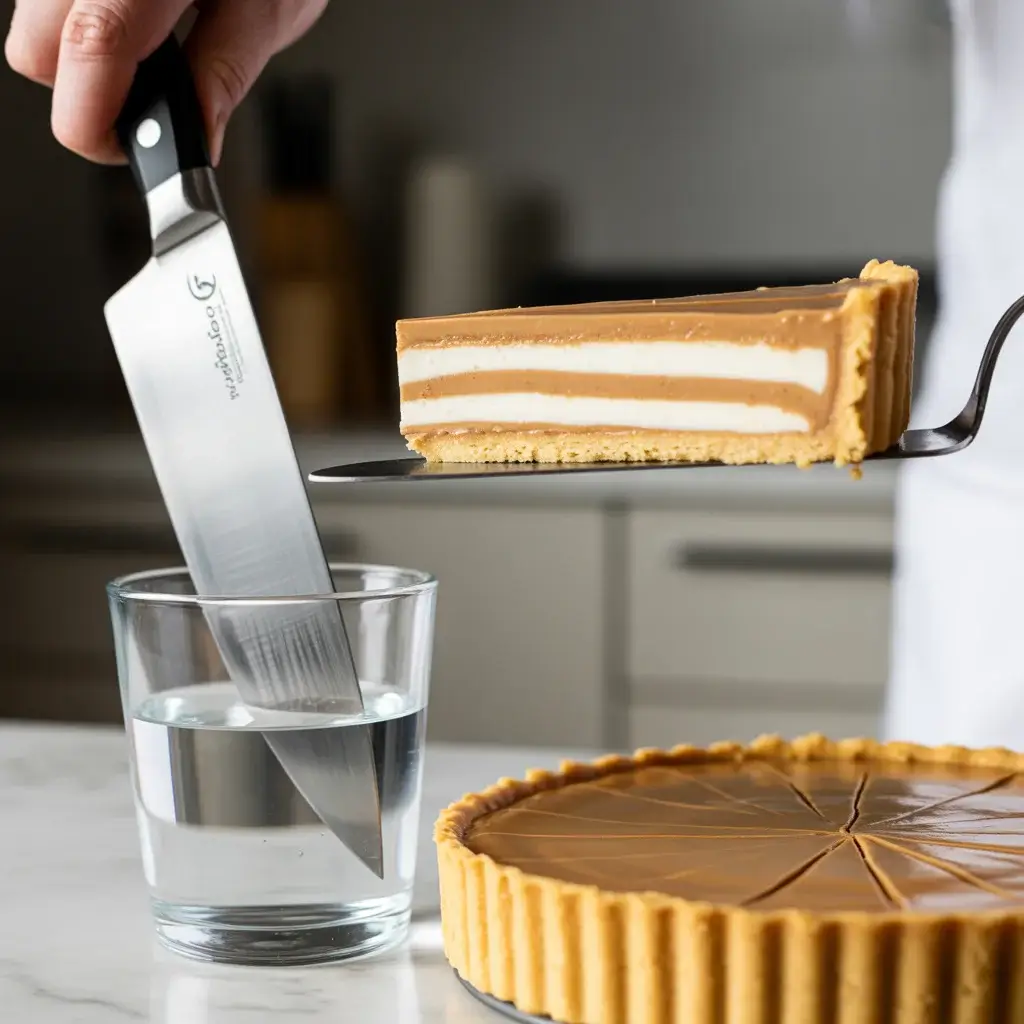
Use a sharp knife dipped in hot water and wiped completely dry between each cut. This is the single best trick I’ve learned after slicing probably 50 of these tarts.
Make your first cut all the way across the diameter, then wipe the knife and dip it again. For the second cut, rotate the tart 90 degrees and cut across again. Now you have four quarters. Continue cutting each quarter in half for eight perfect slices.
Don’t saw back and forth. Press straight down in one smooth motion. The hot knife glides through the creamy filling without dragging or tearing the chocolate decorations.
For serving, use a thin offset spatula to lift each slice from the pan. Slide it under the crust and lift straight up. The removable tart pan bottom makes this so much easier than a regular pie pan.
Frequently Asked Questions
Can I make this tart ahead of time?
Yes! This peanut butter tart is perfect for preparing in advance. You can refrigerate it up to 2 days before serving, and it will hold its creamy texture and rich flavor.
What kind of peanut butter works best for this recipe?
Smooth, creamy peanut butter works best for a silky filling. Natural peanut butter can be used, but you may need to stir in a little extra sweetener to balance the flavor.
Do I need any special equipment to make this tart?
Not at all! Since it’s a no-bake dessert, you only need a tart pan (or pie dish), a mixing bowl, and a spatula. No oven required, making it super beginner-friendly.