Festive Tree Cake
There’s something magical about a cake shaped like a Christmas tree. Instantly transforms your holiday table into a winter wonderland. This Festive Tree Cake is easier than it looks, made with fluffy vanilla layers, rich buttercream, and festive decorations that’ll have everyone asking for the recipe.
Whether you’re hosting a holiday party or just want to make dessert extra special, this show-stopping cake delivers on both flavor and presentation. The best part? You don’t need fancy equipment or professional skills to pull it off.
Why You’ll Love This Recipe
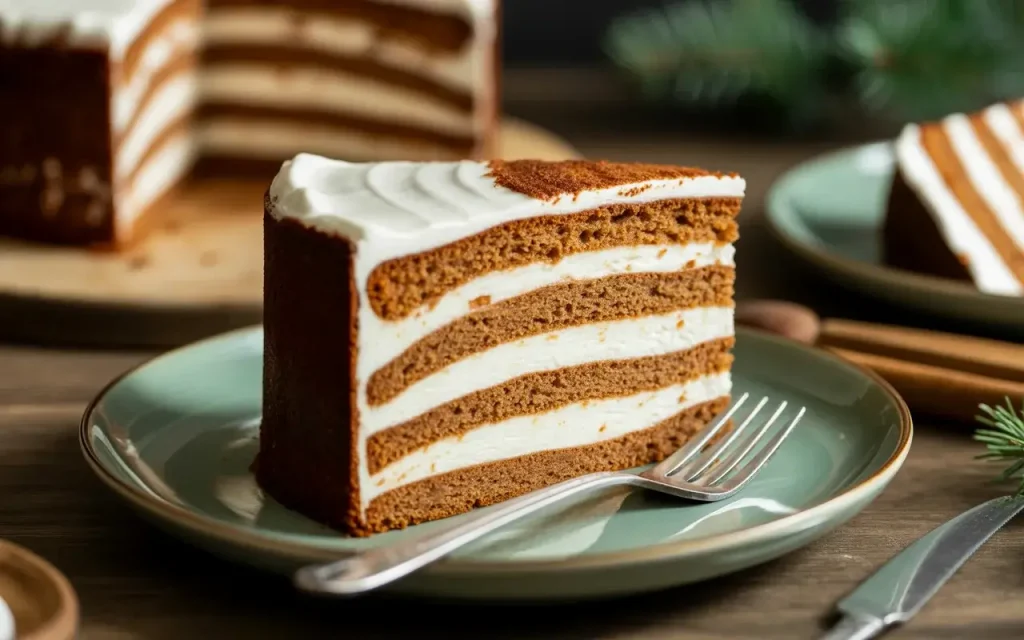
This Festive Tree Cake turns simple ingredients into an impressive centerpiece without requiring advanced baking skills. The cake itself is moist and tender, while the buttercream frosting holds decorations beautifully and tastes absolutely divine.
It’s also incredibly versatile—you can customize the colors, decorations, and even the cake flavor to match your holiday theme. Kids especially love helping with the decorating process, making it a fun family activity.
Plus, this cake can be made a day ahead, which means less stress on the actual holiday. Just store it in the fridge and bring it to room temperature before serving.
Ingredients You’ll Need
The beauty of this recipe is that it uses pantry staples you likely already have on hand. All-purpose flour, sugar, butter, eggs, and vanilla form the base of this delicious cake.
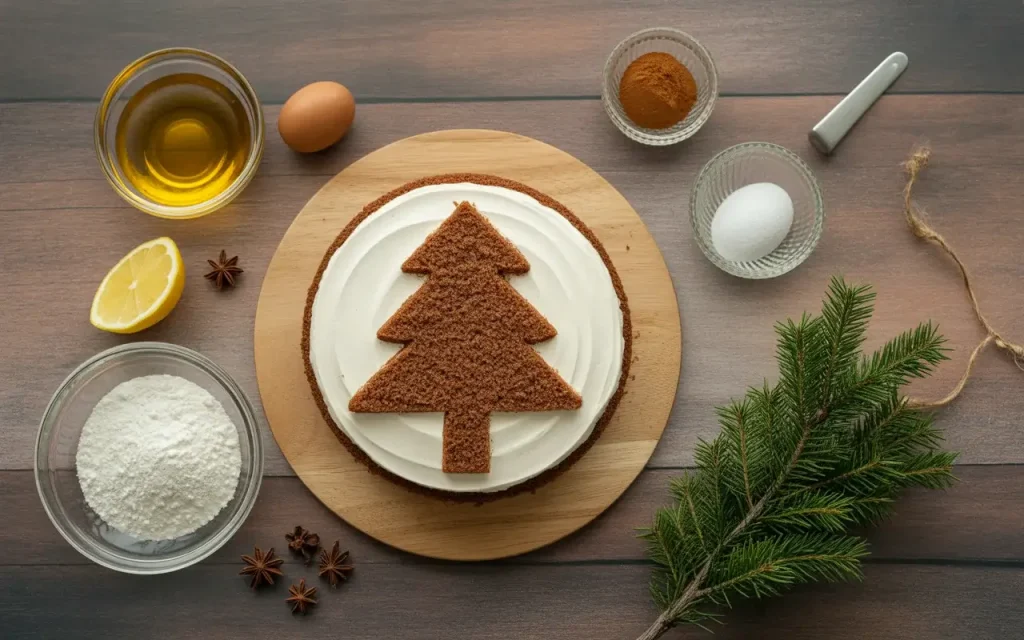
For the frosting, you’ll need butter, powdered sugar, milk, and green food coloring to create that signature tree look. The decorations are where you can get creative—mini chocolate chips, sprinkles, candies, or even fresh rosemary sprigs work beautifully.
Don’t skip the salt in the cake batter. It enhances all the other flavors and keeps the sweetness balanced. Quality vanilla extract also makes a noticeable difference in the final taste.
How to Make Festive Tree Cake
Start by prepping your pans, you’ll need one 9-inch round pan and one 8-inch round pan for the tiered tree effect. Grease them well and line the bottoms with parchment paper to ensure easy removal.
Mix your dry ingredients separately from your wet ingredients, then combine them gently to avoid overmixing. Divide the batter proportionally between the pans, with more going into the larger pan.
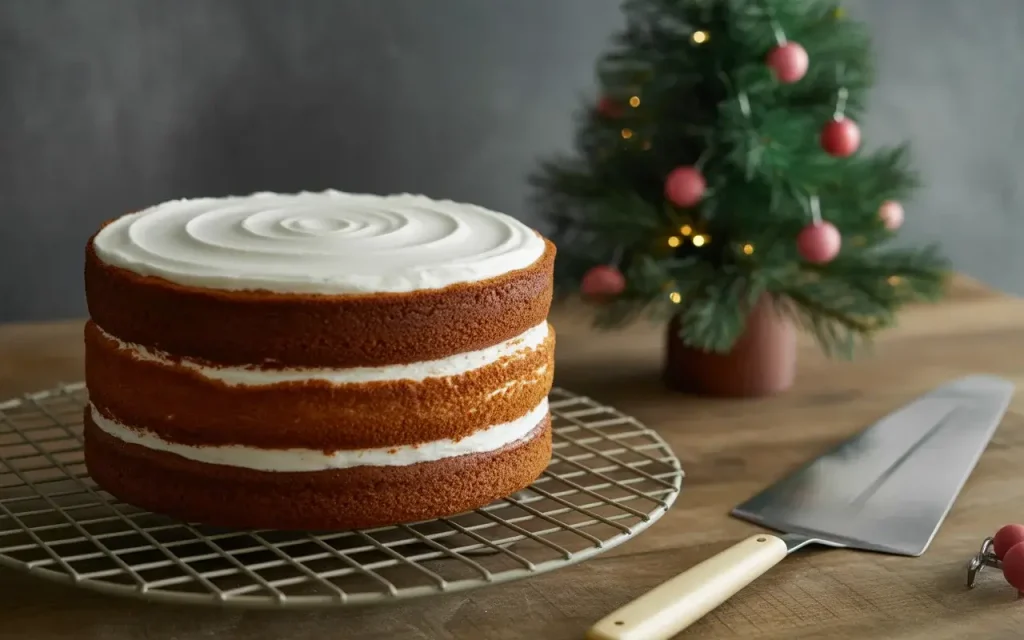
Bake until a toothpick inserted in the center comes out clean, then cool completely before frosting. This step is crucial, frosting warm cake will result in a melted mess.
Festive Tree Cake
Course: DessertCuisine: AmericanDifficulty: Medium4
servings30
minutes1
5
minutes1
35
minutesA stunning Christmas tree-shaped layer cake with vanilla sponge and green buttercream frosting, perfect for holiday celebrations.
Ingredients
- For the Cake
3 cups all-purpose flour
2½ cups granulated sugar
1 cup unsalted butter, softened
4 large eggs, room temperature
1 cup whole milk, room temperature
½ cup sour cream
2 tablespoons vanilla extract
1 tablespoon baking powder
½ teaspoon salt
- For the Buttercream
1½ cups unsalted butter, softened
6 cups powdered sugar
¼ cup heavy cream
2 teaspoons vanilla extract
Green gel food coloring
Pinch of salt
- For Decorating
Assorted candies and sprinkles
Mini chocolate chips
Gold or silver star decoration
Powdered sugar for dusting
Directions
- Preheat oven to 350°F (175°C). Grease one 9-inch round pan and one 8-inch round pan, then line bottoms with parchment paper.
- In a large bowl, whisk together flour, baking powder, and salt. Set aside.
- In a separate bowl, cream butter and sugar with an electric mixer until light and fluffy, about 3 minutes.
- Add eggs one at a time, beating well after each addition. Mix in vanilla extract.
- Add sour cream and mix until combined.
- Alternately add flour mixture and milk to the butter mixture in three additions, beginning and ending with flour. Mix until just combined.
- Pour approximately 3 cups of batter into the 9-inch pan and 2 cups into the 8-inch pan.
- Bake for 30-35 minutes, or until a toothpick inserted in the center comes out clean. The smaller cake will finish first.
- Cool cakes in pans for 10 minutes, then turn out onto wire racks to cool completely.
- For the buttercream, beat butter until creamy. Gradually add powdered sugar, one cup at a time.
- Add cream, vanilla, and salt. Beat on high for 3 minutes until light and fluffy. Add green food coloring until desired shade is reached.
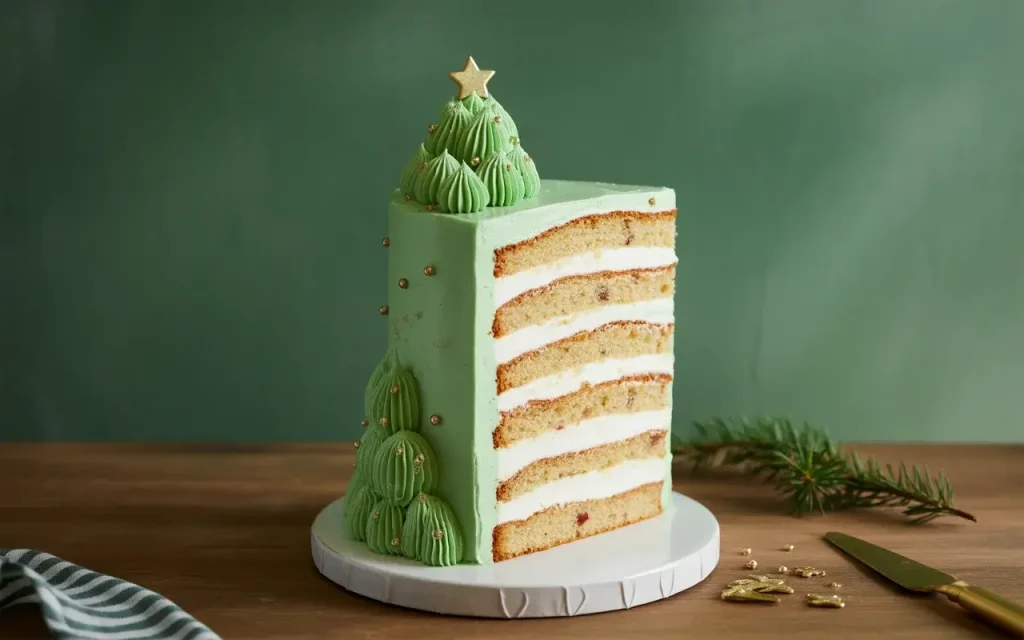
- Level cake tops if needed. Place the 9-inch cake on your serving plate and spread with frosting.
- Center the 8-inch cake on top to create the tree shape.
- Apply a thin crumb coat of frosting, then refrigerate for 15 minutes.
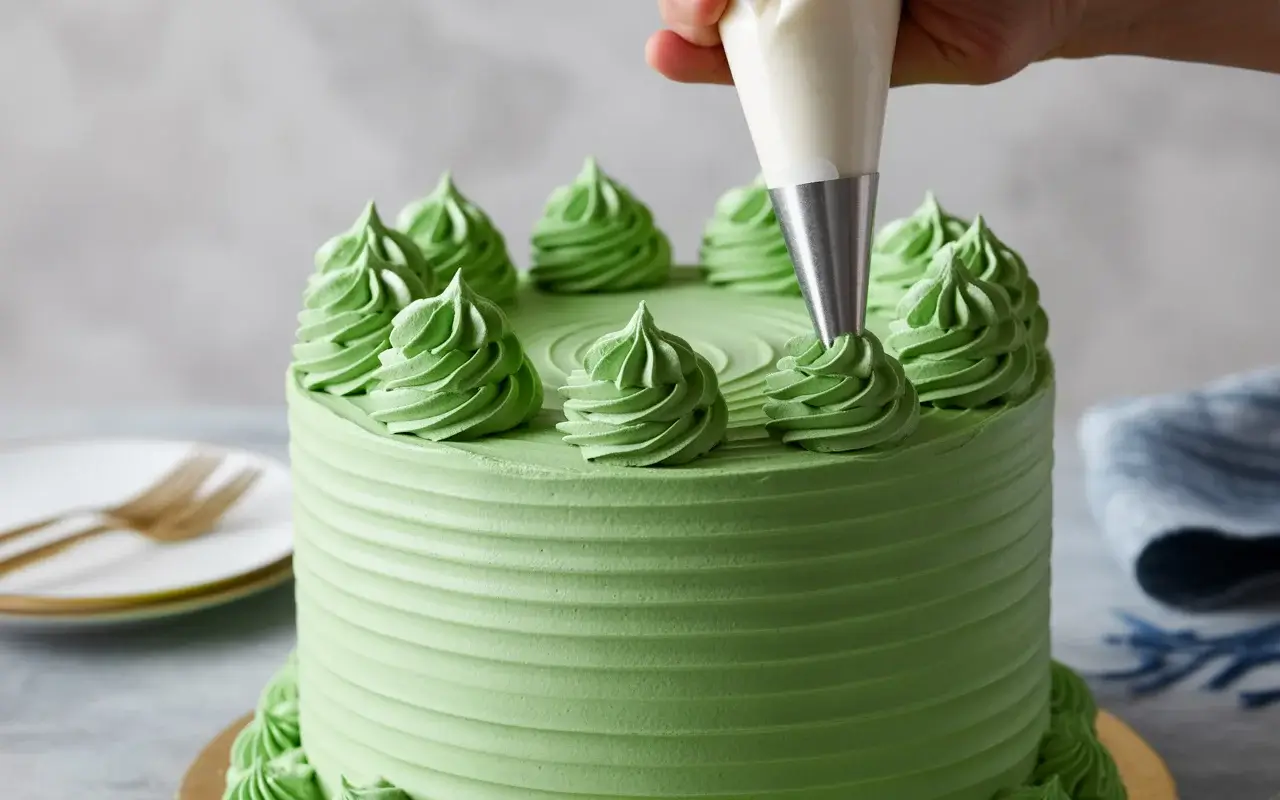
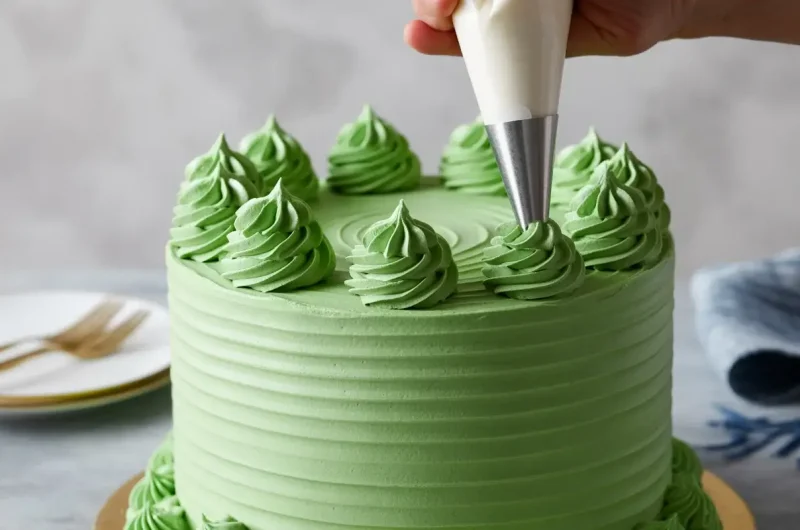
- Apply final layer of frosting, creating swirls or peaks for texture.
- Decorate with candies, chocolate chips, and star topper. Dust with powdered sugar before serving.
Notes
- Flavor Variations: Swap vanilla for almond extract, or add 1 teaspoon of peppermint extract for a festive twist.
Frosting Tips: If frosting is too thick, add more cream 1 tablespoon at a time. If too thin, add more powdered sugar.
Size Options: You can make this with three 6-inch rounds stacked for a taller tree effect.
Make It Chocolate: Replace ½ cup flour with cocoa powder for chocolate cake layers.
Dairy-Free: Use plant-based butter and non-dairy milk for both cake and frosting.
Nutrition Information (Per Serving)
| Nutrient | Amount |
|---|---|
| Calories | 685 |
| Total Fat | 32g |
| Sugars | 78g |
| Protein | 5g |
Decorating Your Tree Cake
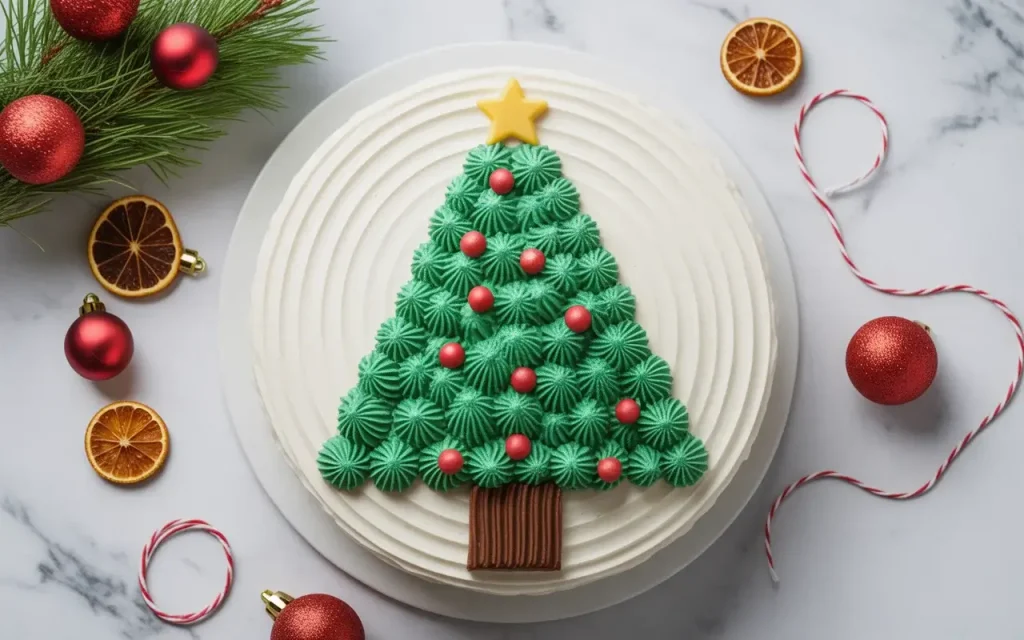
Once your cakes are cooled, trim the tops flat if needed to create stable layers. Place the larger cake on your serving plate, frost the top, then add the smaller cake on top to create the tree shape.
Apply a thin crumb coat of green frosting first, then chill for 15 minutes before adding the final thick layer. Use a spatula or piping bag to create texture that mimics tree branches.
Now comes the fun part, add your decorations! Place a star on top, then add “ornaments” using colorful candies, chocolate chips. Dust with powdered sugar for a snowy effect.
Storage and Make-Ahead Tips
This cake stores beautifully in the refrigerator for up to 4 days when covered properly. Use a cake dome or wrap it loosely with plastic wrap to prevent the frosting from smudging.
You can bake the cake layers a day ahead and store them wrapped tightly at room temperature. You can even freeze unfrosted layers for up to 3 months. Just thaw completely before decorating.
If you’ve already decorated the cake, bring it to room temperature 30 minutes before serving for the best texture and flavor. The buttercream will soften slightly and taste much better than when cold.
Frequently Asked Questions
Can I make this cake ahead of time?
Yes! Bake the cake layers up to 2 days ahead and store wrapped at room temperature. You can also freeze unfrosted layers for up to 3 months. Decorate the cake up to 24 hours before serving and refrigerate.
What if I don’t have two different sized pans?
You can use three 6-inch pans for a taller tree, or simply stack two same-sized layers and trim one into a smaller circle with a knife. Another option is to bake the batter in one 9×13 pan and cut out circles in graduating sizes.
How do I get the frosting that perfect green color?
Use gel food coloring rather than liquid—it gives more vibrant color without thinning the frosting. Start with a small amount and add gradually until you reach your desired shade. Wilton’s u0022Leaf Greenu0022 or u0022Kelly Greenu0022 work beautifully for this recipe.