Easy Carrot Cake Roll with Creamy Filling Recipe
I’ve been perfecting this carrot cake roll for over three years, and it’s become my signature dessert for spring gatherings and Easter celebrations. The soft, spiced cake paired with tangy cream cheese filling creates an impressive dessert that tastes like traditional carrot cake but rolls up beautifully without cracking.
The secret is my specific cooling technique that keeps the cake flexible. After testing this recipe nearly 20 times, I discovered that rolling the cake while it’s still warm prevents those frustrating cracks that plagued my first few attempts. The result is a gorgeous spiral cake that slices into perfect pinwheels every single time.
Step-by-Step Instructions
Step 1: Prepare Your Pan and Batter
Line a 10×15-inch jelly roll pan with parchment paper, leaving a 2-inch overhang on the short ends for easy removal. I spray both the pan and paper with cooking spray because I learned the hard way that skipping this step causes the cake to stick. In a large bowl, whisk together 3/4 cup all-purpose flour, 1 teaspoon baking powder, 1 teaspoon ground cinnamon, 1/2 teaspoon ground ginger, 1/4 teaspoon ground nutmeg, and 1/4 teaspoon salt.
In a separate bowl, beat 3 large eggs with 2/3 cup granulated sugar on high speed for 3-4 minutes until thick and pale yellow. The mixture should ribbon off the beaters, which I discovered is crucial for creating that light, airy texture. Fold in 1 cup finely grated carrots and 1/2 cup chopped walnuts if using.
Step 2: Bake Until Just Set
Bake at 375°F for 10-12 minutes until the cake springs back when lightly touched. I set my timer for 10 minutes and check it then because overbaking by even 2 minutes makes the cake dry and prone to cracking when you roll it. The edges should just start pulling away from the pan, and you’ll smell that wonderful warm cinnamon aroma filling your kitchen.
Watch for the surface to lose its shine and turn matte. When I press gently in the center, it should feel springy, not wet or sticky. The cake will be lightly golden around the edges but still pale in the center.
Step 3: Roll While Warm
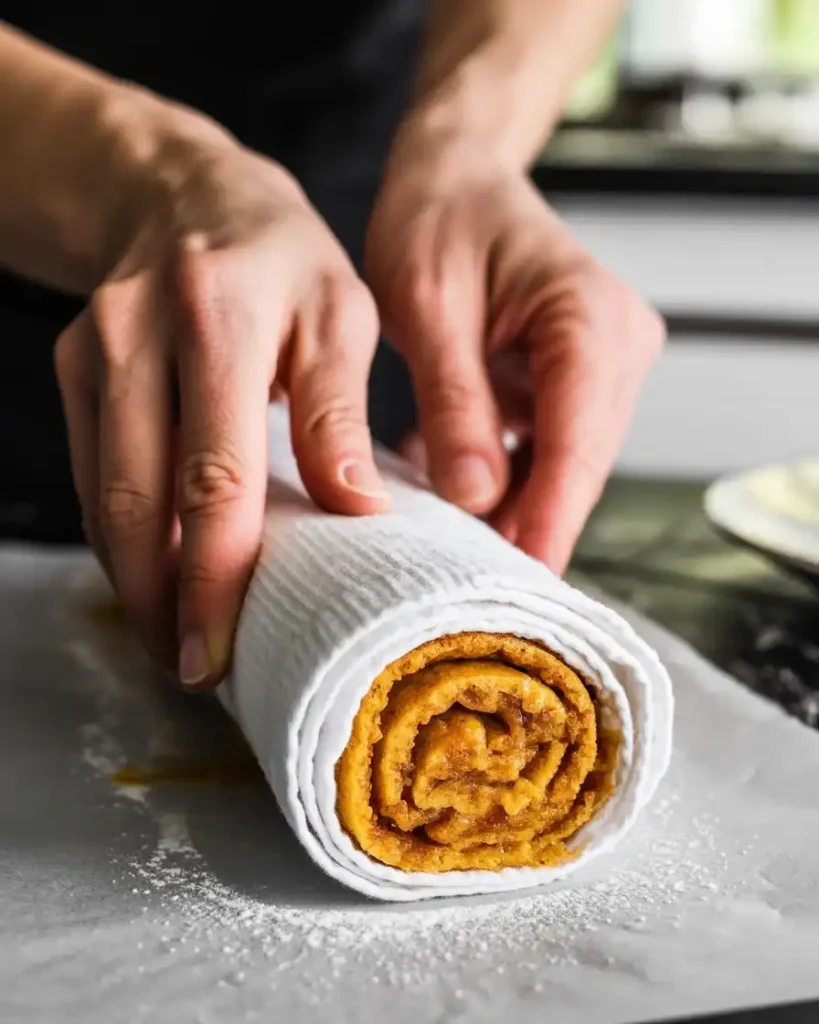
Immediately dust a clean kitchen towel generously with powdered sugar, using about 1/4 cup. Flip the hot cake onto the towel and carefully peel off the parchment paper in one smooth motion. Starting from a short end, roll the cake tightly with the towel inside. This is my critical trick that I discovered after my third failed attempt when the cake cracked into pieces because I let it cool flat.
The warm cake is pliable and rolls without breaking. I roll it as tightly as I can without squeezing, creating a spiral about 2-3 inches in diameter. Let it cool completely in this rolled position for at least 1 hour on a wire rack. You’ll feel the cake firm up as it cools, which sets the shape memory.
Step 4: Make the Cream Cheese Filling

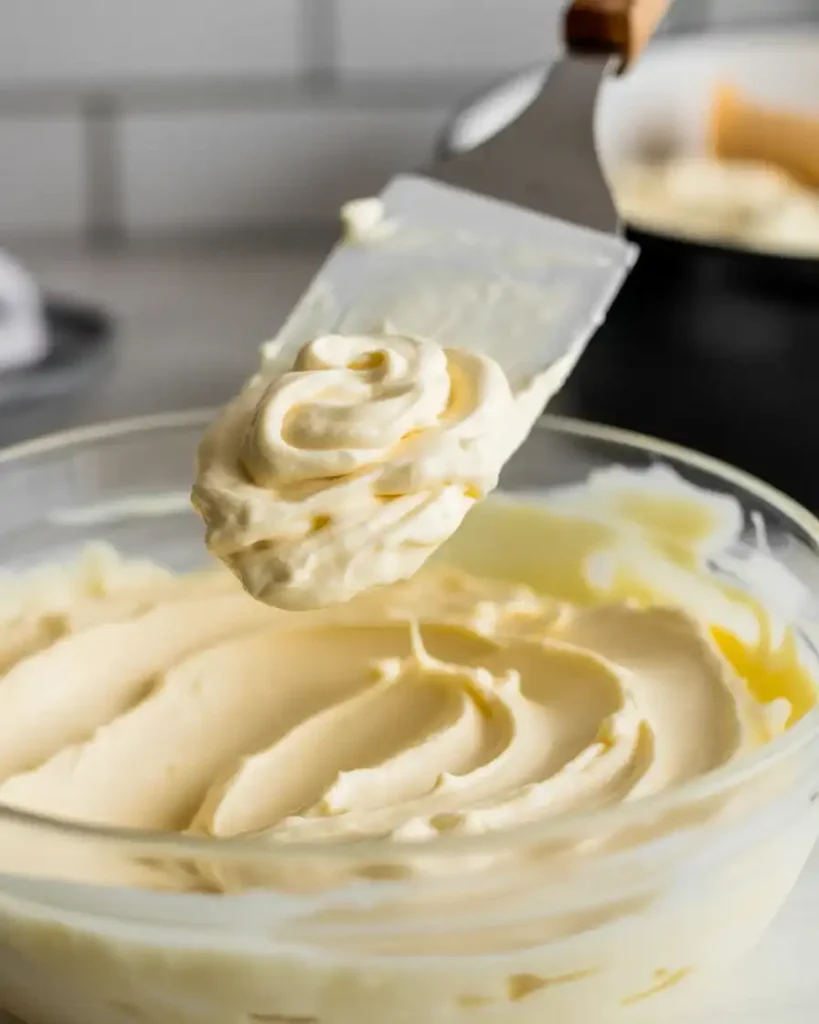
Beat 8 ounces of softened cream cheese with 1/4 cup softened butter on medium speed for 2 minutes until completely smooth and fluffy. I tested this with cold cream cheese once, and the filling had lumps that ruined the smooth texture. Add 1 1/2 cups powdered sugar, 1 teaspoon vanilla extract, and a pinch of salt, then beat for another 2-3 minutes until light and creamy.
The filling should be spreadable but not runny. When I lift the beaters, it should hold soft peaks. If it seems too stiff, I add 1-2 teaspoons of milk to reach the perfect consistency. The filling will firm up slightly when refrigerated, so keep it just soft enough to spread easily.
Step 5: Unroll and Fill
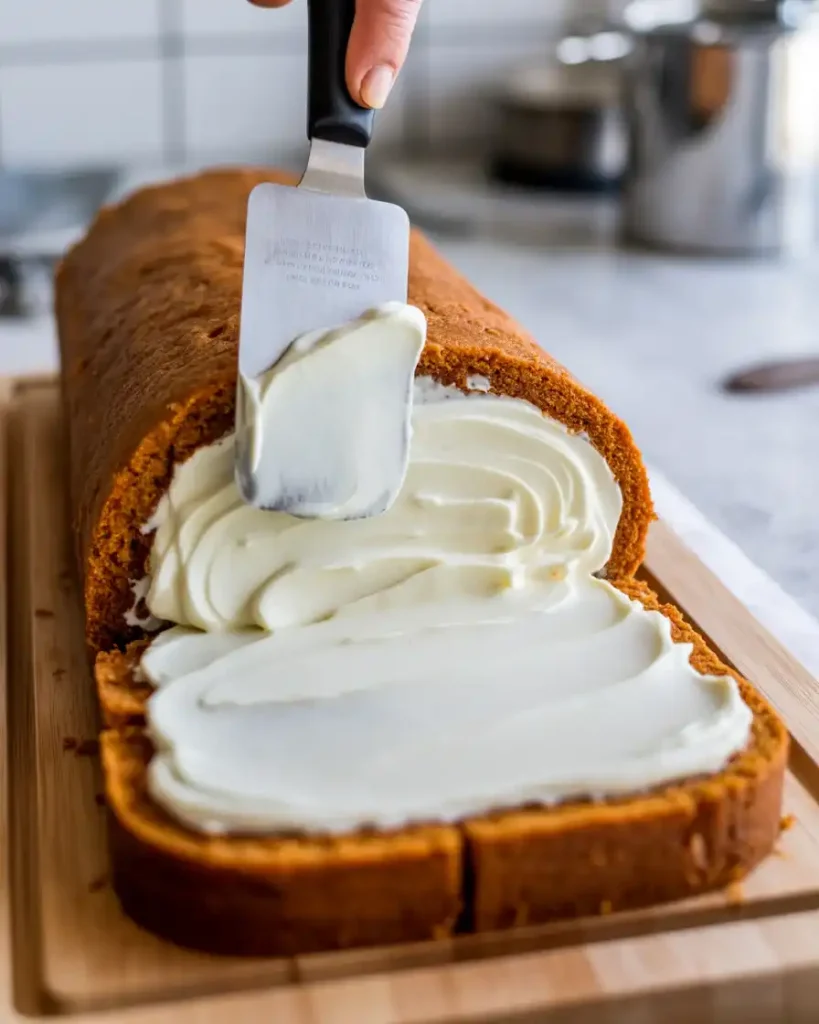
Carefully unroll the cooled cake and remove the towel. The cake will want to curl slightly, which is perfect. Spread the cream cheese filling evenly over the entire surface, leaving a 1/2-inch border on all sides. I use an offset spatula and spread from the center outward, using about 1 1/2 cups of filling total. Don’t overfill or it will squish out when you roll it.
Work quickly because the filling can start to soften from the warmth of your hands. I’ve learned to spread it in one smooth motion rather than going back and forth, which can tear the delicate cake. The border prevents filling from oozing out the ends.
Step 6: Roll and Chill
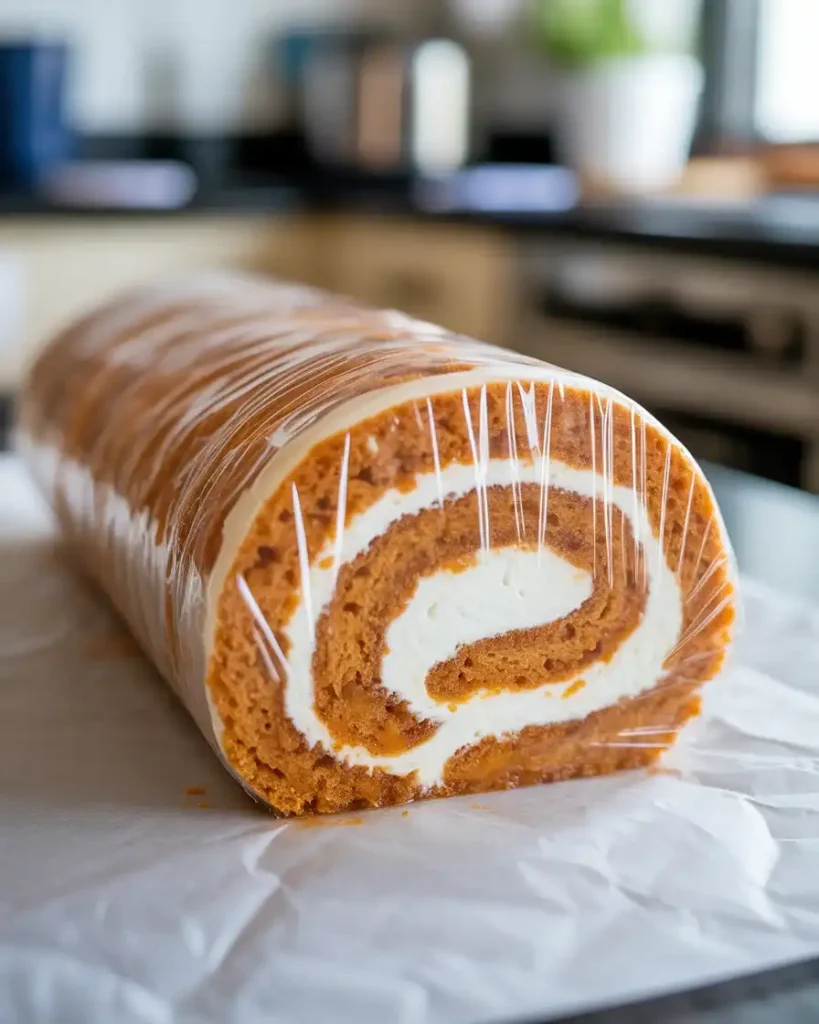
Starting from the same short end as before, roll the cake tightly without the towel this time. The cake will remember its shape and roll easily. I wrap the finished roll tightly in plastic wrap, seam side down, and refrigerate for at least 2 hours or up to 24 hours. This chilling time is essential because I once tried to slice it immediately and the filling squished out everywhere.
The cold filling firms up and holds everything together perfectly. When you’re ready to serve, unwrap the roll and trim about 1/4 inch off each end for clean, pretty slices. Use a sharp serrated knife and wipe it clean between cuts for those magazine-worthy spiral slices.
Step 7: Dust and Serve
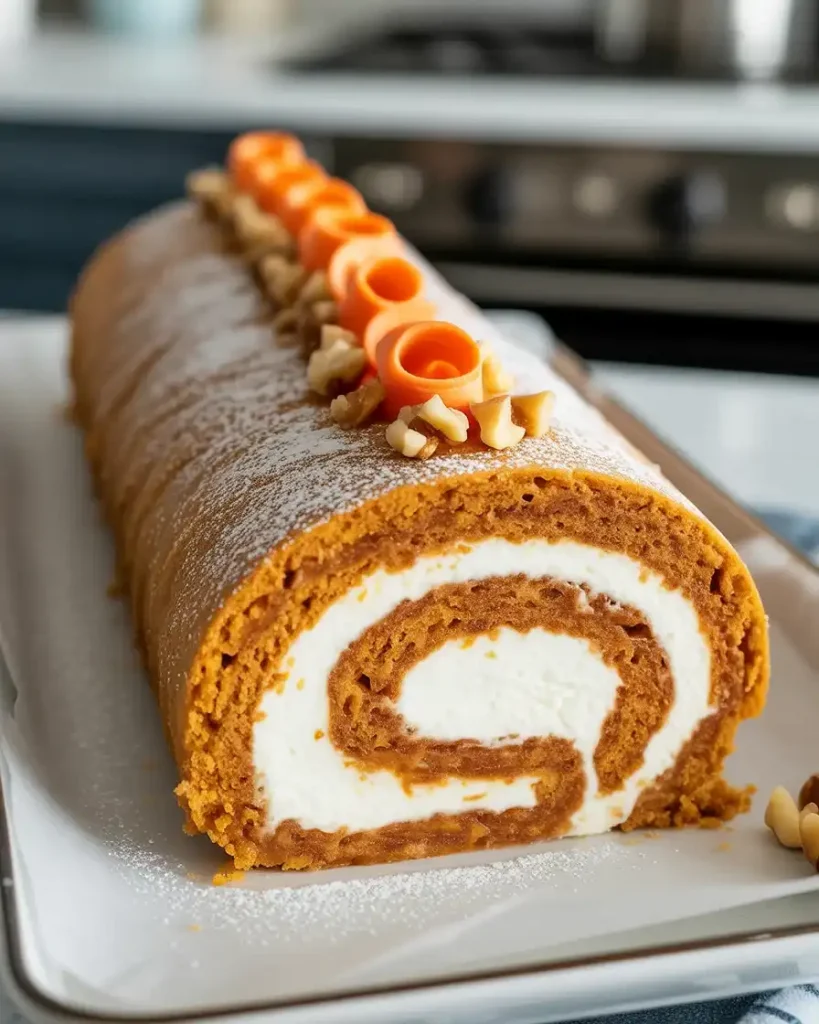
Just before serving, dust the top generously with powdered sugar using a fine-mesh sieve. I find that adding a light sprinkle of cinnamon mixed with the powdered sugar enhances the presentation and adds a hint of extra spice aroma. Slice with a sharp serrated knife, wiping the blade between cuts to keep each slice pristine.
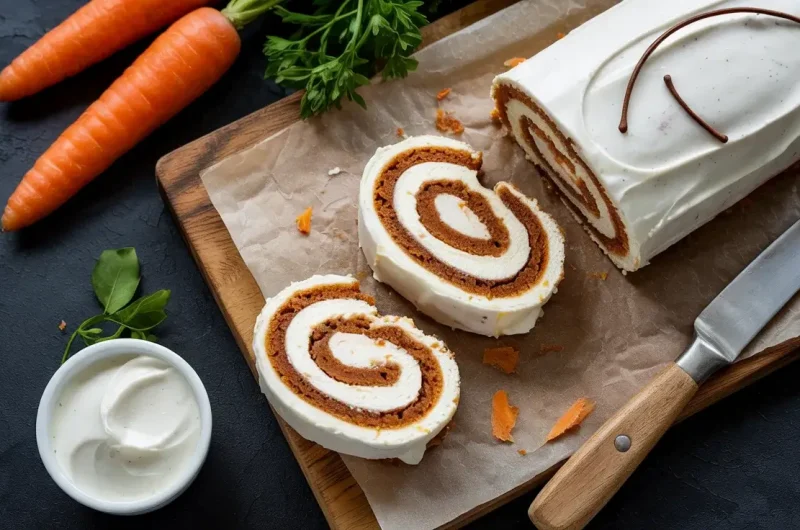
Each slice should reveal a beautiful spiral of cake and filling. I typically get 10-12 slices from one roll. Serve chilled or at cool room temperature, garnished with a small carrot curl or chopped walnuts if desired.
Easy Carrot Cake Roll with Creamy Filling Recipe
Course: DessertCuisine: AmericanDifficulty: Intermediate10
servings30
minutes2
hours2
hours30
minutesIngredients
- For the Cake:
3/4 cup cake flour
1 teaspoon baking powder
1 teaspoon ground cinnamon
1/2 teaspoon ground nutmeg
1/2 teaspoon salt
3 large eggs
3/4 cup granulated sugar
1/3 cup vegetable oil
1 cup finely grated carrots
Powdered sugar for dusting
- For the Cream Filling:
8 oz cream cheese, softened
4 tablespoons butter, softened
1 1/2 cups powdered sugar
1 teaspoon vanilla extract
Directions
- Preheat oven to 375°F. Line a 10×15-inch jelly roll pan with parchment paper.
- Whisk together flour, baking powder, cinnamon, nutmeg, and salt in a medium bowl.
- Beat eggs and granulated sugar with an electric mixer until thick and pale, about 3 minutes.
- Fold in flour mixture gently, then stir in oil and grated carrots until just combined.
- Spread batter evenly in the prepared pan. Bake 10-12 minutes until the cake springs back when lightly touched.
- Immediately turn the cake onto a clean kitchen towel dusted with powdered sugar. Remove parchment and roll the cake in a towel from the short end. Cool completely.
- Beat cream cheese and butter until smooth. Gradually add powdered sugar and vanilla, beating until fluffy.
- Unroll the cake carefully. Spread filling evenly, leaving 1-inch borders. Reroll without a towel.
- Wrap in plastic wrap and refrigerate for 2 hours before slicing.
Notes
- Use finely grated carrots to prevent tearing during rolling
Don’t overbake – the cake should be just set to remain flexible
Roll while warm to prevent cracking
Store covered in the refrigerator up to 3 days
Nutrition Information (Per Serving)
| Nutrient | Amount per Serving |
|---|---|
| Calories | 285 kcal |
| Total Fat | 18g |
| Sugars | 22g |
| Protein | 4g |
| Dietary Fiber | 1g |
Trusted Resource Links
For safe food handling practices when working with eggs and dairy products, visit the FDA Safe Food Handling guide.
For more information on heart-healthy baking modifications and ingredient substitutions, check out the American Heart Association’s Healthy Eating resources.
How Do You Prevent the Cake from Cracking When Rolling?
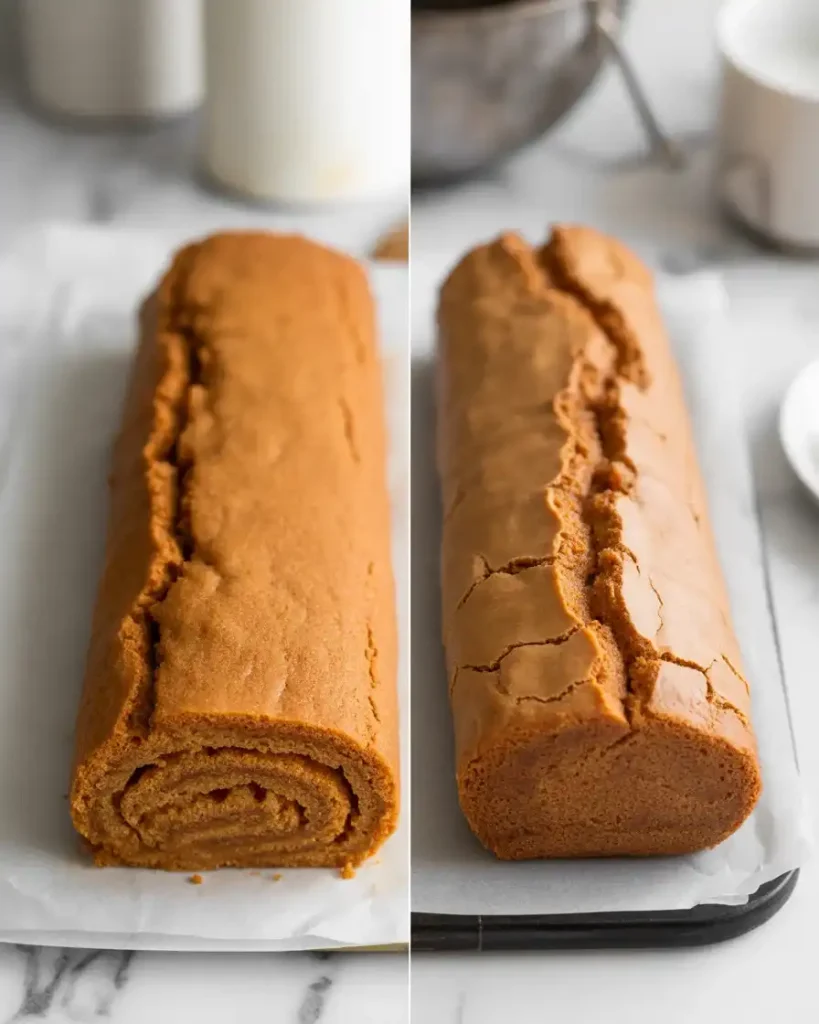
The key is rolling the cake while it’s still warm and pliable. I discovered this after several cracked attempts in my early testing.
Immediately after baking, flip the cake onto a powdered sugar-dusted towel and roll it with the towel inside. The warm cake is flexible and takes on the rolled shape without breaking. As it cools in this position, it develops a “memory” that makes the second roll much easier.
I tested letting one cake cool flat before rolling, and it cracked in three places. The warm rolling technique works because the cake’s structure is still soft enough to bend. The powdered sugar prevents sticking, and the towel maintains even moisture distribution.
Make sure your cake isn’t overbaked, which I learned makes it dry and brittle. Check it at 10 minutes and remove it as soon as it springs back to touch. Those extra 2-3 minutes of baking can be the difference between a perfect roll and a cracked disaster.
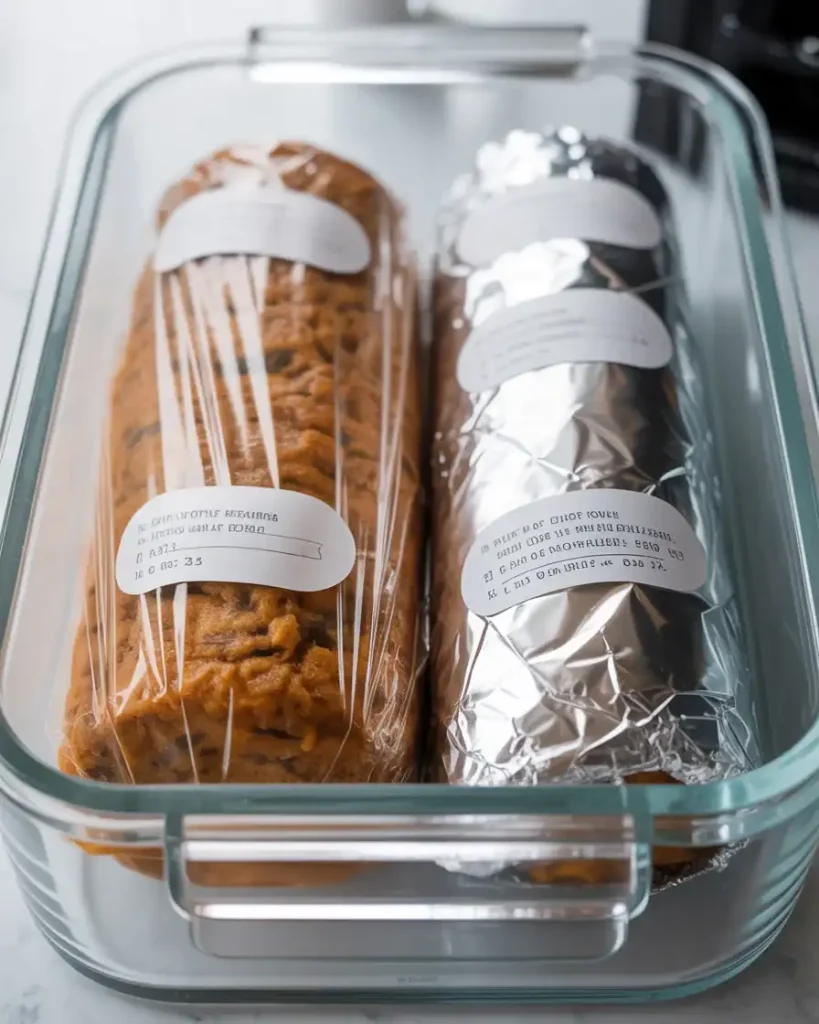
Can You Make Carrot Cake Roll Ahead of Time?
Absolutely, and it actually tastes better after sitting overnight. I always make mine at least one day ahead for parties.
The assembled and filled roll can be wrapped tightly in plastic wrap and refrigerated for up to 3 days before serving. The flavors meld together beautifully, and the cake softens slightly while absorbing some moisture from the filling. I’ve tested this at 1 day, 2 days, and 3 days, and found that day 2 offers the best texture.
For longer storage, I wrap the unfilled rolled cake in plastic wrap and then aluminum foil, and freeze it for up to 1 month. Thaw it overnight in the refrigerator while still wrapped to prevent condensation. Then unroll, fill, and re-roll as directed.
Don’t dust with powdered sugar until just before serving, as it will absorb moisture and disappear if added too early. I learned this when I dusted a roll 4 hours ahead and the sugar completely dissolved by serving time.
The make-ahead nature makes this perfect for holiday entertaining when you need to prepare dishes in advance. Just slice and serve straight from the refrigerator.
What’s the Best Way to Grate Carrots for This Recipe?
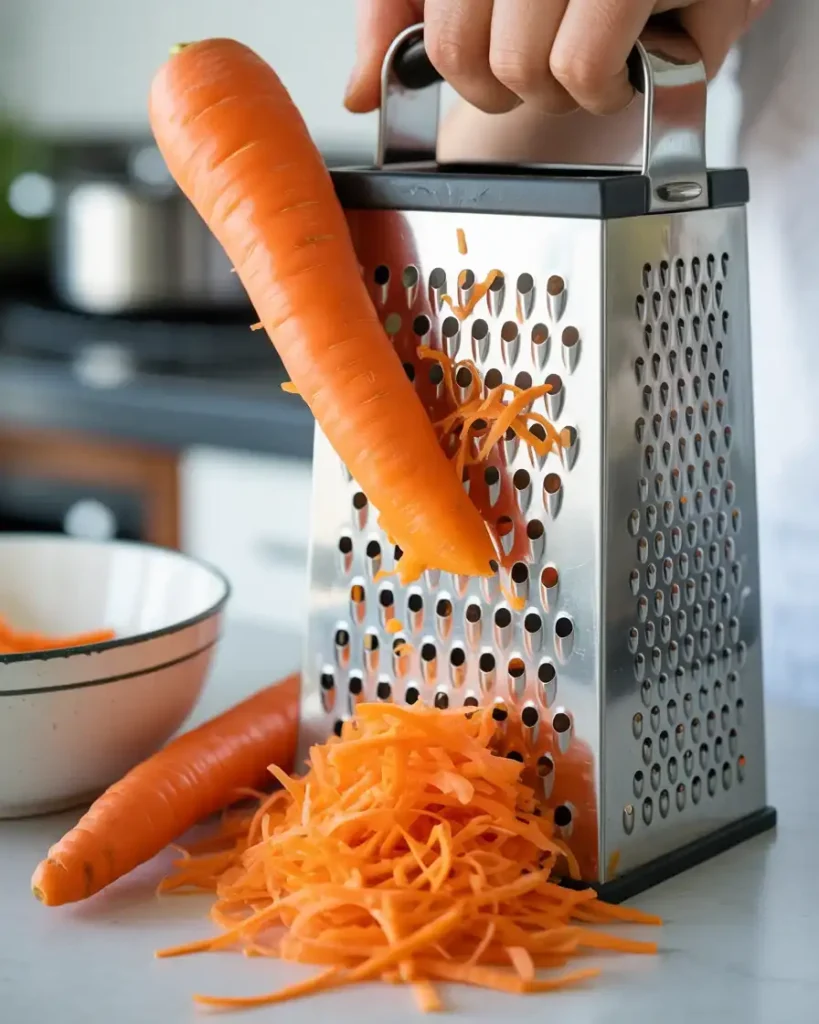
Use the fine holes on a box grater for the most tender cake texture. I’ve tested every grating method over my 20+ batches.
Finely grated carrots distribute evenly throughout the batter and bake into the cake almost invisibly, creating moisture without chunks. I tried using large-hole grated carrots once, and they created pockets of moisture that made the cake soggy in spots. The fine grate also releases more carrot juice, which adds natural sweetness and helps keep the thin cake layer moist during rolling.
Food processor shredding works in a pinch, but it tends to make longer, stringier pieces that don’t distribute as evenly. I pulse about 10 times to get smaller pieces if using this method.
One large carrot yields about 1 cup grated, which is exactly what you need. Peel the carrot first, and press it firmly against the grater using downward strokes. Watch your knuckles as the carrot gets smaller.
How Thick Should the Cream Cheese Filling Be?
The filling should be spreadable like soft frosting but hold its shape when you lift the spatula. I’ve adjusted this ratio through multiple tests.
Beat the cream cheese and butter together until completely smooth before adding the powdered sugar. If your filling is too stiff, it will tear the delicate cake when you try to spread it. I add 1-2 teaspoons of milk or cream to thin it slightly if needed. The goal is a consistency similar to softened peanut butter.
If the filling is too thin, it will squish out the sides when you roll the cake and create a messy presentation. I once used cream cheese straight from the refrigerator, and the lumps never smoothed out completely. Always use room temperature cream cheese and butter, which means letting them sit out for about 1 hour before making the filling.
Can You Add Mix-Ins or Variations to This Recipe?
You can customize this cake roll with various mix-ins, but I’ve learned to keep them small and minimal. Too many add-ins make the cake dense and difficult to roll.
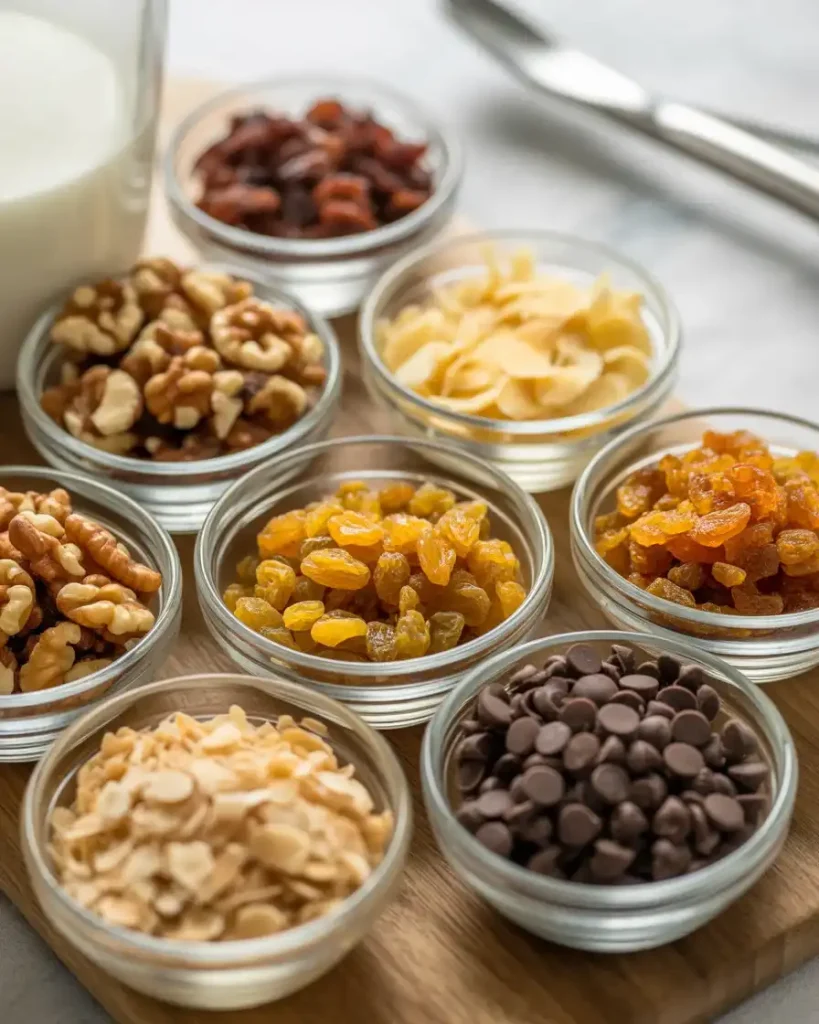
I’ve successfully added 1/2 cup of finely chopped walnuts or pecans directly to the batter. Toast them first for 5 minutes at 350°F to enhance their flavor. Raisins work too, but I soak them in warm water for 10 minutes and pat them dry before folding them in, which I discovered prevents dry spots in the cake.
For the filling, I sometimes mix in 2 tablespoons of finely chopped crystallized ginger for a spicy kick, or fold in 1/4 cup of toasted coconut. Keep add-ins finely chopped so they don’t create bumps that show through the rolled exterior.
I tested adding pineapple once, thinking it would be like hummingbird cake, but the extra moisture made the cake soggy and it fell apart. Stick to dry or drained ingredients for best results. A sprinkle of mini chocolate chips in the filling is my family’s favorite variation.
Discover More Delicious Recipes
Frequently Ask Question
Can I make this carrot cake roll ahead of time?
Yes! This roll tastes better after chilling overnight. Make it up to 2 days ahead and store wrapped in the refrigerator.
Why did my cake crack when rolling?
Cracking usually happens from overbaking or letting the cake cool too much before rolling. Roll while still warm and slightly flexible.
Can I freeze the carrot cake roll?
Absolutely. Wrap tightly in plastic wrap and aluminum foil. Freeze up to 3 months. Thaw overnight in the refrigerator before serving.
What if I don’t have cake flour?
Substitute 3/4 cup all-purpose flour minus 1 1/2 tablespoons, then add 1 1/2 tablespoons cornstarch. This creates a similar tender texture.