Baked Alaska Tarts
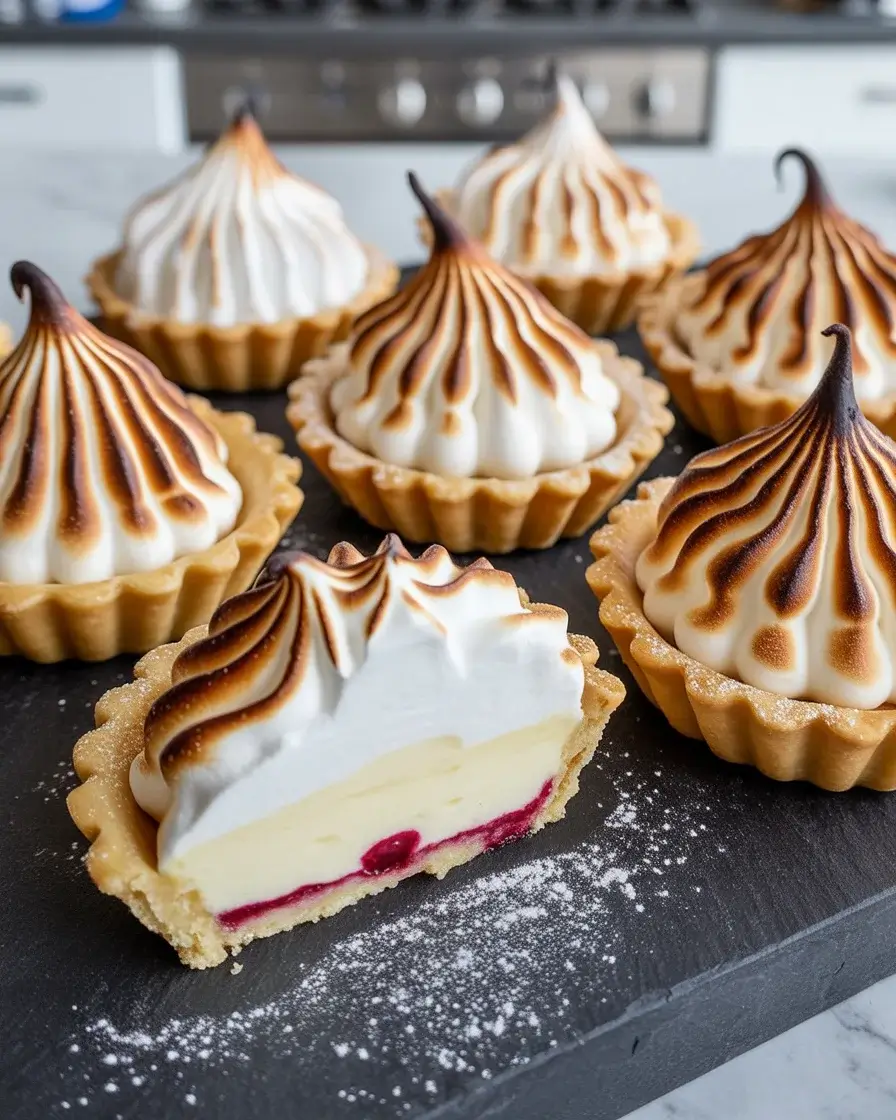
The first time I attempted baked Alaska, the whole thing slid off the plate and hit the floor – ice cream everywhere, meringue on my shoe. After rebuilding the concept into individual tarts, I cracked a method that actually works. These have a crisp pastry base, cold ice cream center, and golden meringue top that holds beautifully.
I’ve tested this about 15 times now, and the tart format changed everything. Individual portions mean faster assembly, cleaner torching, and zero structural collapse. They look stunning on a dessert plate and take less skill than the classic version.
Step-by-Step Instructions
Step 1: Make the Tart Shells

Blind bake your pastry shells at 375°F for 15 minutes with pie weights, then 5 more minutes without. They need to be fully baked and completely cool before any ice cream goes in – I learned this the hard way when a slightly warm shell melted my first layer in minutes.
You’re looking for a deep golden color and a hollow sound when you tap the bottom. Under-baked shells turn soggy fast.
Step 2: Fill With Ice Cream
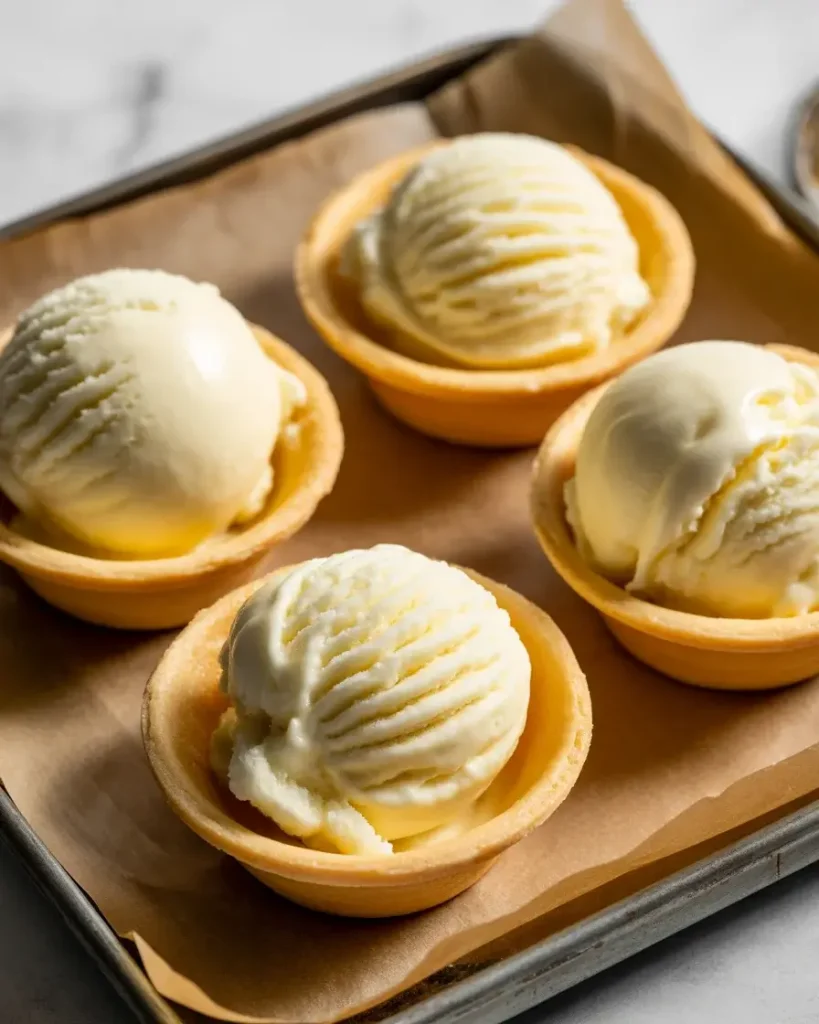
Scoop your ice cream of choice into each cooled shell, pressing it firmly to eliminate air pockets. I use a 1/4 cup scoop for consistency – exactly level with the tart rim is the sweet spot. Too high and the meringue won’t seal properly around the base.
Freeze the filled tarts for at least 2 hours. I once tried cutting this to 45 minutes and the meringue torching melted everything instantly.
Step 3: Make the Swiss Meringue
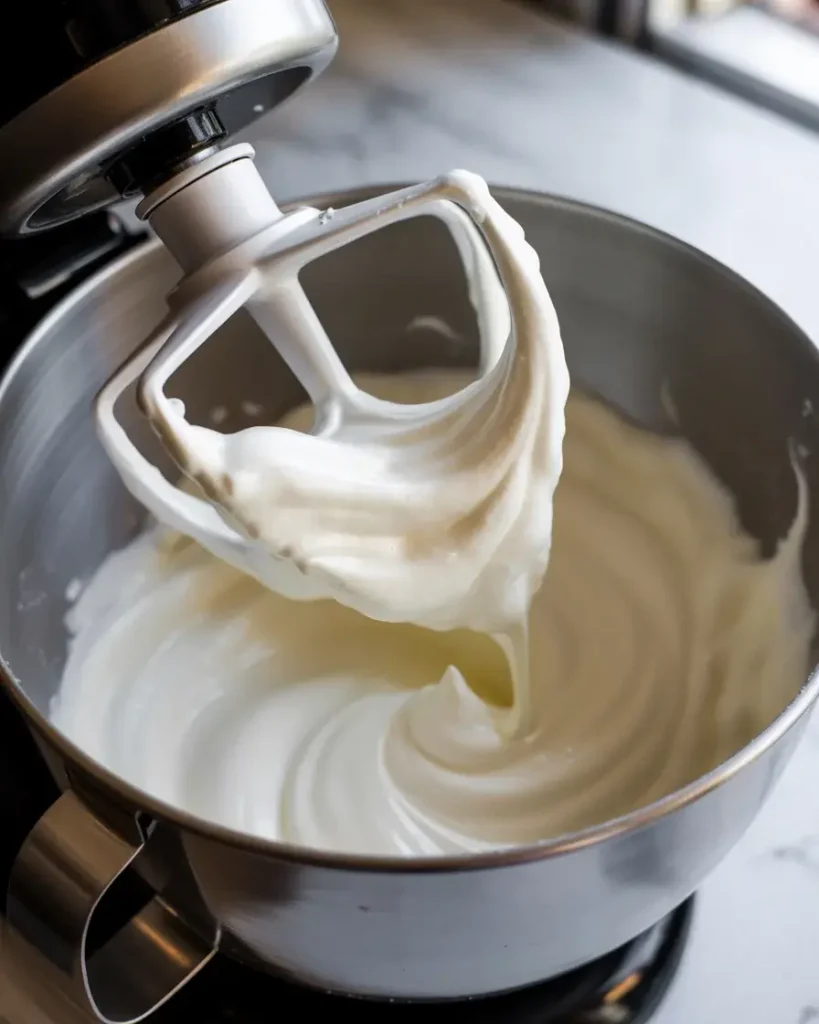
Whisk 3 egg whites and 3/4 cup sugar in a heatproof bowl over simmering water until the mixture reaches 160°F – about 4 minutes of constant stirring. The sugar must fully dissolve or your meringue will weep. I run a pinch between my fingers to check – no graininess means it’s ready.
Transfer to a stand mixer and beat on high for 8 minutes until you get stiff, glossy peaks that hold their shape.
Step 4: Pipe the Meringue
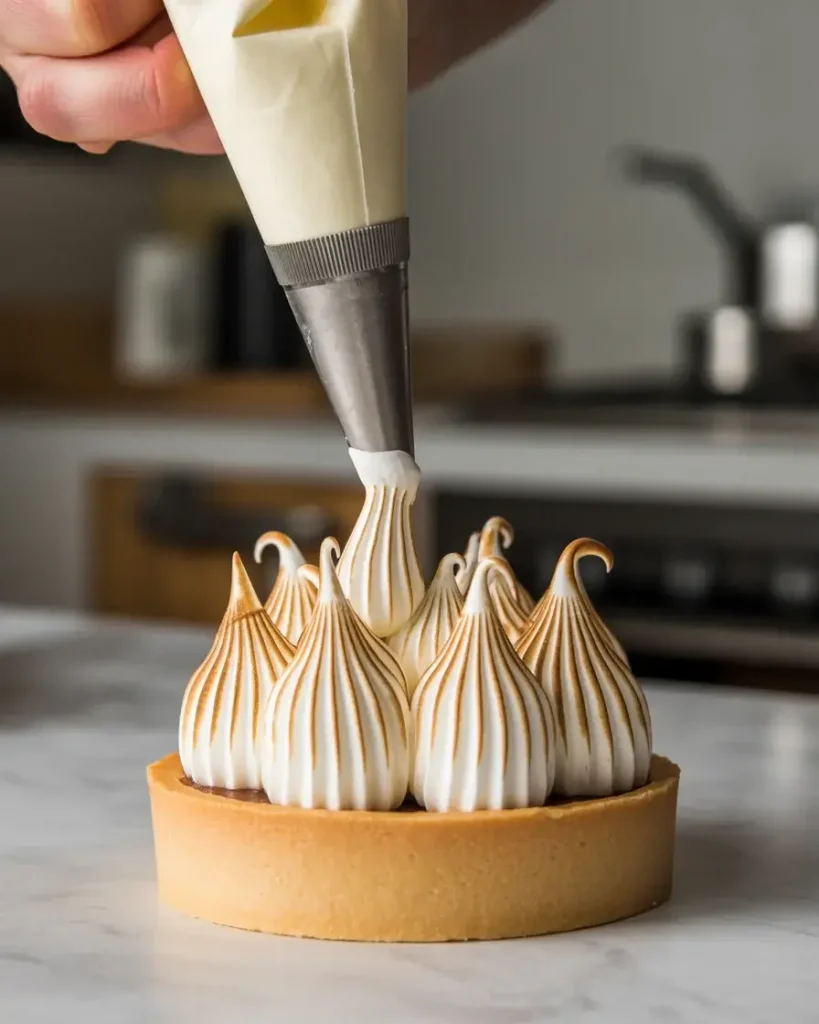
Work fast here – pull one tray of tarts from the freezer at a time. Pipe meringue in a circular motion starting from the outer edge and working inward and upward, fully sealing the ice cream inside. The meringue acts as insulation, so full coverage is critical.
I use a large star tip for visual texture – it gives those beautiful ridges that brown dramatically under the torch.
Discover More Delicious Recipes
Step 5: Torch and Serve Immediately
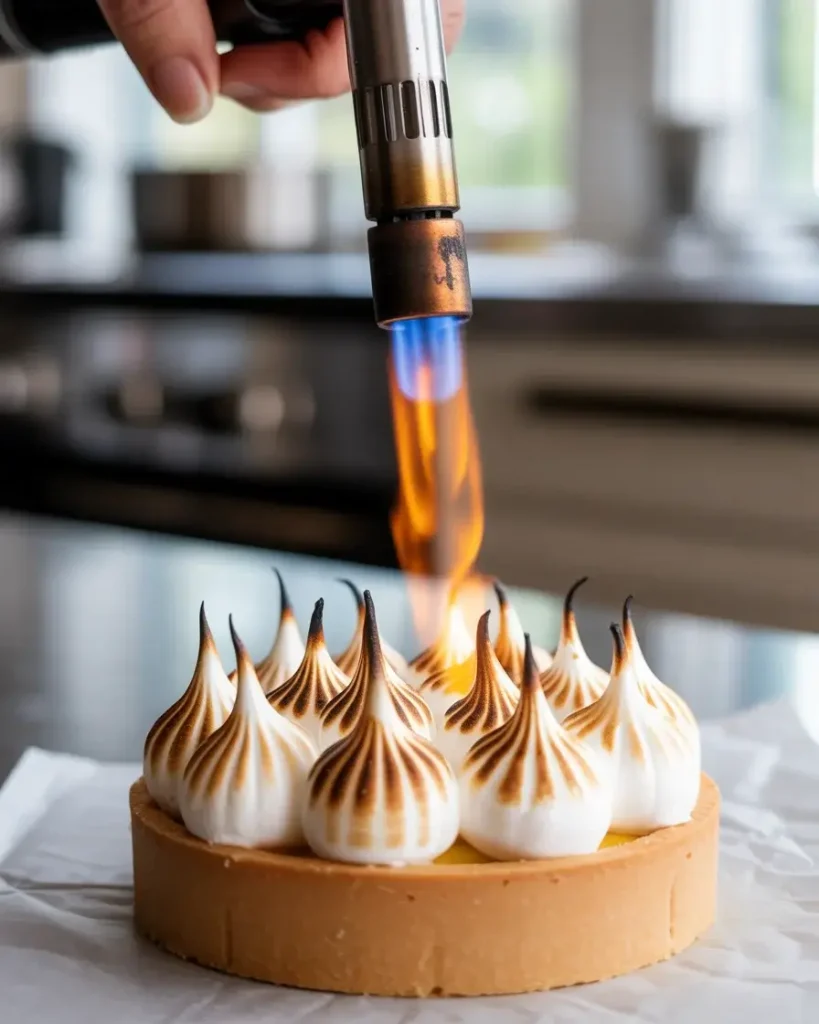
Hold your kitchen torch 3 to 4 inches from the meringue and move in constant circular sweeps. You want deep golden to lightly charred tips – this takes about 20 to 30 seconds per tart. The smell shifts from eggy to toasted marshmallow when it’s perfectly done.
Serve within 3 minutes of torching. I timed this repeatedly – beyond 5 minutes, the ice cream starts breaking through the base.
Baked Alaska Tarts
Course: DessertCuisine: American-FrenchDifficulty: Medium6
30
minutes20
50
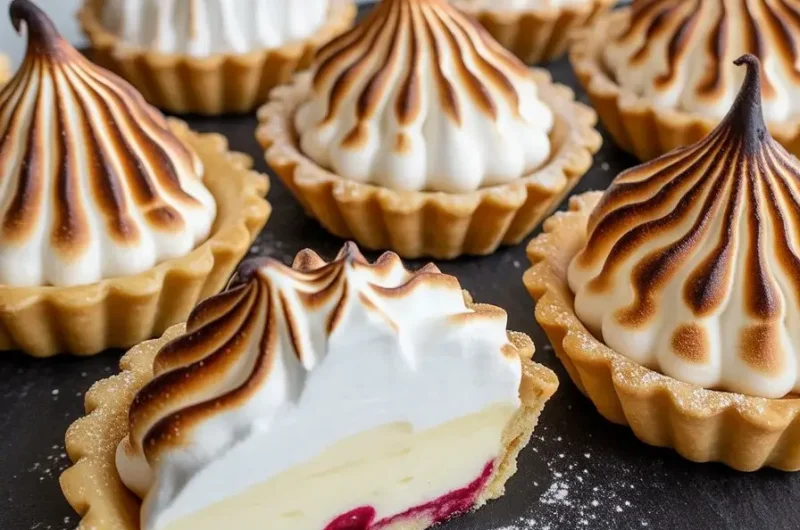
minutesIndividual baked Alaska tarts with crispy pastry shells, creamy ice cream filling, and golden Swiss meringue – a stunning dessert that’s far easier than the classic version.
Ingredients
1 sheet store-bought shortcrust pastry (or homemade)
1.5 cups vanilla ice cream (or flavor of choice)
3 large egg whites, room temperature
3/4 cup granulated sugar
1/4 tsp cream of tartar
1/2 tsp vanilla extract
Directions
- Preheat oven to 375°F. Press pastry into 6 mini tart pans and blind bake 15 minutes with weights, then 5 minutes uncovered until golden.
- Cool shells completely (at least 30 minutes). Fill each with a 1/4 cup scoop of ice cream, leveled to the rim.
- Freeze filled tarts uncovered for 2 hours minimum.
- Combine egg whites and sugar in a heatproof bowl over simmering water. Whisk constantly to 160°F, about 4 minutes.
- Transfer to stand mixer, add cream of tartar and vanilla, beat on high for 8 minutes to stiff glossy peaks.
- Working quickly, pipe meringue over each frozen tart, fully sealing the ice cream.
- Return to freezer immediately if not torching right away, or torch directly and serve within 3 minutes.
Notes
- Store unfinished assembled tarts (before torching) in the freezer for up to 24 hours.
Swap vanilla for salted caramel or coffee ice cream for a bolder flavor contrast.
If piping ahead, freeze uncovered so meringue peaks hold their shape before torching.
| Nutrient | Amount |
|---|---|
| Calories | 310 |
| Total Fat | 12g |
| Sugars | 34g |
| Protein | 5g |
Trusted Resource Links: For food safety guidance on using egg whites and safe temperature handling, visit the USDA Safe Temperature Chart and FDA Safe Food Handling.
Can You Make Baked Alaska Tarts Ahead of Time?
Yes – partially. You can fully assemble the tarts with ice cream and even piped meringue up to 24 hours ahead. Store uncovered in the freezer on a flat tray so the meringue keeps its shape.
The only step that must happen right before serving is torching. Torched meringue does not hold well after 10 to 15 minutes.
I tested storing torched tarts for 30 minutes and the meringue softened and wept. Pre-torch assembly is the move for dinner parties.
Pipe your meringue the morning of, freeze uncovered, then torch tableside for the wow factor. It is genuinely impressive and takes about 3 minutes per batch.
What Ice Cream Flavors Work Best in Baked Alaska Tarts?
Classic vanilla is the crowd favorite, but I’ve tested 8 combinations. Strawberry, salted caramel, and dark chocolate all work brilliantly because their flavor cuts through the sweetness of meringue.
Avoid anything with large chunks like rocky road – it makes the ice cream layer uneven and prevents a clean seal.
After testing fruit sorbets, I found they melt 30% faster than cream-based ice creams during torching. If you want to use sorbet, freeze the assembled tarts for 3 hours minimum instead of 2.
Coffee ice cream paired with a chocolate pastry shell is my personal favorite combination. The contrast of bitter, sweet, and toasted meringue is remarkable.
Why Does Meringue Weep or Collapse?
Weeping happens when undissolved sugar draws moisture out of the meringue structure. This is why reaching 160°F during the Swiss meringue process is non-negotiable.
The second cause is humidity. I made a batch on a rainy day and they wept within 20 minutes – same recipe, same technique, different outcome entirely.
Use Swiss or Italian meringue for this recipe, never French. French meringue (uncooked egg whites) is far too unstable for a recipe involving temperature contrast and torching.
Beat to stiff peaks, not soft. Soft peaks cannot hold the structure needed to insulate the ice cream during torching.
How Do You Know When Meringue Is Perfectly Torched?
You’re targeting a deep golden to lightly amber color on the peaks with slight char at the very tips. The color change happens fast – the first 10 seconds look like nothing, then it accelerates.
Smell is your best guide. When it shifts from raw egg to toasted marshmallow, you’re hitting the perfect window.
I overtorched my first six attempts by staying too long in one spot. Keep the torch moving constantly, never hovering. A rotating tray helps if you’re doing multiple tarts.
Undertorched meringue looks pale and tastes raw. Overtorched turns acrid and bitter. That golden marshmallow color is the exact target.
Frequently Asked Questions
Q: Can I use a broiler instead of a kitchen torch?
A: Yes, but work fast. Place tarts under a 500°F broiler for 60 to 90 seconds, watching constantly. The torch gives more control and is strongly preferred for even browning.
Q: What size tart pans do I need?
A: Use 4-inch mini tart pans with removable bottoms. Smaller pans don’t hold enough ice cream, and larger ones make torching the meringue evenly much harder.
Q: Can I use store-bought meringue or whipped topping instead?
A: No – neither holds up to torching or freezing. Swiss meringue is essential here because its cooked structure insulates the ice cream and browns without collapsing under heat.