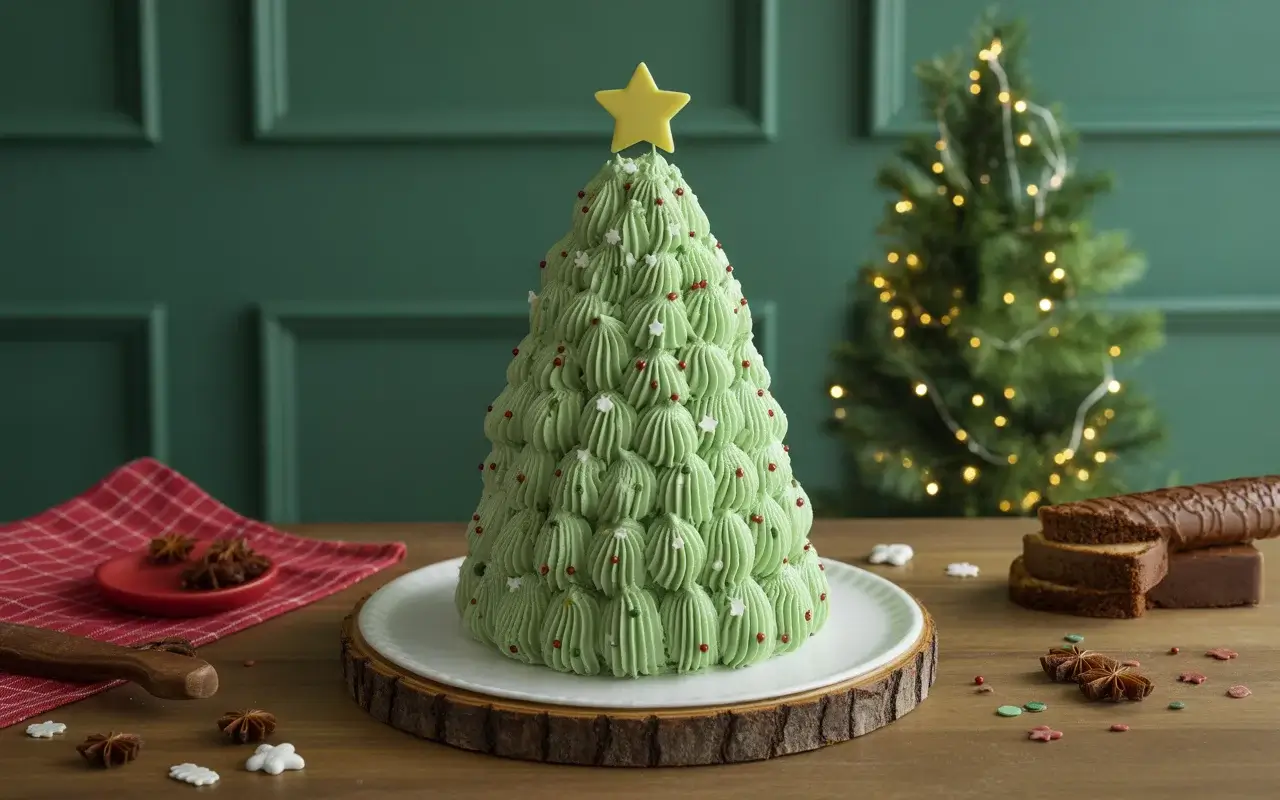
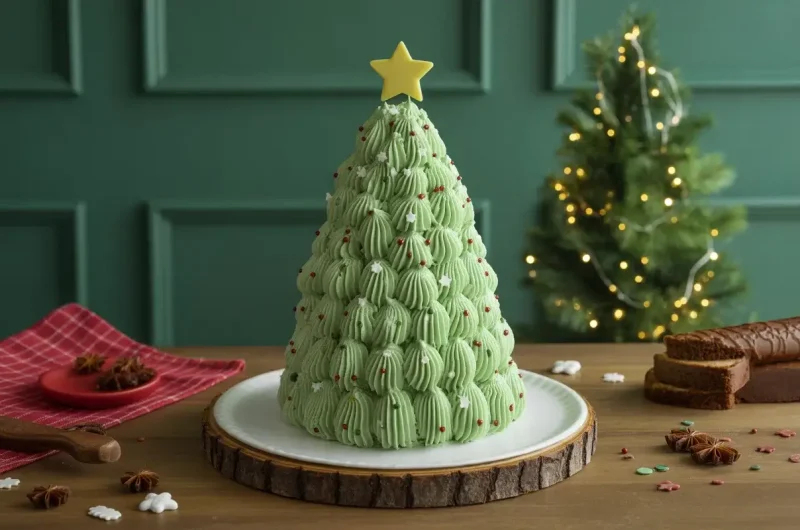
Christmas Tree Cake Recipe
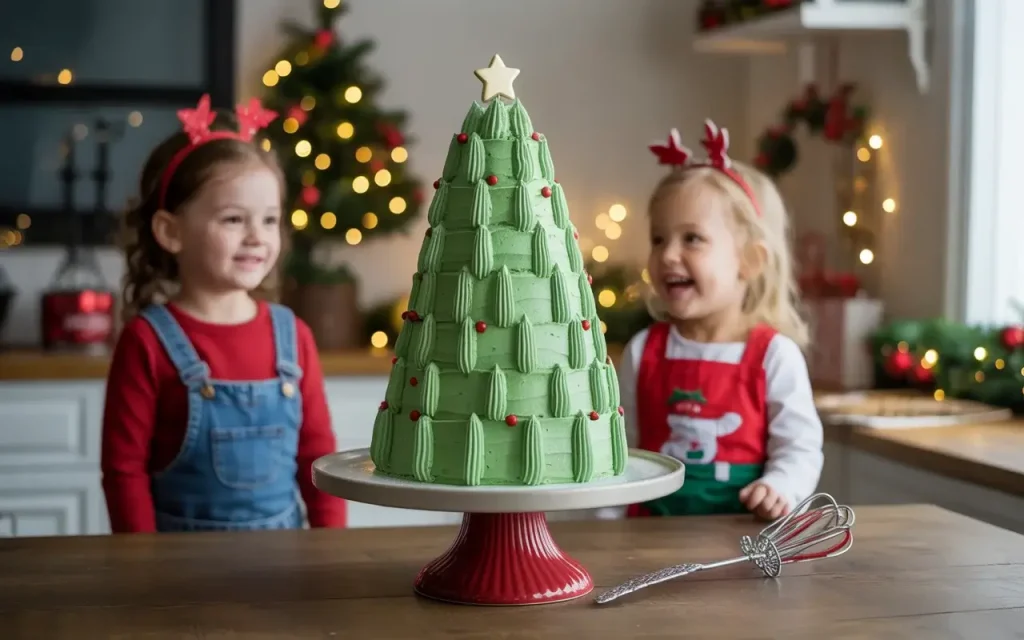
This Christmas Tree Cake is a festive showstopper that’s easier to make than it looks! With layers of moist vanilla cake, creamy frosting, and fun decorations, it’s perfect for your holiday celebration.
Whether you’re baking for a party or making memories with the kids, this Christmas tree-shaped cake brings joy to any dessert table. It’s customizable, delicious, and guaranteed to impress your guests.
Why You’ll Love This Recipe

This Christmas Tree Cake is a holiday tradition waiting to happen. The soft, fluffy cake pairs perfectly with sweet buttercream, and the decorating process is fun for the whole family.
You can customize it with your favorite colors, flavors, and toppings. It’s budget-friendly, uses simple ingredients, and looks absolutely stunning on your holiday spread.
Plus, it stays moist for days, making it perfect for advance prep. No specialty pans needed, just stack, cut, and decorate your way to Christmas magic.
Read More: Festive Tree Cake
Ingredients You’ll Need
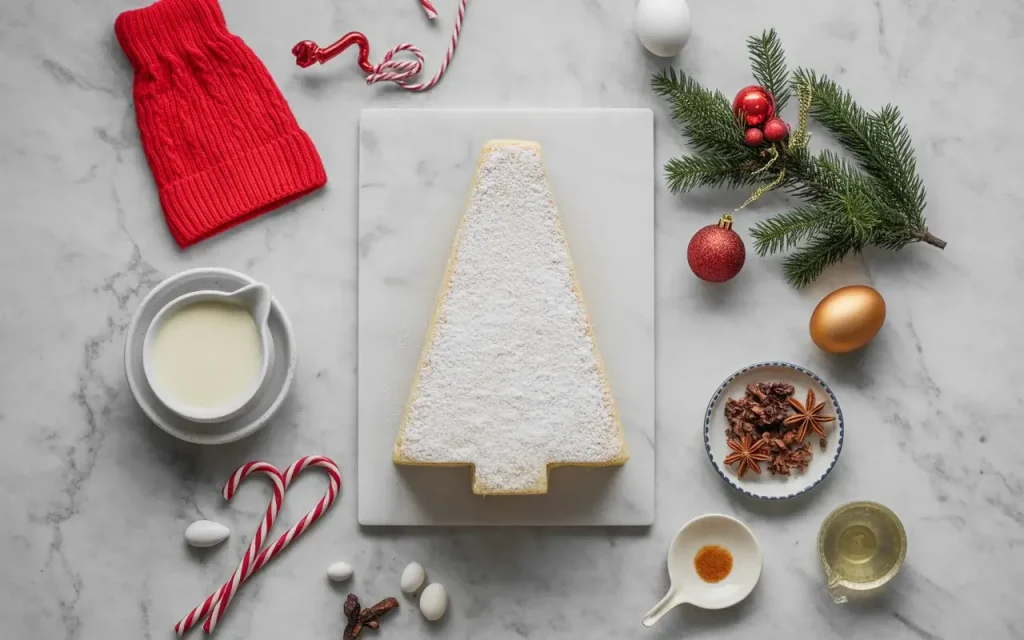
The beauty of this cake is that you likely have most ingredients in your pantry already. Simple pantry staples come together to create something truly special.
For the Cake:
For the Frosting:
How to Make Christmas Tree Cake
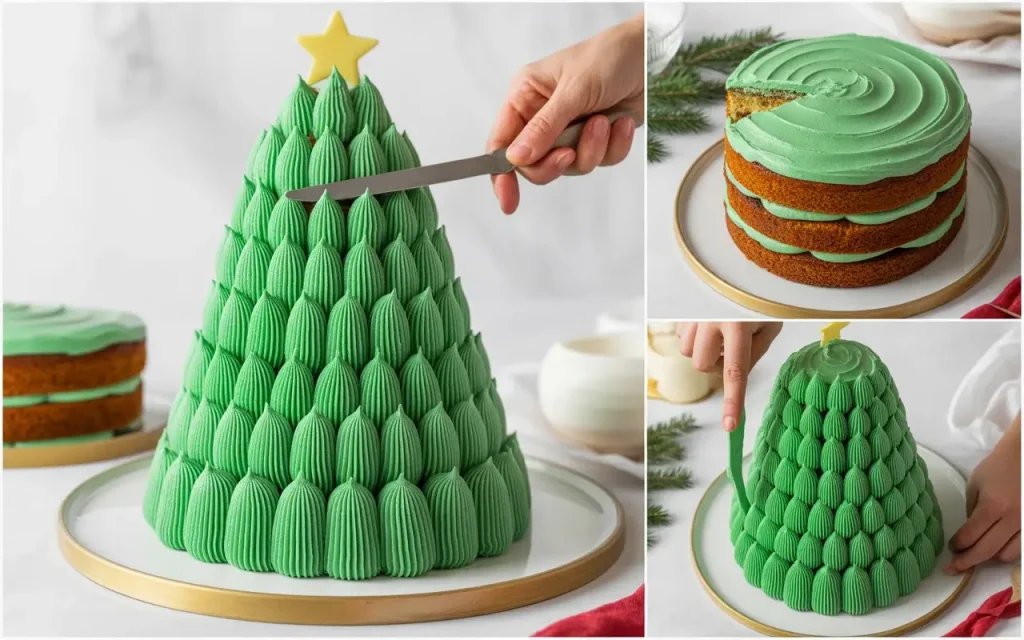
Making this cake is simpler than you’d think. The trick is in the assembly—stacking round cakes in descending sizes creates that perfect tree shape without any complicated carving.
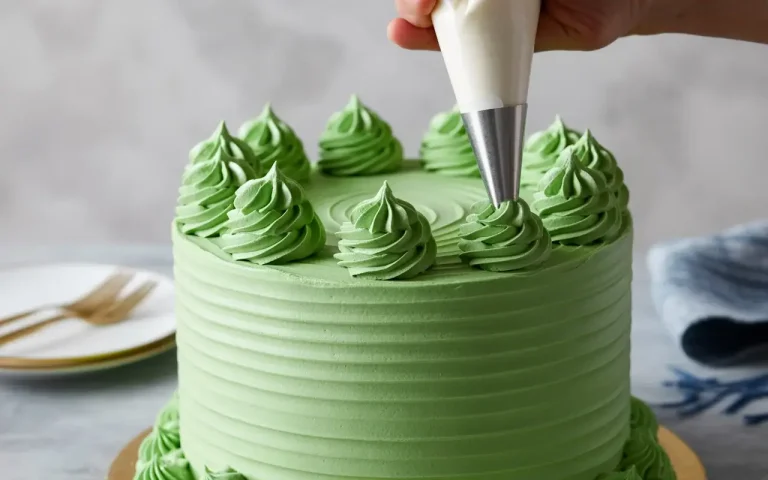
Start by baking your cakes in different sized round pans (or use one size and cut them down). Once cooled, stack them with frosting in between, then cover the whole tree in green buttercream.
The decorating is where the magic happens. Use a piping bag to create texture, add sprinkles as “ornaments,” and top with a star. Let your creativity shine—there’s no wrong way to decorate!
Christmas Tree Cake Recipe
Course: DessertCuisine: AmericanDifficulty: Medium12
servings30
30
minutes1
A festive layered vanilla cake shaped like a Christmas tree, covered in green buttercream and decorated with colorful sprinkles. perfect for holiday celebrations!
Ingredients
- Cake
2½ cups all-purpose flour
2½ tsp baking powder
½ tsp salt
1 cup unsalted butter, softened
2 cups granulated sugar
4 large eggs, room temperature
1 tbsp vanilla extract
1 cup whole milk, room temperature
- Buttercream Frosting
1½ cups unsalted butter, softened
6 cups powdered sugar, sifted
3–4 tbsp heavy cream
2 tsp vanilla extract
Green gel food coloring
Sprinkles, candy decorations, star topper
Directions
- Prepare the pans: Preheat oven to 350°F. Grease and flour three round cake pans (9-inch, 7-inch, and 5-inch) or use same sized pans and trim after baking.
- Make the batter: In a medium bowl, whisk together flour, baking powder, and salt. In a large bowl, beat butter and sugar until light and fluffy, about 3 minutes.
- Combine wet ingredients: Add eggs one at a time, beating well after each addition. Mix in vanilla extract.
- Alternate dry and wet: Add flour mixture in three additions, alternating with milk, beginning and ending with flour. Mix until just combined.
- Bake: Divide batter among prepared pans (more batter in larger pans). Bake for 25-30 minutes until a toothpick comes out clean. Cool in pans 10 minutes, then turn out onto wire racks.
- Make frosting: Beat butter until creamy. Gradually add powdered sugar, then cream and vanilla. Add green food coloring until desired shade is reached.
- Assemble tree: Place largest cake on serving platter. Spread frosting on top. Add medium cake, frost, then top with smallest cake.
- Decorate: Cover entire cake with remaining green frosting. Use a piping bag with star tip to create texture. Add sprinkles, candies, and star topper.
- Chill and serve: Refrigerate 30 minutes to set frosting. Bring to room temperature before serving.
Notes
- Size flexibility: Use same-sized pans and cut cakes into graduated circles using bowls as guides
Flavor variations: Add almond extract, lemon zest, or peppermint to batter for different flavors
Make ahead: Bake cakes 1 day ahead, wrap tightly, and store at room temperature
Storage: Keep covered at room temperature for 2 days or refrigerate up to 5 days
Frosting tip: Use a basket weave or star piping tip for realistic “tree branch” texture
Nutrition Information (Per Serving)
| Nutrient | Amount |
|---|---|
| Calories | 685 |
| Total Fat | 32g |
| Sugars | 78g |
| Protein | 5g |
Decorating Tips
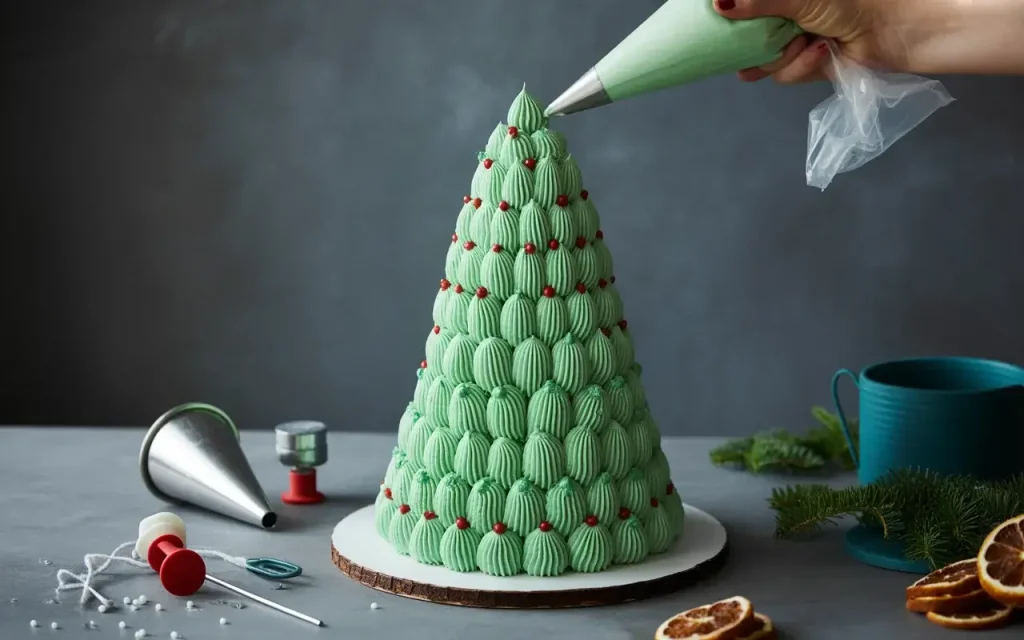
The decorating stage is where your Christmas Tree Cake truly comes to life. Use a star-shaped piping tip to create textured frosting that mimics tree branches. Just pipe in upward strokes around the entire cake.
Get creative with your “ornaments”! Mini M&Ms, colorful sprinkles, edible pearls, or even small candies work beautifully. Don’t forget a statement star or angel on top to complete the look.
Work in layers, frost the entire cake first as a crumb coat, chill for 15 minutes, then add your final frosting layer. This ensures a smooth, professional finish that’s easier to decorate.
Storage and Serving
This Christmas Tree Cake stays fresh and moist for days when stored properly. Keep it covered at room temperature for up to 2 days, or refrigerate for up to 5 days in an airtight container.
If refrigerated, bring the cake to room temperature 30 minutes before serving for the best flavor and texture. The buttercream may firm up in the fridge but will soften beautifully once warmed.
You can freeze unfrosted cake layers for up to 3 months. Wrap each layer tightly in plastic wrap, then foil. Thaw overnight in the refrigerator before assembling and decorating.
Flavor Variations
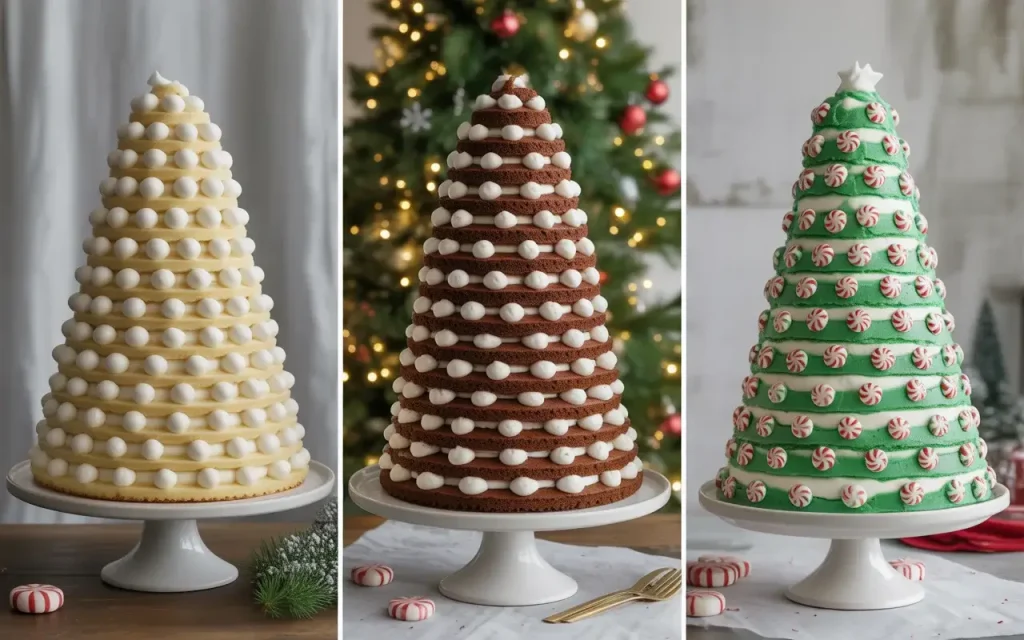
While classic vanilla is always a winner, this Christmas Tree Cake is incredibly versatile. Try chocolate cake for a rich twist, or add peppermint extract to the batter for a candy cane-inspired flavor.
For the frosting, you can stick with classic green or go wild with ombre shades from dark to light green. White frosting with green drizzle creates a “snowy” effect that’s equally gorgeous.
Consider filling the layers with different flavors, raspberry jam, lemon curd, or chocolate ganache all work beautifully. Just spread a thin layer between each cake round before adding the buttercream.
Frequently Asked Questions
Can I use a boxed cake mix instead of homemade?
Absolutely! Use two boxes of vanilla or white cake mix and follow package directions. You’ll need to bake in graduated pan sizes or trim the cakes after baking to create the tree shape.
How do I get the perfect tree shape without special pans?
Bake 2-3 round cakes in the same size pans, then use bowls or pot lids in descending sizes as guides to cut graduated circles. Stack from largest to smallest with frosting between each layer.
Can I make this cake dairy-free?
Yes! Substitute the butter with vegan butter, use non-dairy milk (almond or oat work well), and replace heavy cream in the frosting with coconut cream. The texture will be slightly different but still delicious.