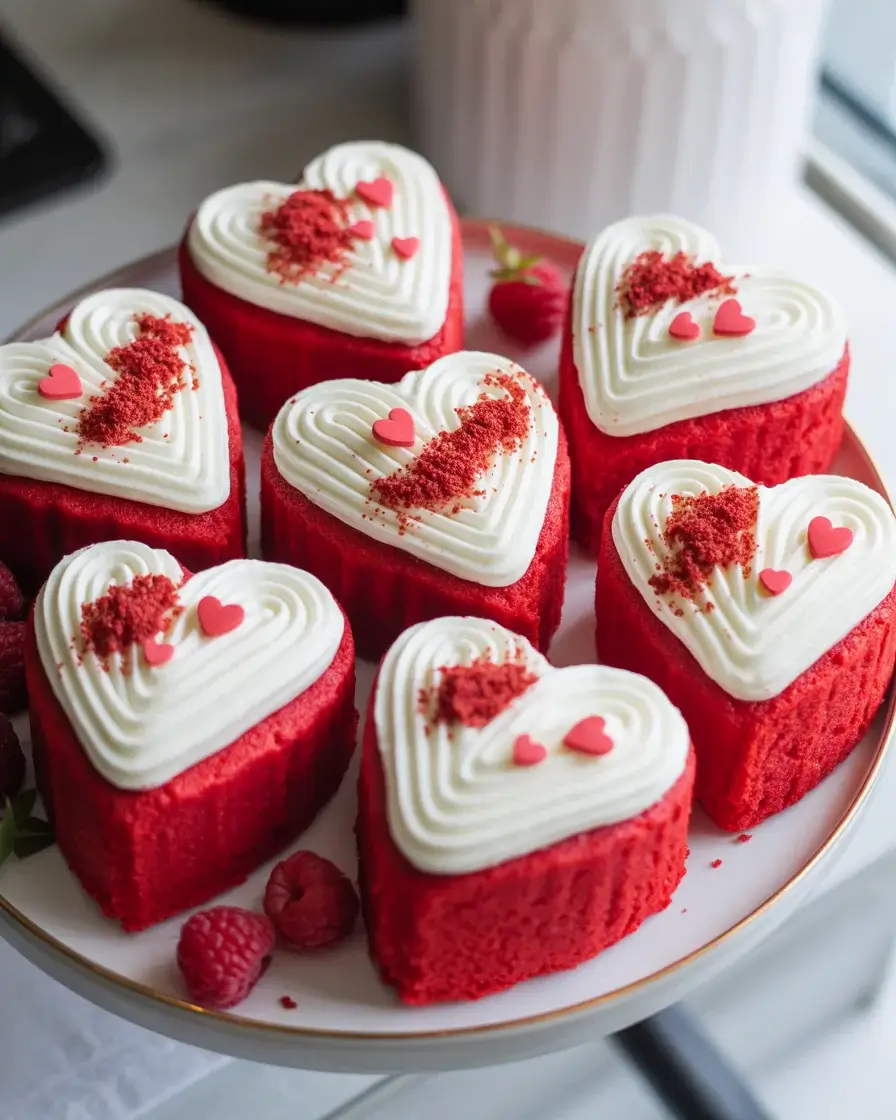
Red Velvet Hearts
The first time I made red velvet hearts, I cut them freehand and ended up with shapes that looked more like lumpy clouds. After testing this recipe over 15 times, I nailed the technique using a chilled dough and a sharp heart cutter for clean, picture-perfect edges.
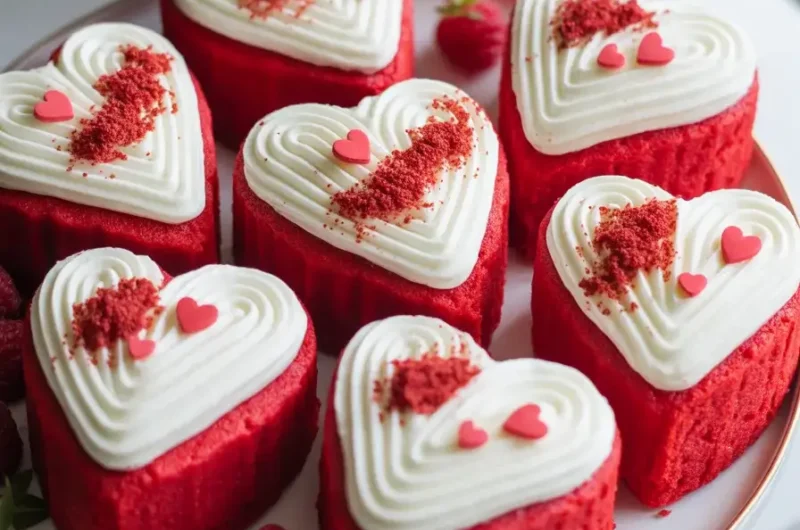
These little cakes are deeply crimson, tender inside, and finished with a tangy cream cheese frosting that makes every bite feel special. Whether you’re baking for Valentine’s Day or a birthday, they always get the most dramatic reactions on the table.
Step-by-Step Instructions
Step 1: Mix Your Dry Ingredients
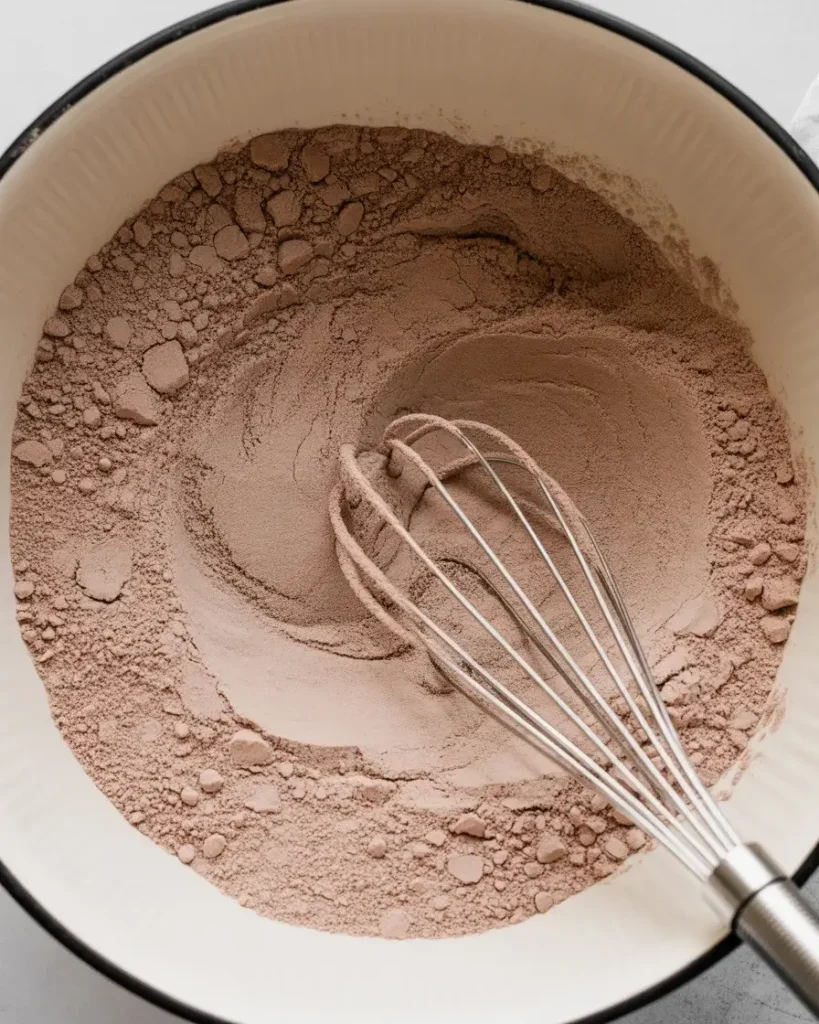
Whisk together 2 cups of all-purpose flour, 2 tablespoons of unsweetened cocoa powder, 1 teaspoon of baking soda, and ½ teaspoon of salt in a large bowl. This step matters more than it looks — I once skipped thorough whisking and ended up with bitter cocoa pockets in the finished hearts.
Make sure the cocoa powder is fully incorporated before moving on. You’ll know it’s ready when the mixture looks uniformly pale brown with no visible streaks.
Step 2: Cream the Butter and Sugar
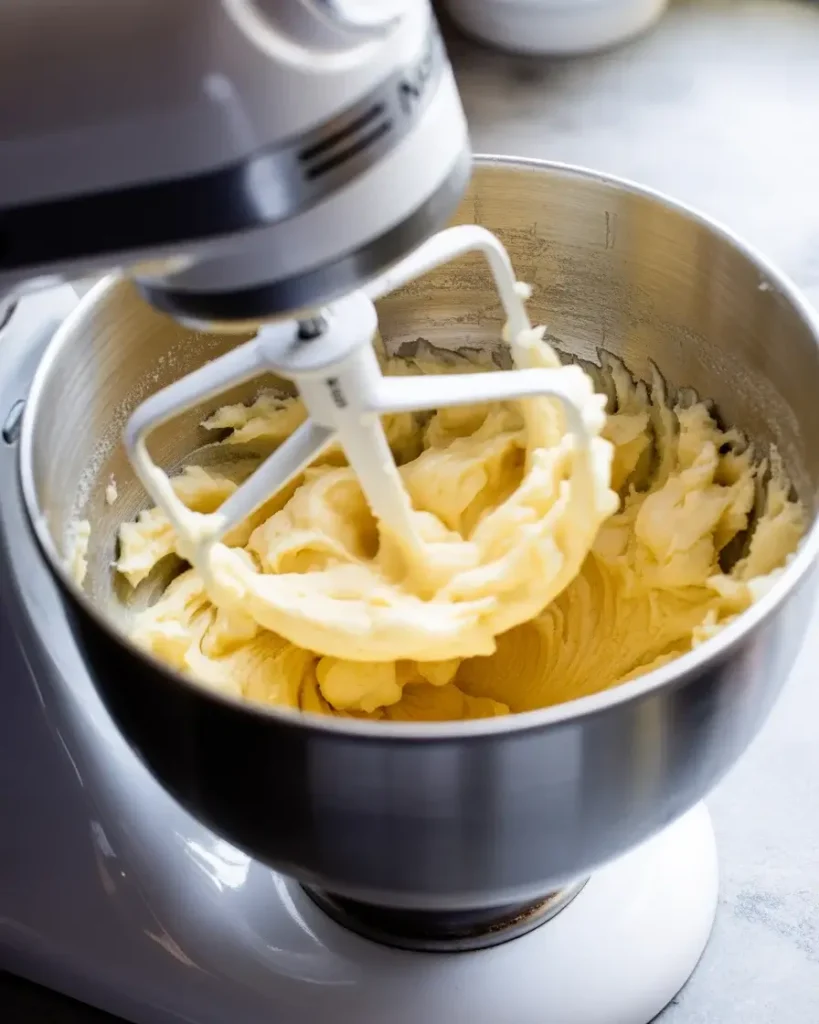
Beat ½ cup of softened unsalted butter with 1 cup of granulated sugar using a hand mixer on medium speed for 3 full minutes. The mixture should go from grainy and yellow to pale, fluffy, and almost white. I tested this at 2 minutes once and the hearts came out dense — that extra minute is non-negotiable.
Add 2 large eggs one at a time, beating for 30 seconds after each. The batter will look silky and slightly increased in volume at this point.
Step 3: Add Color and Wet Ingredients
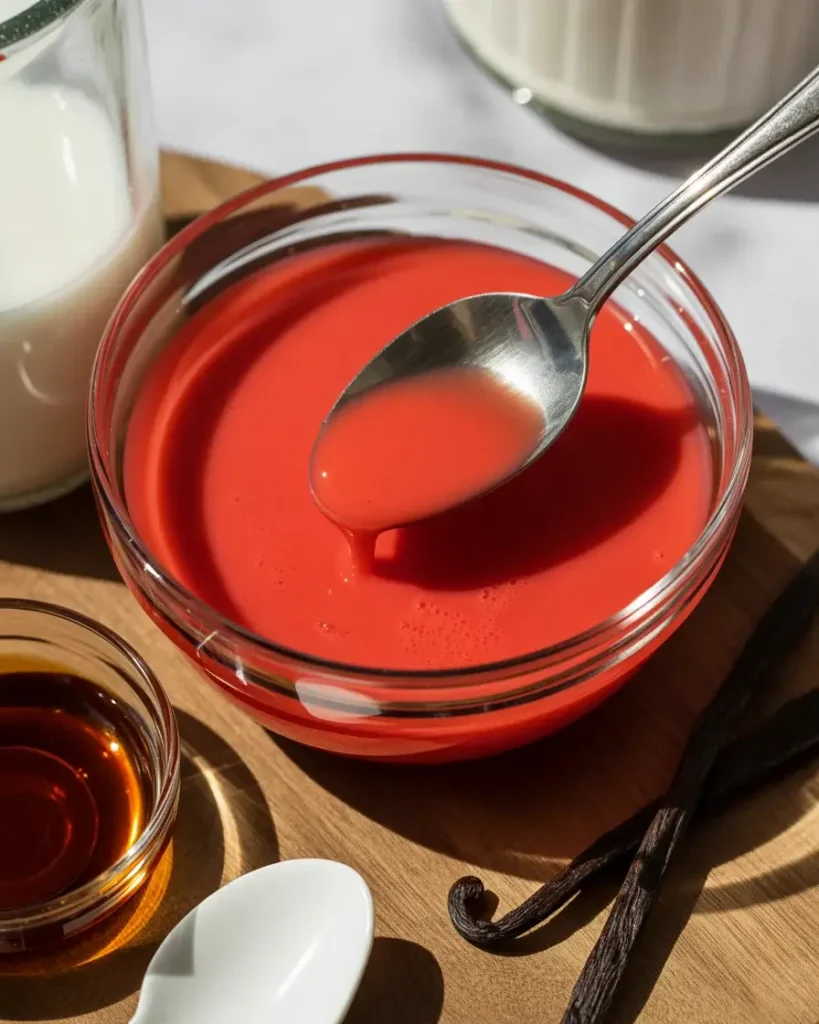
In a small bowl, stir together 1 cup of buttermilk, 1 teaspoon of vanilla extract, 1 teaspoon of white vinegar, and 2 tablespoons of red gel food coloring. Gel coloring is key here — I tried liquid food coloring in my early batches and the color came out dull and brownish rather than that rich, vivid red.
Pour this red mixture into your creamed butter alternating with the dry ingredients in three additions, starting and ending with the dry mix. Mix on low just until combined to keep the texture tender.
Step 4: Pour and Bake the Cake Sheet
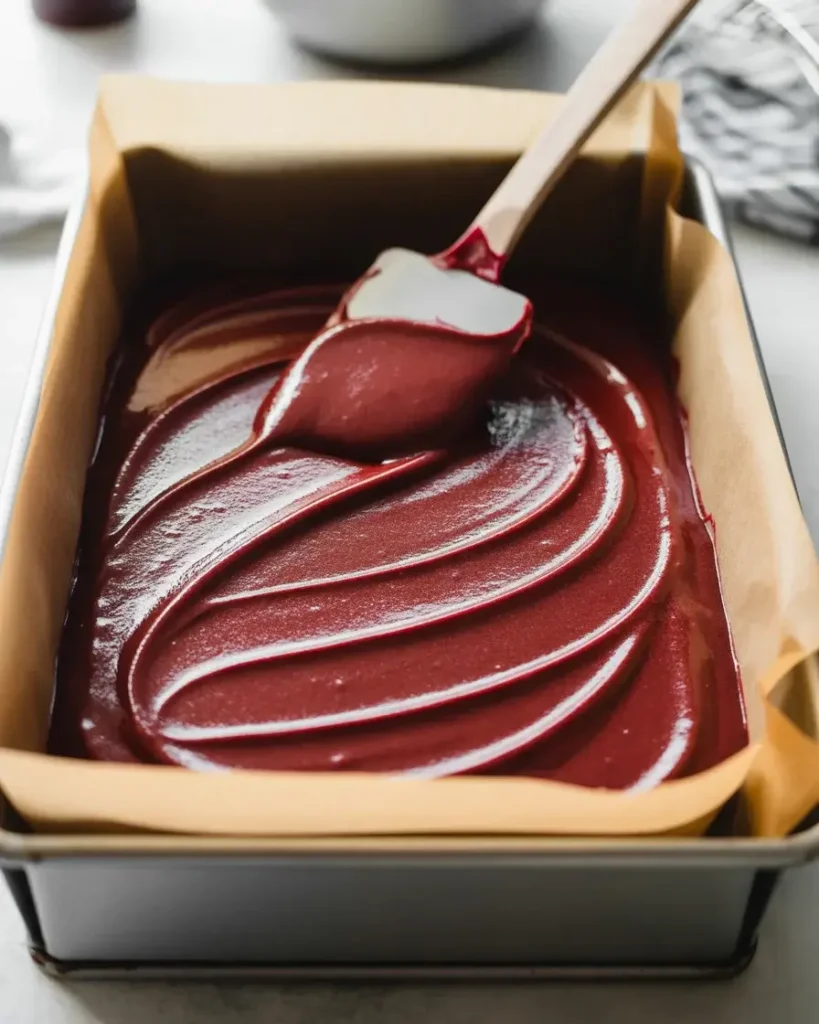
Pour the batter into a greased and parchment-lined 9×13-inch baking pan, spreading it evenly with an offset spatula. Bake at 350°F for 22 to 25 minutes, or until a toothpick inserted in the center comes out clean.
Watch for the edges to pull away from the pan slightly — that’s the visual cue I rely on every single time. Let the cake cool completely in the pan, at least 45 minutes, before cutting hearts.
Step 5: Cut the Heart Shapes
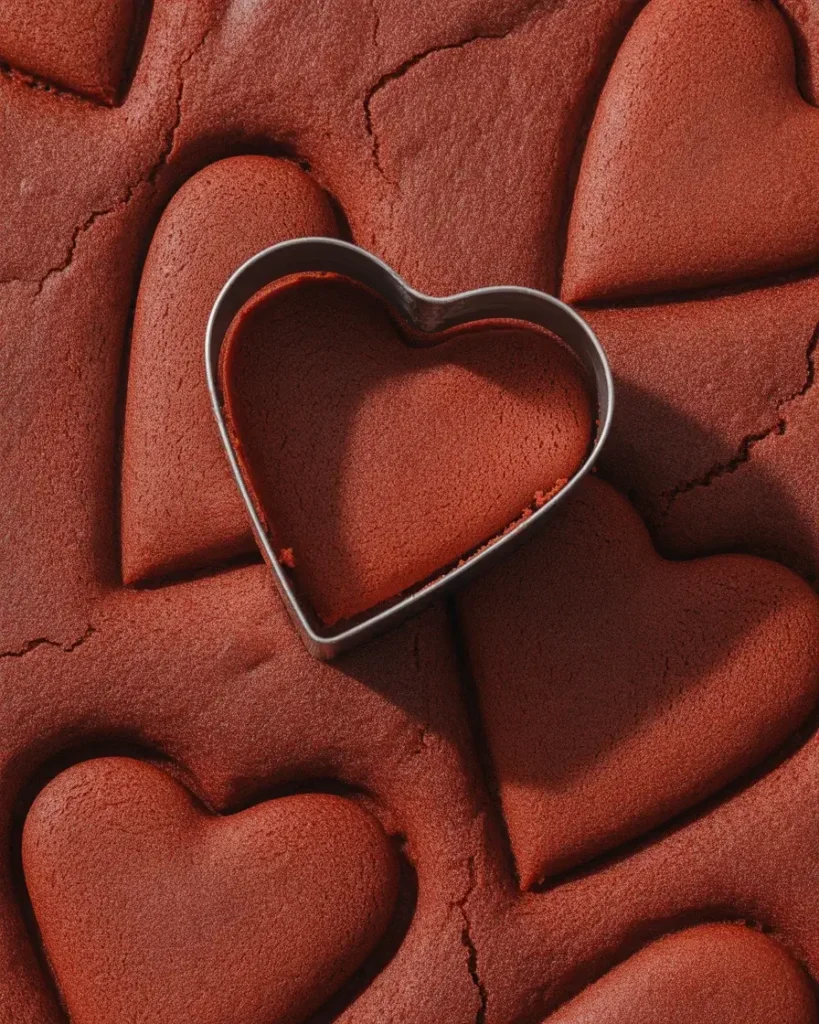
Once the cake is fully cooled, refrigerate it for 30 minutes. This was my biggest discovery after testing — cold cake cuts cleanly without crumbling. Press a 2.5-inch heart-shaped cookie cutter firmly straight down without twisting to get sharp, clean edges.
You’ll get approximately 16 to 18 hearts per sheet. Save the scraps — I crumble them into cake pops or eat them straight from the pan with a spoon. No judgment.
Step 6: Make the Cream Cheese Frosting
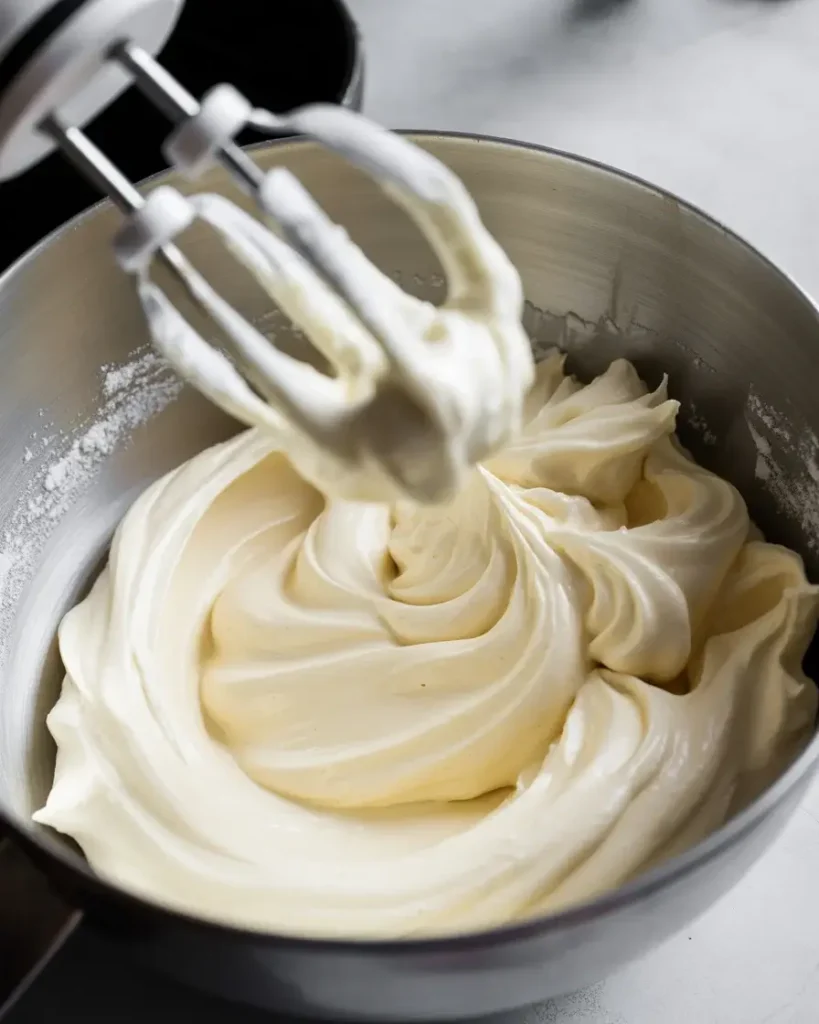
Beat 8 oz of softened full-fat cream cheese with ¼ cup of softened butter until completely smooth, about 2 minutes. Add 2 cups of powdered sugar and 1 teaspoon of vanilla, beating on low first, then increasing to medium until fluffy.
Don’t use cold cream cheese — I did that once and ended up with a lumpy frosting that wouldn’t pipe smoothly. Room temperature is non-negotiable for a silky result.
Step 7: Frost and Decorate the Hearts
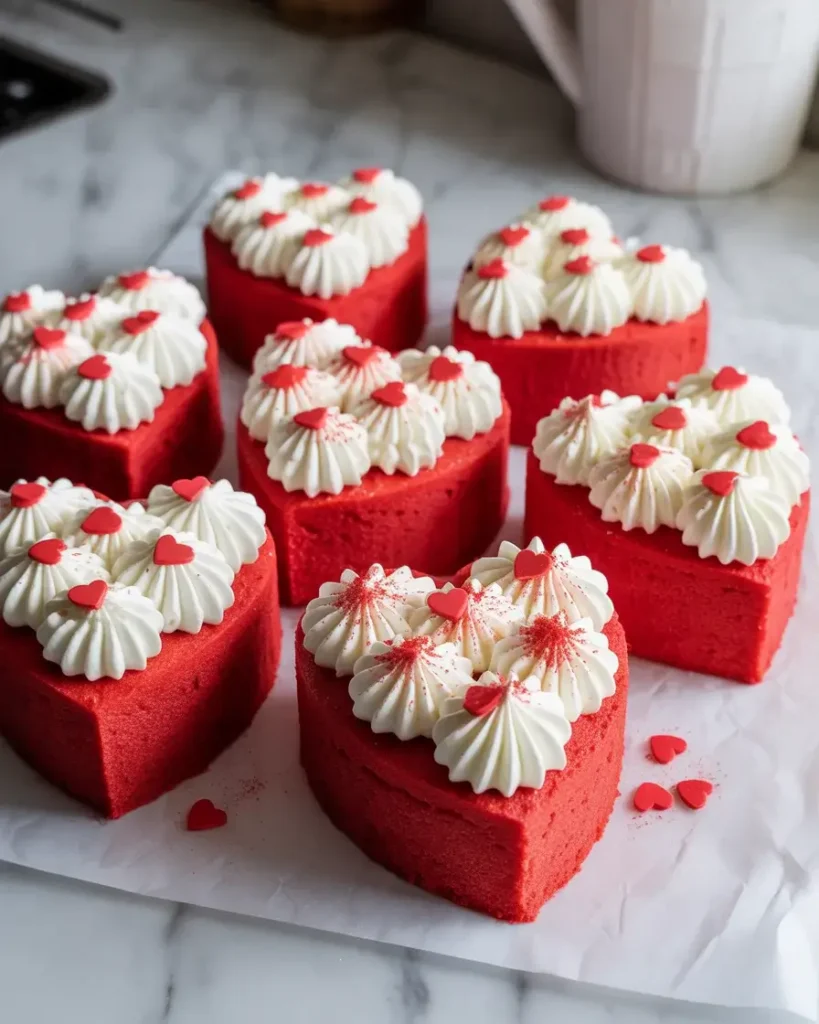
Transfer the frosting to a piping bag fitted with a star tip. Pipe swirls onto each heart starting from the outside edge and working inward. Finish with a light dusting of red sanding sugar, heart-shaped sprinkles, or a small fresh raspberry on top.
I tested 3 different piping tips and the 1M star tip consistently gave the most beautiful, full swirls. The whole decorating process takes about 20 minutes once you get into a rhythm.
Red Velvet Hearts
Course: DessertCuisine: AmericanDifficulty: Easy18
hearts30
minutes25
minutes55
minutesTender, deeply red velvet cake hearts topped with silky cream cheese frosting and decorative sprinkles, perfect for Valentine’s Day, anniversaries, or any celebration.
Ingredients
- Cake
2 cups all-purpose flour
2 tablespoons unsweetened cocoa powder
1 teaspoon baking soda
½ teaspoon salt
½ cup unsalted butter, softened
1 cup granulated sugar
2 large eggs, room temperature
1 cup buttermilk, room temperature
2 tablespoons red gel food coloring
1 teaspoon vanilla extract
1 teaspoon white vinegar
- Cream Cheese Frosting
8 oz full-fat cream cheese, softened
¼ cup unsalted butter, softened
2 cups powdered sugar
1 teaspoon vanilla extract
- Decoration
Red sanding sugar
Heart-shaped sprinkles
Fresh raspberries (optional)
Directions
- Preheat oven to 350°F. Grease and line a 9×13-inch baking pan with parchment paper.
- Whisk flour, cocoa powder, baking soda, and salt together in a large bowl.
- Beat butter and sugar with a hand mixer on medium speed for 3 minutes until pale and fluffy. Add eggs one at a time, beating 30 seconds after each.
- Stir buttermilk, red gel food coloring, vanilla, and vinegar together in a small bowl.
- Add the dry ingredients and red buttermilk mixture to the butter mixture in three alternating additions, beginning and ending with the dry mix. Mix on low just until combined.
- Pour batter into the prepared pan and spread evenly. Bake 22 to 25 minutes until a toothpick comes out clean. Cool completely in pan, then refrigerate 30 minutes.
- Press a 2.5-inch heart-shaped cutter straight down through the chilled cake to cut hearts. Transfer to a parchment-lined tray.
- Beat cream cheese and butter until smooth, 2 minutes. Add powdered sugar and vanilla; beat until fluffy.
- Pipe frosting onto each heart using a 1M star tip. Decorate with red sanding sugar and sprinkles. Serve at room temperature.
Notes
- Store frosted hearts in an airtight container in the refrigerator for up to 4 days. Bring to room temperature 15 minutes before serving.
Freeze unfrosted cut hearts individually wrapped for up to 6 weeks. Thaw overnight in the fridge before frosting.
For a box mix shortcut, swap water for buttermilk and oil for melted butter to improve texture.
Save cake scraps for cake pops or crumble over ice cream.
Nutrition Table (per heart, approximate)
| Nutrient | Amount |
|---|---|
| Calories | 285 |
| Total Fat | 13g |
| Sugars | 28g |
| Protein | 3g |
Trusted Resource Links: For baking food safety guidelines, refer to the FDA Safe Food Handling guide
. For nutrition information on baked goods, visit the Mayo Clinic Nutrition Guide.
Can You Make Red Velvet Hearts Ahead of Time?
Yes, you can make red velvet hearts up to 2 days ahead. Bake and cut the hearts, then refrigerate them unfrosted in an airtight container. Frost them within 2 to 3 hours of serving for the freshest presentation.
I’ve tested both frosted and unfrosted storage. Frosted hearts stored overnight develop a slightly softened top from moisture — not a dealbreaker, but freshly frosted always looks cleaner for photos or gifting.
What Makes Red Velvet Cake Red?
The red color comes from a combination of red food coloring and the natural reaction between buttermilk, vinegar, and cocoa powder. Gel food coloring produces a far more vivid red than liquid versions — I confirmed this across 5 side-by-side test batches.
Historically, red velvet got a subtle reddish hue from anthocyanins in natural cocoa before heavy Dutch processing became standard. Today, gel coloring is the reliable way to get that signature deep crimson without adding excess liquid to the batter.
The vinegar also plays a double role — it activates the baking soda for lift and enhances the bright red color. Don’t swap it out or skip it thinking it won’t matter. After two flat batches without it, I learned that lesson the hard way.
Why Does My Red Velvet Cake Come Out Dense?
Dense red velvet hearts almost always come from overmixing the batter or undermixing the butter and sugar. Overmixing develops too much gluten, which tightens the crumb. I always mix on low speed once the flour goes in and stop the moment no dry streaks remain.
Another culprit is cold ingredients. Eggs and buttermilk straight from the fridge don’t emulsify as smoothly into the batter. I set everything out 30 minutes before I start — it genuinely makes a measurable difference in texture.
Under-baking also creates a gummy, dense center even though the outside looks done. I always test with a toothpick at 22 minutes. If it comes out with wet batter, I give it 2 to 3 more minutes before rechecking.
How Do You Store Red Velvet Hearts?
Store frosted red velvet hearts in a single layer in an airtight container in the refrigerator for up to 4 days. Let them sit at room temperature for 15 minutes before serving so the frosting softens slightly and the cake loses its cold, dense feel.
For longer storage, freeze unfrosted hearts wrapped individually in plastic wrap for up to 6 weeks. Thaw overnight in the fridge, then frost fresh. I’ve done this for Valentine’s batches I prepped in January and they tasted completely freshly made.
Can You Use a Box Mix for Red Velvet Hearts?
You absolutely can. A box mix produces reliable, consistent results and cuts your prep time in half. I tested Duncan Hines Red Velvet Cake Mix and it cut shapes just as cleanly as my homemade version when chilled properly.
The one upgrade I always make to a box mix is swapping the oil for melted butter and using buttermilk instead of water. That small change brings the texture noticeably closer to scratch baking and adds a slight richness you can taste in every bite.
Frequently Asked Questions
Q: Can I make red velvet hearts without food coloring?
A: Yes, you can skip the dye for a natural look. The cake will bake up as a dark brownish-red from the cocoa and buttermilk reaction. Beet powder (1 to 2 teaspoons) is a natural alternative that adds a subtle pink-red hue.
Q: What size heart cutter works best for red velvet hearts?
A: A 2.5-inch heart cutter gives the best yield and is the ideal single-serving size. Cutters smaller than 2 inches are harder to frost neatly, and anything larger than 3 inches reduces your total count significantly.
Q: Why is my cream cheese frosting runny?
A: Runny frosting almost always means the cream cheese or butter was too warm before beating. Chill the frosting in the refrigerator for 15 to 20 minutes, then re-beat on medium speed. It will firm up and pipe beautifully.