Baked Sushi Cups
The first time I made baked sushi cups, I burned the bottom nori layer completely because I didn’t press the rice firmly enough. After fixing that and testing this recipe 15+ times, I finally landed on a version that comes out crispy, creamy, and absolutely addictive every single time.
These little cups hit every note: crunchy edges, warm seasoned rice, and that rich spicy tuna topping bubbling under the broiler. They come together in under 30 minutes and disappear even faster at any table.
Step-by-Step Instructions
Step 1: Cook and Season the Sushi Rice

Rinse 2 cups of short-grain rice until the water runs clear, then cook according to package directions. While still warm, fold in 3 tablespoons rice vinegar, 1 tablespoon sugar, and 1 teaspoon salt.
I tested both warm and cold rice for shaping, and warm rice every time wins. It sticks together better and presses into the muffin tin without crumbling apart.
Step 2: Press Rice Into the Muffin Tin
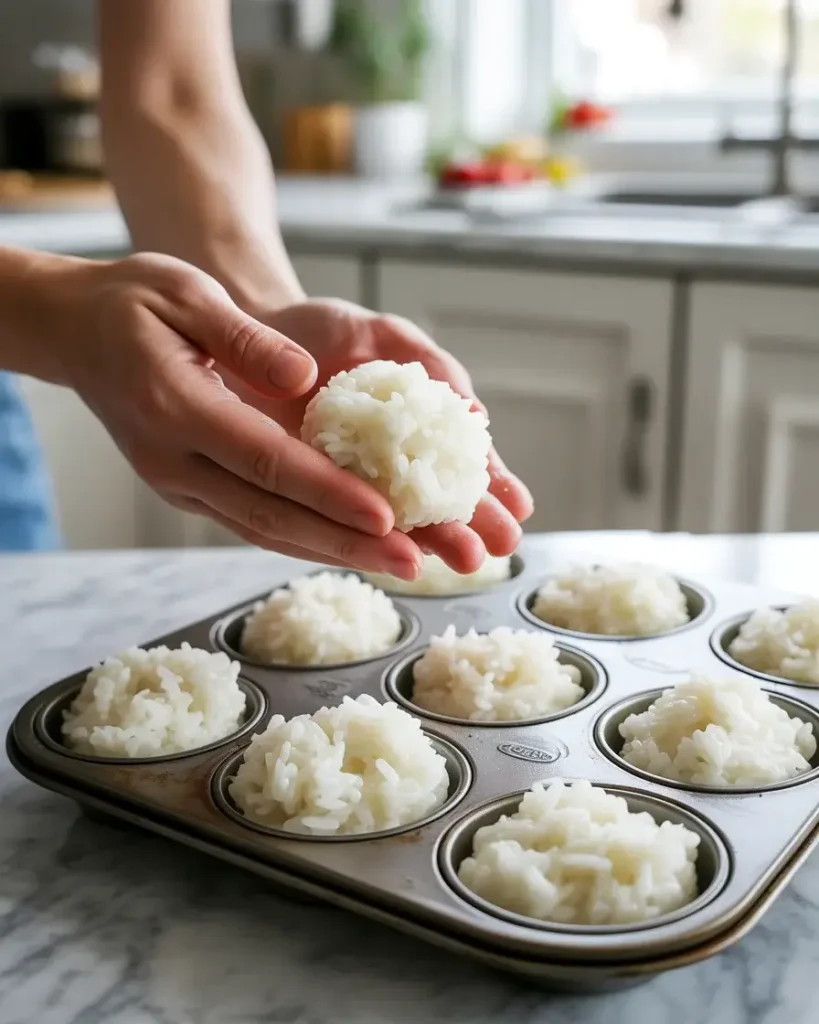
Lightly grease a standard 12-cup muffin tin with sesame oil. Press about 3 tablespoons of seasoned rice firmly into each cup, shaping it up the sides to form a small bowl.
Don’t be shy with pressing here. I learned the hard way that loosely packed cups collapse when you add the topping. Use wet fingers to prevent sticking and get a tight, even wall.
Step 3: Pre-Bake the Rice Cups
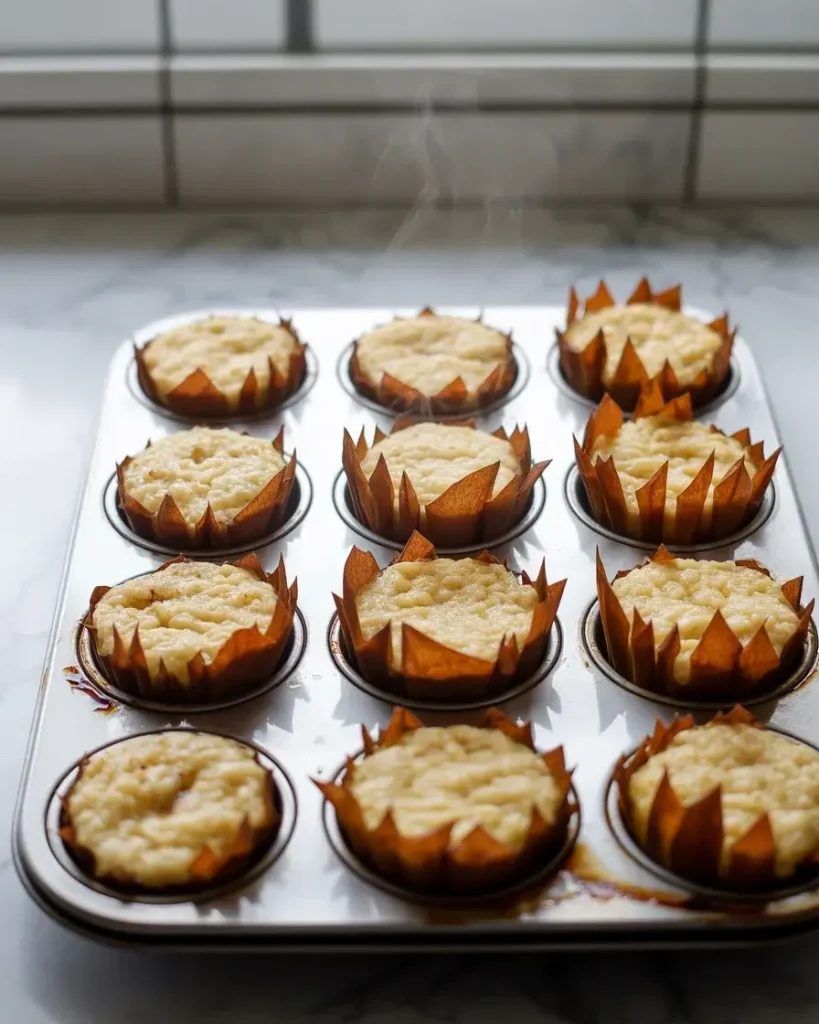
Bake the rice cups at 400°F for 15 minutes until the edges turn lightly golden and feel crisp to the touch. They should pull away slightly from the tin edges.
This pre-bake step is non-negotiable. Skipping it gives you soggy cups that fall apart the moment you scoop them out. That golden, slightly crunchy rim is what makes these so satisfying.
Step 4: Mix the Spicy Tuna Topping
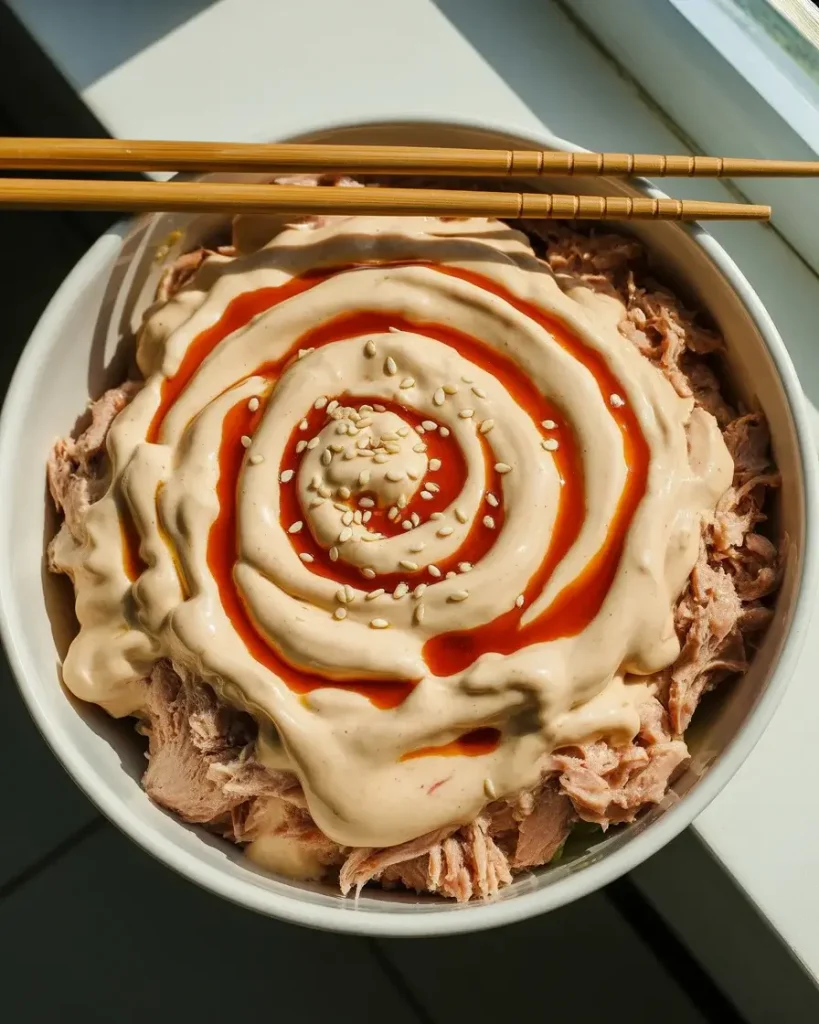
Combine 2 cans of drained tuna (or 1 cup imitation crab) with 3 tablespoons Kewpie mayo, 1 tablespoon sriracha, 1 teaspoon soy sauce, and 1 teaspoon sesame oil. Mix until creamy and well combined.
Kewpie mayo is richer and slightly tangier than regular mayo, and it makes a real difference here. I tested both side by side across 5 batches and Kewpie gave a noticeably creamier, more flavorful result.
Step 5: Fill and Broil the Cups
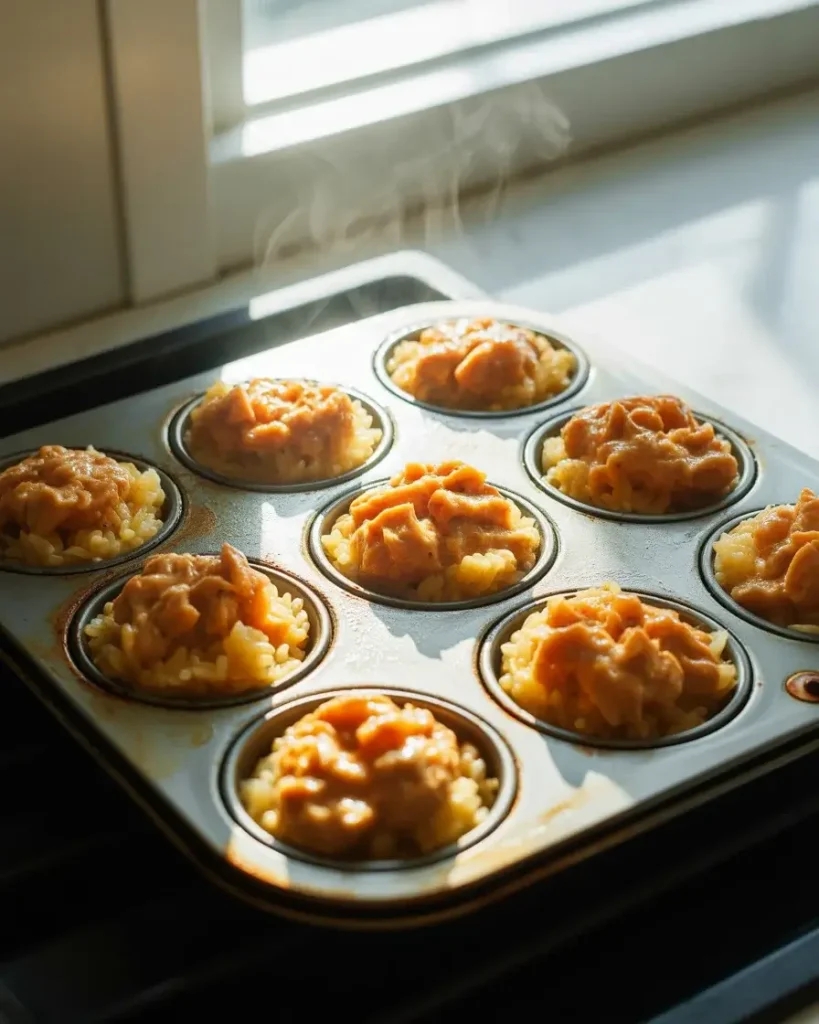
Spoon about 1 tablespoon of the spicy tuna mixture into each pre-baked rice cup. Switch your oven to broil on high and cook for 3 to 4 minutes until the tops are bubbling and slightly golden.
Watch them closely under the broiler. At the 3-minute mark, they look underdone; at 5 minutes, the edges can scorch. That 3-to-4-minute window is the sweet spot I found after burning an entire batch.
Discover Delicious Appetizers
Step 6: Garnish and Serve
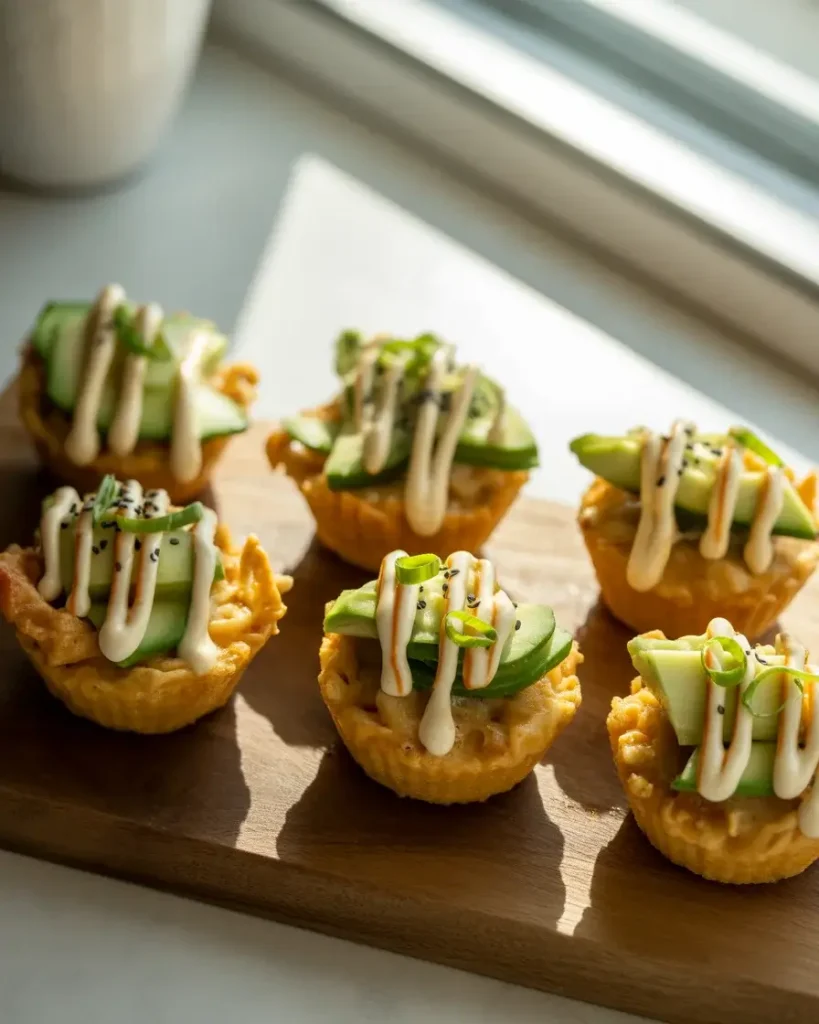
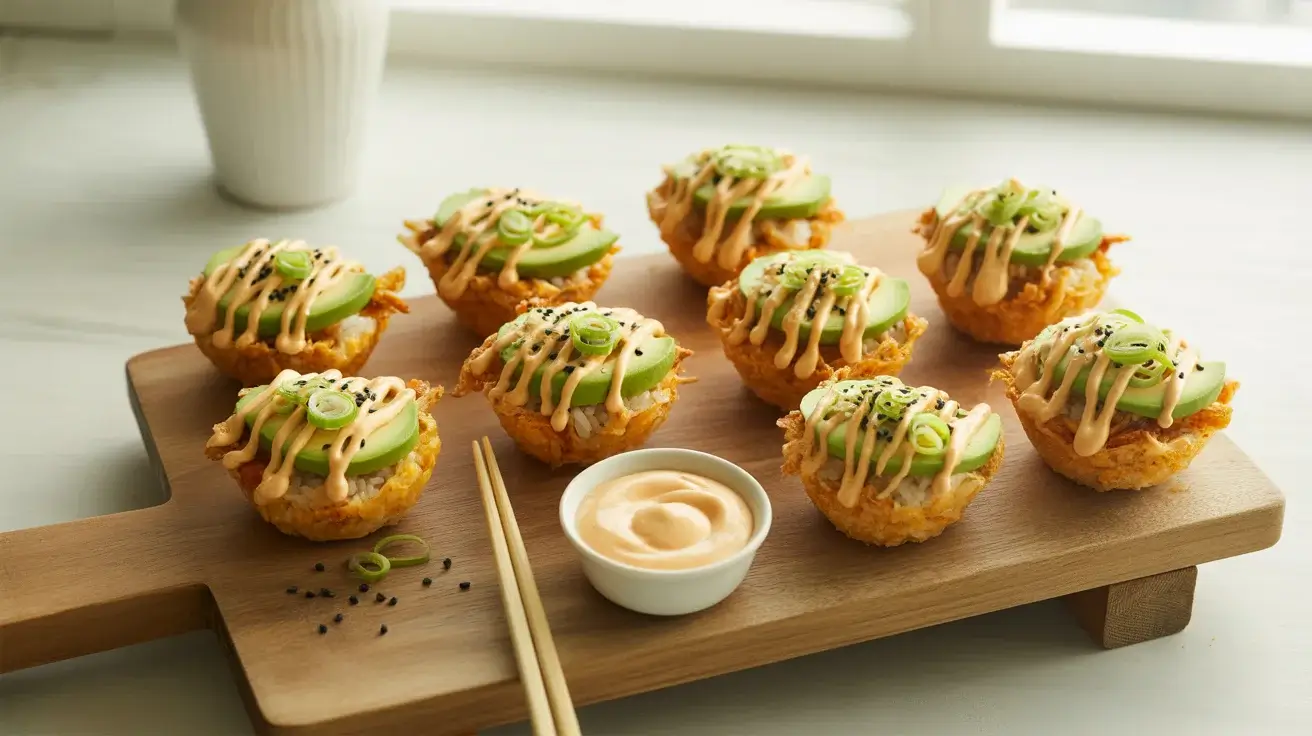
Remove the cups from the tin using a small offset spatula and plate them on a serving board. Top each cup with a drizzle of spicy mayo, sliced avocado, cucumber ribbons, sesame seeds, and thinly sliced green onions.
Serve immediately while the rice is still crispy. I tested holding them for 15 minutes and the crunch fades fast. These are best eaten hot, straight from the tin.

Baked Sushi Cups
Course: AppetizersCuisine: Japanese-AmericanDifficulty: Easy12
15
minutes19
minutes34
minutesCrispy rice cups filled with creamy spicy tuna and broiled to perfection. A fun, impressive appetizer ready in just 30 minutes.
Ingredients
2 cups short-grain sushi rice, cooked and warm
3 tbsp rice vinegar
1 tbsp granulated sugar
1 tsp salt
1 tsp sesame oil (for greasing tin)
2 cans (5 oz each) tuna in water, drained
3 tbsp Kewpie mayo
1 tbsp sriracha
1 tsp soy sauce or tamari
1 tsp sesame oil
Sliced avocado, cucumber, green onions, sesame seeds for garnish
Spicy mayo for drizzling
Directions
- Cook rice and season with rice vinegar, sugar, and salt while warm.
- Grease a 12-cup muffin tin with sesame oil. Press rice firmly into each cup.
- Bake at 400°F for 15 minutes until edges are golden and crisp.
- Mix tuna, Kewpie mayo, sriracha, soy sauce, and sesame oil until creamy.
- Spoon filling into each pre-baked cup.
- Broil on high for 3 to 4 minutes until tops are bubbling and golden.
- Remove from tin and garnish with avocado, cucumber, sesame seeds, and green onions.
Notes
- Store leftover rice cups (unfilled) at room temperature, uncovered, for up to 24 hours.
Substitute imitation crab or smoked salmon for the tuna.
Use tamari instead of soy sauce for a gluten-free version.
Nutrition Table (per serving, 3 cups)
| Nutrient | Amount |
|---|---|
| Calories | 310 |
| Total Fat | 11g |
| Sugars | 4g |
| Protein | 18g |
What Type of Rice Works Best for Baked Sushi Cups?
Short-grain Japanese sushi rice is the only rice I recommend for this recipe. It has the right starch content to hold its shape when pressed and baked, creating that satisfying crispy exterior.
I tested medium-grain and jasmine rice across multiple batches. Both resulted in cups that crumbled when scooped from the tin and lacked the signature chewy-crispy texture that makes baked sushi cups so good.
Always rinse your rice until the water runs nearly clear before cooking. That step removes excess surface starch that can make the rice gummy instead of sticky-firm.
Can You Make Baked Sushi Cups Ahead of Time?
You can pre-bake the rice cups up to 24 hours ahead and store them uncovered at room temperature. Storing them covered or in the fridge traps moisture and softens the crispy edges.
When ready to serve, simply add the filling and broil for 3 to 4 minutes fresh. I tested this method for a party and it worked perfectly with almost no last-minute effort.
Do not add the tuna topping in advance. The moisture from the filling will soften the rice cups within an hour, losing that contrast of crispy base and creamy top that makes this recipe shine.
How Do You Keep Sushi Cups from Falling Apart?
The two biggest factors are pressing the rice firmly enough and pre-baking before adding the filling. Loose rice and skipping the pre-bake are the top two reasons cups fall apart.
I ruined my first three batches by under-pressing the rice and adding the topping straight to unbaked cups. The steam from the filling turned everything mushy from the inside out.
Use wet fingertips to press the rice with real firmness, especially up the sides. The wall of each cup needs to be at least half an inch thick to hold together through the broiling step.
What Fillings Work Best Besides Spicy Tuna?
Spicy tuna is the classic, but I’ve tested at least six variations and they all work beautifully. Imitation crab with Kewpie mayo is my second favorite and much more budget-friendly.
Other winners include cream cheese and smoked salmon, teriyaki chicken with green onion, or a vegan version using edamame and miso mayo. The key is keeping the filling thick enough that it doesn’t pool and run into the rice base.
Avoid watery fillings like fresh tomato or loose cucumber salads without draining them first. Excess moisture is the enemy of a crispy sushi cup base.
Are Baked Sushi Cups Gluten-Free?
The base recipe is naturally gluten-free as long as you use tamari instead of regular soy sauce. Standard soy sauce contains wheat, which makes it not safe for those with celiac disease or gluten sensitivity.
I always keep tamari in my kitchen specifically for recipes like this. It tastes nearly identical to soy sauce and swaps in at a 1:1 ratio with zero adjustment needed.
Double-check your sriracha brand as well, since some contain trace gluten from additives. Most major brands like Huy Fong are gluten-free, but reading the label takes two seconds and is always worth it.
Frequently Asked Questions
Q: Can I use regular mayo instead of Kewpie mayo?
A: Yes, regular mayo works as a substitute. Kewpie is richer and slightly tangier, so your filling may taste a little milder. Add a small squeeze of lemon juice to get closer to that flavor.
Q: Can baked sushi cups be made in an air fryer?
A: Yes. Air fry the pressed rice cups at 375°F for 10 to 12 minutes until crispy, then add filling and air fry 2 more minutes. The result is just as crispy with faster cook time.
Q: How long do leftover baked sushi cups keep?
A: Leftovers store in the fridge for up to 2 days in an airtight container. Reheat in the oven at 375°F for 5 to 6 minutes to bring back the crispiness. Avoid microwaving as it softens the rice.