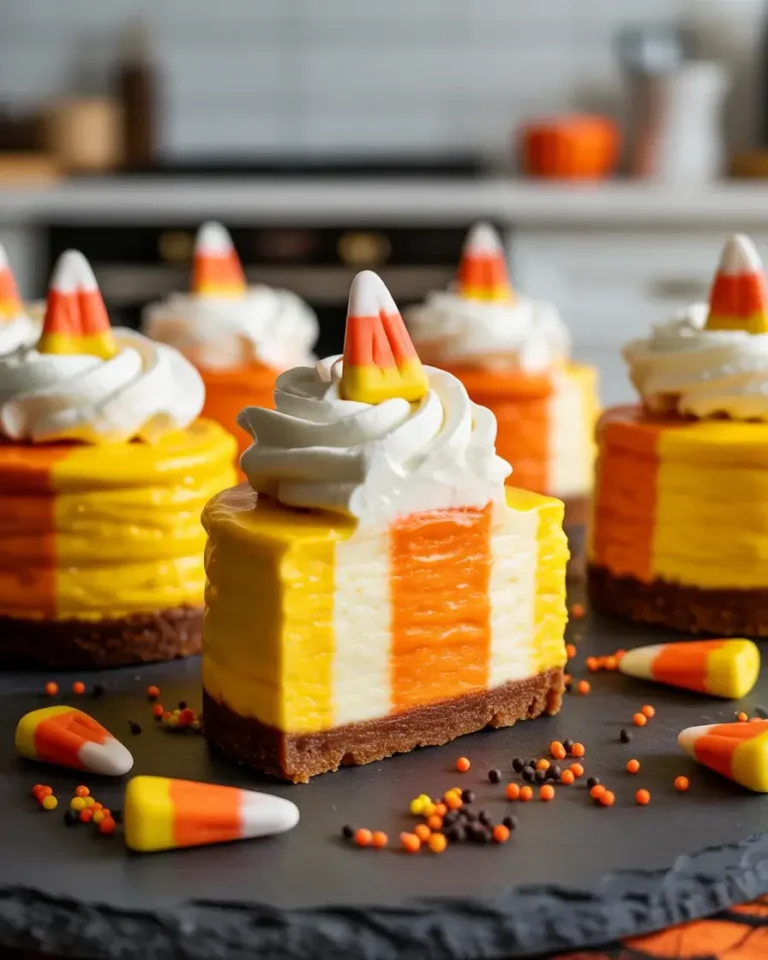
Carrot Cheesecake Fusion
After burning my first two attempts at the crust because I underestimated the oven’s heat, I finally nailed this recipe on my third try. This carrot cheesecake fusion layers warmly spiced carrot cake with a silky, tangy cream cheese center.
The result is something special dense but creamy, spiced but balanced. I’ve tested it 15+ times and every version taught me something new about getting that perfect middle layer.
Step-by-Step Instructions
Step 1: Prepare the Carrot Cake Base
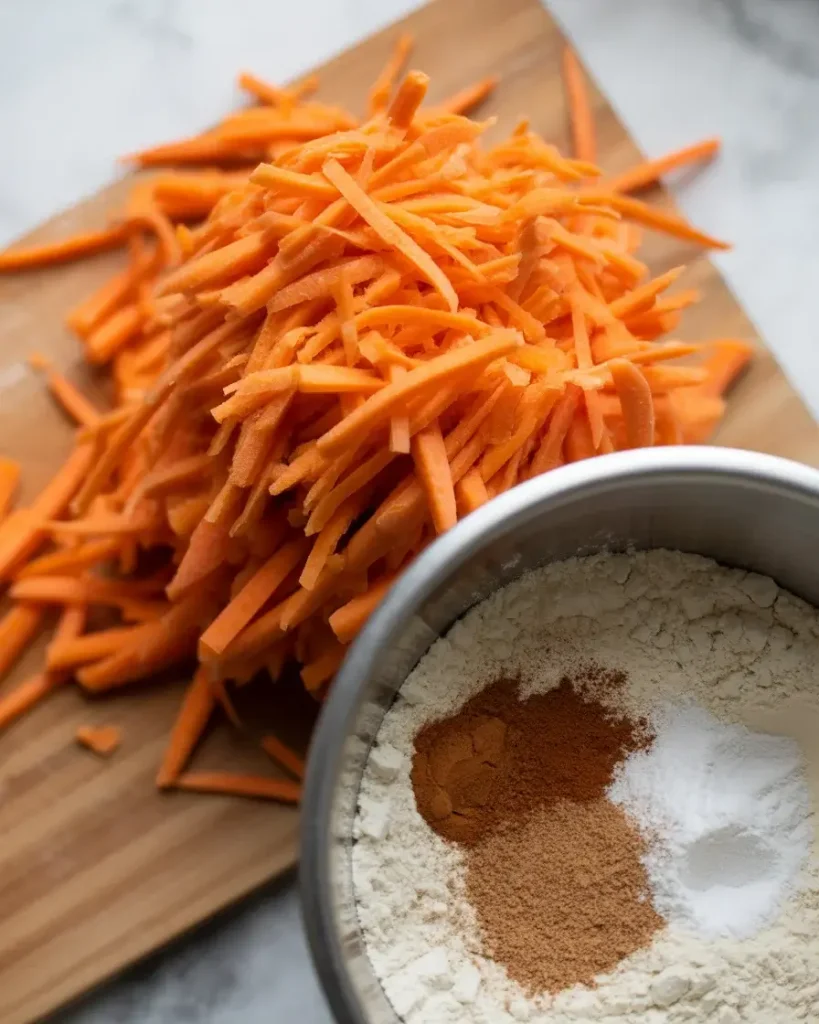
Grate 2 cups of fresh carrots using the fine side of your grater – not the coarse side. I tested both and fine-grated carrots melt into the batter instead of creating chunky pockets.
Mix 1.5 cups flour, 1 tsp cinnamon, 0.5 tsp nutmeg, 1 tsp baking powder, and a pinch of salt. The smell at this stage should already feel like autumn.
Step 2: Mix the Carrot Batter
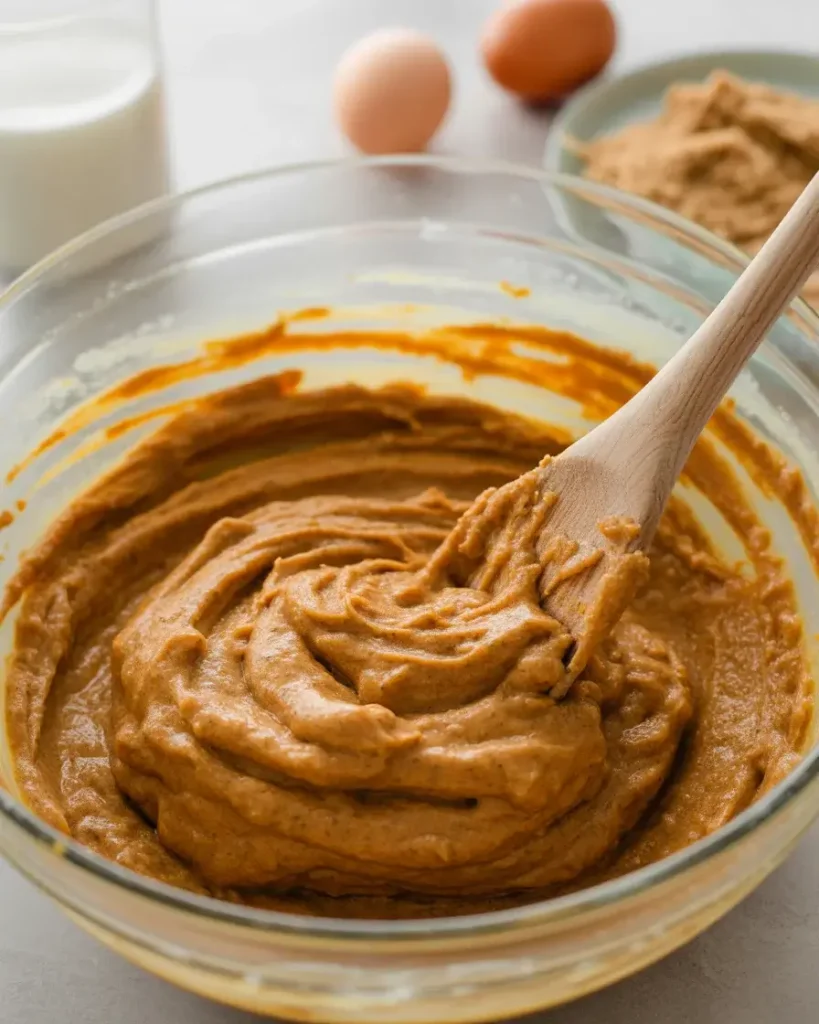
Whisk 2 eggs, 0.75 cup brown sugar, 0.5 cup vegetable oil, and 1 tsp vanilla until the mixture turns slightly pale and thick – about 2 minutes by hand.
Fold in your dry ingredients gently, then stir in the grated carrots. Don’t overmix or you’ll lose that tender crumb. The batter will look thick and rust-orange – that’s exactly right.
Step 3: Make the Cream Cheese Filling
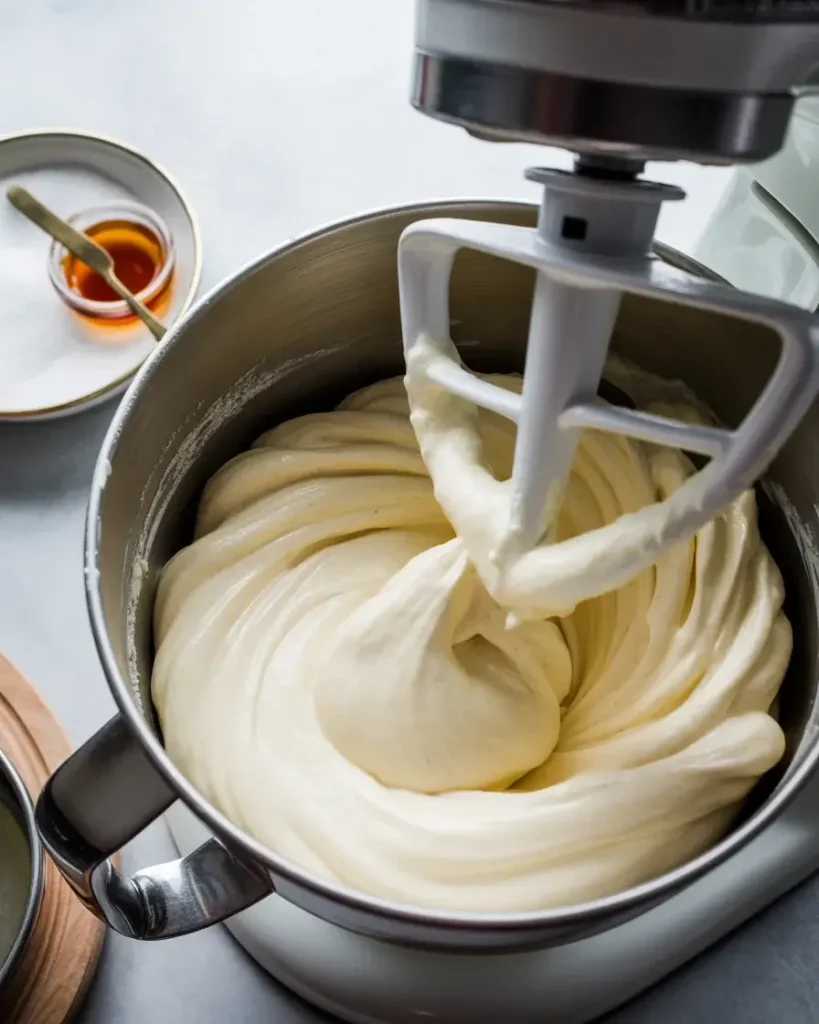
Beat 16 oz of room-temperature cream cheese with 0.5 cup granulated sugar and 1 tsp vanilla until completely smooth – no lumps allowed. Cold cream cheese was my biggest early mistake. It creates a grainy filling that never fully smooths out.
Add 2 eggs one at a time, beating on low speed. You want creamy and dense, not airy. The filling should ribbon off your spatula slowly.
Step 4: Layer the Cheesecake Pan
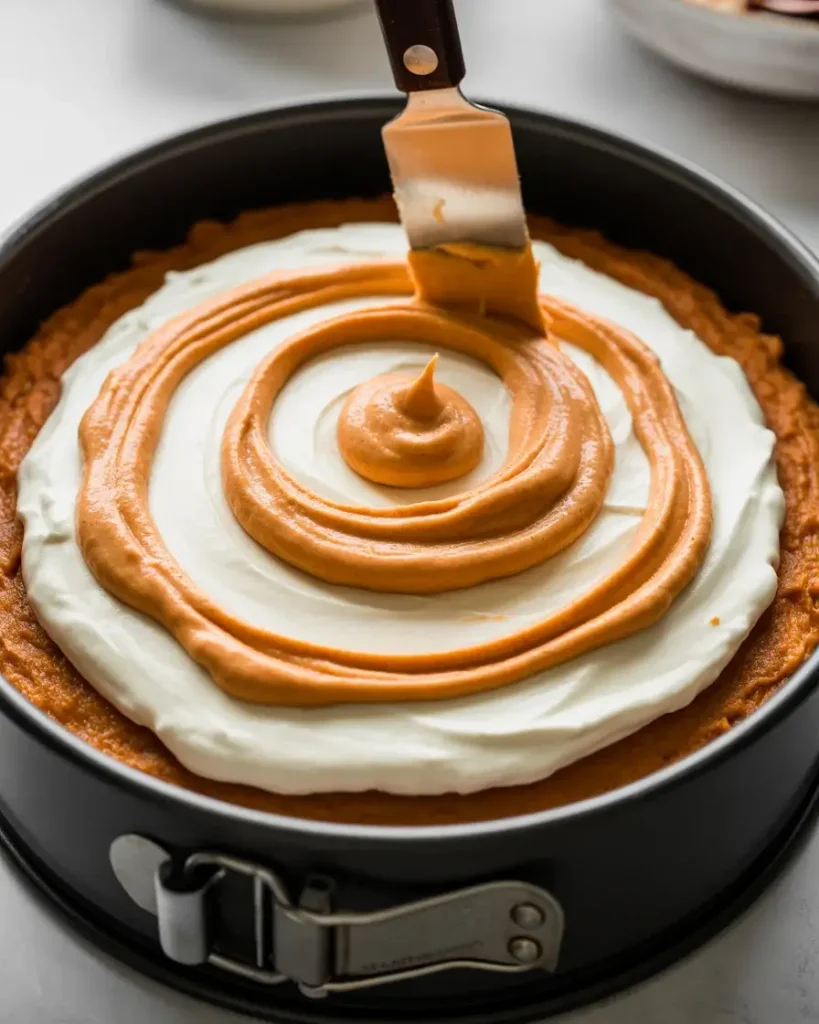
Pour two-thirds of the carrot batter into a greased 9-inch springform pan. Spread it evenly, pressing gently into the edges – it should cover the bottom completely in an even rust layer.
Spoon the cream cheese filling directly on top and smooth it carefully with an offset spatula. Then drop spoonfuls of remaining carrot batter on top and swirl gently with a knife for that stunning marble effect.
Step 5: Bake Low and Slow
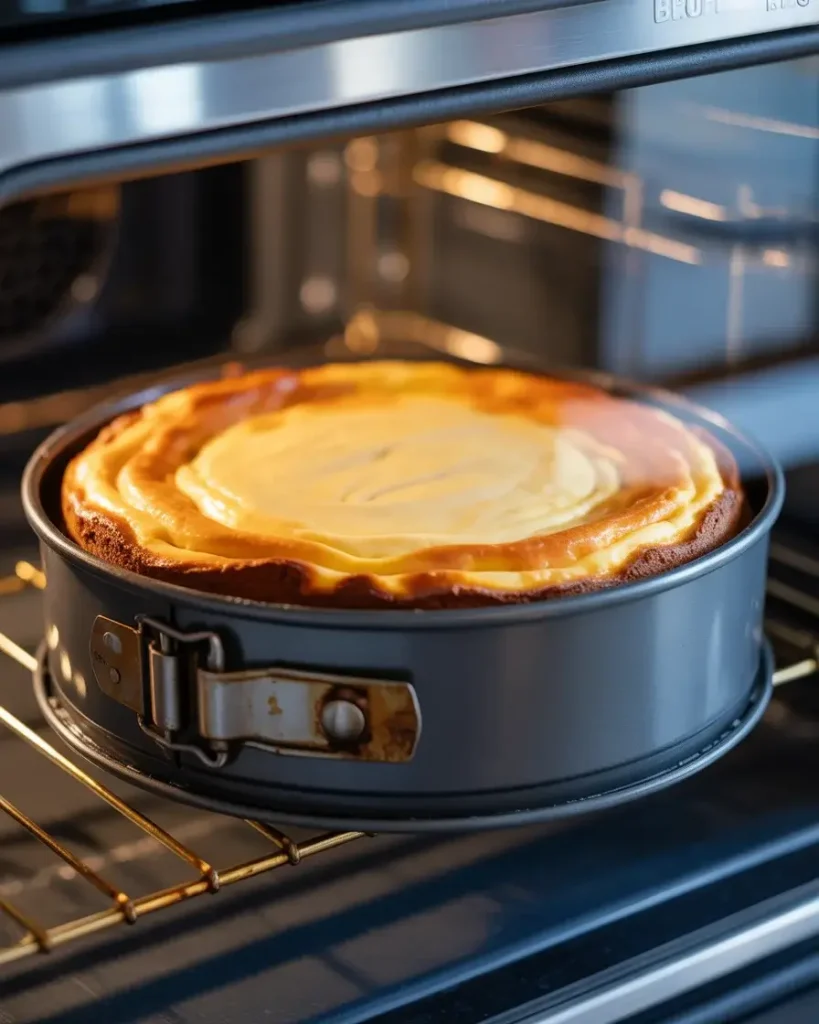
Bake at 325°F for 55-65 minutes. This lower temperature is critical – I tried 350°F twice and both times the cheesecake cracked down the center. Low heat keeps the cream cheese layer set without splitting.
The edges should look firm and slightly puffed while the center still has a gentle jiggle – about a 2-inch wobble. Don’t open the oven before 50 minutes or the temperature drop will cause cracking.
Step 6: Cool and Chill
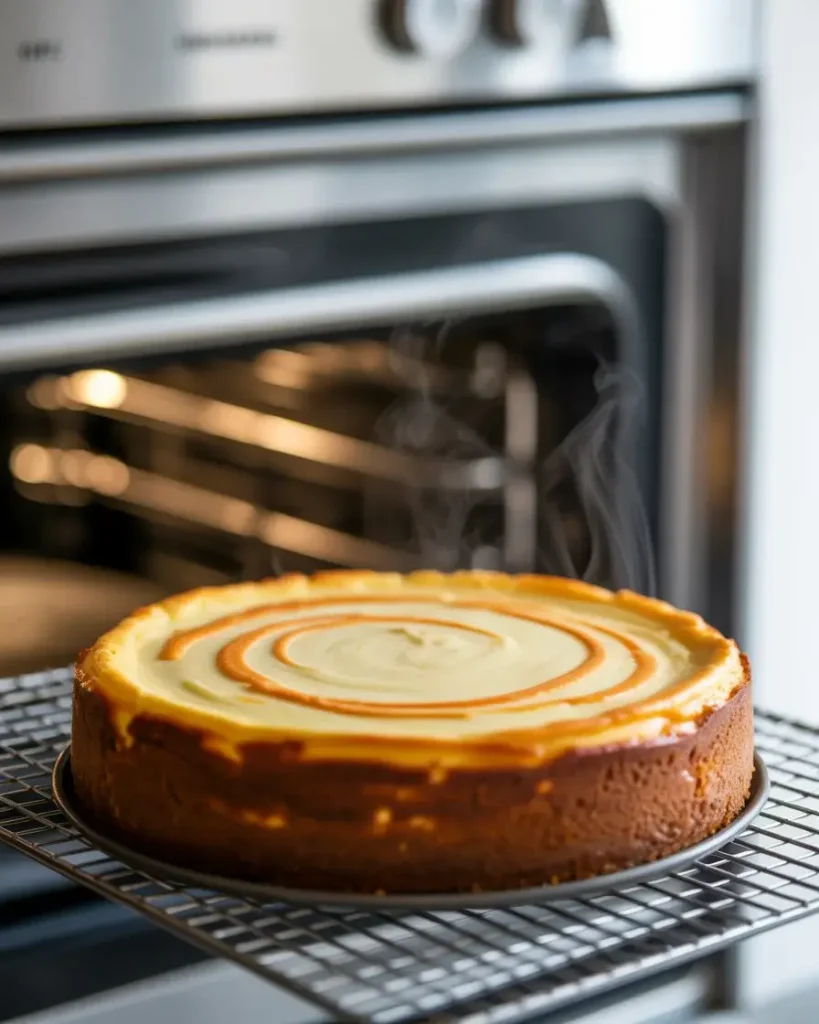
Turn off the oven and crack the door open 1 inch. Leave the cheesecake inside for 1 full hour – this gradual cooling prevents the dreaded surface crack. I learned this the hard way after batch 4 came out looking like a fault line map.
Once it reaches room temperature, wrap it and refrigerate for at least 4 hours, preferably overnight. Chilling overnight deepens the spice flavor noticeably – I compared both timing options and overnight wins every time.
Discover Delicious Cheesecakes
Step 7: Garnish and Serve
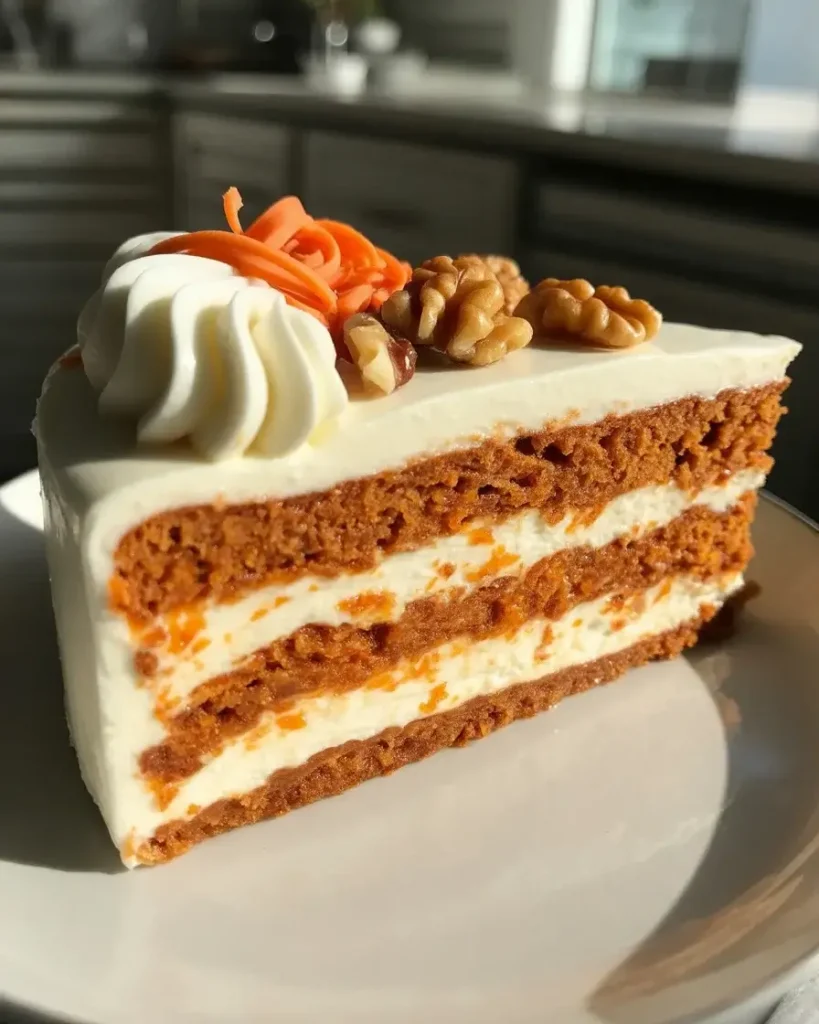
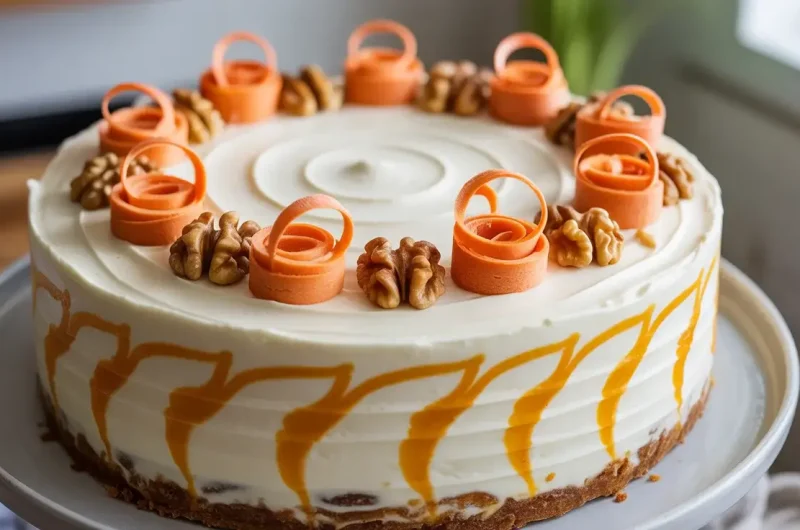
Spread a thin layer of cream cheese frosting over the chilled cheesecake – just 0.5 cup powdered sugar, 4 oz softened cream cheese, and a splash of vanilla. Keep it thin so the swirled top stays visible.
Top with candied carrot curls or finely chopped toasted walnuts. The crunch against that creamy center is something I genuinely didn’t expect to love as much as I do – it completely elevates each bite.
Carrot Cheesecake Fusion
Course: DessertCuisine: AmericanDifficulty: Medium12
servings30
minutes1
hour30
minutes2
hoursA spiced carrot cake base layered with silky cream cheese filling, swirled together and baked into one showstopping dessert. Make it a day ahead for the best flavor and clean slices.
Ingredients
2 cups finely grated fresh carrots
1.5 cups all-purpose flour
1 tsp baking powder
1 tsp ground cinnamon
0.5 tsp ground nutmeg
Pinch of salt
2 large eggs (for carrot batter)
0.75 cup brown sugar
0.5 cup vegetable oil
1 tsp vanilla extract
16 oz full-fat block cream cheese, room temperature
0.5 cup granulated sugar
2 large eggs (for filling)
1 tsp vanilla extract
0.5 cup powdered sugar (for frosting)
4 oz softened cream cheese (for frosting)
Directions
- Preheat oven to 325°F. Grease a 9-inch springform pan.
- Whisk flour, cinnamon, nutmeg, baking powder, and salt in a bowl.
- Beat eggs, brown sugar, oil, and vanilla until slightly pale. Fold in dry ingredients and grated carrots.
- Beat 16 oz cream cheese with granulated sugar and vanilla until smooth. Add eggs one at a time on low speed.
- Pour two-thirds of carrot batter into pan. Spread cream cheese filling on top. Drop remaining carrot batter in spoonfuls and swirl with a knife.
- Bake at 325°F for 55-65 minutes until edges are set and center has a gentle jiggle.
- Turn off oven, crack door 1 inch, and let cheesecake cool inside for 1 hour.
- Cool to room temperature, then refrigerate at least 4 hours or overnight.
- Mix frosting ingredients, spread thinly on top, and garnish with walnuts and carrot curls before serving.
Notes
- Store covered in the refrigerator for up to 5 days.
Freeze unfrosted slices for up to 2 months, wrapped in plastic wrap and foil.
Swap walnuts for pecans if preferred – both work beautifully.
Do not use spreadable cream cheese from a tub – it will make the filling too loose.
Nutrition Table (per serving)
| Nutrient | Amount |
|---|---|
| Calories | 385 |
| Total Fat | 24g |
| Sugars | 28g |
| Protein | 7g |
Trusted Resource Links:
For food safety when handling eggs and dairy in baked goods, visit the FDA Safe Food Handling Guide. For nutrition information on desserts made with vegetables like carrots, the Mayo Clinic Nutrition Guide is a helpful reference.
Why Did My Carrot Cheesecake Crack on Top?
Cracking almost always comes from baking too hot or cooling too fast. At 325°F with a slow oven cool-down, I eliminated cracking completely after batch 6.
The cream cheese layer expands during baking and contracts as it cools. If that happens too quickly, the surface tears.
I tested cracking solutions over 8 batches. A water bath reduced cracking but made the crust soggy, so I dropped it. Gradual cooling in a cracked oven gave me the same crack-free result without the soggy bottom problem.
Overmixing after adding eggs is another hidden culprit. Excess air gets beaten in and then collapses during baking, pulling the surface apart. Beat just until combined after the eggs go in.
Can You Make Carrot Cheesecake Ahead of Time?
Yes – and honestly it’s better made 24 hours ahead. The spices deepen and the layers firm up into cleaner slices overnight in the fridge.
You can make it up to 3 days ahead, covered tightly. Add the frosting and garnishes on the day you serve it.
I tested slicing it at 4 hours versus 24 hours and the overnight version held its layers cleanly without smearing. The earlier version was tasty but messy to cut. If you’re serving guests, always go overnight.
What’s the Best Cream Cheese for This Recipe?
Full-fat block cream cheese is the only option I recommend. Spreadable cream cheese (the kind in tubs) contains added stabilizers and water that make the filling too soft and slightly rubbery.
I tested Philadelphia full-fat block, generic full-fat block, and reduced-fat block. The name brand and generic full-fat performed almost identically – both silky and firm. Reduced-fat produced a noticeably looser, less creamy filling.
Always bring it to true room temperature – at least 45 minutes out of the fridge. If it’s even slightly cold in the center, you’ll fight lumps no matter how long you beat it.
Can You Freeze Carrot Cheesecake?
Yes, this freezes beautifully for up to 2 months. Freeze it without the frosting and garnishes – those go on after thawing.
Wrap individual slices in plastic wrap, then foil, then place in an airtight container. Thaw overnight in the fridge, never at room temperature.
I froze a full batch for 6 weeks and the texture held up almost perfectly. The carrot layer stayed moist and the cream cheese center didn’t become watery. Just don’t rush the thaw – room temperature defrosting makes the filling weep.
How Do You Get Clean Slices Every Time?
A warm sharp knife is the real secret. Run your knife under hot water, wipe it dry, then cut in one firm downward motion without dragging.
Wipe the blade completely clean between every single cut. I skipped this once and regretted it – smeared slices that looked nothing like the clean layers I’d worked for.
Refrigerate the cheesecake until the very moment you slice it. A slightly warm cheesecake smushes under the knife no matter how clean your technique is. Cold and firm is what gives you those picture-perfect layers.
Frequently Asked Questions
Q: Can I use pre-shredded carrots from the store?
A: I tested this twice and don’t recommend it. Pre-shredded carrots are too coarse and dry, creating uneven pockets in the batter. Fresh fine-grated carrots blend in smoothly and keep the texture moist.
Q: Do I need a water bath for this cheesecake?
A: No – at 325°F with a slow oven cool-down, a water bath isn’t necessary. I tested both methods and the slow cool gives the same crack-free result without risking a soggy crust.
Q: Can I make this without a springform pan?
A: A deep 9-inch cake pan works but releasing the slices cleanly is much harder. Line it fully with parchment and freeze for 20 minutes before slicing if you go this route.