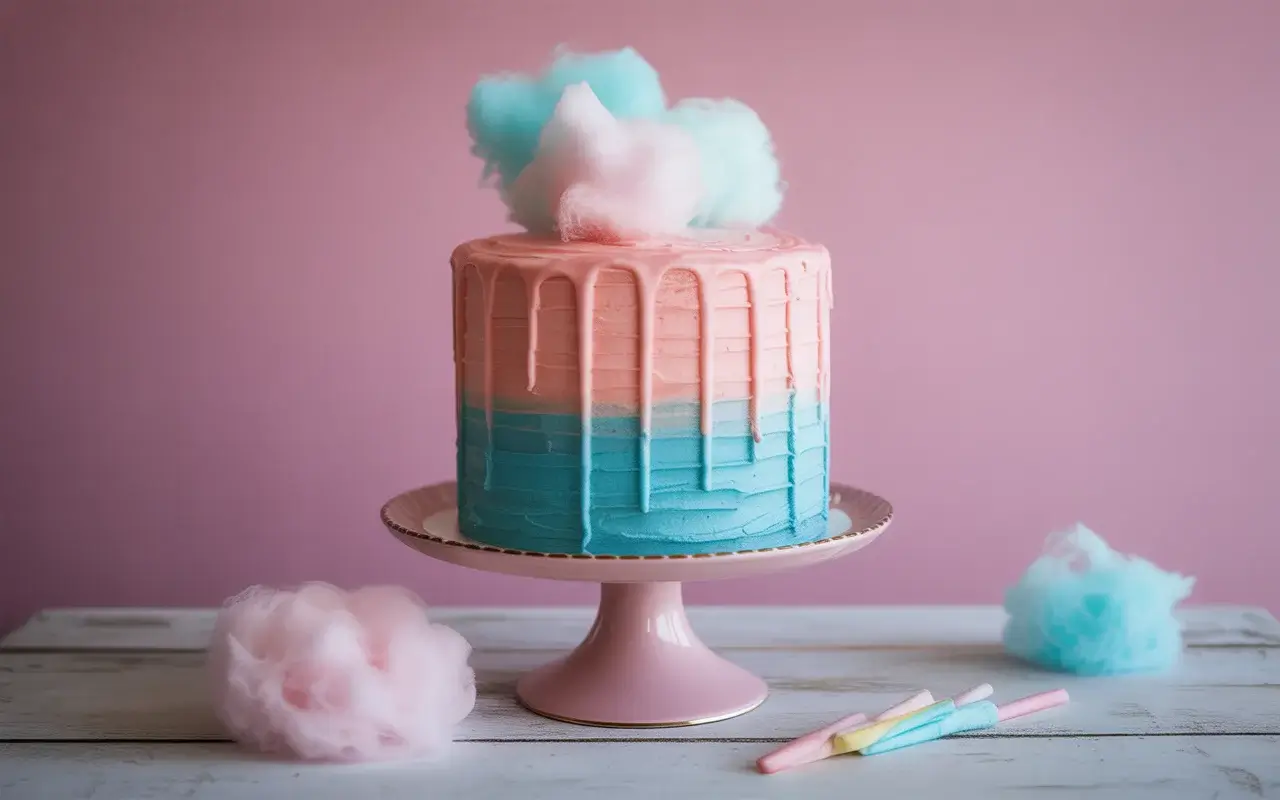
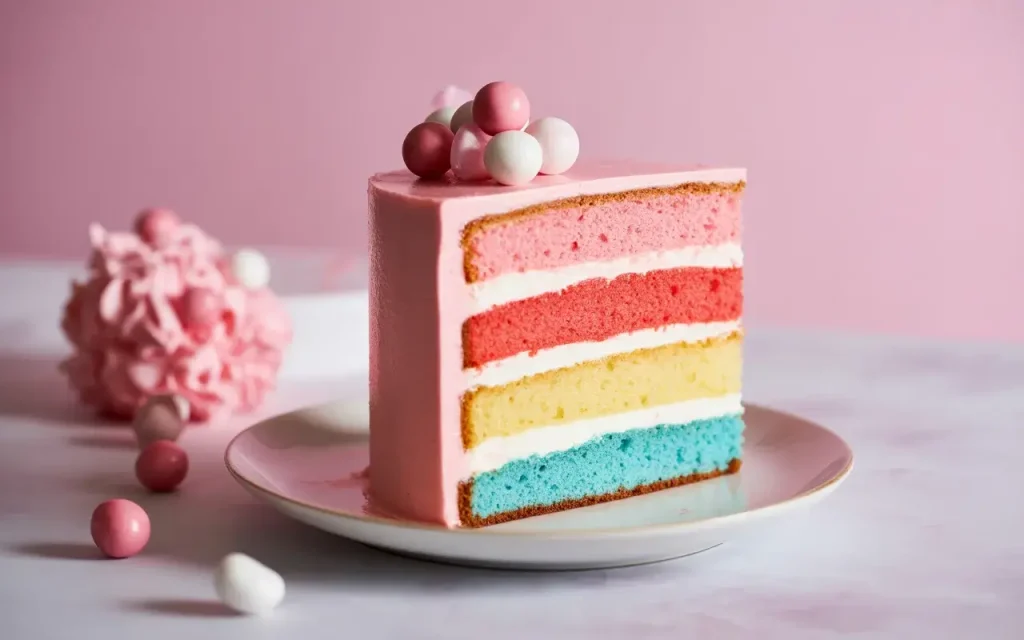
Cotton Candy Layer Cake
This cotton candy layer cake is a dreamy, fluffy dessert that tastes just like the carnival treat we all love. With soft vanilla layers, sweet cotton candy buttercream, and a cloud of spun sugar on top, it’s pure magic on a plate.
Perfect for birthdays, baby showers, or any celebration that needs a pop of whimsy. This recipe breaks down every step so you can create a bakery-worthy cake at home, even if you’re new to layer cakes.
Why You’ll Love This Recipe
This cake isn’t just pretty, it delivers on flavor too. The vanilla cake is moist and tender, while the cotton candy buttercream brings that nostalgic sweetness without being overly sugary.
It’s easier than it looks. You don’t need fancy tools or advanced skills, just a few simple techniques and quality ingredients. The result? A showstopper dessert that tastes as good as it photographs.
Plus, it’s endlessly customizable. Swap the colors, adjust the sweetness, or even add sprinkles for extra fun.
Read More: Old Fashioned British Christmas Cake
Ingredients You’ll Need
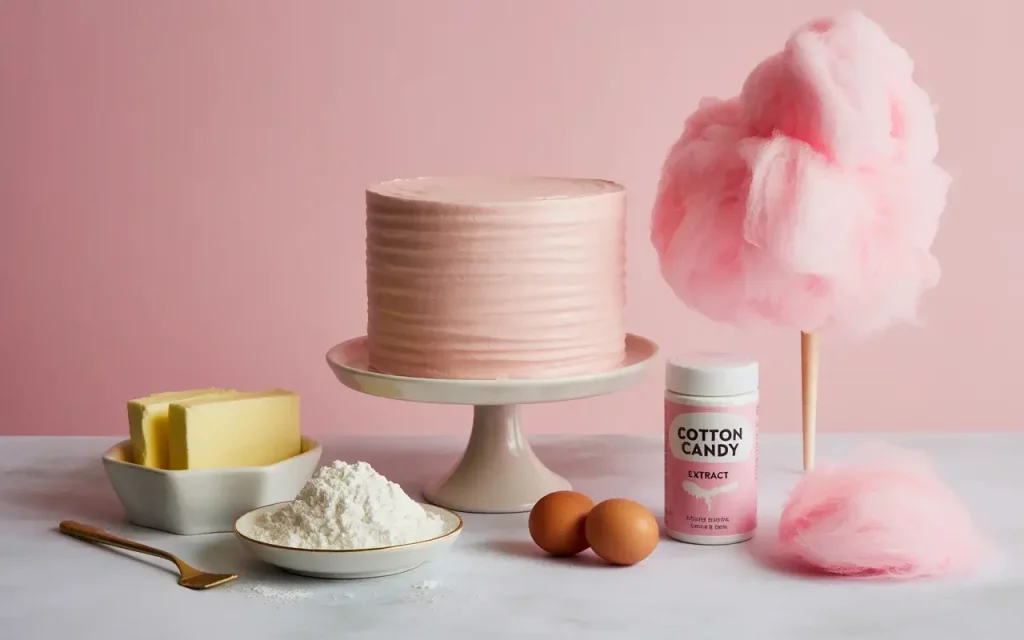
The beauty of this cake is in its simplicity. You likely have most of these ingredients in your pantry already, and the cotton candy flavoring is what makes it truly special.
For the Cake:
For the Cotton Candy Buttercream:
For Decoration:
How to Make Cotton Candy Layer Cake
Making this cake is all about patience and following each step carefully. Don’t rush the cooling process, it makes all the difference in getting clean, beautiful layers.
Start by prepping your pans and bringing ingredients to room temperature. This ensures even baking and smooth frosting. Cold ingredients can cause lumps or uneven texture.
Step 1: Prepare the Cake Batter Preheat your oven to 350°F. Grease and line three 8-inch round cake pans with parchment paper. In a medium bowl, whisk together flour, baking powder, and salt.
In a large bowl, beat butter and sugar until light and fluffy, about 4 minutes. Add eggs one at a time, beating well after each addition. Mix in vanilla extract.
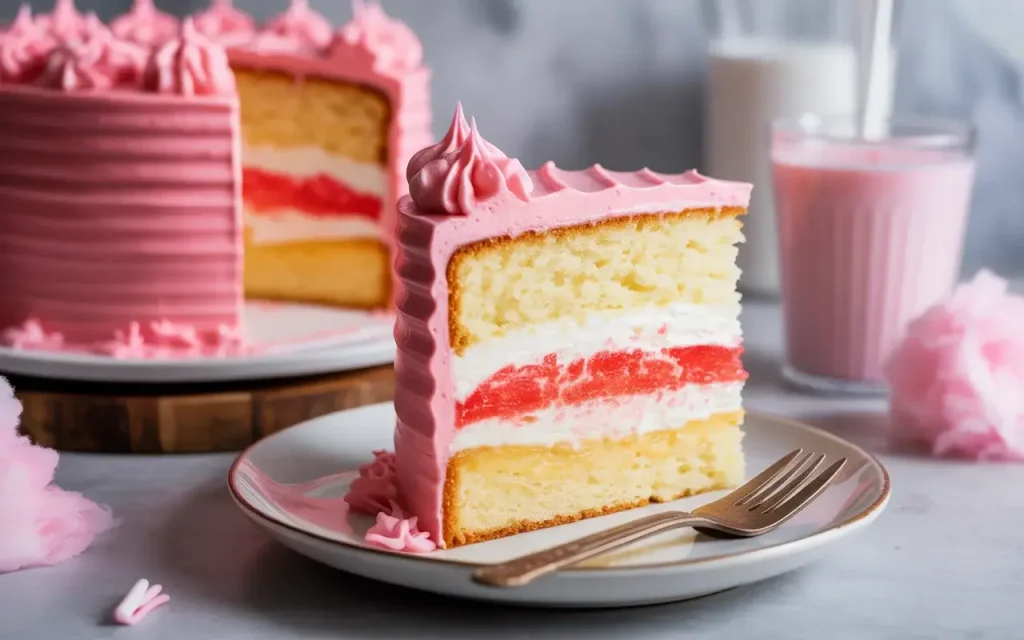
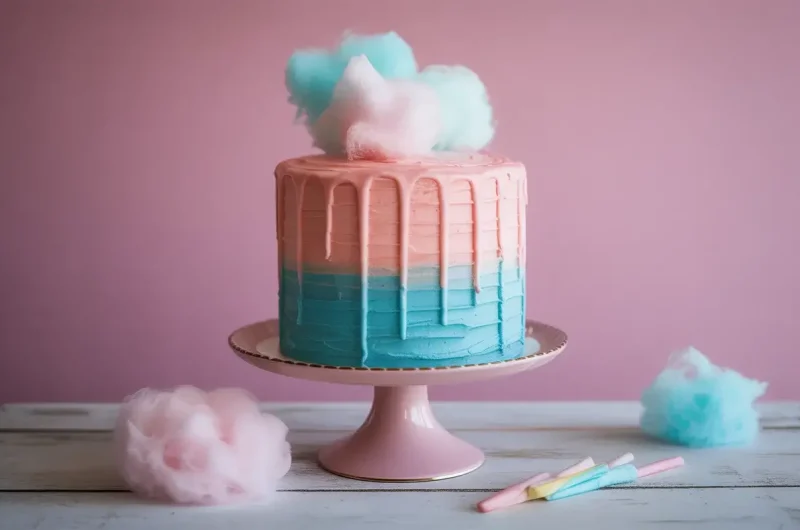
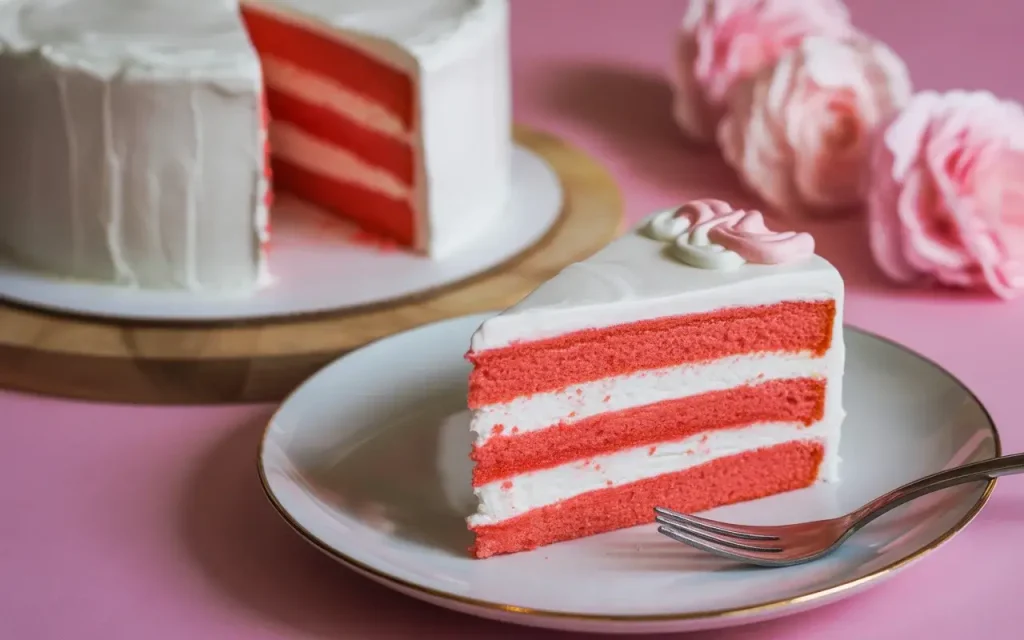
Alternate adding the dry ingredients and milk to the butter mixture, beginning and ending with dry ingredients. Mix until just combined. Divide batter into three bowls and tint one pink, one blue, and leave one plain if desired.
Step 2: Bake the Layers Pour each colored batter into prepared pans. Tap pans gently on the counter to release air bubbles. Bake for 25 to 28 minutes, or until a toothpick inserted in the center comes out clean.
Let cakes cool in pans for 10 minutes, then turn out onto wire racks to cool completely. This step is crucial, warm cakes will melt your frosting.
Step 3: Make the Buttercream Beat softened butter until creamy and pale, about 3 minutes. Gradually add powdered sugar, one cup at a time, beating on low speed.
Add heavy cream, cotton candy extract, and salt. Beat on high for 3 to 4 minutes until light and fluffy. Add pink food coloring if desired and mix until evenly distributed.
Step 4: Assemble the Cake Place first cake layer on a serving plate or cake board. Spread about ¾ cup of buttercream evenly over the top. Add second layer and repeat.
Place final layer on top. Apply a thin crumb coat of frosting over the entire cake and refrigerate for 20 minutes. This seals in crumbs for a cleaner final coat.
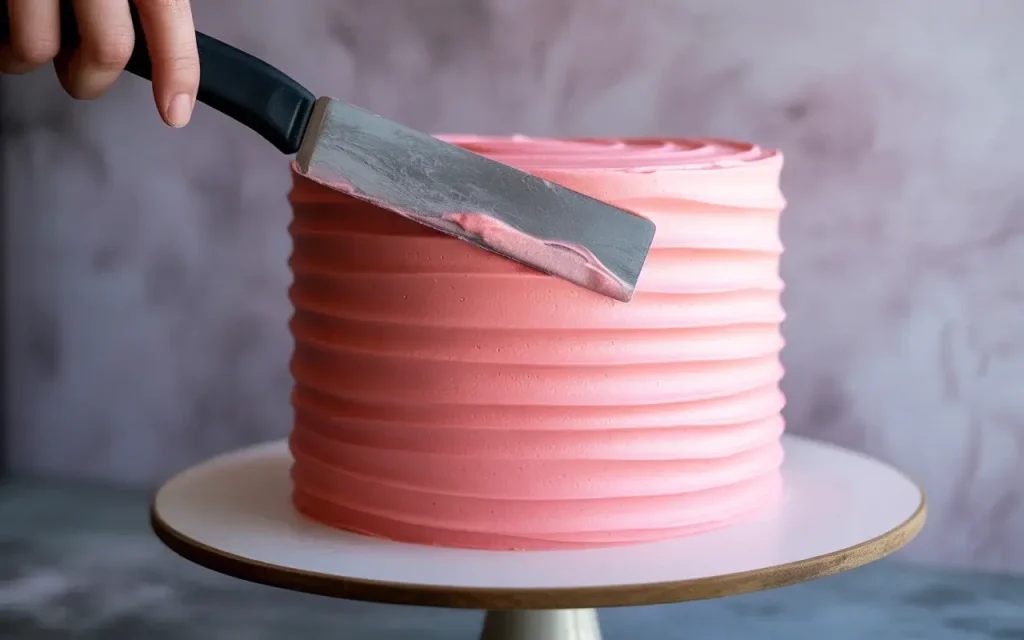
Frost the entire cake with remaining buttercream, using a bench scraper or offset spatula for smooth sides. Create swirls or keep it sleek, your choice.
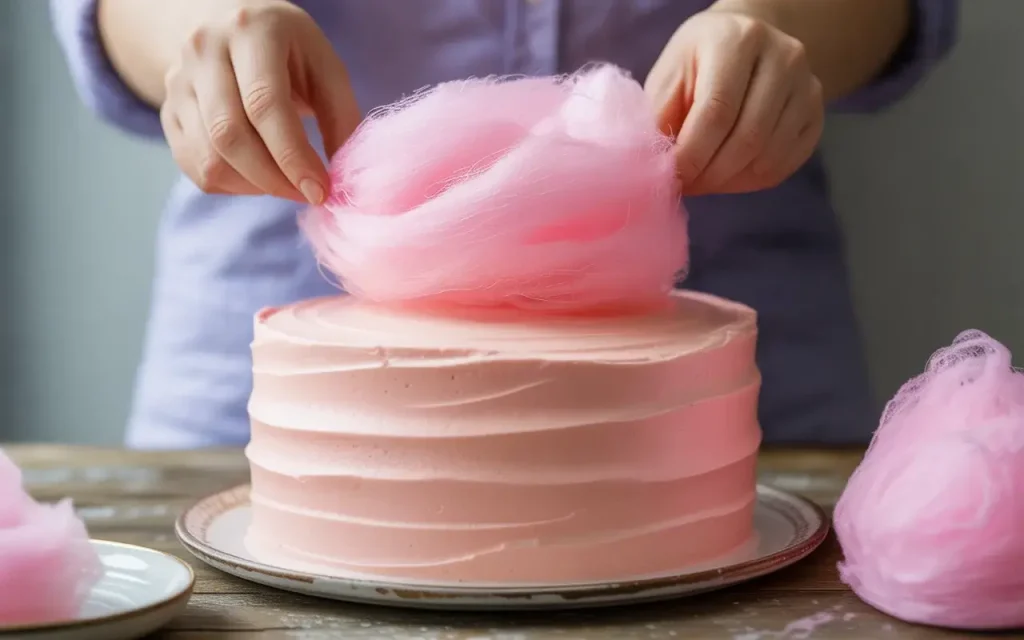
Step 5: Decorate and Serve Top the cake with fresh cotton candy just before serving. Cotton candy dissolves quickly, so add it at the last minute for the best visual impact.
Add sprinkles around the base or on top if desired. Slice with a sharp knife, wiping it clean between cuts for neat slices.
Cotton Candy Layer Cake
Course: DessertCuisine: AmericanDifficulty: Intermediate12
servings30
48
minutes1
hour18
minutesA fluffy vanilla layer cake with sweet cotton candy buttercream and a cloud of spun sugar on top. Perfect for celebrations and guaranteed to wow your guests.
Ingredients
- Cake
2¾ cups all-purpose flour
2½ teaspoons baking powder
½ teaspoon salt
1 cup unsalted butter, softened
2 cups granulated sugar
4 large eggs, room temperature
1 tablespoon vanilla extract
1 cup whole milk, room temperature
Pink and blue gel food coloring
- Buttercream
1½ cups unsalted butter, softened
6 cups powdered sugar
¼ cup heavy cream
2 teaspoons cotton candy extract
Pinch of salt
Pink gel food coloring
- Decoration
Cotton candy
Sprinkles (optional)
Directions
- Make the cake layers
- Preheat oven to 350°F. Grease and line three 8-inch round cake pans with parchment paper.
- Whisk together flour, baking powder, and salt in a medium bowl. Set aside.
- Beat butter and sugar in a large bowl until light and fluffy, about 4 minutes. Add eggs one at a time, beating well after each addition. Mix in vanilla extract.
- Alternate adding dry ingredients and milk to butter mixture, beginning and ending with dry ingredients. Mix just until combined.
- Divide batter into three bowls. Tint one pink, one blue, and leave one plain. Pour batter into prepared pans.
- Bake for 25–28 minutes until a toothpick inserted into the center comes out clean.
- Cool cakes in pans for 10 minutes, then transfer to wire racks to cool completely.
- Make the buttercream
- Beat butter in a large bowl until creamy, about 3 minutes.
- Gradually add powdered sugar, beating on low speed until incorporated.
- Add heavy cream, cotton candy extract, and salt. Beat on high speed for 3–4 minutes until light and fluffy.
- Add pink food coloring if desired and mix until evenly colored.
- Assemble the cake
- Place first cake layer on a serving plate. Spread about ¾ cup buttercream evenly over the top.
- Add second cake layer and repeat with another ¾ cup buttercream.
- Place final cake layer on top.
- Apply a thin crumb coat of buttercream over the entire cake. Refrigerate for 20 minutes to set.
- Frost cake with remaining buttercream. Smooth with an offset spatula or create decorative swirls.
- Decorate and serve
- Top with cotton candy just before serving. Add sprinkles if desired.
- Slice and serve immediately for best texture and appearance.
Notes
- Cotton candy extract can be found in baking supply stores or online. If you can’t find it, use vanilla extract and add cotton candy flavor by dissolving actual cotton candy into your milk before adding it to the batter.
For perfectly level layers, use cake strips around your pans during baking or trim domed tops with a serrated knife once cooled.
If buttercream becomes too soft while working, refrigerate for 10 minutes to firm up before continuing.
Nutrition (Per Serving)
| Nutrient | Amount |
|---|---|
| Calories | 685 |
| Total Fat | 32g |
| Sugars | 78g |
| Protein | 5g |
Tips for the Best Results
Room temperature ingredients are non-negotiable here. They blend smoothly and create a better texture in both cake and frosting. Set them out 30 minutes before you start.
Don’t overmix the batter. Stir until ingredients are just combined to keep your cake tender and light. Overmixing develops gluten and makes the cake dense.
Chill your cake layers before frosting. Cold cake is much easier to work with and won’t shed crumbs into your buttercream. Wrap cooled layers in plastic and refrigerate for an hour if you have time.
Storage and Make-Ahead Options
This cake keeps beautifully at room temperature for up to 2 days if covered loosely. The buttercream acts as a protective layer, keeping the cake moist inside.
For longer storage, refrigerate for up to 5 days in an airtight container. Bring to room temperature 30 minutes before serving for the best flavor and texture.
You can also freeze unfrosted cake layers for up to 3 months. Wrap tightly in plastic wrap, then foil. Thaw in the fridge overnight before assembling and frosting.
Variations to Try
Swap cotton candy extract for other flavors like almond, strawberry, or even bubblegum. The cake base is versatile and works with almost any flavor profile.
Try different color combinations. Pastel rainbow layers, ombre pink, or classic white with colorful sprinkles all work beautifully.
Add a filling between layers like strawberry jam, lemon curd, or chocolate ganache for extra flavor depth. Just spread a thin layer before adding buttercream.
Frequently Asked Questions
Can I make this cake without cotton candy extract?
Yes, you can use vanilla extract or almond extract instead. The cake will still be delicious and you can add actual cotton candy as decoration to bring in that nostalgic flavor. Some bakers dissolve cotton candy into warm milk for the batter to infuse subtle sweetness.
Why is my buttercream grainy?
Grainy buttercream usually means the powdered sugar wasn’t fully incorporated or the butter was too cold. Beat the frosting for an extra 2 to 3 minutes on high speed to smooth it out. Make sure your butter is truly softened to room temperature, not melted or cold from the fridge.
How far in advance can I decorate this cake?
You can fully frost the cake up to 24 hours ahead and keep it refrigerated. Just wait to add the cotton candy topping until right before serving since it dissolves quickly. The frosted cake actually tastes better after sitting overnight as the flavors meld together.