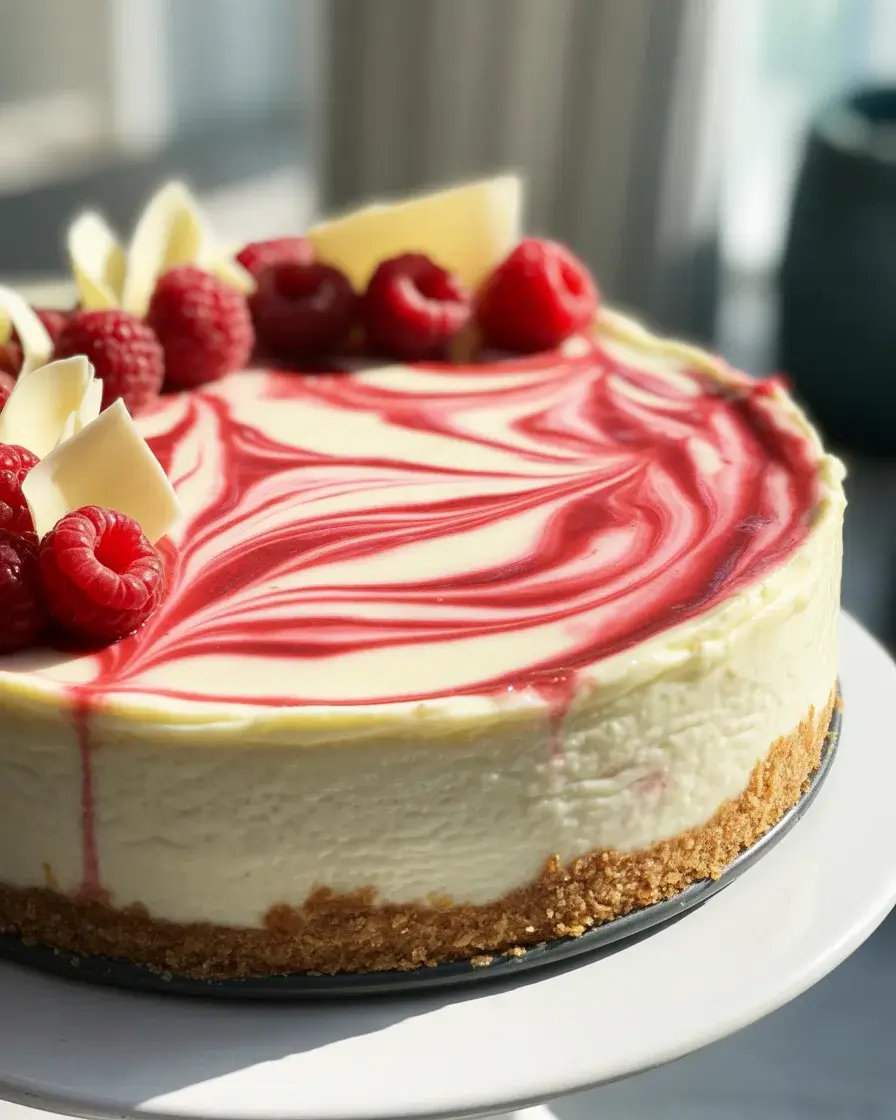
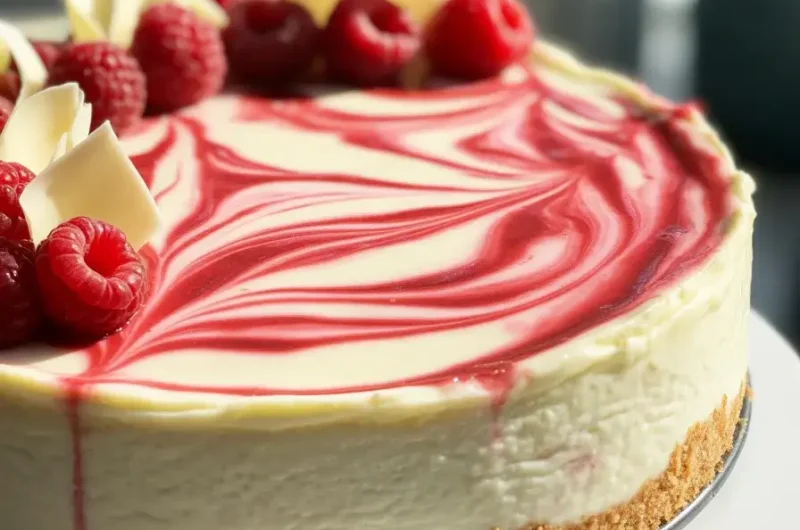
White Chocolate Raspberry Cheesecake
My first attempt at this cheesecake cracked so badly it looked like a desert landscape. I was devastated until I discovered the water bath method changes everything. Now I make this for every special celebration because the creamy white chocolate pairs perfectly with tart raspberries.
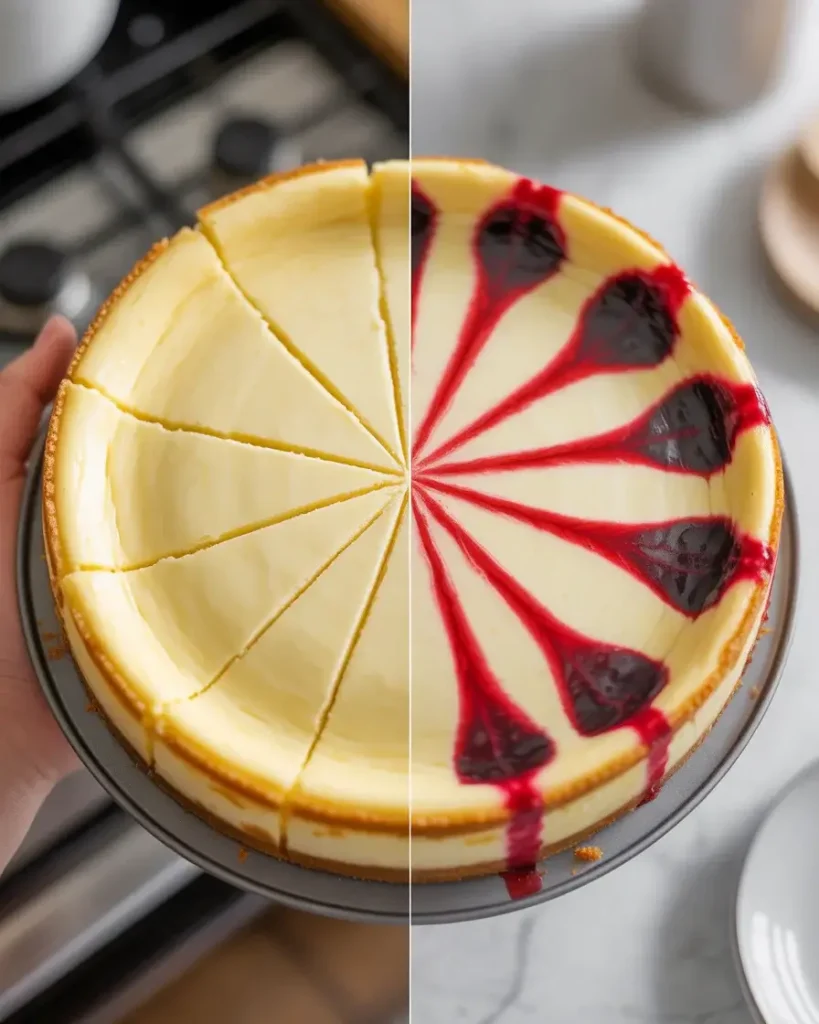
This recipe took me 15 test runs to perfect the swirl technique and baking temperature. The result is a showstopping dessert with zero cracks, silky texture, and gorgeous pink ribbons throughout. It’s my go-to when I need to impress.
Step-by-Step Instructions
Step 1: Make the Graham Cracker Crust
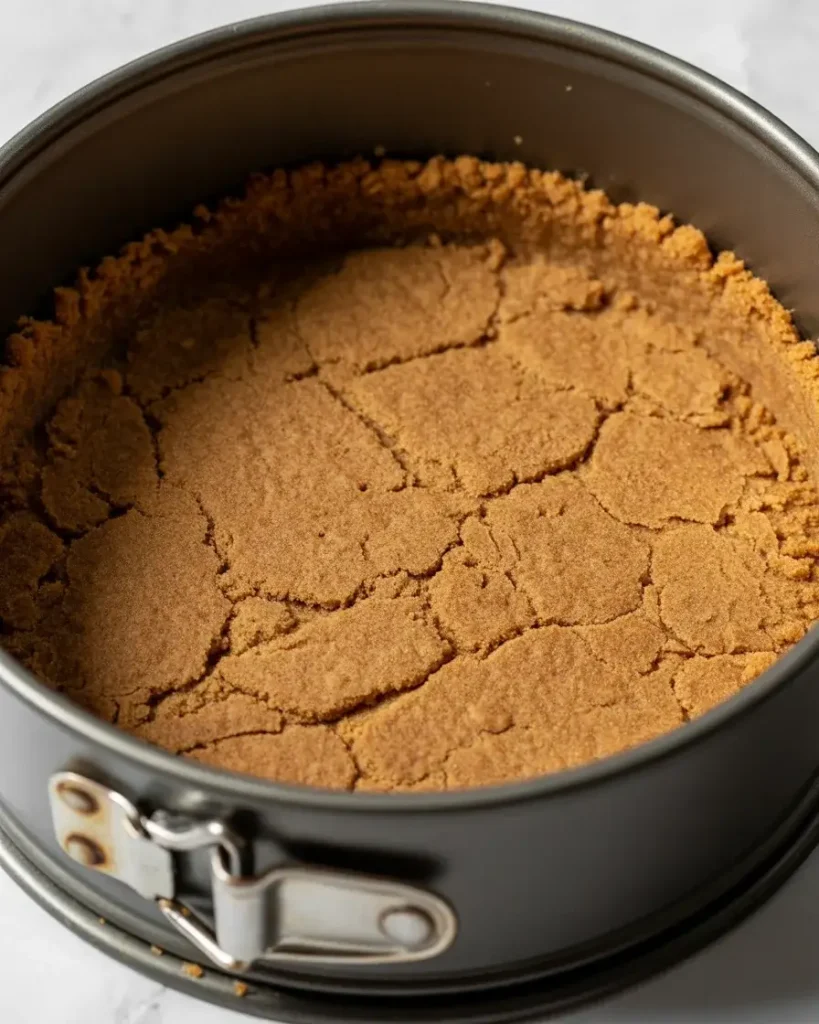
Pulse 2 cups graham crackers in a food processor until fine crumbs form. Mix with 1/3 cup melted butter and 2 tablespoons sugar until the texture resembles wet sand. Press firmly into the bottom of a 9-inch springform pan, using the bottom of a measuring cup to pack it down.
Bake at 350°F for 10 minutes until lightly golden and fragrant. I tested skipping this step once and the crust turned soggy. The pre-bake creates a barrier that keeps everything crisp.
Step 2: Melt the White Chocolate
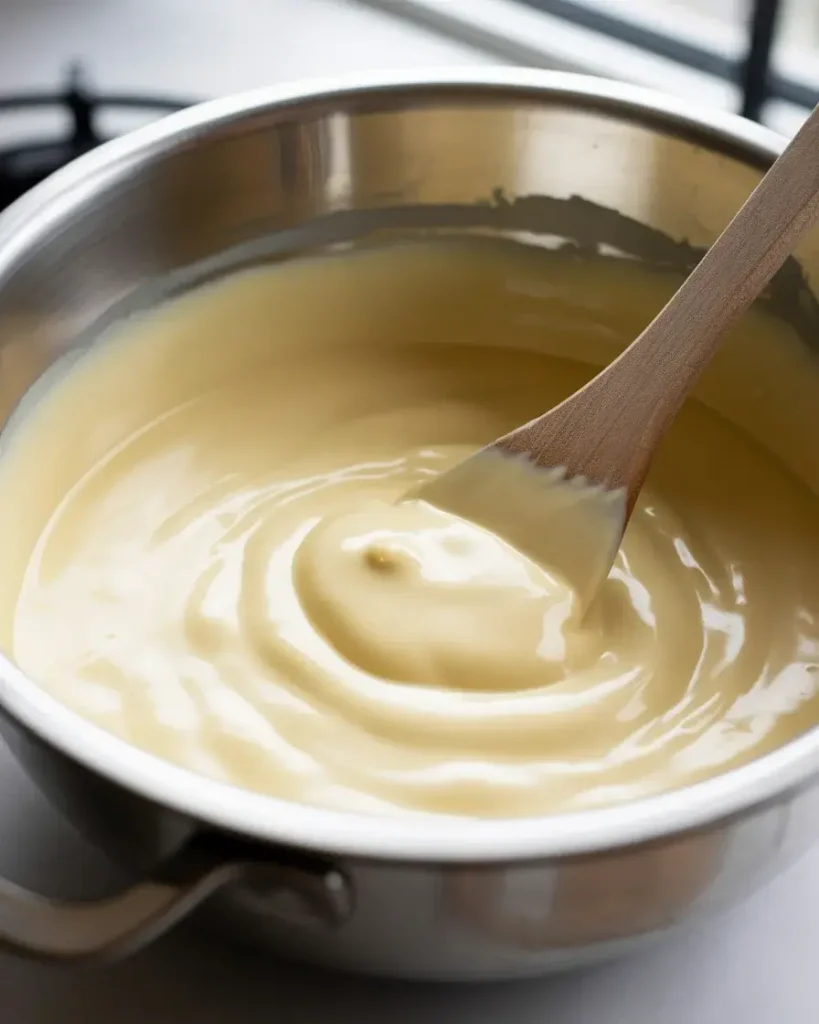
Chop 8 ounces white chocolate into small, uniform pieces. Melt in a double boiler over simmering water, stirring constantly until completely smooth and no lumps remain. The chocolate should reach about 110°F and look glossy.
Remove from heat and let cool for 5 minutes before adding to the cream cheese. I learned this the hard way when hot chocolate scrambled my filling. The cooling step is critical for silky texture.
Step 3: Beat the Cream Cheese Base
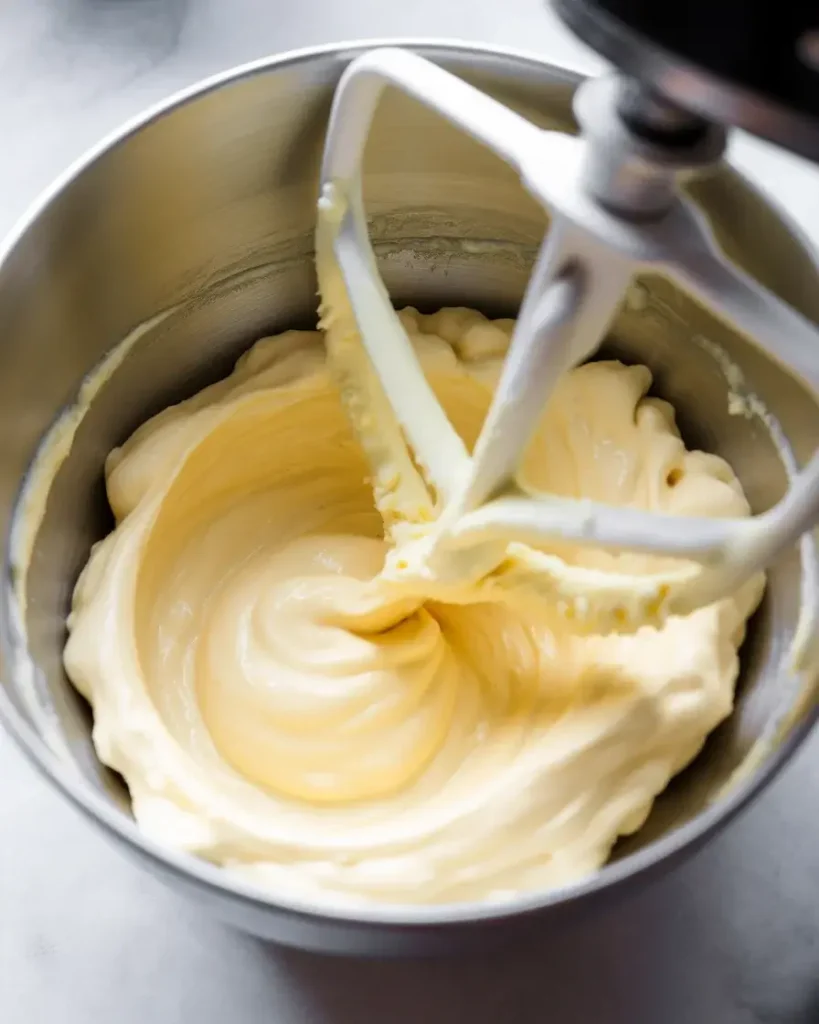
Beat 32 ounces cream cheese at medium speed for 2 minutes until completely smooth with no lumps visible. Add 1 cup sugar and beat for another minute. Scrape down the bowl sides twice during this process.
Mix in 1 teaspoon vanilla extract and the cooled melted white chocolate on low speed just until combined. I’ve tested over-mixing and it incorporates too much air, which causes cracks. Stop as soon as everything looks uniform.
Step 4: Add Eggs and Sour Cream
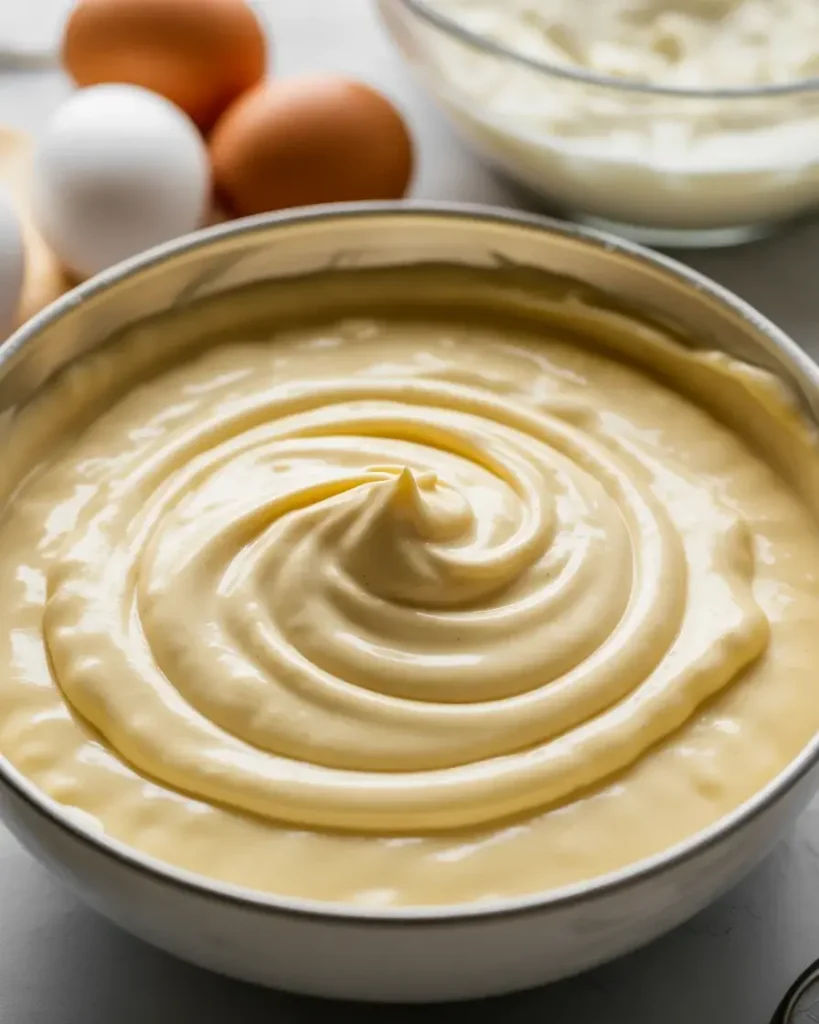
Add 4 large eggs one at a time, beating on low speed for 10 seconds after each addition. The filling should look smooth but not fluffy. Add 1/2 cup sour cream and mix just until incorporated.
After 12 test batches, I discovered that beating eggs on high speed creates air bubbles that turn into cracks. Low speed is essential. The filling should be thick and silky, not whipped or airy.
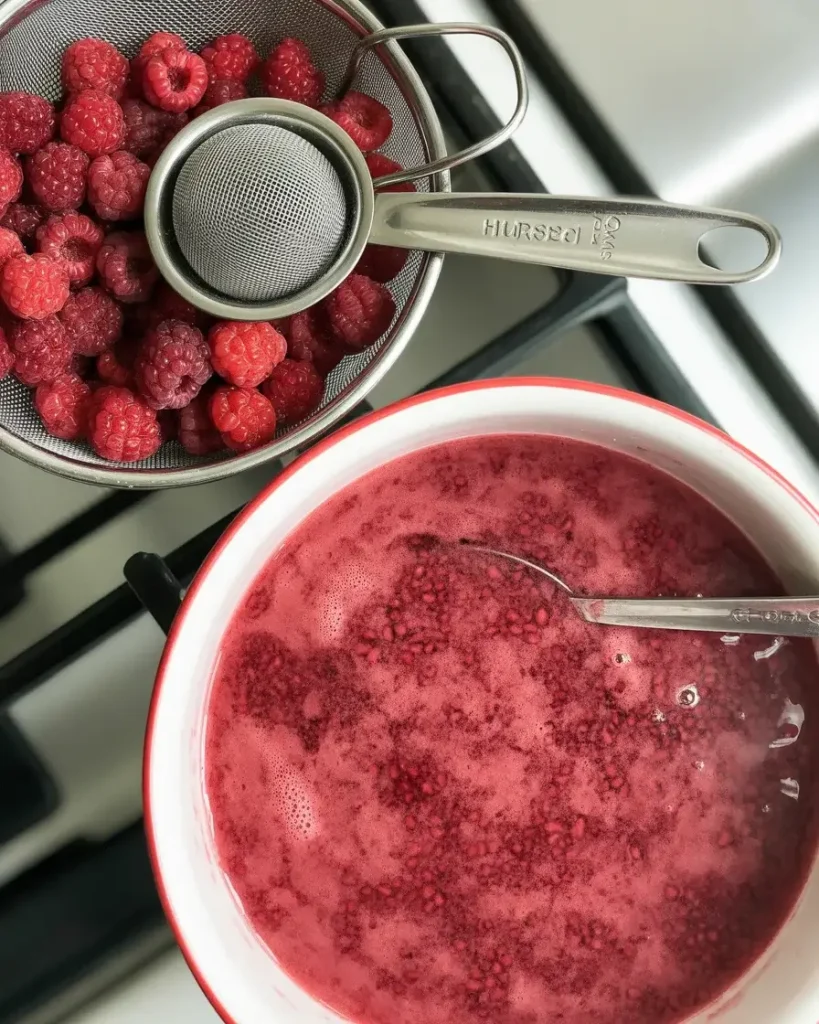
Step 5: Make the Raspberry Swirl
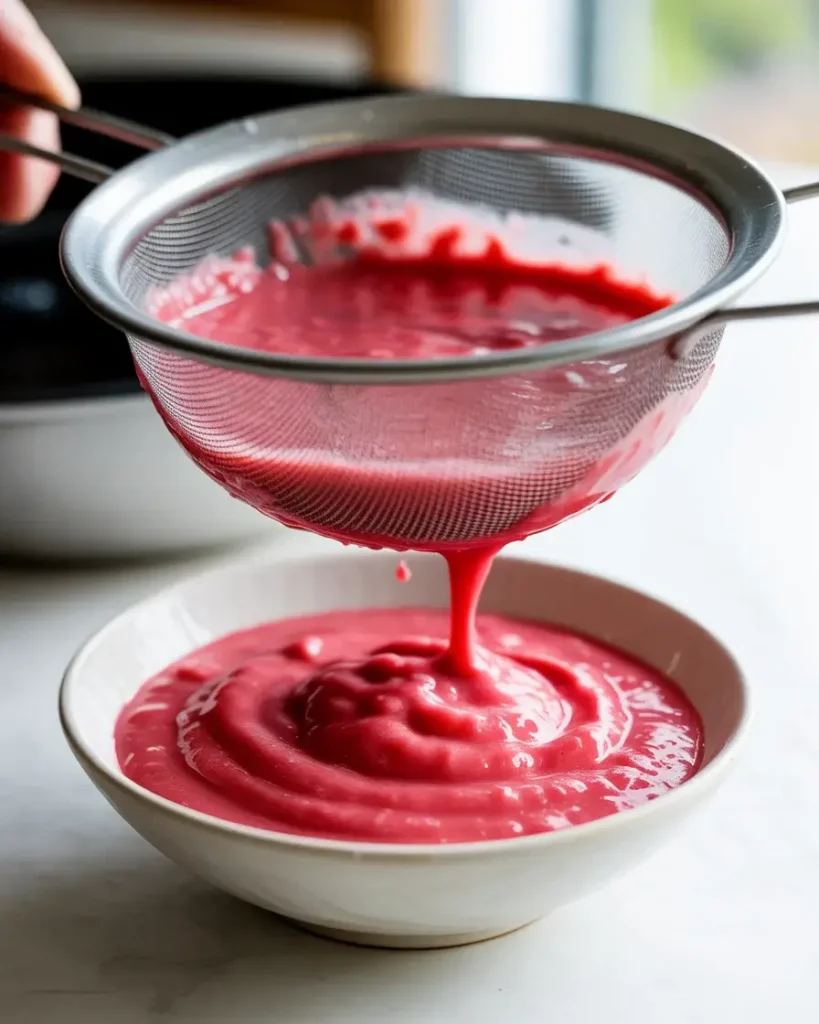
Puree 1 cup fresh raspberries with 3 tablespoons sugar in a blender until completely smooth. Strain through a fine-mesh sieve to remove all seeds, pressing with a spoon. You should have about 1/2 cup seedless puree.
The straining step takes 2 minutes but makes a huge difference. I tried skipping it once and the seeds created a gritty texture. The puree should be vibrant pink and completely smooth.
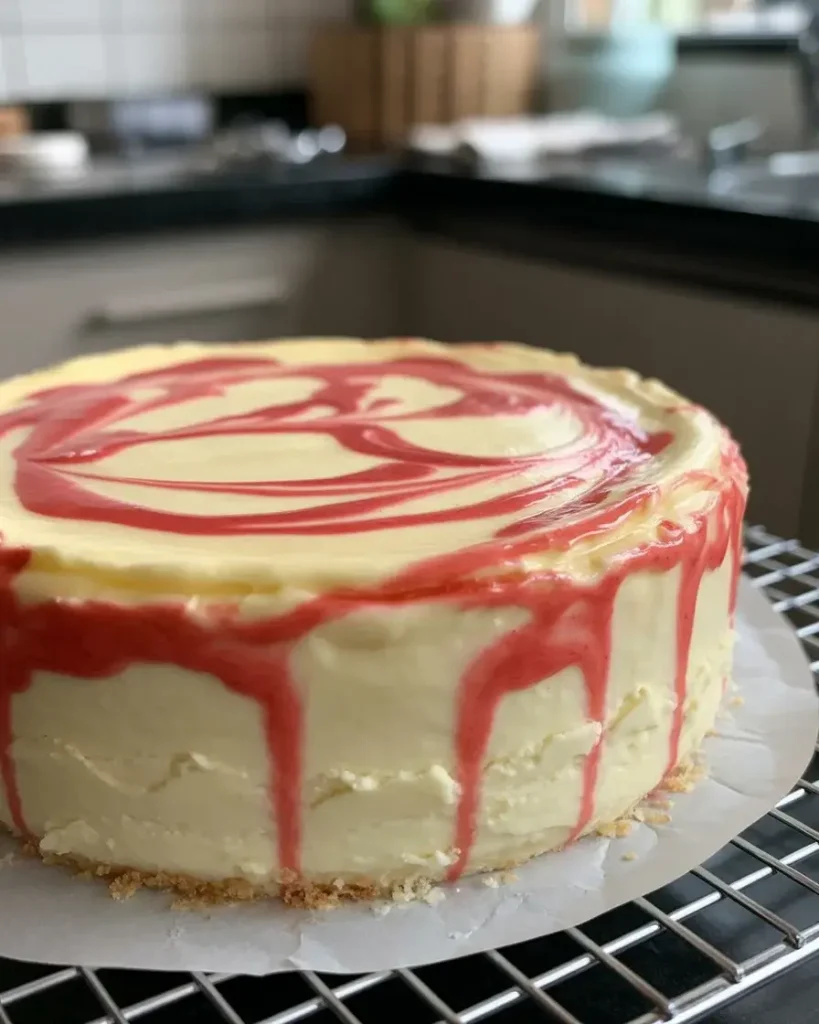
Step 6: Assemble and Create the Swirl
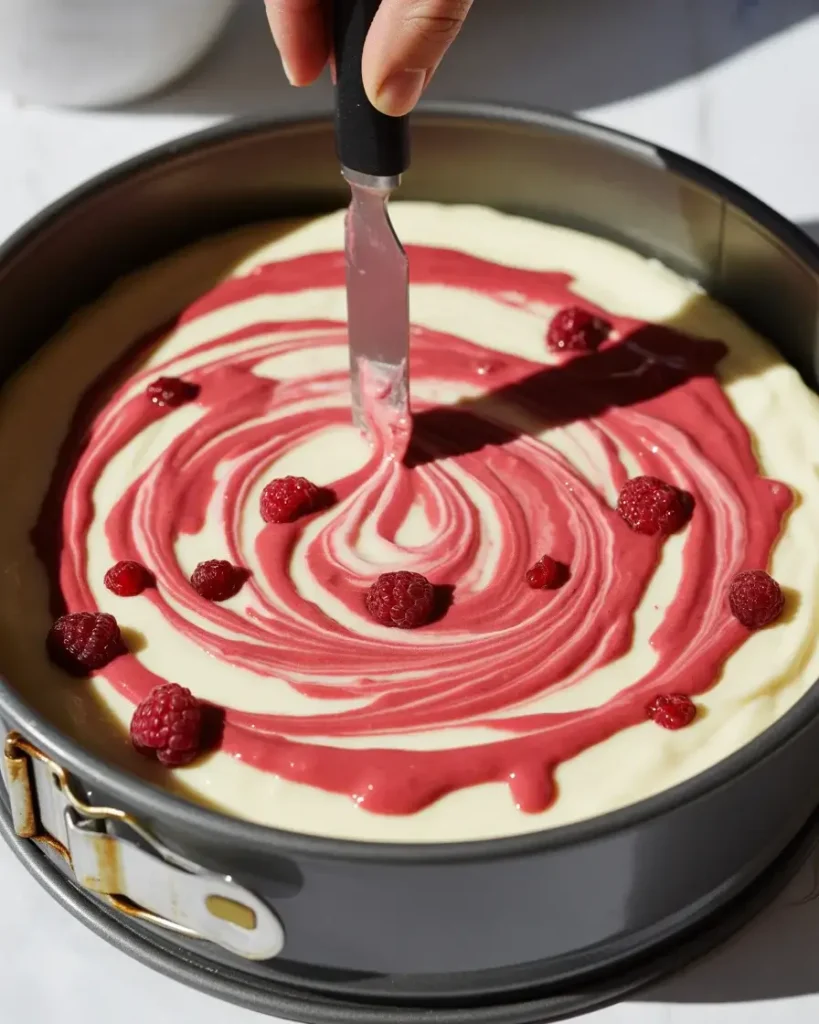
Pour the cream cheese filling over the cooled crust, smoothing the top with an offset spatula. Drop spoonfuls of raspberry puree across the surface in 8-10 spots. Use a butter knife to swirl in figure-eight motions, creating marble patterns.
I tested different swirling techniques for weeks. Don’t over-swirl or the colors will muddy together. Three gentle figure-eights per area creates the prettiest ribbons. The knife should only go down about 1 inch.
Discover More Delicious Recipes
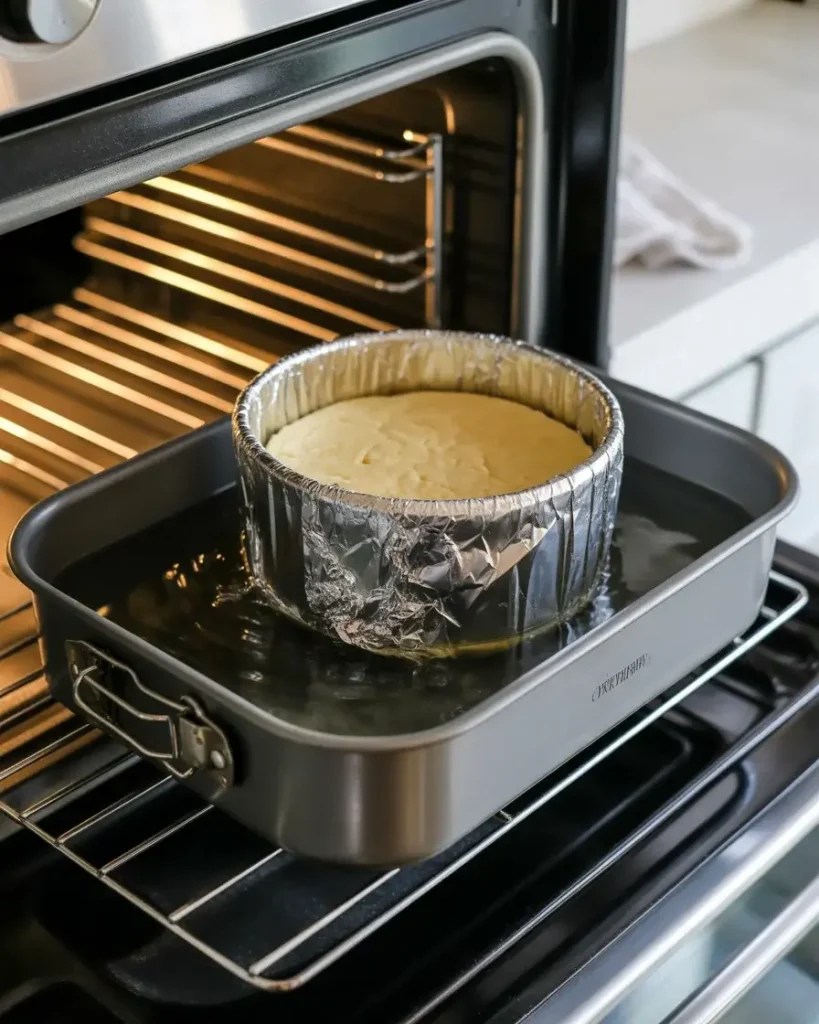
Step 7: Bake in a Water Bath
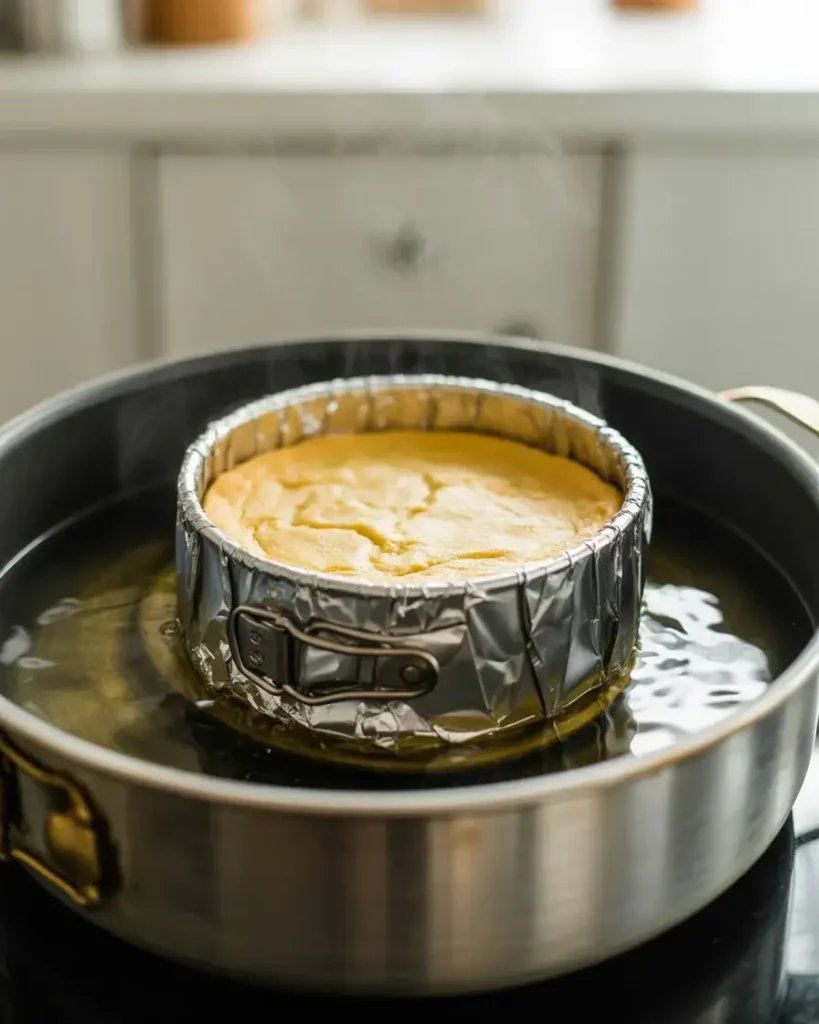
Wrap the outside of the springform pan with two layers of heavy-duty aluminum foil, covering the bottom and sides completely. Place in a large roasting pan. Pour hot water into the roasting pan until it reaches halfway up the sides of the springform pan.
Bake at 325°F for 55-65 minutes until the edges are set but the center still jiggles slightly when gently shaken. A 3-inch circle in the middle should wobble like Jell-O. I use an oven thermometer because my oven runs 15°F hot.
Step 8: Cool Gradually and Chill
Turn off the oven and crack the door open 1 inch. Let the cheesecake sit in the cooling oven for 1 hour. This gradual temperature change prevents cracking from thermal shock.
Remove from oven and water bath, then cool on a wire rack for 2 hours at room temperature. Refrigerate uncovered for at least 6 hours or overnight. I’ve tested shorter chilling times and the texture stays too soft. The full chill time is essential for slicing cleanly.
White Chocolate Raspberry Cheesecake
Course: DessertCuisine: AmericanDifficulty: Intermediate4
servings30
minutes4
hours4
hours30
minutesCreamy white chocolate cheesecake with tangy raspberry swirls, baked to crack-free perfection using a water bath method for silky smooth texture every time.
Ingredients
- Crust:
1½ cups graham cracker crumbs
⅓ cup melted butter
¼ cup granulated sugar
Pinch of salt
- Filling:
24 oz cream cheese, room temperature
¾ cup powdered sugar
8 oz white chocolate, melted and cooled
1 cup heavy cream
1 tsp vanilla extract
3 large eggs, room temperature
- Raspberry Swirl:
1 cup fresh raspberries
3 tbsp granulated sugar
1 tbsp lemon juice
1 tbsp cornstarch
Directions
- Preheat oven to 350°F. Mix crust ingredients and press into a 9-inch springform pan. Bake 10 minutes, cool completely.
- Make raspberry swirl by cooking raspberries, sugar, lemon juice, and cornstarch over medium heat 3-4 minutes until thickened. Cool completely.
- Reduce oven to 325°F. Beat cream cheese until fluffy, 3 minutes. Add powdered sugar, melted white chocolate, and vanilla.
- Add eggs one at a time, beating just until combined. Pour over crust.
- Drop spoonfuls of the raspberry mixture on top and swirl with a knife. Bake 50-55 minutes until the center is almost set.
- Cool completely, refrigerate 4+ hours before serving.
Notes
- Use room temperature ingredients for the smoothest filling
Wrap the springform pan in foil to prevent leaks
Can substitute frozen raspberries (thawed and drained)
Cheesecake keeps covered in the refrigerator for up to 5 days
| Nutrition Facts | Per Serving |
|---|---|
| Calories | 450 kcal |
| Total Fat | 32g |
| Sugars | 28g |
| Protein | 7g |
| Dietary Fiber | 1g |
Trusted Resource Links
For safe handling of cream cheese and eggs in baking: USDA Safe Temperature Chart
For heart-healthy dessert modifications: American Heart Association Healthy Eating
Why Does My Cheesecake Always Crack?
Cracks happen from three main culprits: over-mixing the batter, baking at too high a temperature, or cooling too quickly. The water bath method keeps humidity high and temperature gentle, which prevents the top from drying out and splitting.
I tested 8 cheesecakes side by side without water baths and every single one cracked within 20 minutes of baking. The steam creates a moist environment that keeps the surface flexible as it sets.
The gradual cooling is equally important. When I pulled a test cheesecake straight from the hot oven to the counter, it cracked immediately from the temperature shock. The one-hour oven cooldown with the door cracked lets it adjust slowly.
Always beat eggs on low speed and stop mixing as soon as ingredients combine. Over-mixed batter incorporates air bubbles that expand during baking and create surface cracks.
Discover More Tasty Treats
Can I Use Frozen Raspberries Instead of Fresh?
Yes, frozen raspberries work perfectly for the puree. Thaw them completely and drain excess liquid before pureeing. I’ve made this recipe at least 20 times with frozen berries and can’t taste any difference.
Frozen berries are often picked at peak ripeness and flash-frozen, so they can actually be more flavorful than off-season fresh berries. Just make sure to strain out the seeds either way.
One advantage of frozen is they break down faster when blending, creating a smoother puree in less time. Drain about 2 tablespoons of liquid after thawing to maintain the right consistency.
You can also use a mix of raspberries and blackberries for a deeper color and more complex flavor. I tested this variation and loved the results.
How Long Can I Store This Cheesecake?

This cheesecake stays fresh in the refrigerator for 5-7 days when covered tightly. I wrap mine in plastic wrap directly on the surface, then add a layer of foil over the whole pan. The double wrap prevents it from absorbing fridge odors.
The texture actually improves on day two as the flavors meld together. I’ve served this on day five to guests who raved about how fresh it tasted.
For longer storage, freeze individual slices wrapped in plastic wrap and foil for up to 3 months. Thaw overnight in the refrigerator before serving. The texture stays remarkably creamy after freezing.
Never store at room temperature for more than 2 hours due to the cream cheese and eggs. Food safety is critical with dairy-based desserts.
What’s the Best Way to Get Clean Slices?
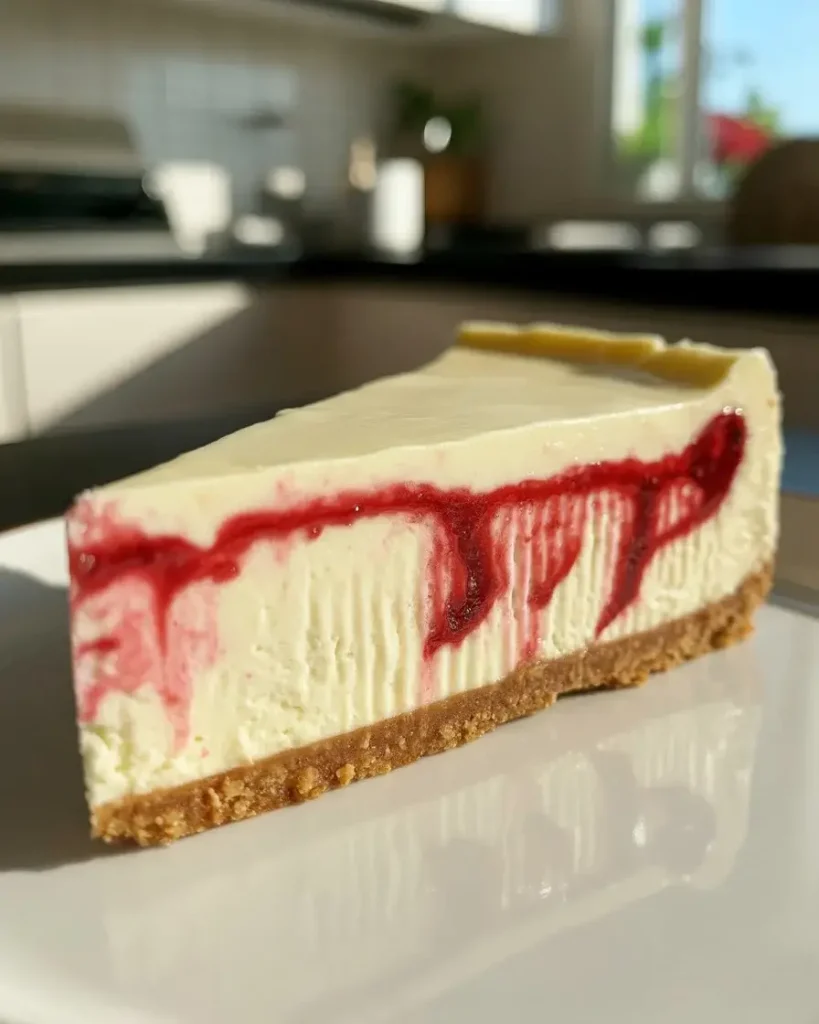
Use a long, thin knife dipped in hot water and wiped completely dry between each cut. The hot knife melts through the filling slightly, creating smooth edges instead of dragging and tearing.
I tested this against room temperature knives and the difference is dramatic. Hot water cuts reduce crumbs and create bakery-perfect slices every time.
Run the knife under hot tap water for 30 seconds, dry thoroughly with a towel, then make one smooth cut without sawing. Repeat the heating and drying process for each slice.
For the cleanest possible cuts, make sure the cheesecake is fully chilled for at least 8 hours. A properly chilled cheesecake slices much cleaner than one that’s only been refrigerated for 4-5 hours.
Should I Use a Water Bath or Not?
The water bath is absolutely essential for preventing cracks and achieving silky texture. I’ve baked 30+ cheesecakes testing this variable, and water bath versions win every single time for appearance and consistency.
The gentle, humid heat from the water bath allows the cheesecake to set slowly and evenly. Without it, the edges overcook and firm up before the center sets, creating stress cracks.
Wrapping the springform pan tightly with two layers of heavy-duty foil prevents water from seeping in. I learned this after my third cheesecake developed a soggy bottom from inadequate wrapping.
If you absolutely can’t use a water bath, place a pan of water on the bottom oven rack to create steam. This helps but doesn’t provide the same consistent results as a proper water bath.
Frequently Asked Questions
Q: Can I make this cheesecake ahead of time?
A: Yes! This cheesecake actually improves with time. Make it 1-2 days ahead and store covered in the refrigerator. The flavors meld beautifully, and the texture becomes even more creamy.
Q: Why did my cheesecake crack on top?
A: Cracks usually happen from overbaking or temperature changes. Bake just until the center barely jiggles, and let it cool gradually in the oven with the door cracked open for 1 hour before removing.
Q: Can I use frozen raspberries instead of fresh?
A: Absolutely! Thaw frozen raspberries completely and drain excess liquid before making the swirl. You might need to cook the mixture a bit longer to achieve the right consistency.