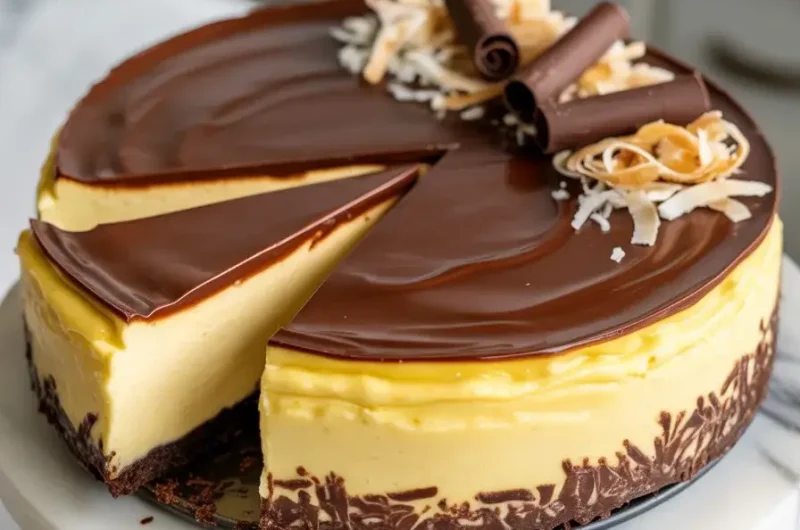
Nanaimo Bar Cheesecake
After burning my first ganache topping completely black and ending up with a grainy custard layer, I finally cracked the code on this recipe after 15 test batches. The result is a no-bake cheesecake that captures every iconic layer of a classic Nanaimo bar.
The coconut-chocolate base stays firm, the custard cheesecake filling is silky and just sweet enough, and the ganache sets with a satisfying snap. It is the kind of dessert that disappears at every party I bring it to.
Step-by-Step Instructions
Step 1: Make the Chocolate Coconut Base
Combine 1/2 cup melted butter, 1/3 cup cocoa powder, 1/4 cup granulated sugar, 1 egg, 1 tsp vanilla, 2 cups graham cracker crumbs, 1 cup shredded coconut, and 1/2 cup finely chopped walnuts in a large bowl. Mix until the crumbs look evenly dark and the mixture holds together when pressed.
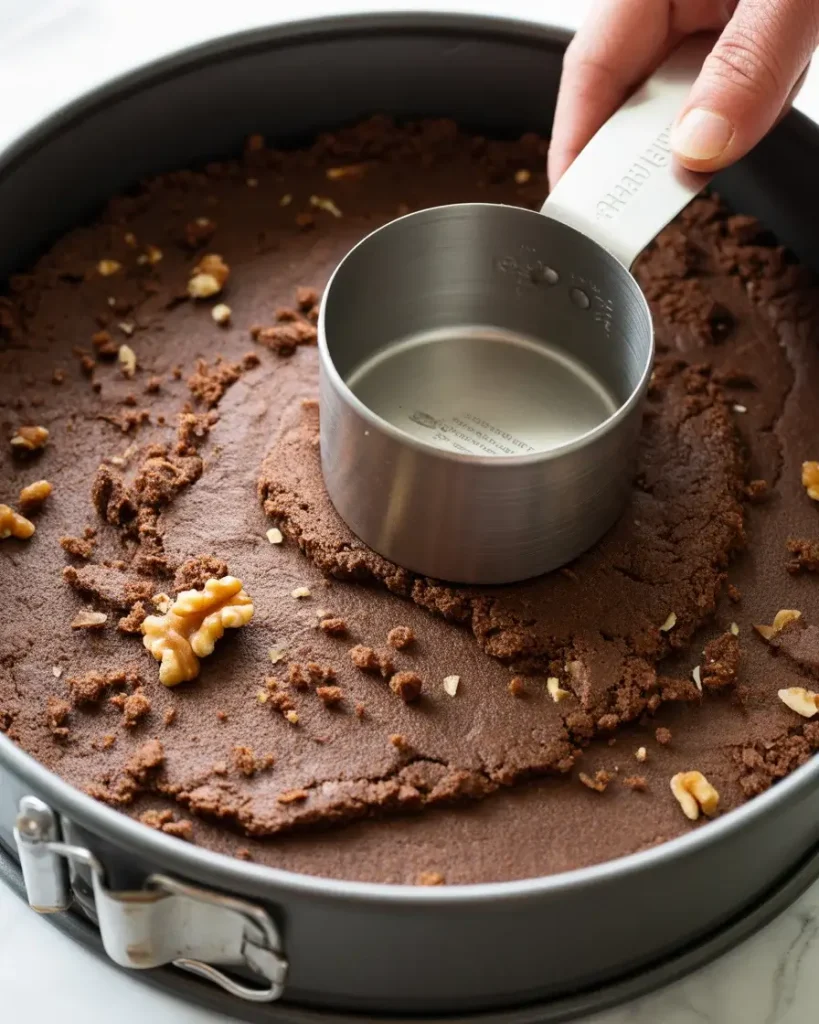
Press firmly into a parchment-lined 9-inch springform pan. I use the flat bottom of a measuring cup to get it tight and even – a loose crust will crumble when you slice. Freeze for 20 minutes until it feels completely solid to the touch.
Step 2: Prepare the Custard Cheesecake Filling
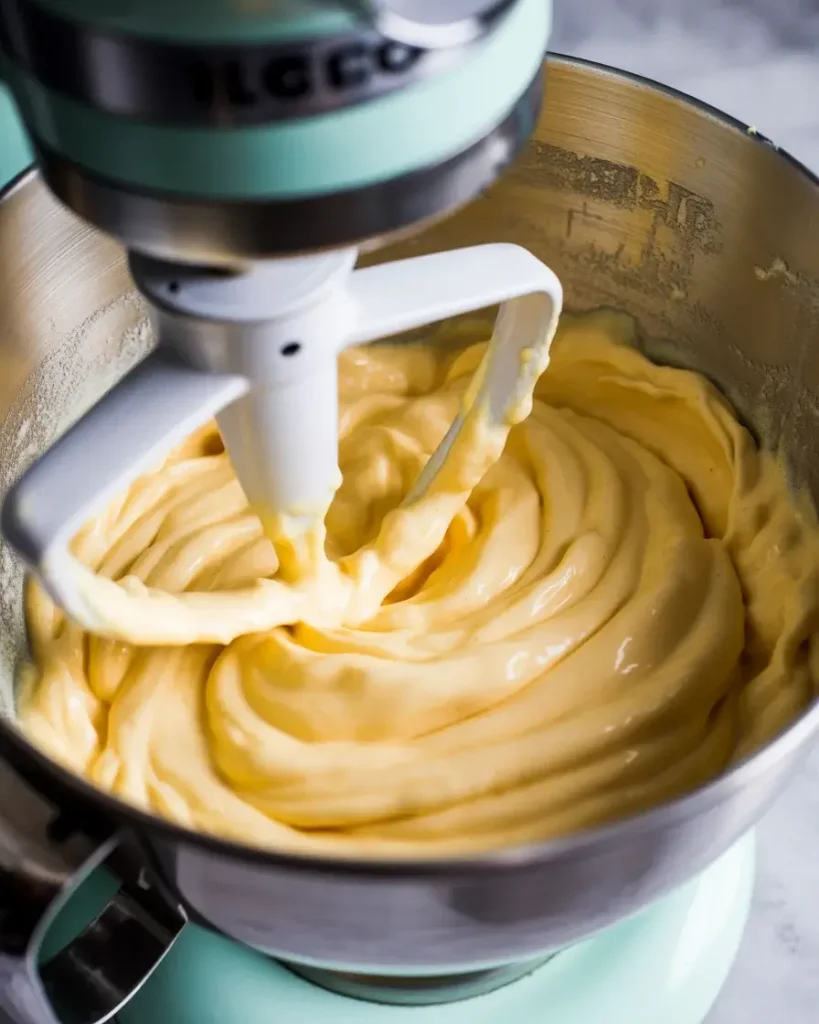
Beat 16 oz softened cream cheese with 1/4 cup softened butter until completely smooth, about 3 minutes on medium speed. The mixture should look white and fluffy with no lumps. Add 3 tbsp Bird’s custard powder, 2 cups powdered sugar, and 1 tsp vanilla, then beat for another 2 minutes.
I tested this without the custard powder once and the filling tasted like plain cheesecake with none of that signature vanilla-custard flavor. Do not skip it. The filling should hold stiff peaks when you lift the beater.
Step 3: Spread the Filling Over the Crust
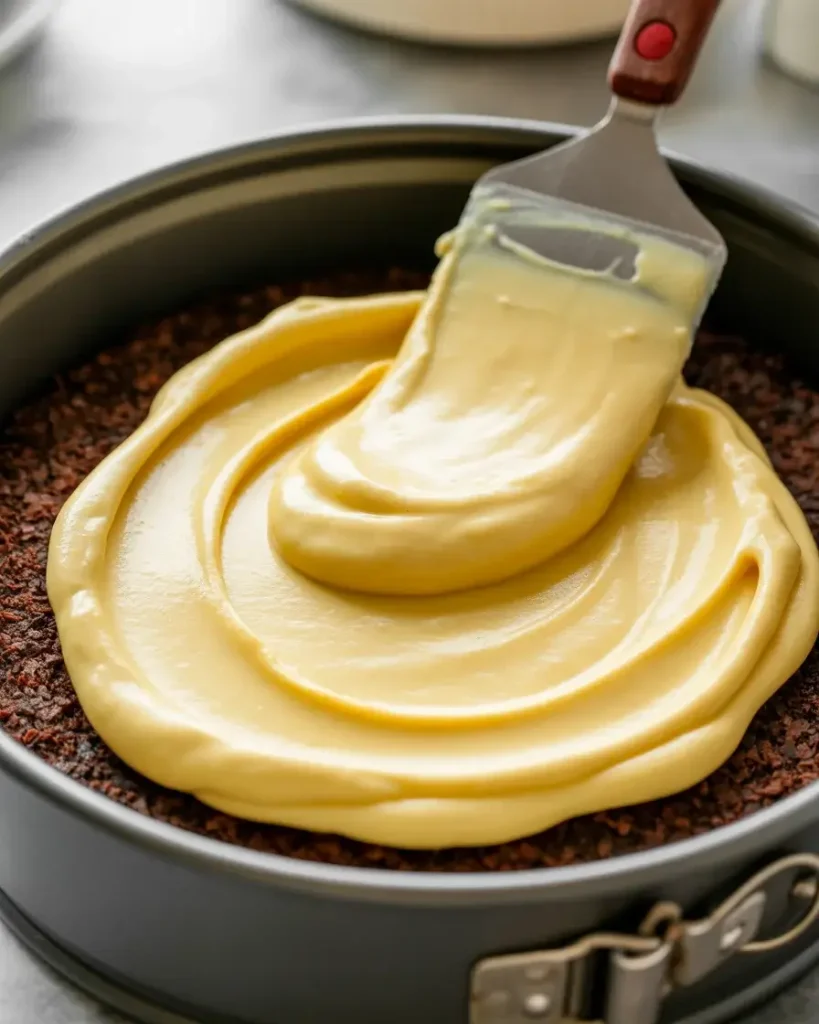
Remove the frozen crust from the freezer. Spoon the custard filling onto the center and spread it evenly to the edges using an offset spatula. Work gently so you do not disturb the crust underneath.
I always chill the filled pan for at least 30 minutes before adding the ganache. The one time I rushed this step, my chocolate layer sank right into the filling and the layers looked muddy. Patience here makes the difference between beautiful clean layers and a mess.
Step 4: Make the Chocolate Ganache Topping

Heat 1/2 cup heavy cream in a small saucepan over medium heat until you see tiny bubbles forming at the edges, about 170°F. Do not let it boil or the ganache will separate. Pour it over 6 oz of finely chopped dark chocolate (70% cocoa works best) in a heatproof bowl.
Let it sit undisturbed for 2 minutes, then stir from the center outward until glossy and completely smooth. I tested this with milk chocolate twice and the topping never set firm enough to slice cleanly. Dark chocolate is non-negotiable here.
Step 5: Pour and Set the Ganache

Let the ganache cool for 10 minutes until it is warm but not hot (around 90°F). Pour it slowly over the chilled cheesecake filling, tilting the pan gently to spread it all the way to the edges. You should hear a very faint sizzle if the filling is cold enough.
Refrigerate the cheesecake for a minimum of 4 hours, but overnight gives the cleanest slices. I once tried cutting at 3 hours and the ganache cracked instead of snapping. The extra time is absolutely worth it.
Discover Delicious Cheesecakes
Step 6: Slice and Serve
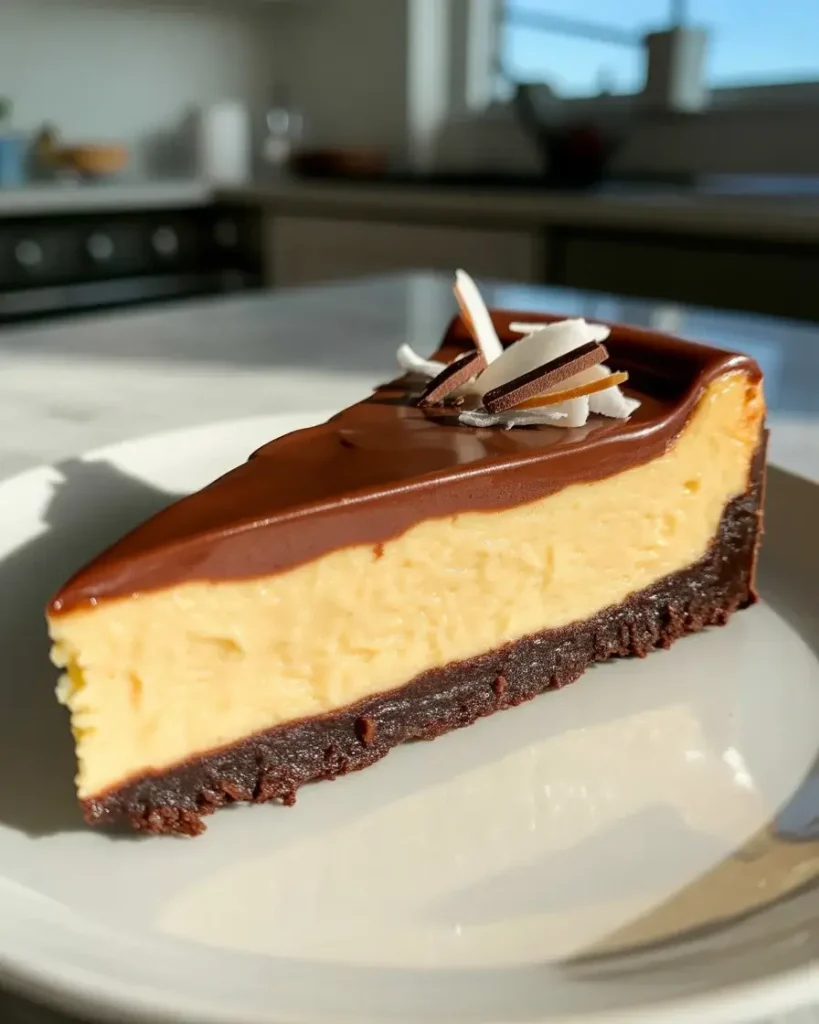
Run a sharp knife under hot water, dry it, and slice the cheesecake in one clean downward motion. Wipe the blade between every cut. This is the trick that took me the longest to learn – drag-cutting smears the layers completely.
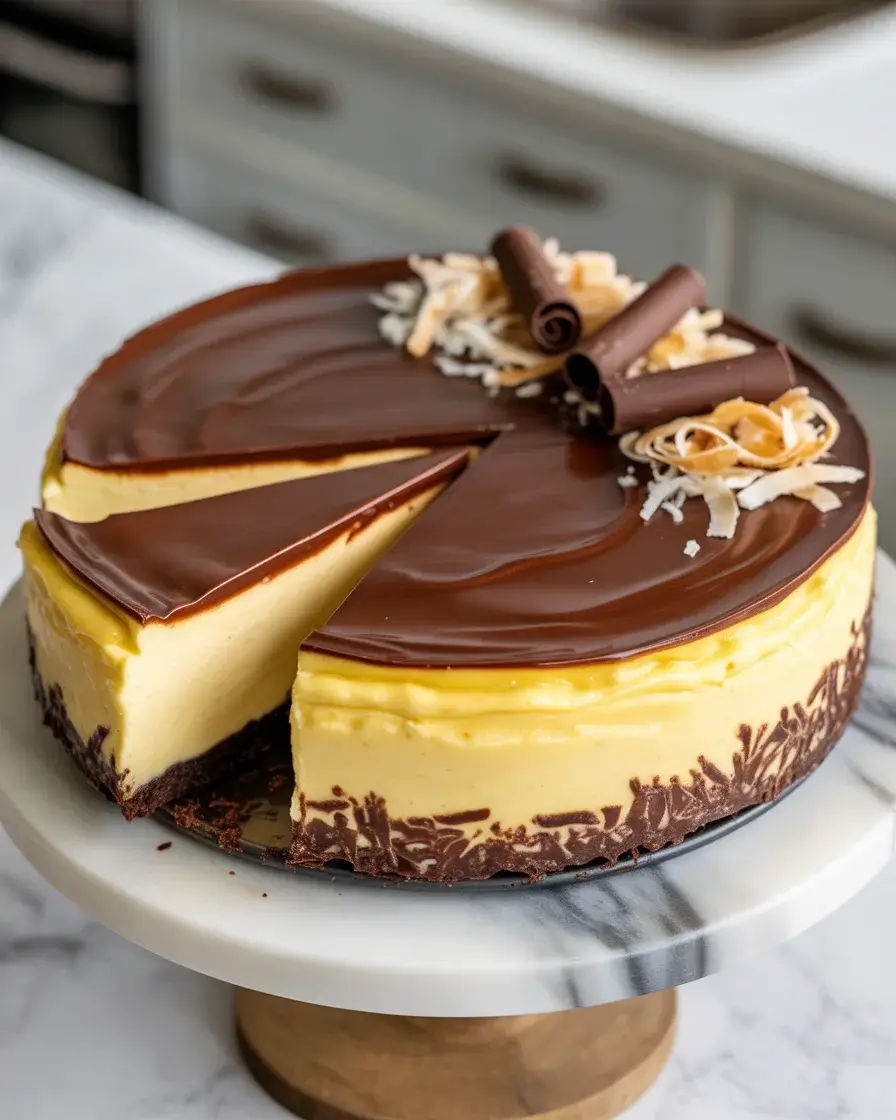
Serve cold straight from the fridge. Garnish with a small sprinkle of toasted coconut or chocolate shavings if you want a showstopping presentation. Each slice shows three distinct layers that look just like a classic Nanaimo bar.
Nanaimo Bar Cheesecake
Course: DessertCuisine: CanadianDifficulty: Medium12
35
minutes35
minutesA no-bake cheesecake built on a chocolate coconut crust, filled with a creamy custard layer, and topped with dark chocolate ganache. Every bite tastes exactly like a classic Nanaimo bar.
Ingredients
- Chocolate Coconut Crust
1/2 cup unsalted butter, melted
1/3 cup cocoa powder
1/4 cup granulated sugar
1 large egg, beaten
1 tsp vanilla extract
2 cups graham cracker crumbs
1 cup sweetened shredded coconut
1/2 cup finely chopped walnuts
- Custard Cheesecake Filling:
16 oz full-fat cream cheese, softened
1/4 cup unsalted butter, softened
3 tbsp Bird’s custard powder
2 cups powdered sugar
1 tsp vanilla extract
- Dark Chocolate Ganache
6 oz dark chocolate (70% cocoa), finely chopped
1/2 cup heavy cream
Directions
- Mix melted butter, cocoa, sugar, egg, and vanilla in a bowl. Stir in graham crumbs, coconut, and walnuts until evenly combined.
- Press mixture firmly into a parchment-lined 9-inch springform pan. Freeze for 20 minutes.
- Beat cream cheese and butter on medium speed for 3 minutes until smooth and fluffy.
- Add custard powder, powdered sugar, and vanilla. Beat for 2 more minutes until stiff and creamy.
- Spread filling evenly over the frozen crust. Refrigerate for 30 minutes.
- Heat cream to 170°F, pour over chopped chocolate, rest 2 minutes, then stir until glossy.
- Cool ganache to 90°F, pour over chilled filling, and spread to edges.
- Refrigerate for at least 4 hours or overnight before slicing.
- Slice with a warm dry knife, wiping between cuts. Serve cold.
Notes
- Storage: Keep covered in the refrigerator for up to 4 days.
Make-ahead: This cheesecake can be made up to 3 days ahead. Flavor improves overnight.
Freeze: Freeze whole or in slices for up to 6 weeks. Thaw overnight in the refrigerator.
Substitution: Walnuts can be replaced with almonds or omitted entirely.
Custard powder: Bird’s custard powder is strongly recommended. Vanilla pudding powder changes the flavor noticeably.
Nutrition Table (per serving)
| Nutrient | Amount |
|---|---|
| Calories | 520 |
| Total Fat | 36g |
| Sugars | 38g |
| Protein | 6g |
Trusted Resource Links:
For food safety guidelines when working with cream cheese and egg-based desserts, refer to the USDA Safe Temperature Chart and FDA Safe Food Handling.
Can You Make Nanaimo Bar Cheesecake Ahead of Time?
Yes, this cheesecake is an excellent make-ahead dessert. It keeps beautifully in the refrigerator for up to 4 days tightly wrapped, and the flavors actually deepen overnight as the layers settle together.
I tested making it 3 days ahead for a dinner party and it sliced even more cleanly than the same-day version. The ganache had firmed up perfectly and the custard layer held its shape with no drooping. For longer storage, freeze it whole (without garnishes) for up to 6 weeks.
Thaw overnight in the refrigerator before slicing. I wrap mine in two layers of plastic wrap plus foil to prevent any freezer flavor from getting in.
What Is the Difference Between No-Bake and Baked Cheesecake for This Recipe?
This recipe uses a no-bake method, which is actually more authentic to a traditional Nanaimo bar. No-bake keeps the custard layer dense and cold-set, which matches the texture of the original candy bar filling.
I tried a baked version in one of my early tests and the custard powder flavor got muted by the oven heat. The baked version was also slightly grainy compared to the smooth, dense texture of the no-bake approach. For this specific recipe, no-bake wins every single time.
If you want a firmer, more sliceable cheesecake, add 1 tbsp of powdered gelatin bloomed in 2 tbsp water and folded into the filling. I use this method when I know the dessert will be sitting out at room temperature for more than an hour.
Why Does the Ganache Crack When Sliced?
Ganache cracks when it is too cold and too thick. If your slices are shattering instead of snapping, your ganache layer is likely over 1/4 inch thick or the cheesecake is too cold straight from the freezer.
I discovered this after my third batch when I tried to serve it immediately after pulling it from the fridge on a very cold day. The ganache shattered into shards across the plate. Letting the cheesecake sit at room temperature for 5-7 minutes before slicing solves this completely.
Also, your knife technique matters a lot. A warm dry knife pressed straight down (not sawed) gives you a clean snap instead of a crack. I keep a tall glass of hot water beside the cutting board and dip the blade between every slice.
How Do You Get the Custard Layer to Taste Like a Real Nanaimo Bar?
Bird’s custard powder is the key ingredient. It is the same powder used in classic Canadian Nanaimo bars and it has a distinct vanilla-egg flavor that no substitute fully replicates. I tested with vanilla pudding powder twice and the flavor was noticeably different.
The ratio of butter to cream cheese also matters. Too much cream cheese and the filling tastes tangy like a regular cheesecake. The correct balance is 2 parts cream cheese to 1 part butter, which gives you that rich, neutral, melt-in-your-mouth custard quality.
Finally, use powdered sugar rather than granulated. I made the mistake of using granulated sugar in one early batch and the filling had a slightly gritty texture even after 5 minutes of beating. Powdered sugar dissolves completely and keeps the filling perfectly smooth.
How Do You Store Leftover Nanaimo Bar Cheesecake?
Leftover cheesecake keeps best covered tightly in the refrigerator for up to 4 days. Press a layer of plastic wrap directly against any cut edges to prevent the filling from drying out.
I do not recommend leaving this cheesecake at room temperature for more than 2 hours because of the cream cheese filling. For freezing individual slices, wrap each piece in plastic wrap and place them in an airtight container so you can grab one at a time without thawing the whole cheesecake.
Frequently Asked Questions
Q: Can I use a regular pie pan instead of a springform pan?
A: A springform pan is strongly recommended because the sides release cleanly for serving. A regular pie pan makes it nearly impossible to remove slices without breaking the crust.
Q: Can I substitute the Bird’s custard powder with something else?
A: Vanilla instant pudding powder is the closest substitute, but the flavor will be slightly different. Use the same 3 tbsp measurement. The texture stays similar but the custard flavor is less pronounced.
Q: How do I know when the cheesecake is fully set and ready to slice?
A: The ganache should feel completely firm and matte (not tacky) when touched lightly with a fingertip. If it leaves a print, refrigerate for another hour. A properly set cheesecake will have no jiggle when you gently shake the pan.