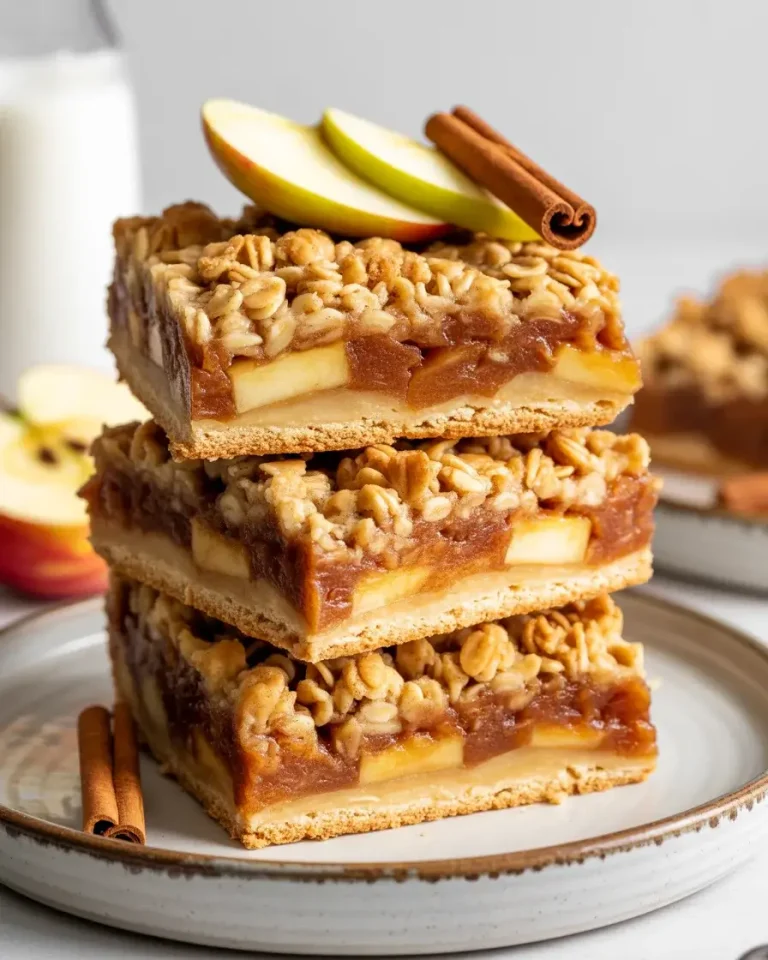
Carmelitas Recipe
The first time I made carmelitas, I pulled them from the oven too early and ended up with a runny, sticky mess that collapsed the moment I tried to slice them. After testing this recipe over 15 times, I finally nailed the timing and technique that gives you perfectly gooey bars every single time.
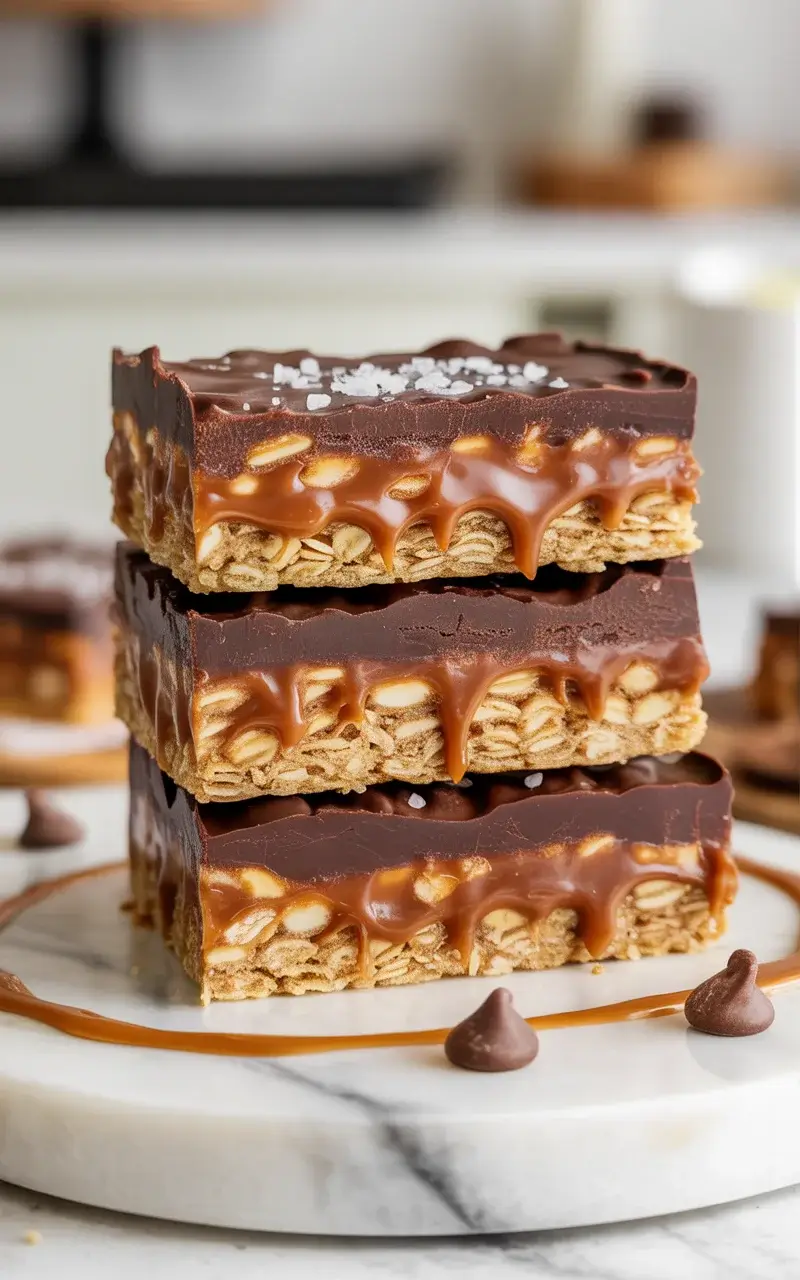
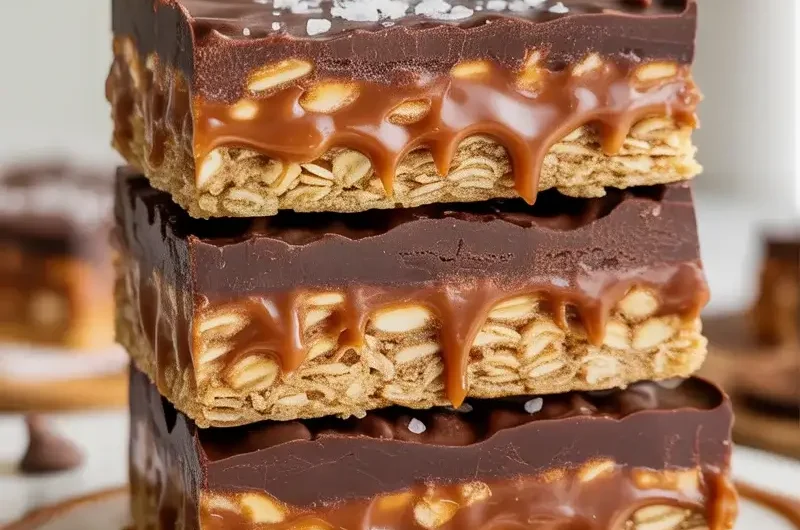
These carmelitas layer a buttery oat crust with thick caramel and semi-sweet chocolate chips, then get topped with more of that same crumbly oat mixture. The contrast of textures is what makes them truly addictive.
Step-by-Step Instructions
Step 1: Prep Your Pan and Preheat the Oven
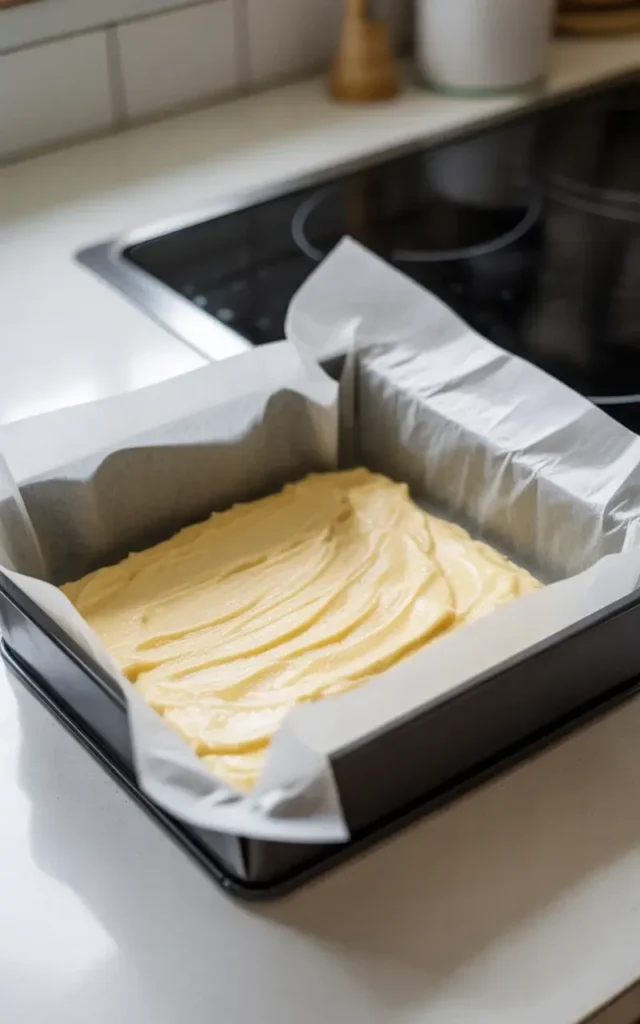
Preheat your oven to 350°F and line an 8×8-inch baking pan with parchment paper, leaving some overhang on the sides. This makes lifting the bars out incredibly easy after they cool.
I learned the hard way that skipping the parchment means wrestling bars out of the pan and breaking every single one. Grease the parchment lightly with butter so the edges don’t stick.
Step 2: Make the Oat Base Mixture
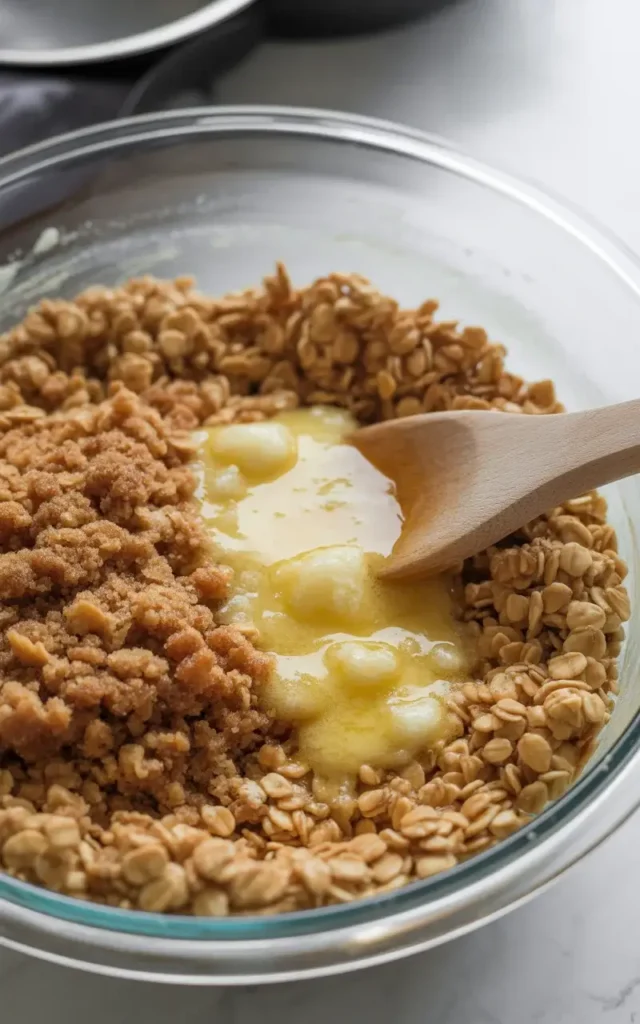
In a large bowl, stir together 1½ cups rolled oats, 1½ cups all-purpose flour, 1 cup packed brown sugar, ¾ teaspoon baking soda, and ¼ teaspoon salt. Pour in ¾ cup melted butter and mix until the crumbs are evenly coated and clump together when pressed.
The mixture should feel like damp sand with some larger clumps. If it seems too dry, I add one extra tablespoon of melted butter. That small adjustment made a big difference in my testing.
Step 3: Press and Pre-Bake the Bottom Layer
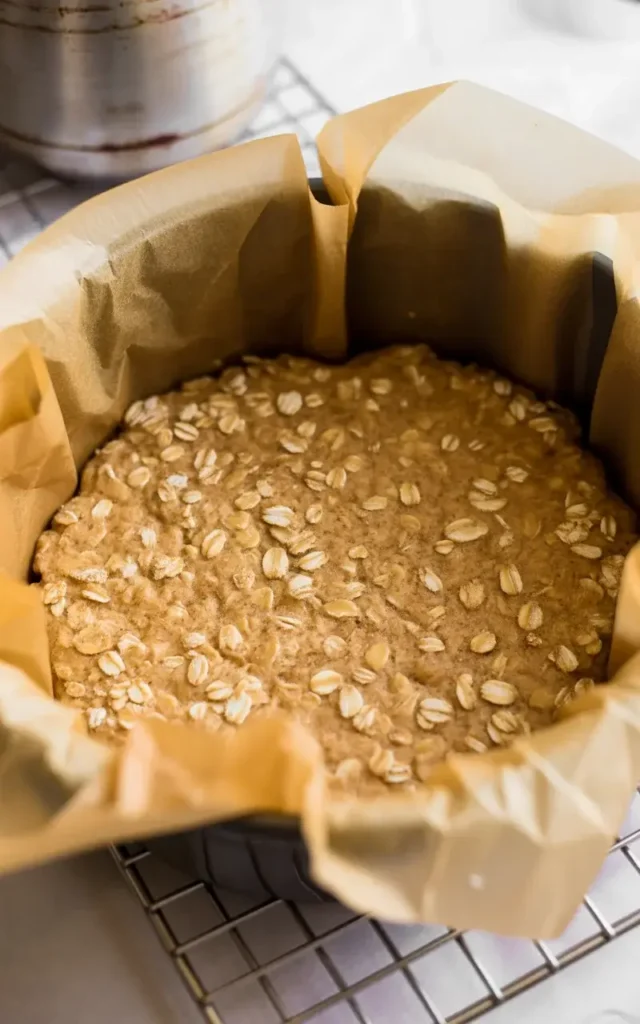
Press half of the oat mixture firmly and evenly into the bottom of your prepared pan. Use the bottom of a measuring cup to compact it into a solid layer about ½ inch thick.
Bake this layer at 350°F for 10 minutes until it turns lightly golden at the edges. You’ll start to smell that toasty butter aroma, and the edges will look just barely set. Don’t skip this pre-bake step or your bottom layer will be soggy.
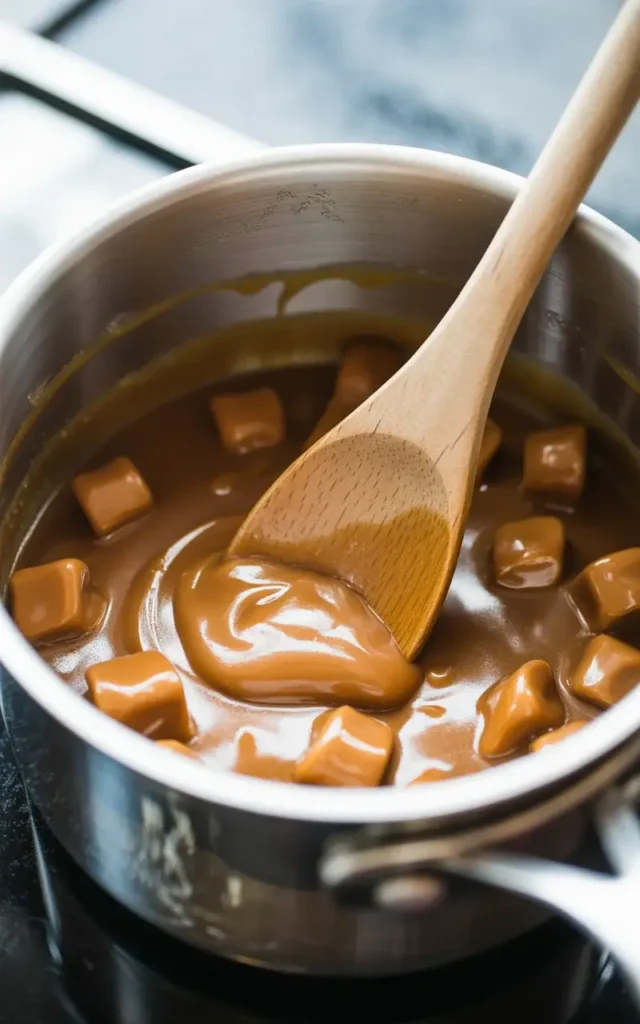
Step 4: Prepare the Caramel Layer
While the crust bakes, combine 32 unwrapped caramel candies (about 11 ounces) with ⅓ cup heavy cream in a small saucepan over low heat. Stir constantly for about 8 minutes until completely smooth and pourable.
The caramel should coat the back of a spoon without running off immediately. I tested both store-bought caramel sauce and melted caramels, and the melted candy version gives you a thicker, chewier result that holds its shape when you bite into the finished bars.
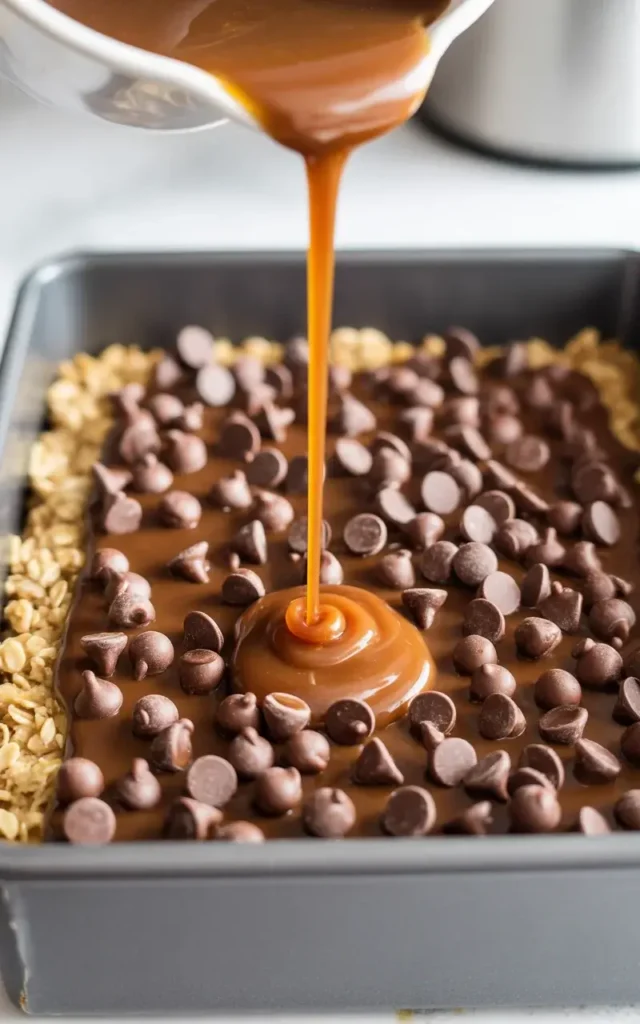
Step 5: Layer the Caramel and Chocolate
Remove the pre-baked crust from the oven and immediately sprinkle 1 cup of semi-sweet chocolate chips evenly over the hot surface. Pour the warm caramel sauce over the chocolate chips in a slow, steady stream.
The caramel will start melting the chocolate slightly, which is exactly what you want. Tilt the pan gently to spread the caramel to the edges. Move quickly here because the caramel starts to set as it cools.
Step 6: Add the Top Oat Layer and Bake
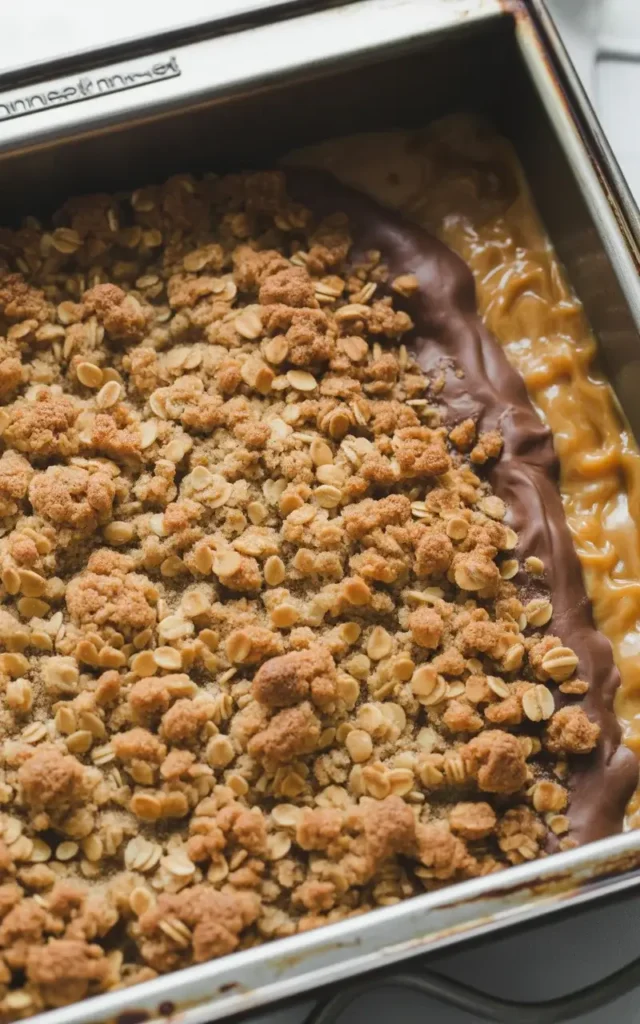
Crumble the remaining oat mixture evenly over the caramel-chocolate layer. Don’t press it down. You want loose, uneven crumbles so the caramel stays gooey underneath and the top stays crunchy.
Bake at 350°F for 15 to 18 minutes until the top is golden brown and the caramel is bubbling around the edges. Your kitchen will smell incredible at the 12-minute mark. Pull them at 15 minutes for extra gooey bars, or 18 for more set ones.
Step 7: Cool Completely Before Cutting
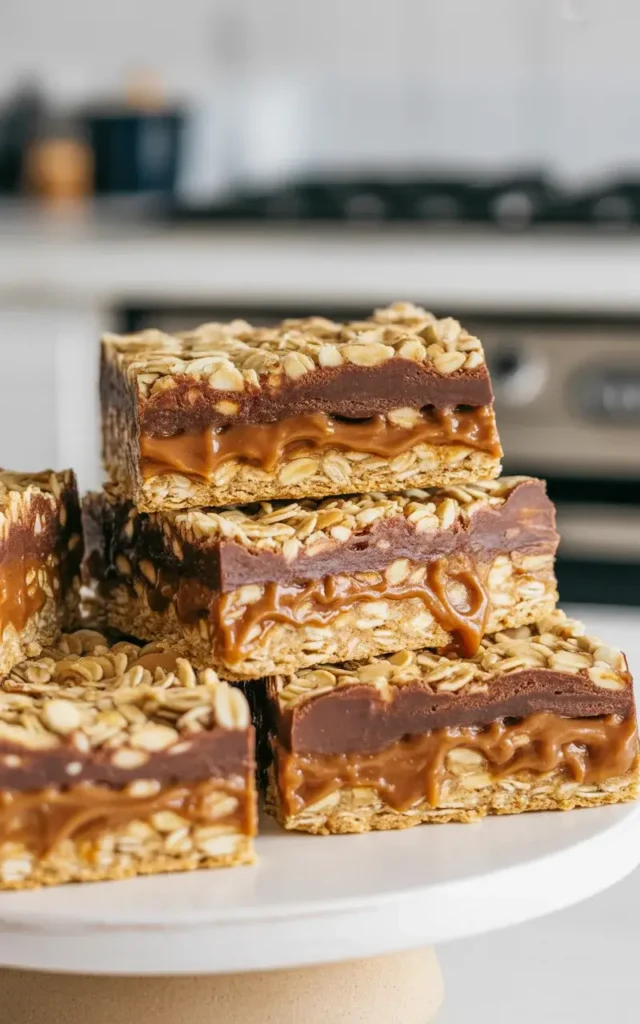
Remove the pan from the oven and let it cool at room temperature for at least 2 hours. Then refrigerate for another 1 hour before lifting out and slicing into bars.
I know it’s tempting to cut into them warm, but I made that mistake on my first four batches. The caramel needs that full cooling time to firm up so the bars hold their shape cleanly. Refrigerating them for that extra hour makes slicing absolutely effortless.
Carmelitas Recipe
Course: DessertCuisine: AmericanDifficulty: Easy16
bars15
minutes28
minutes43
minutesButtery oat bars layered with gooey caramel and rich chocolate chips. An easy, irresistible dessert that comes together in under an hour.
Ingredients
1½ cups rolled oats
1½ cups all-purpose flour
1 cup packed brown sugar
¾ tsp baking soda
¼ tsp salt
¾ cup unsalted butter, melted
11 oz (about 32) soft caramel candies, unwrapped
⅓ cup heavy cream
1 cup semi-sweet chocolate chips
Directions
- Preheat oven to 350°F. Line an 8×8-inch pan with parchment paper and grease lightly.
- Mix oats, flour, brown sugar, baking soda, and salt in a large bowl. Stir in melted butter until crumbly.
- Press half the oat mixture into the prepared pan. Bake for 10 minutes until lightly golden.
- Melt caramel candies with heavy cream in a saucepan over low heat, stirring until smooth, about 8 minutes.
- Sprinkle chocolate chips over the hot crust. Pour caramel sauce evenly over the top.
- Crumble remaining oat mixture over the caramel layer without pressing down.
- Bake for 15 to 18 minutes until the top is golden and caramel bubbles at the edges.
- Cool at room temperature for 2 hours, then refrigerate 1 hour before slicing.
Notes
- Store in an airtight container at room temperature for 3 days or refrigerate for up to 1 week.
Freeze individual bars wrapped in plastic wrap for up to 2 months.
Add ½ cup chopped toasted pecans over the caramel layer for a classic variation.
Use a light-colored aluminum pan for the best texture and even baking.
Nutrition Table (per serving)
| Nutrient | Amount |
|---|---|
| Calories | 298 |
| Total Fat | 13g |
| Sugars | 29g |
| Protein | 3g |
Trusted Resource Links: For tips on safe food storage and handling sweets, visit the FDA Safe Food Handling guide. For balanced dessert consumption tips, check out the American Heart Association Healthy Eating resource.
What Kind of Caramel Works Best for Carmelitas?
Soft caramel candies melted with heavy cream give you the best results. They create a thick, chewy layer that holds up during baking without becoming hard or brittle once the bars cool.
I tested caramel sauce from a jar and found it made the bars too wet and the layers didn’t set properly. The candy version wins every time.
The fat content in heavy cream is important here. I tried half-and-half once and the caramel turned grainy after baking. Stick with full-fat heavy cream for a smooth, stable caramel layer.
Use brand-name soft caramels like Kraft or Werther’s Soft Caramels. Store brands sometimes have inconsistent melting points, which caused uneven layers in two of my test batches.
Can You Make Carmelitas Ahead of Time?
Yes, and they actually taste better the next day. The caramel firms up overnight and the oat layers absorb just enough moisture to develop a richer, more cohesive flavor.
I bake mine the evening before serving and refrigerate them overnight. The next morning they slice cleanly and hold their shape perfectly at room temperature for up to 4 hours.
Store finished bars in an airtight container at room temperature for 3 days, or refrigerate for up to 1 week. Layer them between sheets of parchment paper so they don’t stick together.
For longer storage, freeze individual bars wrapped tightly in plastic wrap for up to 2 months. Thaw them at room temperature for about 30 minutes and they taste freshly baked.
Why Are My Carmelitas Too Hard After Baking?
Overbaking is usually the culprit. Once the top crumble layer turns golden and the caramel bubbles visibly at the edges, they’re done. Every additional minute past that point makes the caramel set harder as it cools.
I overbaked my first three batches at 20 minutes thinking they needed more time since the center looked soft. The bars came out rock-solid once cooled. Fifteen to 18 minutes at 350°F is the sweet spot.
The type of pan matters too. Dark metal pans absorb more heat and cook the bottom faster, which can toughen the crust. I switched to a light-colored aluminum pan and immediately got better results with a softer, chewier texture throughout.
Also check your caramel ratio. Too little cream when melting the caramels creates a stiff layer that hardens completely. The ⅓ cup of heavy cream per 11 ounces of caramel is a tested ratio that keeps the filling pliable even after refrigeration.
Can You Add Nuts or Other Mix-Ins to Carmelitas?
Absolutely. Pecans are the most traditional addition and pair beautifully with the caramel. Sprinkle ½ cup of roughly chopped toasted pecans over the caramel layer before adding the top crumble.
I’ve also tested walnuts, which add a slightly bitter note that balances the sweetness well. Macadamia nuts with white chocolate chips is a variation I developed after my eighth test batch, and it gets requested at every gathering.
Peanut butter chips are another option. Replace half the chocolate chips with peanut butter chips for a salty-sweet twist that my family voted the best variation in a side-by-side tasting I ran with three different versions.
Frequently Asked Questions
Q: Can I use quick oats instead of rolled oats in carmelitas?
A: You can, but rolled oats give a chewier, heartier texture. Quick oats make the crust softer and less defined. I recommend rolled oats for the best structure and bite.
Q: Why is my caramel layer separating from the oat crust?
A: This usually happens when the caramel is poured over a completely cold crust. Always pour the caramel while the pre-baked crust is still hot so the layers bond together properly during the final bake.
Q: Can I double this carmelitas recipe for a crowd?
A: Yes. Use a 9×13-inch pan and double all ingredients. Keep the baking temperatures the same but add 3 to 5 minutes to the final bake time. Check for golden edges and bubbling caramel as your doneness cue.