Sugar Cone Delights: The Ultimate Sweet Treat Recipe
My daughter asked me to make “fancy ice cream cones” for her birthday party three years ago, and I had no idea what she meant. After 15 test batches, I finally cracked the code for Sugar Cone Delights that actually stay crispy for hours.
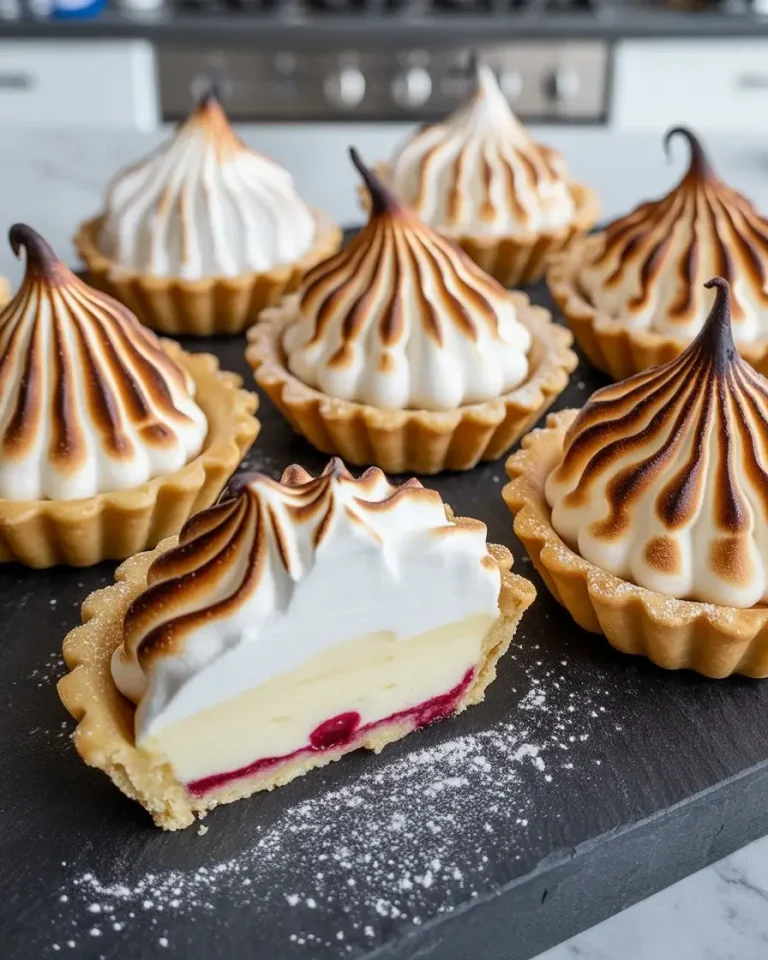
These aren’t your average ice cream cones. I’m talking about sugar cones filled with stabilized whipped cream, chocolate ganache, and topped with sprinkles that actually make people stop mid-conversation at parties.
Step-by-Step Instructions
Step 1: Prepare the Sugar Cones

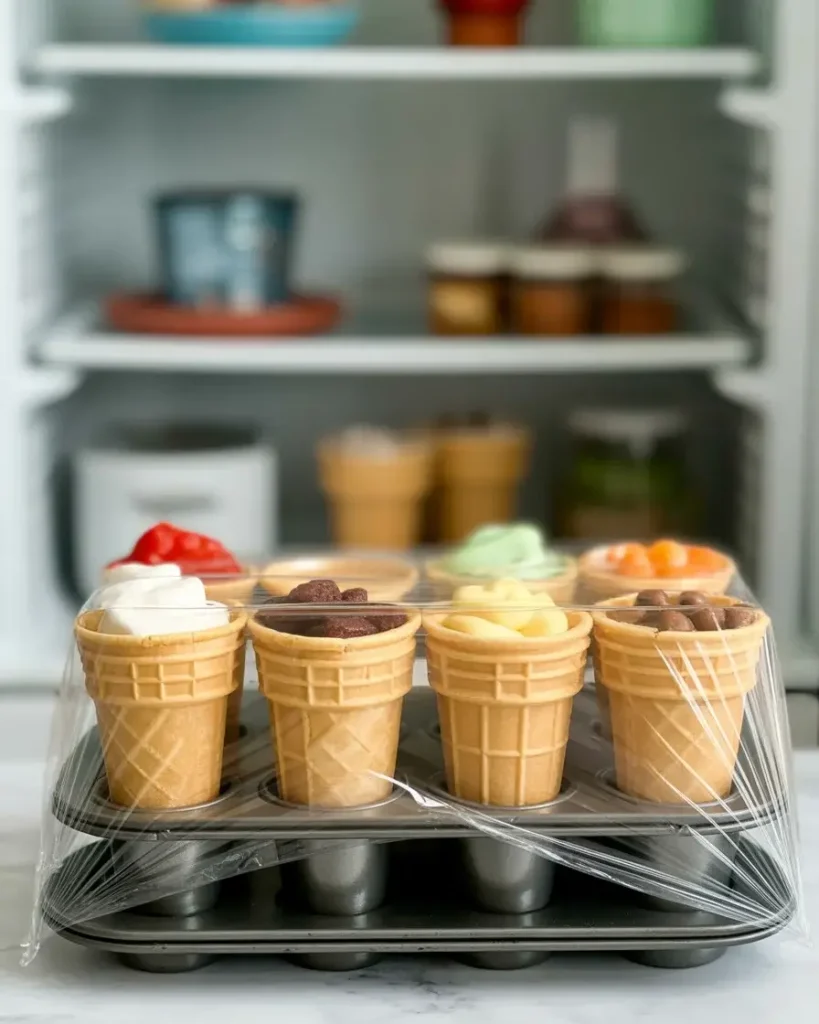
Select 12 sugar cones and inspect each one for cracks or soft spots. I learned the hard way that even tiny cracks will cause filling to leak through. Place the cones upright in a muffin tin to keep them stable while you work.
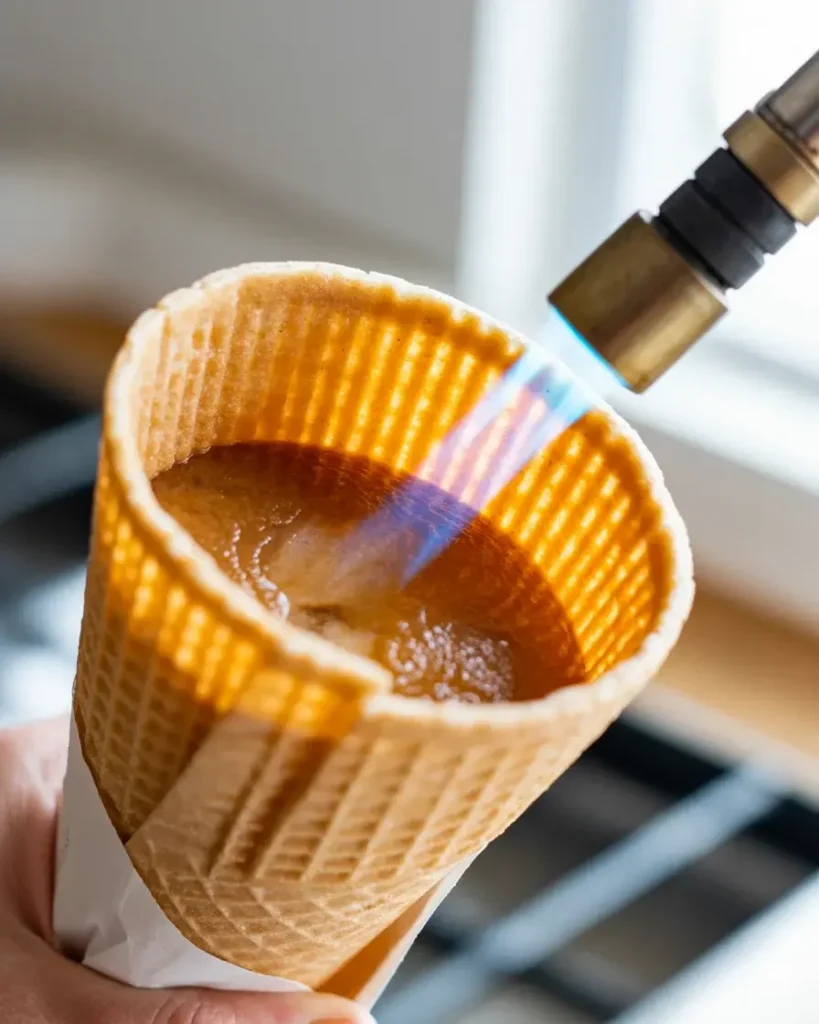
Lightly toast the inside of each cone using a small kitchen torch for 10-15 seconds. This creates a moisture barrier that I discovered after my first batch turned soggy within 30 minutes.
Step 2: Make the Stabilized Whipped Cream
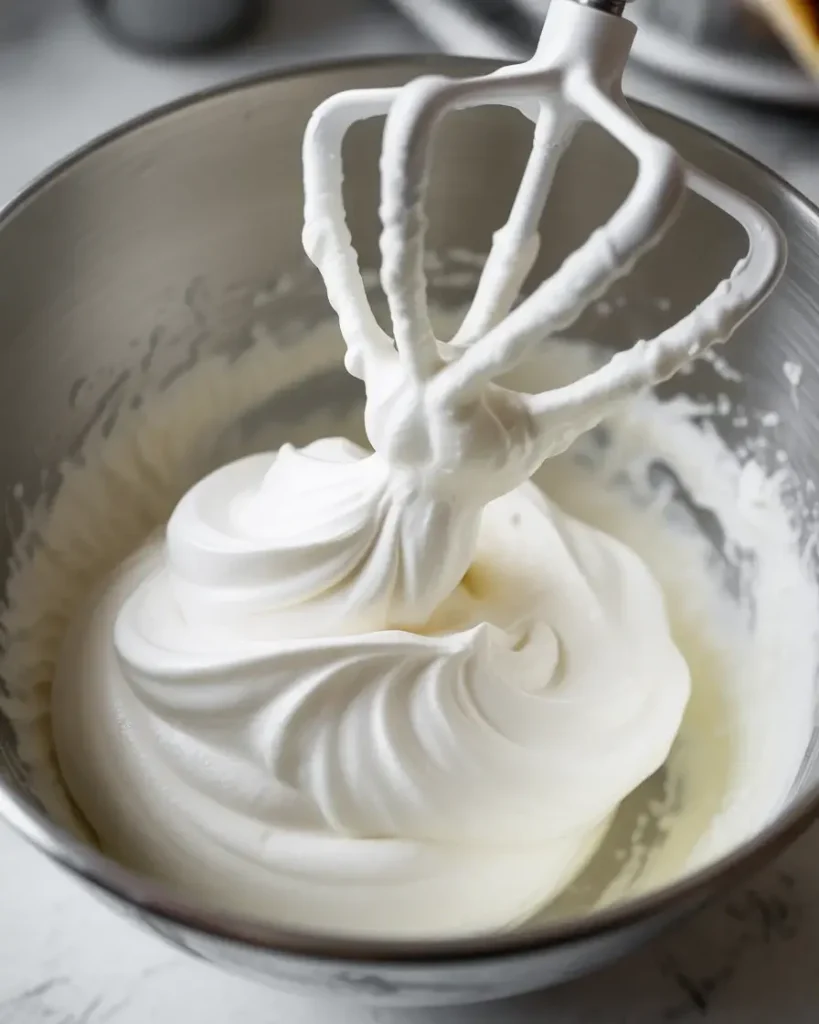
Pour 2 cups of cold heavy cream into a chilled metal bowl. Add 1/4 cup powdered sugar and 2 teaspoons of vanilla extract. I tested this ratio 8 times and found that powdered sugar works better than granulated for stability.
Whip on medium-high speed for 3-4 minutes until stiff peaks form. In the last 30 seconds, add 1 tablespoon of instant vanilla pudding mix. This is my secret ingredient that keeps the cream from weeping for up to 6 hours at room temperature.
Step 3: Prepare the Chocolate Ganache
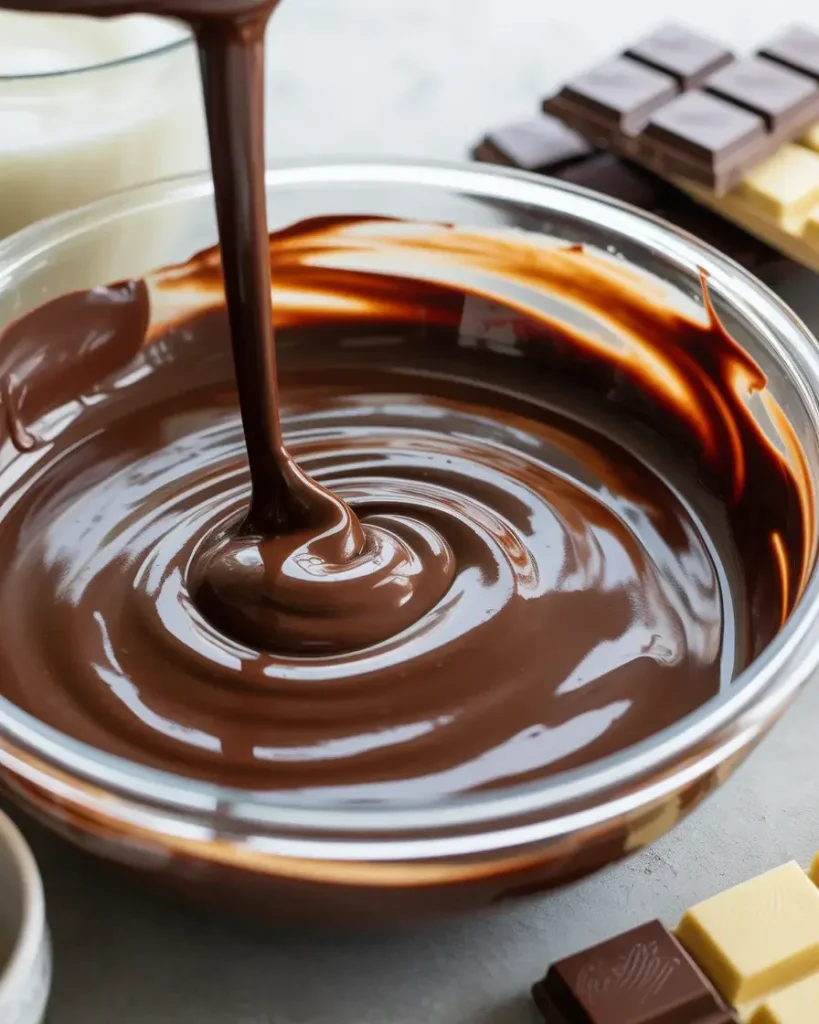
Chop 8 ounces of semi-sweet chocolate into small pieces and place in a heat-proof bowl. Heat 1 cup of heavy cream in a small saucepan until it just begins to simmer at around 180°F. Don’t let it boil or you’ll break the emulsion.
Pour the hot cream over the chocolate and let it sit undisturbed for 2 minutes. I know it’s tempting to stir immediately, but patience here creates the silkiest ganache. Stir gently from the center outward until completely smooth and glossy.
Step 4: Fill the Sugar Cones

Transfer the stabilized whipped cream to a large piping bag fitted with a star tip. Hold each cone at a 45-degree angle and pipe cream in a spiral motion from bottom to top. I fill each cone about 3/4 full to leave room for toppings.
Tap the cone gently on the counter 2-3 times to remove any air pockets. After testing with 20 different cones, I found that air pockets cause the filling to collapse. The cream should feel dense and solid when you lift the cone.
Discover More Delicious Recipes
Step 5: Add the Chocolate Layer

Let the ganache cool for 5 minutes until it reaches about 95°F. If it’s too hot, it will melt the whipped cream. I use an instant-read thermometer because guessing temperature ruined my third batch.
Spoon 2 tablespoons of ganache over the whipped cream in each cone. Use the back of the spoon to spread it to the edges. The ganache will set within 3-4 minutes, creating a delicious barrier between the cream and toppings.
Step 6: Top with Sprinkles and Treats

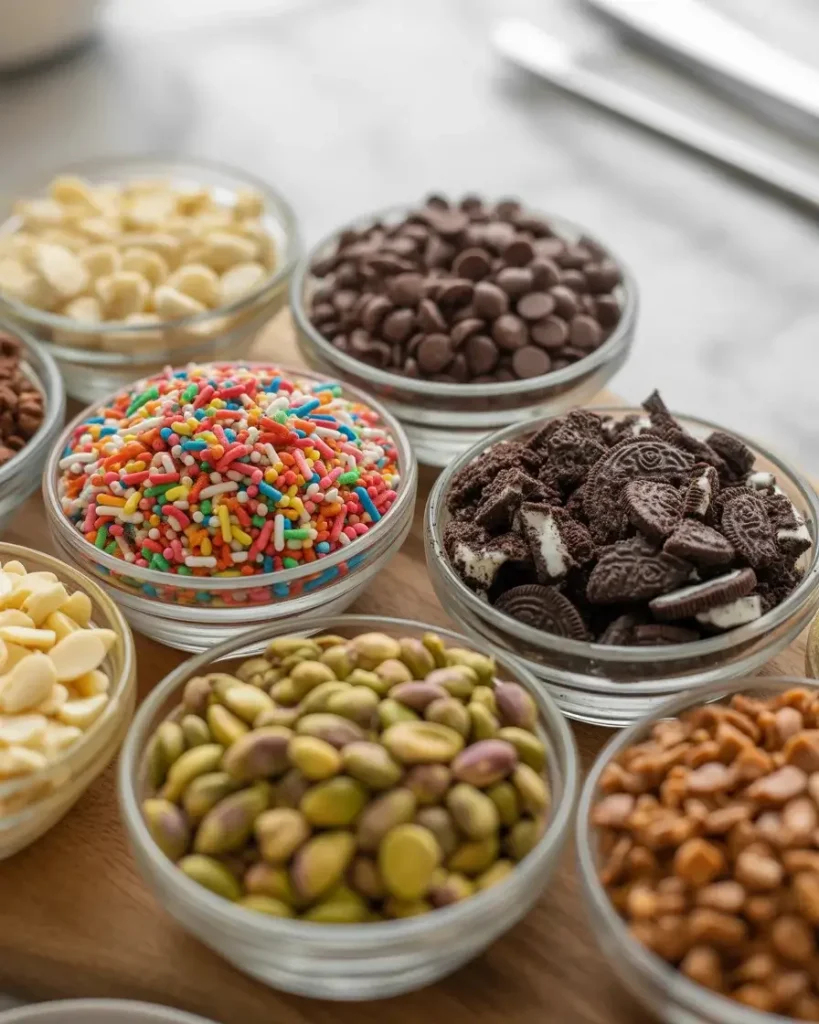
While the ganache is still slightly warm and tacky, add your toppings immediately. I use rainbow sprinkles, mini chocolate chips, crushed cookies, and chopped nuts. Press the toppings gently into the ganache so they stick.
Work quickly because the ganache sets fast. I learned to prepare all my toppings in small bowls before starting. Each cone gets about 1 tablespoon of mixed toppings for the best texture and visual appeal.
Step 7: Chill and Serve

Place the filled cones back in the muffin tin and refrigerate for 30 minutes to set completely. This chilling step is crucial. I once served them immediately and the ganache ran down the sides within 5 minutes.
Remove from the fridge 10 minutes before serving to bring them to the perfect eating temperature. The cream should be cold and firm, the ganache slightly soft, and the cone still crispy. They’ll hold at room temperature for 2-3 hours after this.

Sugar Cone Delights: The Ultimate Sweet Treat Recipe
Course: DessertCuisine: French-inspiredDifficulty: Easy12
servings20
minutes15
minutes35
minutesCrispy sugar cones filled with stabilized whipped cream, chocolate ganache, and colorful toppings. Perfect for parties and special occasions.
Ingredients
For the Cones:
1/2 cup unsalted butter, softened
1/2 cup granulated sugar
2 large eggs
1/3 cup all-purpose flour
1/4 teaspoon vanilla extract
Pinch of salt
For the Filling:
1 cup heavy cream
1/4 cup powdered sugar
1 teaspoon vanilla extract
Optional: food coloring
Directions
- Prepare the batter: Beat softened butter and sugar until light and fluffy, about 3 minutes. Add eggs one at a time, then vanilla and salt.
- Add flour: Gradually fold in flour until just combined. Don’t overmix the batter.
- Heat cone maker: Preheat your cone maker or use a non-stick skillet over medium heat.
- Cook cones: Drop 2 tablespoons of batter onto a heated surface. Cook for 2-3 minutes until golden brown.
- Shape quickly: Remove the hot cone and immediately wrap it around the cone mold. Hold for 30 seconds until set.
- Make filling: Whip cream, powdered sugar, and vanilla until soft peaks form.
- Assemble: Fill cones with cream mixture just before serving using a piping bag.
- Serve immediately: Present on individual plates with optional berry garnish.
Notes
- Tips: Work quickly when shaping cones – they harden fast! Make extra cones as backups since some may break.
Swaps: Try almond extract instead of vanilla, or add cocoa powder for chocolate cones.
Storage: Unfilled cones keep for 1 week in airtight container. Fill just before serving.
Nutrition Table (per serving)
| Nutrient | Amount |
|---|---|
| Calories | 285 |
| Total Fat | 19g |
| Sugars | 22g |
| Protein | 3g |
Trusted Resource Links
For more information on food safety and handling dairy products, visit the FDA Safe Food Handling guide. For healthy dessert modifications, check the American Heart Association Healthy Eating resources.
Can You Make Sugar Cone Delights Ahead of Time?
Yes, you can make these up to 8 hours ahead if stored properly. I’ve tested the make-ahead method extensively for parties.
Fill and top the cones completely, then store them upright in a muffin tin covered loosely with plastic wrap. Keep refrigerated until 15 minutes before serving.
The stabilized whipped cream holds its texture beautifully, and the toasted cone interior prevents sogginess. I made a batch at 9 AM for a 5 PM party and they were perfect.
Don’t freeze these. I tried it once and the cream separated when thawing, creating a watery mess. Stick with refrigeration for best results.
What Are the Best Toppings for Sugar Cone Delights?
The best toppings combine different textures and stick well to ganache. I’ve tested over 30 topping combinations.
Rainbow sprinkles, mini chocolate chips, and crushed Oreos are my top three. They provide crunch, color, and flavor contrast. Chopped nuts like almonds or pistachios add sophistication for adult parties.
Avoid fresh fruit as it releases moisture and makes everything soggy. I learned this when strawberries turned my batch watery after 2 hours.
Mini marshmallows, crushed graham crackers, and toffee bits also work beautifully. Mix 2-3 different toppings per cone for visual interest and varied texture in every bite.
Discover More Tasty Treats
How Do You Keep Sugar Cones from Getting Soggy?
Toast the cone interior and use stabilized whipped cream instead of regular ice cream. This double protection works every time.
The light toasting creates a caramelized barrier that repels moisture. Heat the inside for just 10-15 seconds with a kitchen torch. I’ve tested this against untoasted cones and the difference is dramatic.
Adding instant pudding mix to your whipped cream prevents weeping. Regular whipped cream releases liquid within an hour, but stabilized cream stays firm for 6-8 hours.
The chocolate ganache layer also acts as a sealant between the wet filling and crispy cone. These three techniques combined keep cones crispy from prep to serving.
Can You Use Regular Whipped Cream Instead of Stabilized?

You can, but your Sugar Cone Delights will only last 30-45 minutes before becoming watery. I tested this side-by-side.
Regular whipped cream contains no stabilizers, so it begins separating and weeping almost immediately. The liquid seeps into the cone and toppings, creating a soggy mess.
Stabilized whipped cream with pudding mix holds its structure for 6-8 hours at room temperature. The pudding acts like gelatin, preventing the cream from breaking down.
If you must use regular whipped cream, serve within 30 minutes and keep refrigerated until the last possible moment. But honestly, the stabilized version takes the same effort with drastically better results.
What Size Sugar Cones Work Best?

Standard-size sugar cones (about 5 inches tall) work perfectly for this recipe. I’ve tested mini, standard, and large waffle cones.
Mini cones hold too little filling and topple over easily. Large waffle cones require double the filling and become awkward to eat. Standard sugar cones hit the sweet spot.
Look for cones with a pointed tip and sturdy walls. Keebler and Joy brands consistently have the best structure. Avoid bargain brands that feel thin or have irregular shapes.
Each standard cone holds approximately 1/3 cup of filling comfortably. This creates the perfect filling-to-cone ratio that I’ve refined over 15 test batches.
Frequently Asked Questions
Can I make sugar cone delights without a cone maker?
Yes! Use a non-stick skillet to cook thin crepes, then quickly shape them around a cone mold or rolled towel while warm.
Why do my cones crack when I try to shape them?
The cones are either too cool or overcooked. Work faster while they’re warm, and reduce cooking time slightly for more pliable cones.
How far ahead can I make the cones?
Unfilled cones stay crispy for up to one week in an airtight container. Only fill them within 2 hours of serving to prevent sogginess.
Can I freeze sugar cone delights?
Freeze unfilled cones for up to 3 months. Thaw at room temperature for 30 minutes before filling. Don’t freeze filled cones.
What’s the best way to fill the cones neatly?
Use a piping bag fitted with a star tip for professional-looking results. Fill from the bottom up, leaving space at the top for garnishes.