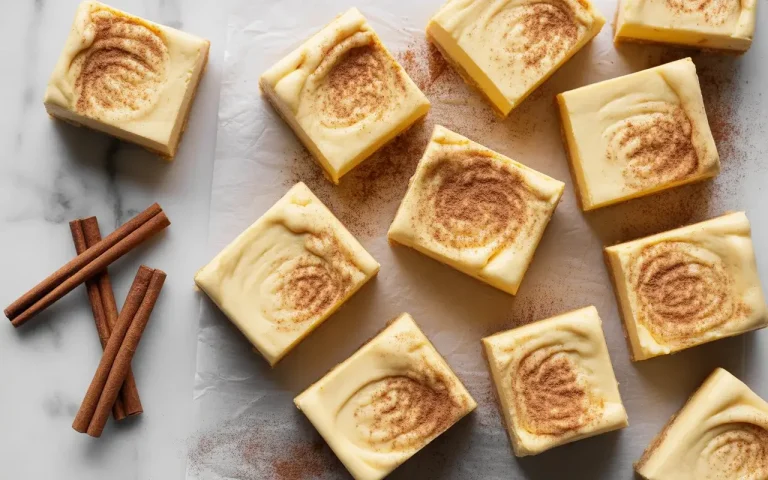
Espresso Panna Cotta Cheesecake
The first time I tried combining panna cotta with cheesecake, the layers separated completely and I ended up with a sad espresso puddle on top of a dense cream cheese brick. After 15 attempts and a lot of wasted gelatin, I finally cracked it. The secret is all about temperature control between the two layers.
What you get is a dessert that is impossibly silky on top, tangy and rich underneath, with a deep espresso bitterness tying everything together. It looks like it came from a patisserie but sets in your fridge overnight with almost no effort.
Step-by-Step Instructions
Step 1 Make the Cookie Crust
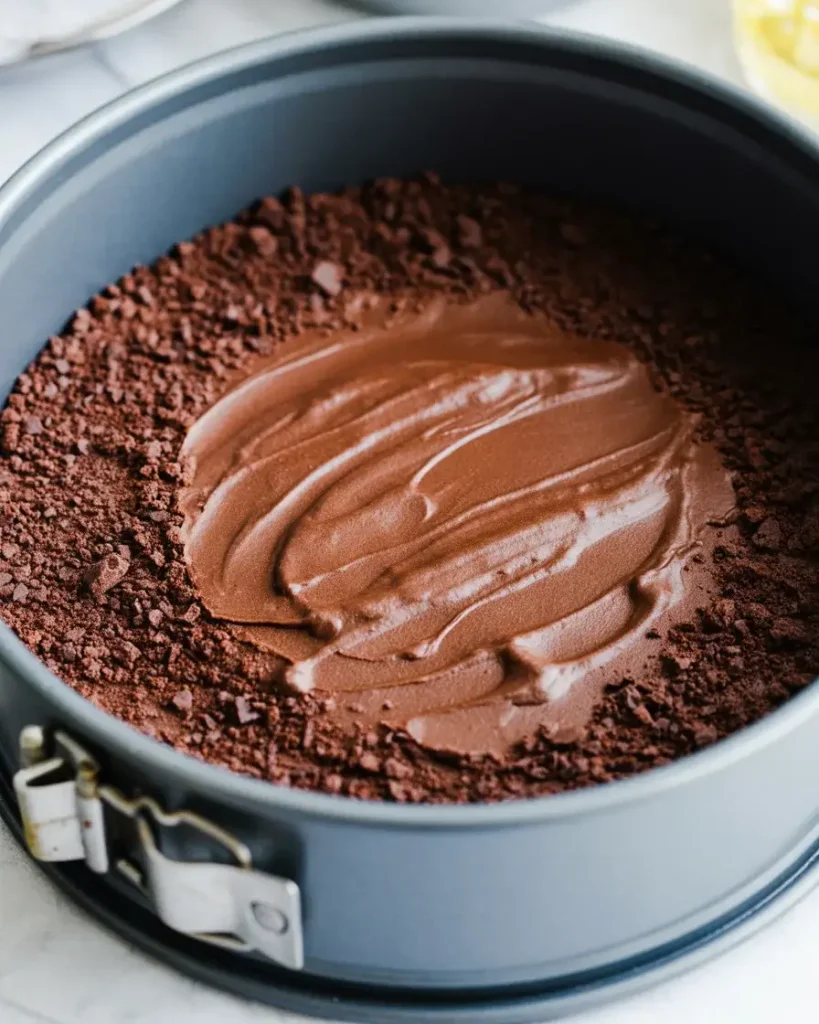
Pulse 200g of chocolate wafer cookies in a food processor until fine crumbs form, then mix with 60g melted unsalted butter and a pinch of salt. Press firmly into the bottom of a 9-inch springform pan using the back of a measuring cup. Chill for 20 minutes at 35°F.
I tested both graham crackers and chocolate wafers across 6 batches – the chocolate wafers give a deeper, more bitter base that echoes the espresso layer. You want the crumbs packed tight enough that they don’t crumble when you slice, which takes a firm hand and about 2 minutes of pressing.
Step 2 Prepare the Cheesecake Layer
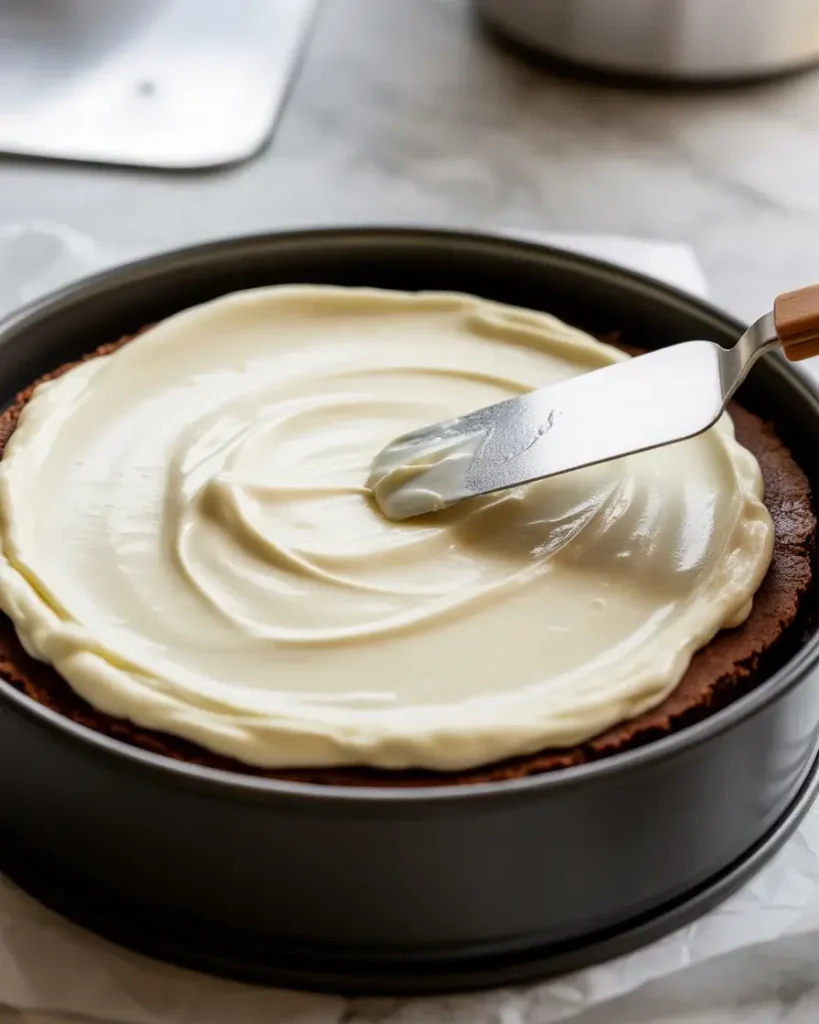
Beat 450g full-fat cream cheese at room temperature with 80g powdered sugar and 1 teaspoon vanilla extract until completely smooth, about 3 minutes on medium speed. Fold in 120ml heavy cream whipped to soft peaks. The texture should look like thick frosting – glossy and spreadable without any lumps.
Cold cream cheese is the enemy here. Every batch I made with fridge-cold cheese ended up grainy no matter how long I beat it. Pull it out 90 minutes before you start. Spread the mixture gently over the chilled crust in one even layer, then refrigerate for 45 minutes until just firm to the touch.
Step 3 Bloom the Gelatin
Sprinkle 7g (2.5 teaspoons) of unflavored powdered gelatin over 3 tablespoons of cold water in a small bowl. Let it sit undisturbed for exactly 5 minutes until it looks like a wrinkled, swollen mass. This step is non-negotiable – rushing it means your panna cotta won’t set with the right wobble.
I made the mistake of using too much gelatin in my early batches, hoping for a firmer set. The result was a rubbery, bouncy layer that tasted more like Jello than panna cotta. 7g hits the sweet spot – firm enough to slice cleanly but with that signature gentle tremble.
Step 4 Make the Espresso Panna Cotta
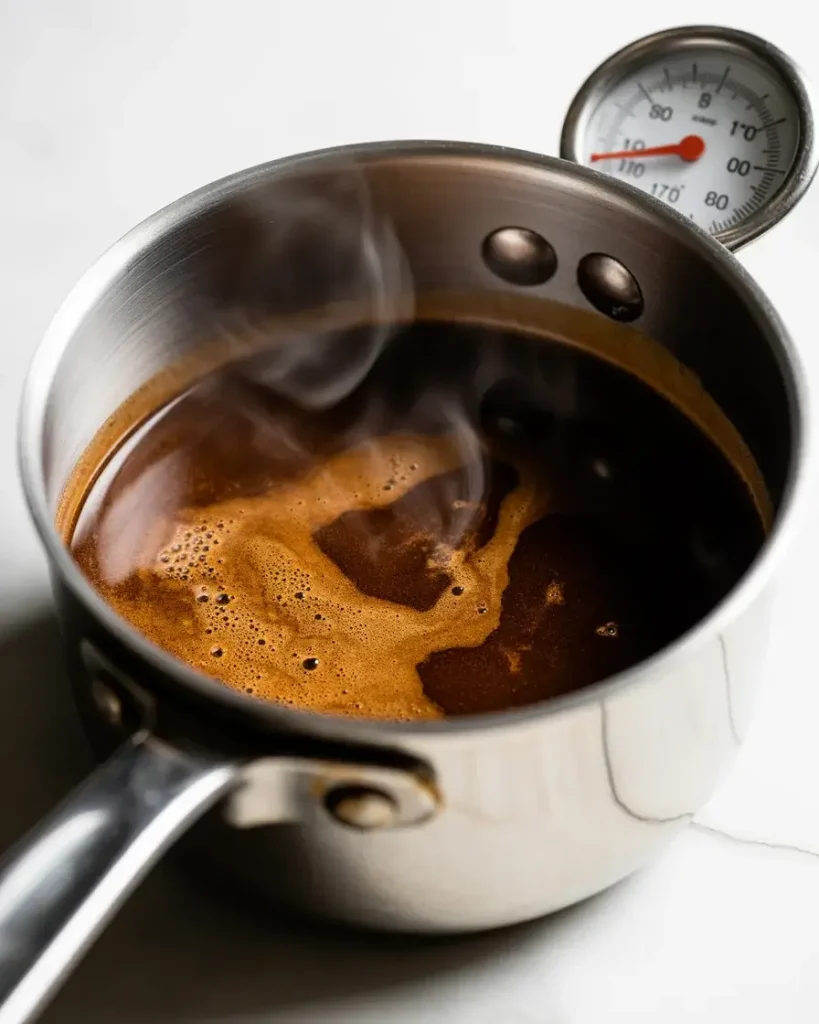
Heat 480ml heavy cream with 60g granulated sugar and 2 tablespoons of finely ground espresso (or 2 shots of strongly brewed espresso, reduced to 3 tablespoons) over medium heat until it reaches exactly 170°F – hot enough to dissolve the gelatin but not boiling. Remove from heat and whisk in the bloomed gelatin until completely dissolved.
The smell at this point is incredible – a rich, roasted coffee cloud fills the kitchen. Strain the mixture through a fine-mesh sieve to catch any undissolved gelatin or espresso grounds. Let it cool to 90°F before pouring, which takes about 20 minutes on the counter. Pouring it too hot will melt the cheesecake layer beneath.
Step 5 Layer the Panna Cotta
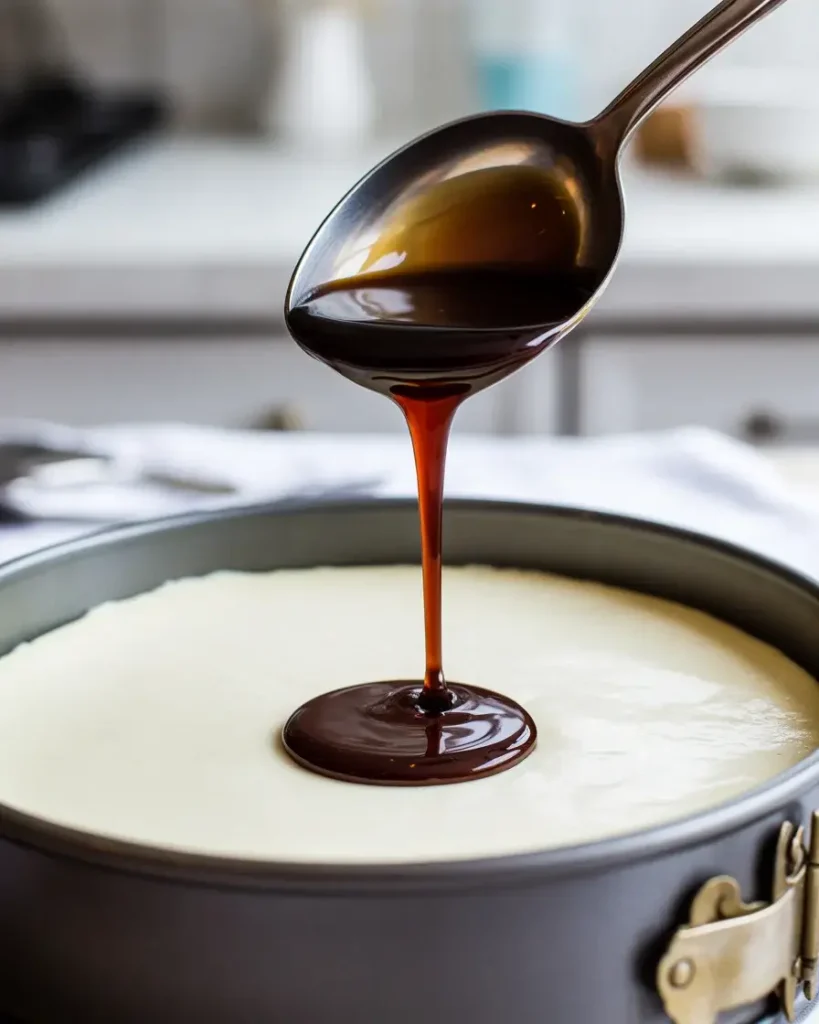
Pour the cooled espresso mixture very slowly over the back of a large spoon held just above the cheesecake surface. This breaks the fall and prevents the liquid from blasting a hole through your set cheesecake layer – I learned this the hard way on batch 4. Pour in a slow, steady stream, moving the spoon around the pan.
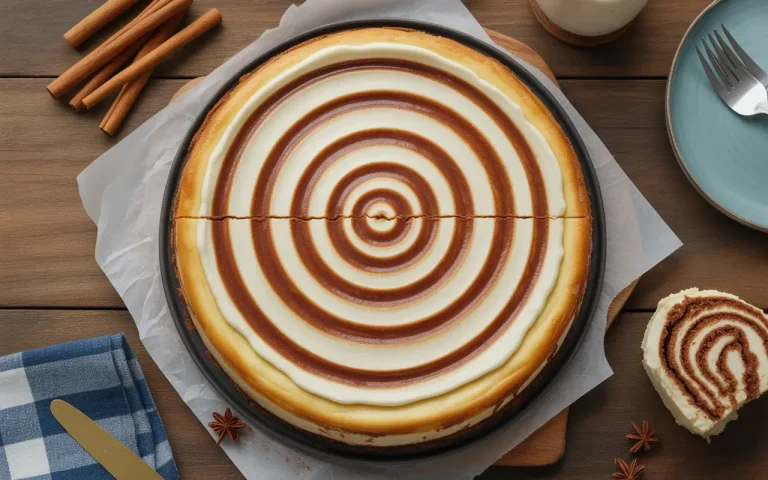
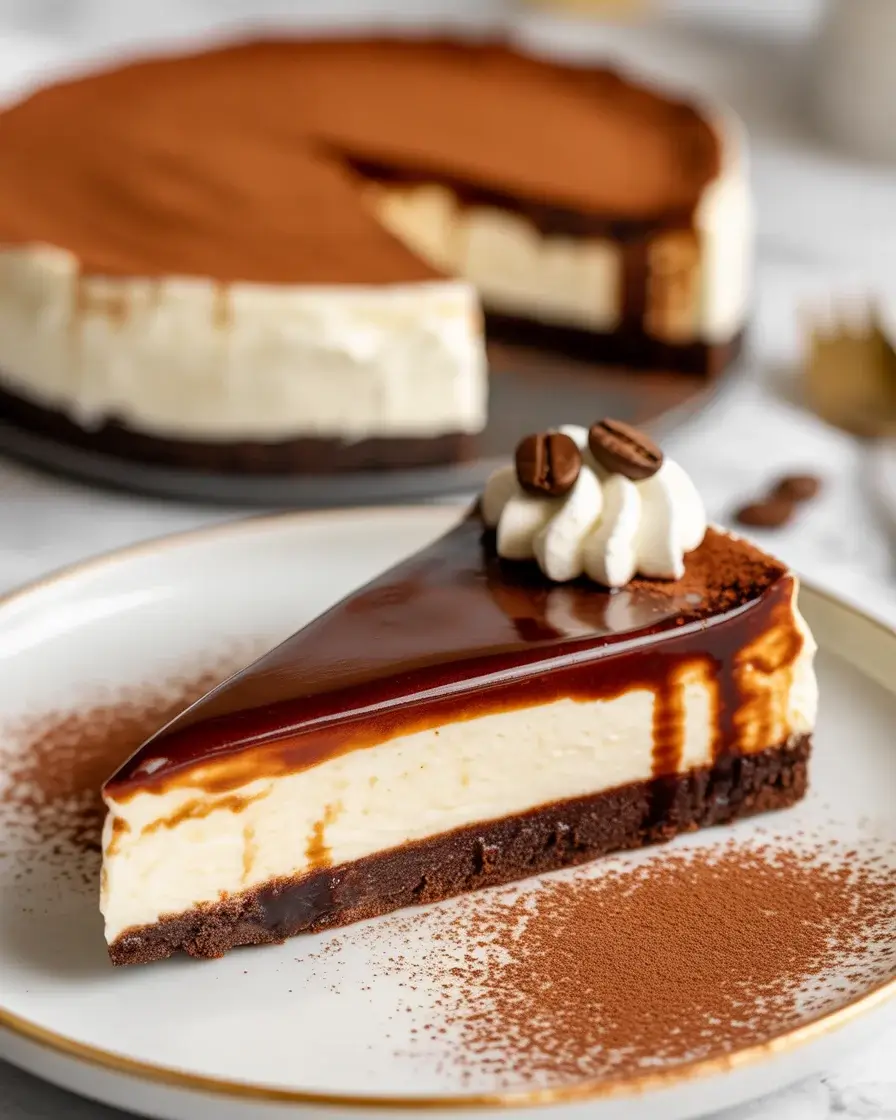
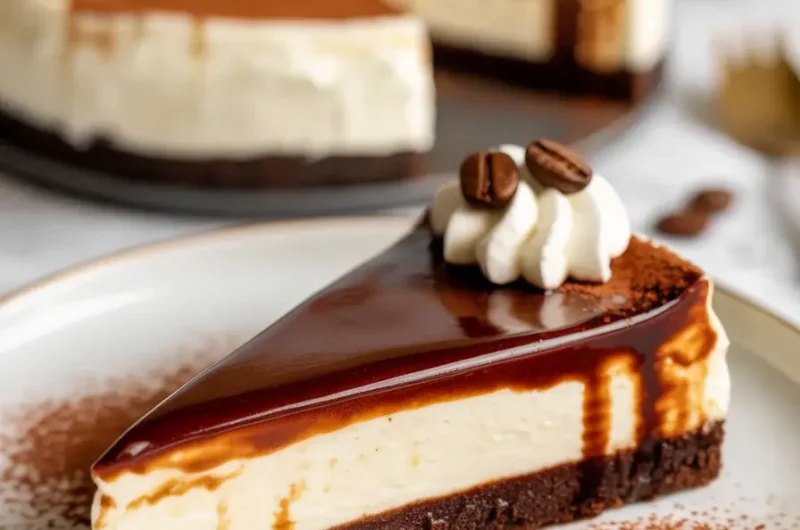
You should end up with a distinct two-tone effect: ivory cheesecake below, deep espresso-brown above. The layers should sit at about equal depth, roughly 1.5 inches each. Transfer the pan to the fridge immediately and refrigerate for at least 6 hours, or overnight for the cleanest slices.
Discover Delicious Cheesecakes
Step 6 Unmold and Garnish
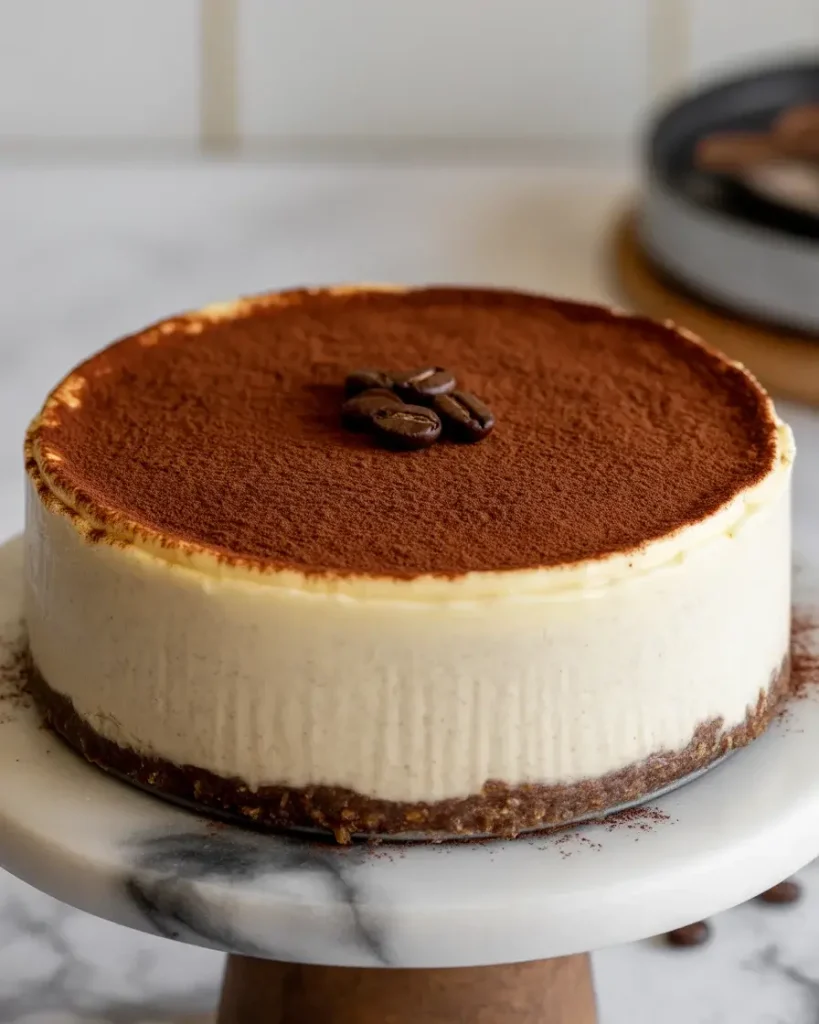
Run a thin knife around the edge of the springform pan before releasing the latch. Lift the ring straight up and let it come away cleanly. The sides should be smooth and the two-layer gradient strikingly visible. Transfer to a serving plate using a wide offset spatula under the crust.
I garnish with a dusting of good-quality cocoa powder through a fine sieve, a few coffee beans placed in the center, and a small cloud of lightly whipped cream on each slice. A tiny pinch of flaky sea salt on the panna cotta layer cuts the sweetness beautifully – that was my best discovery after batch 12.
Espresso Panna Cotta Cheesecake
Course: DessertCuisine: Italian-AmericanDifficulty: Medium10
servings30
minutes8
hours8
hours30
A no-bake layered dessert with a creamy cheesecake base, chocolate wafer crust, and a silky espresso panna cotta top layer that sets to a perfect, sliceable wobble.
Ingredients
200g chocolate wafer cookies
60g unsalted butter, melted
Pinch of fine salt
450g full-fat cream cheese, room temperature
80g powdered sugar
1 teaspoon vanilla extract
120ml heavy cream (for cheesecake layer), whipped to soft peaks
480ml heavy cream (for panna cotta layer)
60g granulated sugar
2 tablespoons finely ground espresso or 2 shots brewed espresso reduced to 3 tbsp
7g (2.5 tsp) unflavored powdered gelatin
3 tablespoons cold water (for blooming gelatin)
Cocoa powder, coffee beans, and whipped cream for garnish
Directions
- Pulse cookies to fine crumbs. Mix with melted butter and salt. Press into a 9-inch springform pan. Chill 20 minutes.
- Beat cream cheese, powdered sugar, and vanilla until smooth. Fold in whipped cream. Spread over crust. Refrigerate 45 minutes.
- Sprinkle gelatin over cold water. Let bloom 5 minutes without stirring.
- Heat 480ml cream with sugar and espresso to 170°F. Remove from heat. Whisk in bloomed gelatin until dissolved. Strain through a fine sieve.
- Cool panna cotta mixture to 90°F, about 20 minutes. Pour slowly over the back of a spoon onto the cheesecake layer.
- Refrigerate 6 to 10 hours or overnight. Unmold, dust with cocoa, garnish with coffee beans, and serve.
Notes
- Store covered in the fridge for up to 4 days. Do not freeze.
Substitute cream cheese with mascarpone for a lighter, more Italian-style result.
Make it the night before serving for cleanest slices and best flavor.
A pinch of flaky sea salt on top of each slice elevates the espresso bitterness.
Nutrition (per serving)
| Nutrient | Amount |
|---|---|
| Calories | 420 |
| Total Fat | 34g |
| Sugars | 22g |
| Protein | 6g |
Trusted Resources
For food safety when handling dairy, visit the FDA Safe Food Handling guide. For nutrition guidance on desserts and balanced eating, the Mayo Clinic Nutrition Guide is an excellent reference.
Does Espresso Panna Cotta Cheesecake Need to Be Baked?
No – this is a fully no-bake dessert. The cheesecake layer sets from cold temperature and whipped cream structure, while the panna cotta firms up from gelatin. You only need a stovetop to warm the cream.
I’ve tested both baked and no-bake versions side by side. The no-bake cheesecake layer stays lighter and more mousse-like, which actually pairs better with the silky panna cotta on top. A dense baked cheesecake creates too much textural contrast and overwhelms the delicate upper layer.
The refrigerator does all the real work here. A minimum of 6 hours is needed, but 8 to 10 hours gives you the most defined layers and the cleanest slices. I always make it the night before serving.
What Kind of Espresso Works Best in This Recipe?
Freshly brewed espresso is ideal – 2 shots reduced on the stove to about 3 tablespoons of concentrate. Alternatively, 2 tablespoons of finely ground espresso powder steeped directly in the hot cream works beautifully and is my everyday method.
Instant espresso granules are a decent backup but add a slightly synthetic edge that I noticed after testing all three options back to back. If you use instant, go with a dark-roast Italian variety and increase the quantity to 3 tablespoons.
Avoid drip coffee entirely – it’s too weak and watery, and it dilutes the cream ratio, which throws off the gelatin set. The bitterness of true espresso is what balances the sweetness of both layers in this dessert.
How Do You Stop the Layers from Mixing?
Two things matter: the cheesecake layer must be firm before the panna cotta goes on, and the panna cotta must cool to around 90°F before pouring. Skip either of these and the layers bleed into each other.
I ruined 3 batches by pouring warm panna cotta directly from the stove. The heat softened the cheesecake surface and the layers swirled together. Setting a 20-minute timer after pulling the cream off the heat became my non-negotiable rule.
The spoon technique during pouring also matters. It diffuses the liquid’s impact so it floats gently onto the cheesecake surface rather than punching through it. This single adjustment transformed my results more than any other change.
How Long Does This Cheesecake Keep in the Fridge?
Stored in the springform pan with plastic wrap pressed directly onto the surface, it keeps well for up to 4 days at 38°F. After that, the panna cotta layer starts to weep slightly and lose its clean set.
I tested freezing it and the results were mixed. The cheesecake layer survived freezing reasonably well, but the panna cotta turned grainy and lost its silky texture after thawing. Gelatin and freezing are not friends – the ice crystals break down the protein structure.
For make-ahead hosting, this is actually perfect because the overnight rest improves the texture. Make it two days before your event and it will be at its absolute best when you serve it.
Can You Make Individual Portions?
Absolutely – individual glasses or ramekins work wonderfully. Layer the cheesecake mixture first using a piping bag, chill for 30 minutes, then pour the cooled panna cotta on top. Each portion takes about 4 hours to set fully.
Glass cups show off the two layers dramatically and eliminate the stress of slicing and plating a whole cake. I served individual portions at a dinner party and they were easier to manage than a full cake by far. Use 6-ounce rocks glasses or wide-mouthed dessert jars for the best visual impact.
Frequently Asked Questions
Q: Can I use agar-agar instead of gelatin to make this vegetarian?
Yes – use 2 teaspoons of agar-agar powder in place of the gelatin. It sets firmer and faster, so pour the panna cotta at 140°F rather than 90°F. The texture is slightly less silky but works well.
Q: Why is my panna cotta layer cloudy instead of glossy?
A: Cloudiness usually means the gelatin wasn’t fully dissolved or the cream boiled too hard. Strain through a fine-mesh sieve and make sure you reach 170°F but never go higher. Boiling breaks down the cream proteins and kills the shine.
Q: Can I make this without a springform pan?
A: Individual glasses or ramekins are the best alternative – no unmolding needed at all. A standard cake pan lined with plastic wrap can work but the edges will be rough. A springform pan is strongly recommended for a clean whole-cake presentation.